2012 MERCEDES-BENZ S-CLASS SEDAN stop start
[x] Cancel search: stop startPage 230 of 536

Only in audio DVD modeXTo pause playback: switch on audio DVD
mode ( Y page 226).XSelect Ë by sliding VÆ and turning
cVd the COMAND controller and press
W to confirm.
The Ë display changes to Ì.XTo continue playback: select Ì and
press W to confirm.
Playback continues from the point where it
was interrupted. The Ì display changes
to Ë .
Stop function
This function is only available in audio DVD
mode.
XSwitch on audio DVD mode ( Y page 226).XTo interrupt playback: select É by
sliding VÆ and turning cVd the COMAND
controller and press W to confirm.
The Ë display changes to Ì. É
remains highlighted.XTo continue playback: select Ì and
press W to confirm.
Playback continues from the point where it
was interrupted.XTo stop playback: while playback is
interrupted, select É again and press
W to confirm.
or
XSelect É and confirm by pressing W
twice in rapid succession.
Ì is highlighted.XTo restart playback: select Ì and
press W to confirm.
Playback starts at the beginning of the
DVD.Selecting CD/audio DVD/MP3 discs
Selecting via the media list
XIn CD/audio DVD and MP3 mode: select
Media by sliding VÆ or turning cVd the
COMAND controller and press W to
confirm.
The media list appears. The # dot
indicates the currently selected medium.
Media list
The media list shows the discs currently
available.
Media list (when equipped with a DVD
changer)Magazine trays, positions 1 to 6: readable
data media are audio CDs, MP3 CDs or MP3
DVDs, audio DVDs and video DVDs.Memory card, position 7MUSIC REGISTER, position 8Media Interface, position 9USB, position 10
i If a disc cannot be read, an entry appears
after the display in the magazine tray.
Equipped with a single DVD driveDVD drive, position 1: readable data media
are audio CDs, MP3 CDs or MP3 DVDs,
audio DVDs and video DVDs.Memory card, position 2228AudioCOMAND
Page 248 of 536

authorized Mercedes-Benz Center. This will
allow you to play video DVDs with a
different region code, provided that they
are produced in accordance with the PAL
or NTSC standard. The region code can be
changed up to five times.
Function restrictions
Depending on the DVD, it is possible that
certain functions or actions will be
temporarily blocked or may not function at all.
As soon as you try to activate these functions
or actions, you will see the K symbol in the
display.
Inserting and removing DVDs
XProceed as described in the "Inserting and
ejecting CDs and DVDs" section
( Y page 225).
Activating video DVD mode
Option 1
XInsert a video DVD.
COMAND loads the medium inserted and
starts to play it.
Option 2
XSelect Video in the main function bar by
sliding ZV and turning cVd the COMAND
controller and press W to confirm.
Video DVD mode is switched on.
Hiding/showing the navigation menu
XTo show: turn cVd or slide ZVÆ the
COMAND controller.
i This function is not available while the
DVD's own menu ( Y page 248) is being
displayed.
XTo hide: slide ZVÆ the COMAND
controller.
or
XWait for approximately eight seconds.
Navigation menu displayed
:Data medium type;Current track=Current scene?Track timeATo show the menu
Showing/hiding the menu
This function is not available while the DVD's
own menu ( Y page 248) is being displayed.
XTo show: press W the COMAND
controller.
or
XSelect Menu while the navigation menu is
shown and press W to confirm.XTo hide: slide ZV the COMAND controller
and confirm Full Screen by pressing W.
Menu shown
:Video DVD options;Pause function=Stop function?Full-screen function246VideoCOMAND
Page 249 of 536
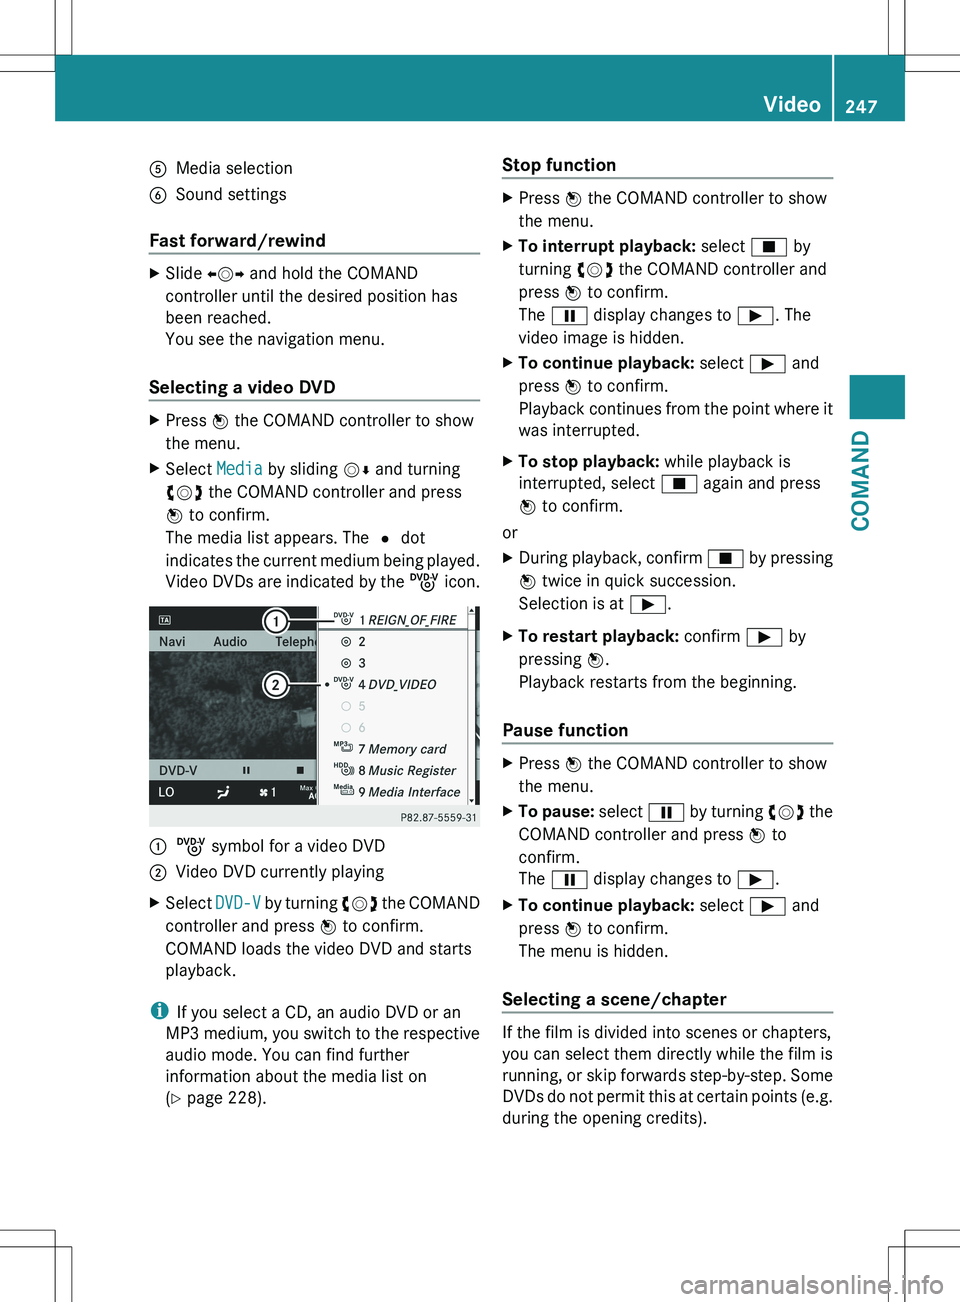
AMedia selectionBSound settings
Fast forward/rewind
XSlide XVY and hold the COMAND
controller until the desired position has
been reached.
You see the navigation menu.
Selecting a video DVD
XPress W the COMAND controller to show
the menu.XSelect Media by sliding VÆ and turning
cVd the COMAND controller and press
W to confirm.
The media list appears. The # dot
indicates the current medium being played.
Video DVDs are indicated by the ý icon.:ý symbol for a video DVD;Video DVD currently playingXSelect DVD-V by turning cVd the COMAND
controller and press W to confirm.
COMAND loads the video DVD and starts
playback.
i If you select a CD, an audio DVD or an
MP3 medium, you switch to the respective
audio mode. You can find further
information about the media list on
( Y page 228).
Stop functionXPress W the COMAND controller to show
the menu.XTo interrupt playback: select É by
turning cVd the COMAND controller and
press W to confirm.
The Ë display changes to Ì. The
video image is hidden.XTo continue playback: select Ì and
press W to confirm.
Playback continues from the point where it
was interrupted.XTo stop playback: while playback is
interrupted, select É again and press
W to confirm.
or
XDuring playback, confirm É by pressing
W twice in quick succession.
Selection is at Ì.XTo restart playback: confirm Ì by
pressing W.
Playback restarts from the beginning.
Pause function
XPress W the COMAND controller to show
the menu.XTo pause: select Ë by turning cVd the
COMAND controller and press W to
confirm.
The Ë display changes to Ì.XTo continue playback: select Ì and
press W to confirm.
The menu is hidden.
Selecting a scene/chapter
If the film is divided into scenes or chapters,
you can select them directly while the film is
running, or skip forwards step-by-step. Some
DVDs do not permit this at certain points (e.g.
during the opening credits).
Video247COMANDZ
Page 260 of 536

XTo interrupt playback: select É using
the :=; buttons on the remote
control and press the 9 button to confirm.
The Ë display changes to Ì.XTo continue playback: select Ì and
press the 9 button to confirm.
Playback continues from the point where it
was interrupted.XTo stop playback: while playback is
interrupted, select É again and press
the 9 button to confirm.
Playback stops and returns to the
beginning of the DVD. Ì is highlighted.XTo restart playback: select Ì and
press the 9 button to confirm.
Playback starts from the beginning of the
DVD.
Setting the audio format
Further information on audio formats is
available in the "Audio" section
( Y page 232).
XSelect DVD-A using the :=;
buttons on the remote control and press
the 9 button to confirm.XSelect Group using the 9: buttons
and press the 9 button to confirm.
The list of available audio formats appears.
The # dot indicates the format currently
selected.XSelect an audio format using the
9: buttons and press the 9 button
to confirm.XTo exit the menu: press the =
or ; button.
Playback options
Further information on playback options is
available in the "Audio" section
( Y page 232).
XSelect CD, DVD-A or MP3 using
the :=; buttons on the remote
control and press the 9 button to confirm.
The options list appears. The # dot
indicates the option currently selected.XSelect Normal Track Sequence , Track
List Mix or Random Folder using the
9: buttons and press the 9 button
to confirm.
The option is switched on. All options
except Normal Track Sequence will be
indicated in the display/selection window.
i If you change the disc, the Normal
Track Sequence option is activated
automatically. If an option is selected, it
remains selected after the Rear Seat
Entertainment System is switched on or
off.
Switching track information on/off
(MP3 mode only)
If the function is switched on, folder and track
names are displayed.
If the function is switched off, disc and file
names are displayed.
XSelect MP3 using the :=;
buttons on the remote control and press
the 9 button to confirm.XSelect Show Track Information using
the 9: buttons and press the 9
button to confirm.
The function is switched on O or off ª,
depending on the previous status.
Video DVD mode
General notes
Here you will find further information on the
following topics:
R safety notes ( Y page 225)
R notes on DVDs ( Y page 245)
258Rear Seat Entertainment SystemCOMAND
Page 262 of 536
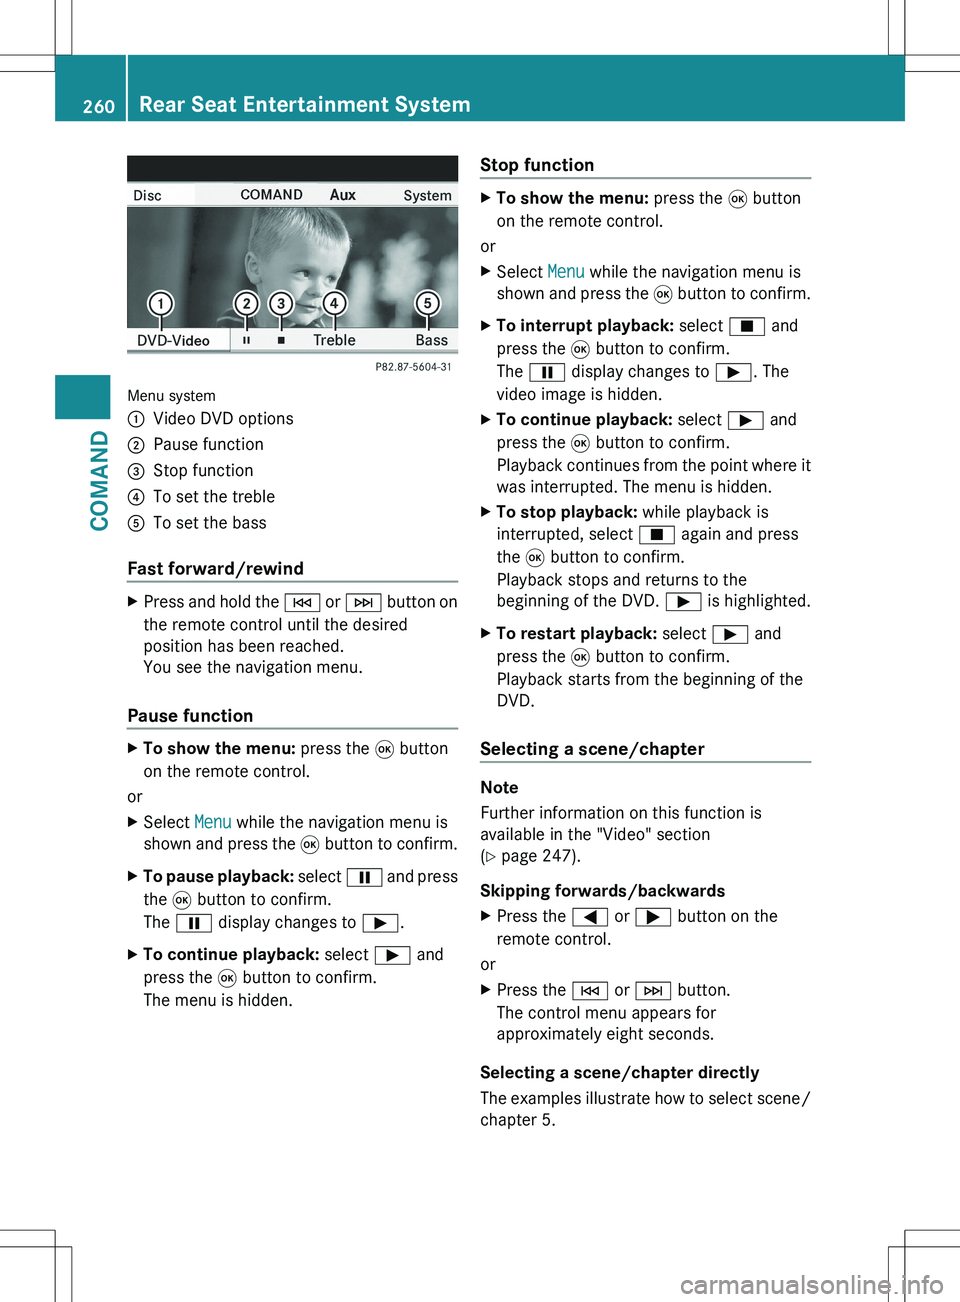
Menu system
:Video DVD options;Pause function=Stop function?To set the trebleATo set the bass
Fast forward/rewind
XPress and hold the E or F button on
the remote control until the desired
position has been reached.
You see the navigation menu.
Pause function
XTo show the menu: press the 9 button
on the remote control.
or
XSelect Menu while the navigation menu is
shown and press the 9 button to confirm.XTo pause playback: select Ë and press
the 9 button to confirm.
The Ë display changes to Ì.XTo continue playback: select Ì and
press the 9 button to confirm.
The menu is hidden.Stop functionXTo show the menu: press the 9 button
on the remote control.
or
XSelect Menu while the navigation menu is
shown and press the 9 button to confirm.XTo interrupt playback: select É and
press the 9 button to confirm.
The Ë display changes to Ì. The
video image is hidden.XTo continue playback: select Ì and
press the 9 button to confirm.
Playback continues from the point where it
was interrupted. The menu is hidden.XTo stop playback: while playback is
interrupted, select É again and press
the 9 button to confirm.
Playback stops and returns to the
beginning of the DVD. Ì is highlighted.XTo restart playback: select Ì and
press the 9 button to confirm.
Playback starts from the beginning of the
DVD.
Selecting a scene/chapter
Note
Further information on this function is
available in the "Video" section
( Y page 247).
Skipping forwards/backwards
XPress the = or ; button on the
remote control.
or
XPress the E or F button.
The control menu appears for
approximately eight seconds.
Selecting a scene/chapter directly
The examples illustrate how to select scene/
chapter 5.
260Rear Seat Entertainment SystemCOMAND
Page 267 of 536
Vehicle
Vehicle functions
General information
In this menu, you can set the following vehicle
functions:
R ECO
R multicontour seat settings
R rear window blind
R EASY-ENTRY/EXIT feature
R exterior lighting delayed switch-off
R interior lighting delayed switch-off
R ambient lighting
R automatic folding mirror function
R locator lighting
R automatic locking feature
R trunk lid opening height restriction
You can open the "Vehicle" menu in one of
two ways.
Opening the "Vehicle" menu from the
main area in the center of the display
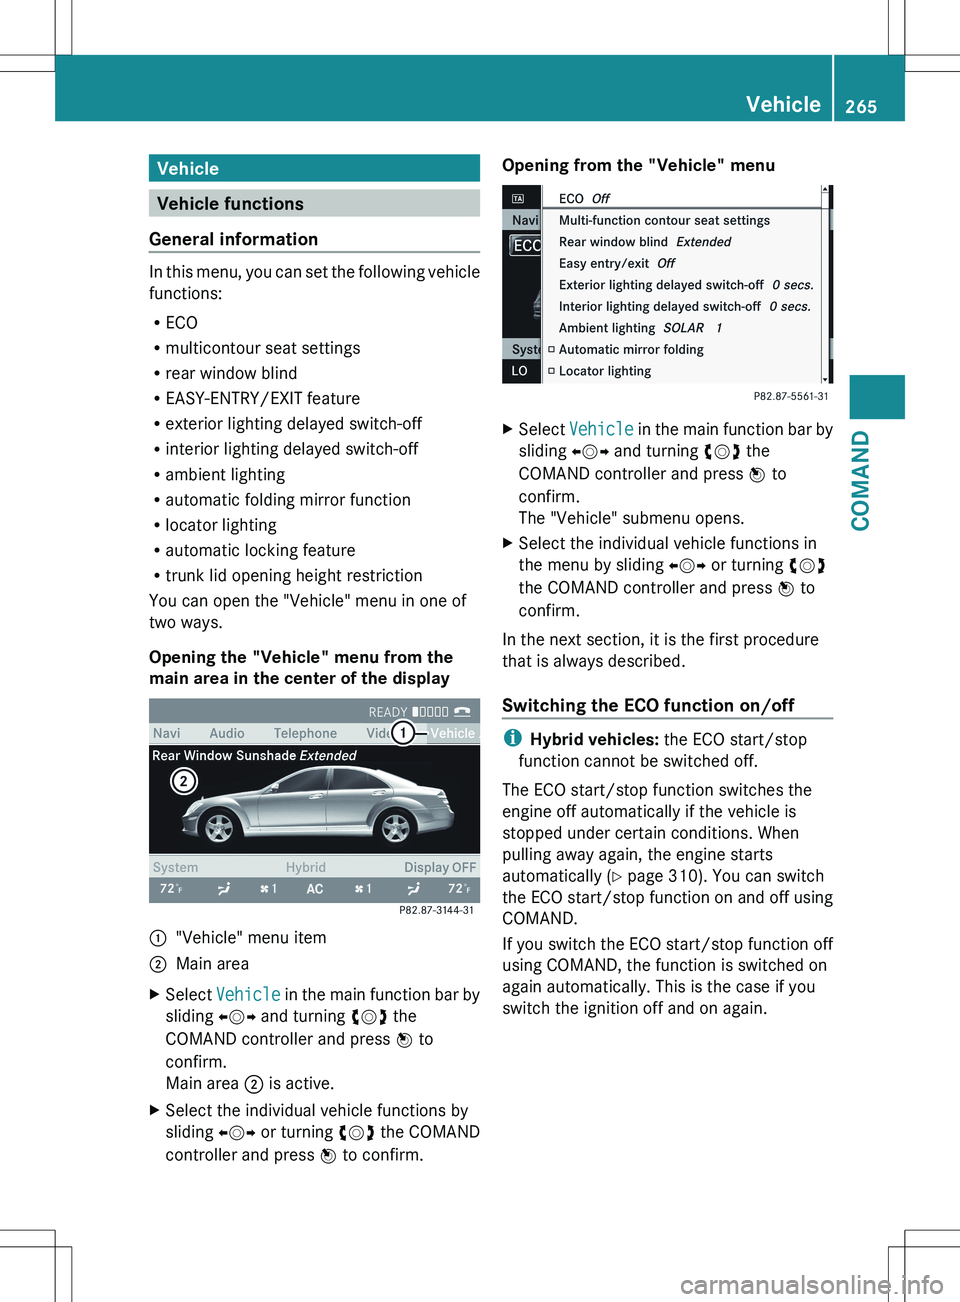
:"Vehicle" menu item;Main areaXSelect Vehicle in the main function bar by
sliding XVY and turning cVd the
COMAND controller and press W to
confirm.
Main area ; is active.XSelect the individual vehicle functions by
sliding XVY or turning cVd the COMAND
controller and press W to confirm.Opening from the "Vehicle" menuXSelect Vehicle in the main function bar by
sliding XVY and turning cVd the
COMAND controller and press W to
confirm.
The "Vehicle" submenu opens.XSelect the individual vehicle functions in
the menu by sliding XVY or turning cVd
the COMAND controller and press W to
confirm.
In the next section, it is the first procedure
that is always described.
Switching the ECO function on/off
i Hybrid vehicles: the ECO start/stop
function cannot be switched off.
The ECO start/stop function switches the
engine off automatically if the vehicle is
stopped under certain conditions. When
pulling away again, the engine starts
automatically ( Y page 310). You can switch
the ECO start/stop function on and off using
COMAND.
If you switch the ECO start/stop function off
using COMAND, the function is switched on
again automatically. This is the case if you
switch the ignition off and on again.
Vehicle265COMANDZ
Page 268 of 536
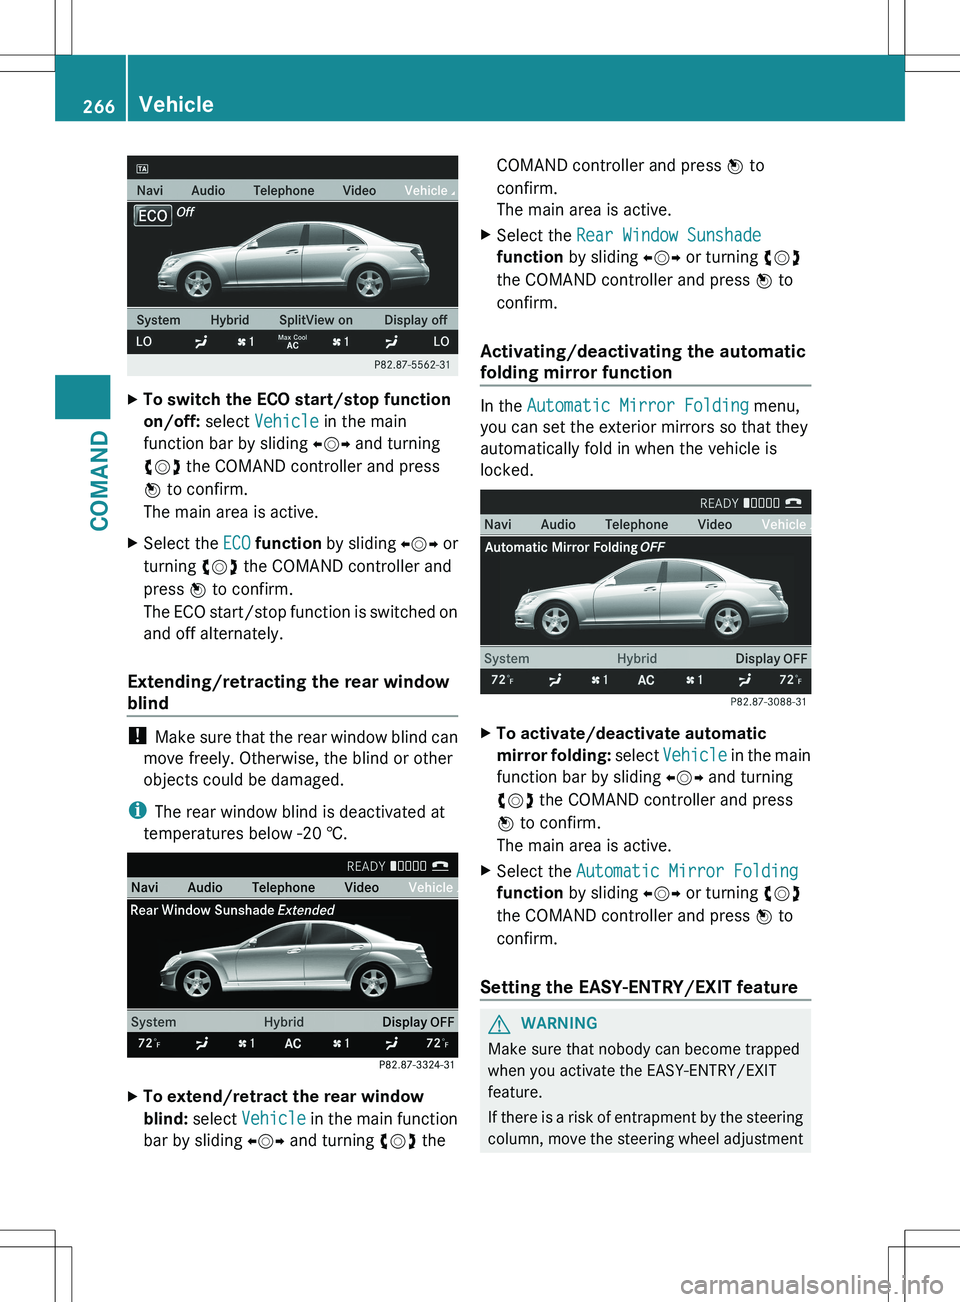
XTo switch the ECO start/stop function
on/off: select Vehicle in the main
function bar by sliding XVY and turning
cVd the COMAND controller and press
W to confirm.
The main area is active.XSelect the ECO function by sliding XVY or
turning cVd the COMAND controller and
press W to confirm.
The ECO start/stop function is switched on
and off alternately.
Extending/retracting the rear window
blind
! Make sure that the rear window blind can
move freely. Otherwise, the blind or other
objects could be damaged.
i The rear window blind is deactivated at
temperatures below -20 †.
XTo extend/retract the rear window
blind: select Vehicle in the main function
bar by sliding XVY and turning cVd theCOMAND controller and press W to
confirm.
The main area is active.XSelect the Rear Window Sunshade
function by sliding XVY or turning cVd
the COMAND controller and press W to
confirm.
Activating/deactivating the automatic
folding mirror function
In the Automatic Mirror Folding menu,
you can set the exterior mirrors so that they
automatically fold in when the vehicle is
locked.
XTo activate/deactivate automatic
mirror folding: select Vehicle in the main
function bar by sliding XVY and turning
cVd the COMAND controller and press
W to confirm.
The main area is active.XSelect the Automatic Mirror Folding
function by sliding XVY or turning cVd
the COMAND controller and press W to
confirm.
Setting the EASY-ENTRY/EXIT feature
GWARNING
Make sure that nobody can become trapped
when you activate the EASY-ENTRY/EXIT
feature.
If there is a risk of entrapment by the steering
column, move the steering wheel adjustment
266VehicleCOMAND
Page 283 of 536
XTurn the light switch to $ or c .
or
XIf the rear fog lamp is switched on: press
the light switch in to the stop.
Low-beam headlamps
XTo switch on the low-beam headlamps:
turn the SmartKey in the ignition lock to
position 2 or start the engine.XTurn the light switch to L.
The T indicator lamp on the light switch
lights up.XTo switch off the low-beam
headlamps: turn the light switch to $.
Daytime running lamps
Daytime running lamps in Canada
The daytime running lamps function is
required by law in Canada. It cannot therefore
be deactivated.
XTurn the light switch to $ or c .
With the engine running: depending on the
ambient light, the daytime running lamps or
the low-beam headlamps are switched on.
When the low-beam headlamps are
activated, the T indicator lamp on the
light switch lights up.
When the engine is running and the vehicle is
stationary or if the electronic parking brake is
applied: if you move the selector lever from a
drive position to P, the daytime running
lamps/low-beam headlamps go out after
three minutes.
When the engine is running, the vehicle is
stationary and in high ambient light
brightness: if you turn the light switch
to T , the daytime running lamps and the
parking lamps are switched on.
If the engine is running and you turn the light
switch to L, the manual settings take
precedence over the daytime running lamps.
Daytime running lamps in the USA
In the USA, the daytime running lamps are
deactivated upon delivery from the factory.XTo activate the daytime running
lamps: activate the daytime running lamps
function in the on-board computer
( Y page 387).XTurn the light switch to $ or c .
With the engine running: depending on the
ambient light, the daytime running lamps or
the low-beam headlamps are switched on.
When the low-beam headlamps are
activated, the T indicator lamp on the
light switch lights up.
If the engine is running and you turn the light
switch to T or L , the manual settings
take precedence over the daytime running
lamps.
Automatic headlamp mode
XTo switch on automatic headlamp
mode: turn the light switch to c.
SmartKey in position 1 in the ignition lock:
the parking lamps are switched on or off
automatically depending on the brightness
of the ambient light.
With the engine running: depending on the
brightness of the ambient light, the daytime
running lamps 12
or the parking lamps and
low-beam headlamps are switched on or off
automatically.
When the low-beam headlamps are
switched on, the T indicator lamp on
the light switch lights up.GWARNING
If the light switch is set to c, the low-beam
headlamps will not come on automatically if
it is foggy. This could endanger you and
others. Therefore, turn the light switch to
L in fog.
12
Only if daytime running lamps have been activated via the on-board computer.Exterior lighting281Lights and windshield wipersZ