2012 MERCEDES-BENZ R-Class light
[x] Cancel search: lightPage 158 of 210

X
Sel ect Menulan guage or
Aud io lan
guage and
pressthe 9button to
confi rm.
In both cases, amenu appe ars afte rafew
seconds. The#dot infront ofan entry
indi cates thecurrently selected langua ge.
X Select asetting using the 9:
buttons andpress the9button toconfirm.
X To exitthe menu: pressthe=
or ; button. Subtitle
sand camera angle
These functions arenot available onallDVDs.
The numbe rofsubt itle lang uages andcam era
ang lesavailab ledepe ndson theco nten to f
the DVD. Itis po ssi ble tha tthe settin gsmay
also beaccessed inthe DVD menu
(Y page 154).
X Show themenu (Ypage 152).
X Select DVD-Video in
the menu using
the :=; buttonsandpress the
9 button toconfirm .
X Select DVDFunctions and
press the9
button toconfirm .
X Select Subtitles or
Camera Angle and
press the9button toconfirm .
In both cases, amenu appears.The #dot
in front ofan entr yindicates thecurrent
settin g.
X Select asettin gusing the9:
buttons andpress the9button toconfirm .
X To exit themenu: pressthe=
or ; button. Interactive
content
DVD scan cont aininteract ivecont ent(e.g. a
video game). Inavideo game, forexample,
you may beable toinfluence eventsby
selecting andtriggering actions.Thetype and
number ofactions depend onthe DVD . X
Select anaction usingthe
9:=; buttonsandpress
the 9button toexecute it.
A menu appearsand thefirst entry,
Select ,
is highlighted.
X Press the9button.
or
X Show thecont rolmenu whileinvideo DVD
mode, ifnecessary.
X Select Menu using
the=;
9: buttonsandpress the9button
to confirm .
X Select DVD-V in
the menu usingthe
=;9: buttonsandpress
the 9button toconfirm .
X Select DVDFunctions and
press the9
button toconfirm .
X Select orexecute anaction usingthearrow
keys. Video
AUXmode Conne
ctingexternal videosources
If your vehicle isequipp edwith aMedia
Int erface, youcan conn ectanextern alvideo
source.
You require anadditional audio/video cable
set toconn ectanextern alvideo source to
Media Interface.
For details, pleaseconsult anauthorized
Mercedes-Ben zCenter orvisit http://
www .mer<00030005000400050013002500020005000E001D00210003000F000D00220003
000FB nnect.and
proceed asdescribed under"Media
Int erface".
The conn ection jacksarelocated:
R in the cent erconsole stowage
compartmen t(SL)
R in the glove box 156
Video
AUXmodeVideo
Page 163 of 210

X
Insert thenew batteries. Observethe
pola ritymarkings onthe batteries and
battery compartment whendoing so.
Left-hand battery:thepositive pole(+)
must faceupwards.
Rig ht-hand battery: thepositive pole(+)
must facedownwa rds.
X To clo sethe battery compartment:
insert battery compartment cover=
starting withretaining lugs? into the
battery compartment andallow catch
tab ;toengage inpla ce.
On the cordle ssheadphones The
battery compartment coverislocated on
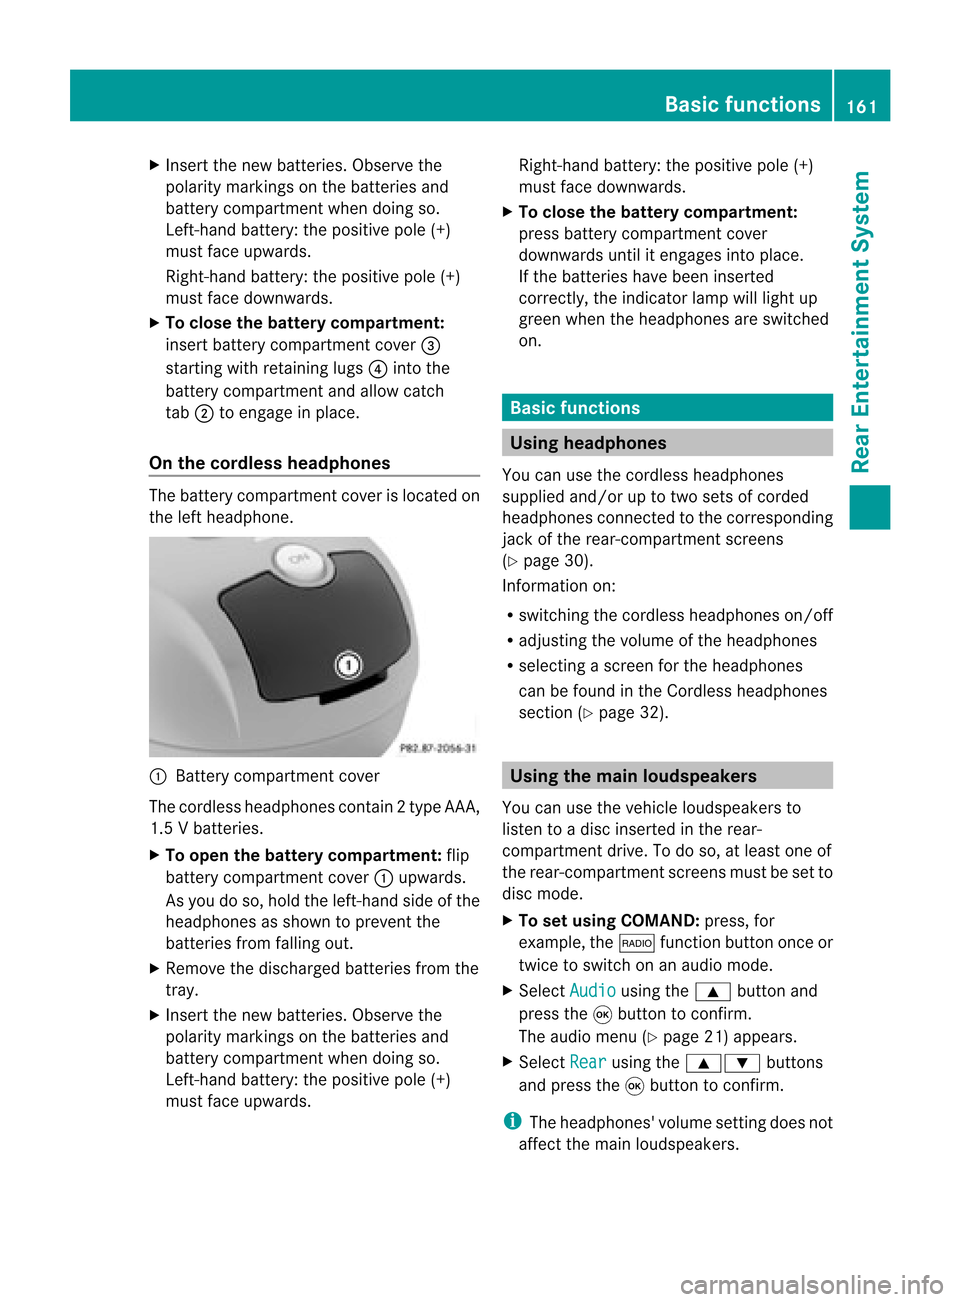
the left head phone. :
Battery compartment cover
The cordless headphones contain 2type AAA,
1. 5V bat terie s.
X To ope nth ebat tery com partme nt:fli p
bat tery compar tmentco ver :upwar ds.
As you doso, holdth elef t-han dside ofthe
head phonesas sho wntopre ven tthe
batteries fromfalling out.
X Remove thedischarged batteriesfromthe
tray.
X Insert thenew batteries. Observethe
polarity markings onthe batteries and
battery compartmen twhen doing so.
Left- hand battery: thepositive pole(+)
must faceupwa rds. Right-hand
battery:thepositive pole(+)
must facedownwards.
X To close thebatt erycompart ment:
press battery compartmen tcover
downwards untilitengages intoplace.
If the batteries havebeen inserted
correct ly,the indicator lampwilllight up
green whentheheadphones areswitched
on. Basic
functions Using
headph ones
You canusethecordless headphones
suppli edand/or uptotwo sets ofcorded
headphones connected tothe corresponding
jack ofthe rear-compart mentscreens
(Y page 30).
Inform ationon:
R switching thecordless headphones on/off
R adjusting thevolume ofthe headphones
R selecting ascreen forthe headphones
can befound inthe Cordless headphones
section (Ypage 32). Using
themain loudspeakers
You canusethevehicle loudspe akersto
listen toadisc inserted inthe rear-
compartmen tdrive. Todo so, atlea stone of
the rear-compa rtmentscreens mustbeset to
disc mode.
X To set using COMA ND:press, for
exampl e,the $ function buttononceor
twice toswi tch onanaudio mode.
X Select Audio usi
ng the 9 button and
press the9button toconfirm.
The audio menu (Ypag e21) appears.
X Select Rear usi
ng the 9: buttons
and press the9button toconfirm.
i The headpho nes'volumesetting doesnot
affect themain loudspe akers. Basic
functio ns
161Rear Entertainmen tSystem Z
Page 166 of 210

X
Adju stthe brightne ssusing the 9:
bu ttons andpressthe 9button toconfi rm.
The brightne ssbarm oves upordown. The
picture becomes lighterordarker in
accordanc ewith thescale. Showing/hiding
thepictur e
X To hide thepictur e:select Display Off in
the system menuusingthe:;
button sand press the9button toconf irm.
The picture ishidden.
X To display thepictur e:press the9
button . Audio
CD/DVDand MP3 mode Import
antsafety notes G
WARNIN
G
The CD/D VDdrive isaclass 1laser product.
Nev eropen thehousi ng.There isarisk of
exposure toinvisible laserradiation ifthe
housing isopened, orifthe casing isfaulty or
damaged.
The Rear SeatEntertainment Systemcontains
no parts which youcan repair yourself. For
safety reasons, allmaintenanc ework must be
carried outbyqual ified aftersales
techn icians. G
WARNING
The driver should notwear aRear Seat
Ent ertainment headsetwhileoperating the
vehicle underanycircumstan ces.Theuseof
a headset whiledriving thevehicle could
drastically impairtheabili tyto react toaudi ble
traffic conditions (e.g.emergency sirensfrom
<0010000F000C0009000300050024000600090012000500240001000D00020015
000C0001000E000300050035> anothercar'shorn,
etc. ). G
WARNING
When notinuse, headsets orextern alvideo
sources shouldbestored inas afe locatio n
(e. g.on eof theveh icle'sstorag e com
partmen ts)so that they are notloose
within thepassenger compartmentduring
braking, vehiclemaneuvers oratraffic
accident .Object smoving withinthe
passenger compartmentcould cause serious
personal injurytovehicle occupant s. G
WARNING
Due toapotent ialchokin ghazar d,wired
heads etusage bychildre nshould onlyoccur
with adultsuper vision . Gener
alnot es
You willfindinf orm ationonthe following
topics inthe "Audio" section:
R notes onCDs/DV Ds(Ypage 137)
R notes onMP3 mode (Ypage 136)
R notes oncopyright (Ypage 137) Inserting
aCD/DVD
M- Class :th eCD /DVD drive isin thece nter
beh ind th efron tseats.
R-Class: theCD/D VDdrive isin the center
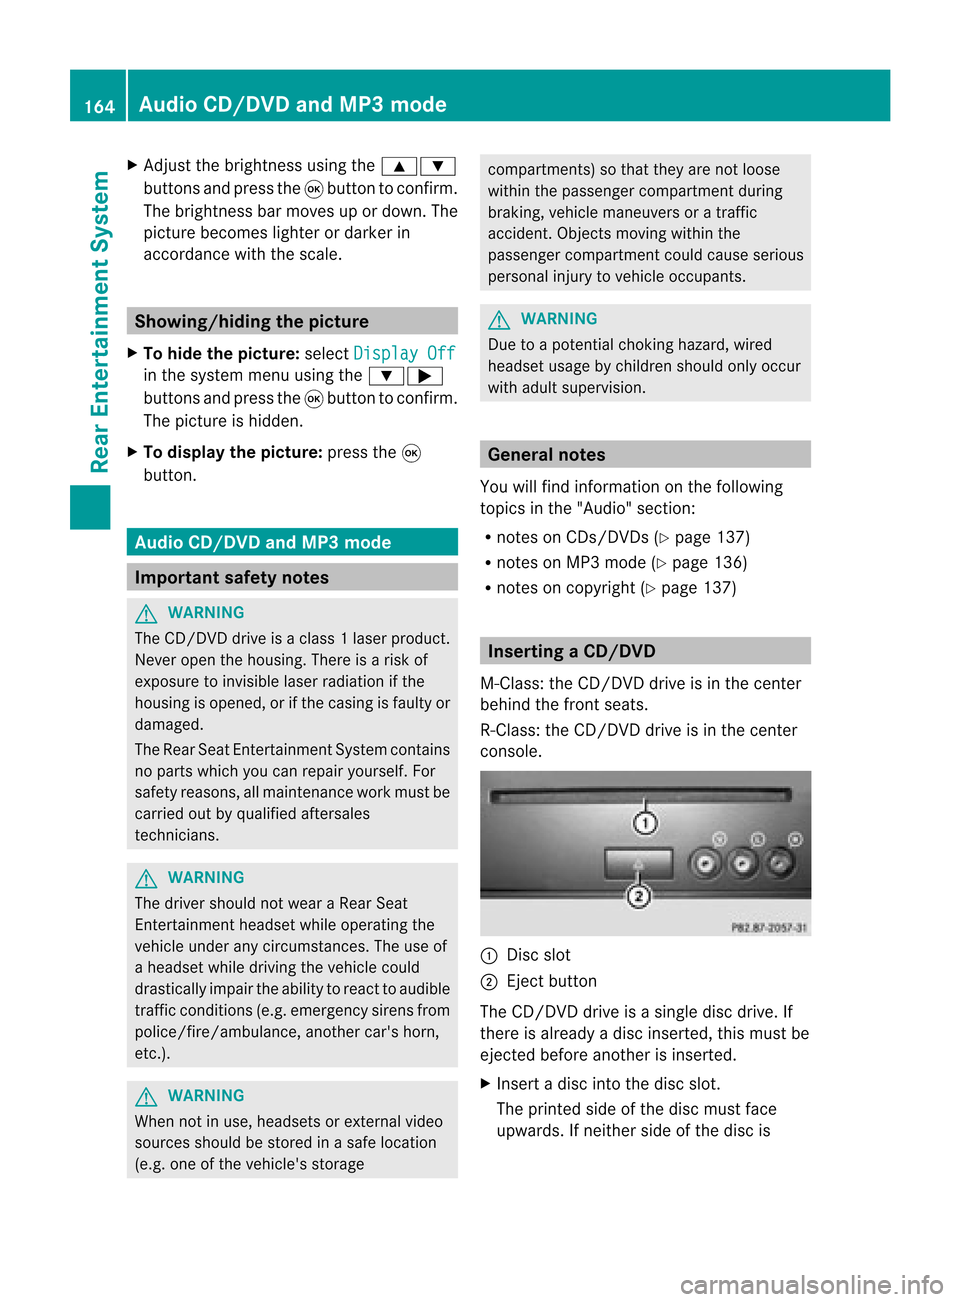
con sole. :
Disc slot
; Eject button
The CD/D VDdrive isasingle discdrive. If
ther eis already adisc insert ed,this must be
ejec tedbefore anotherisinsert ed.
X Inser tadisc intothe disc slot.
The print edside ofthe disc must face
upwards. Ifneit her side ofthe disc is 164
Audio
CD/DVDand MP3 modeRear Entert ainmentSyst em
Page 170 of 210

X
To paus eplay back:sel ect «using
the :=; buttons onthe rem ote
contro land pressthe 9button toconfi rm.
The «displ aycha nge sto M.
X To conti nue play back:sel ect Mand press
the 9button toconfi rm.
The Mdispl aycha nge sto «. Sto
pfuncti on
This function isonly available inaudio DVD
mode.
X To inte rrupt playbac k:sele ct± using
the :=; buttonsonthe remote
control andpress the9button toconfirm.
The «disp laychange sto M.
X To continue playbac k:sele ctM and press
the 9button toconfirm.
Pla yback continues fromthepointwhe reit
wa sinterrup ted.
X To stop playbac k:whi lepla yback is
interrup ted,select± aga inand press the
9 button toconfirm.
Pla yback stops andreturns tothe
begi nning ofthe DVD. Mishigh lighted.
X To restart playbac k:sele ctM and press
the 9button toconfirm.
Pla yback starts fromthebegi nning ofthe
DVD. Settin
gthe audio format
Further informationonaudio formats is
ava ilable inthe "Aud io"section
(Y pag e135).
X Select DVD-A usi
ng the :=;
buttons onthe remote controlandpress
the 9button toconfirm.
X Select Group usi
ng the 9: buttons
and press the9button toconfirm.
The listo favail ableau dio formats appears.
The #dot indica testhe format currently
sele cted. X
Select anaudio format using the
9: buttonsandpress the9button
to confirm.
X To exit themenu: pressthe= or;
button. Playbac
koptio ns
Fur ther informa tion onplay ba ck opti ons is
ava ilab lein the "Audio" secti on
(Y page 135) .
X Sel ect CD ,
DVD -A or
MP3 us
ing
the :=; buttons onthe remo te
control andpressthe 9button toconfi rm.
The options list appe ars .The # dot
indicates theoption current lyselected.
X Select Normal Track Sequence ,
Random Tracks or
Random Folder using
the
9: buttonsandpress the9button
to confirm .
The option isswitched on.For alloptions
except Normal TrackSequence ,
you will
see acorresponding displayin the displa y/
selection window.
i Ifyou change thedisc, theNormal Track
Sequence option
isactivated
automatically .Ifa no ption isselect ed,it
remains selectedafter theRear Seat
En tert ainmen tSyst emisswitc hedonor
off. Switching
track inform ationon/off
(MP3 mode only)
If the func tionisswitc hedon,folder andtrack
names aredisplayed.
If the func tion isswitc hedoff,disc andfile
names aredisplayed.
X Select Displa yTrack Information using
the9: buttonsonthe remot e
con troland press the9butt ontocon firm.
The func tion isswitc hedonO oroff ª,
dependin gon the previous status. 168
Audio
CD/DVDand MP3 modeRear Entert ainmentSyst em
Page 172 of 210

Showing/
hidingthemenu
X To show: pressthe9button onthe
remote control.
or
X Select Menu while
thenavigation menuis
shown andpress the9button toconf irm.
X To hide: press the9 button, select
Full Screen and
press the9button to
conf irm. Menu
shown
: Video DVDoptions
; Pause function
= Stop function
? Toset the treble
A Toset the bass Fast
forward ing/rewi nding
X Press andhold theE orF button on
the remote controluntil thedesired
position hasbeen reached.
You seethenavigation menu. Pause
function
X Show themenu (Ypage 170).
X To pause playback: select«and press
the 9button onthe remote controlto
conf irm.
The «display changes toM. X
To continue playback: selectMand press
the 9button toconf irm.
The menu ishidden. Stop
function
X Show themenu (Ypage 170).
X To interru ptplayback: select±and
press the9button onthe remote control
to conf irm.
The «display changes toM.T hevideo
image ishidden.
X To continue playback: selectMand press
the 9button toconfirm .
Play back continues fromthepoint where it
was interrupted. Themenu ishidden.
X To stop playback: whileplayback is
interrupted, select±again andpress the
9 button toconfirm .
Play back stops andreturns tothe
beginning ofthe DVD .M ishighlighted.
X To restar tplayback: selectMand press
the 9button toconfirm .
Play back starts fromthebeginning ofthe
DVD . Selec
tingascene/ch apter
Not e Fur
ther inform ation onthis fun ction is
availab lein the"Vide o"sec tion
(Y page 153).
Ski pping forwar ds/back wards X
Pre ssthe= or; buttonon the
rem oteco ntrol .
or
X Pre sstheE orF button.
The navigat ionmen u(Y page 169)appear s
for appr oximat elyeigh tsecon ds. 170
Vid
eoDVD modeRear Entert ainment System
Page 175 of 210

ang
lesavailabl edepen dson theco nten to f
the DVD. Itis po ssi ble tha tthe settin gsmay
also beaccessed fromtheDVD menu.
X Show themenu (Ypage 170).
X Select DVD-Video and
press the9
button onthe remote controltoconfirm .
X Select DVDFunctions and
press the9
button toconfirm .
X Select Subtitles or
Camera Angle and
press the9button toconfirm .
In both cases, amenu appearsafter afew
seconds. The#dot infront ofan entr y
indicates thecurrent setting.
X Select asettin gusing the9:
buttons andpress the9button toconfirm .
X To exit themenu: pressthe=
or ; button. Interactive
content
DVD scan also containinteract ivecont ent
(e.g. avideo game). Inavideo game, youmay
be able toinfluence eventsbyselecting and
triggering actions.Thetype andnumber of
actions depend onthe DVD .
X Select anaction usingthe
9:=; buttonsandpress
the 9button toexecute it.
A menu appearsand thefirst entry,
Select ,
is highlighted.
X Press the9button. AUX
mode Introduction
You canconn ectone extern alvideo source to
each ofthe displa ysofthe Rear Seat
Ent ertainment System(AUXdispla y)and also
one extern alvideo source tothe rear-
compartmen tCD/DV Ddrive (AUX drive) with
a sound andvideo signal. Please
seethecorresponding operating
instruct ionsforinformation onhow to
operate theextern alvideo source.
For further detailsaboutextern alvideo
sources, pleaseconsult anauthorized
Mercedes-Ben zCent er. Connecting
AUXequip ment
AUX drive The
AUX drive jacksare located onthe CD/
DVD drive onthe right nextto the CD/D VD
ejec tbutton (Ypage 31).
Displaying AUX The
AUX display jacksare onthe side ofthe
screen (Ypage 30).
Audio andvideo connection X
Inser tthe audi oplugs forthe left and right
signals intothecorresponding Land R
jacks .
X Insert thevideo plugintotheVjack. Activating
AUXmode
AUX drive X
Select Aux in
the menu usingthe
9=; buttonsonthe remote
cont roland press the9button toconfirm .
The AUX menu appears. AUX
menu AUX
mode
173RearEnterta inment System Z
Page 186 of 210

focuse
don safe drivingbeha vior,especially
pay attention totraffic andstreet signs,and
shou ldutil ize the system 'sau dio cues while
drivi ng.
The navig ation system doesnotsupplyany
informa tiononstop signs, yield signs, traffic
regu lations ortraffic safetyrul es. Thei r
obse rvance alwaysremai nsinthe drive r's
perso nalrespo nsibility.DVD maps donot
cover allareas norallroutes withinanarea.
Traffic regulationsalways have priority over
any route recommendations given.Bearin
mind thatataspeed ofjust 30mph
(app roximately 50km/h), yourvehicle is
cover ingadistanc eof 44 feet (approximately
14 m)every second.
During routeguidance, youwillnotreceive
infor mation on:
R traff iclights
R stop andyield signs
R parking orstoppin gzon es
R one- way street s
R narrow bridges
R other trafficregulation data
You should thereforealway sstric tlyobserve
traff icregulations whiledriving. Drive
carefully andalway sobey trafficlaws and
road signs, evenifthey contradict navigation
system instruct ions. G
WARN
ING
Navigation announcementsare inten dedto
direct youwhile driving without divertingyour
atten tionfrom theroad anddriving.
Please alwaysuse this feature instead of
con sulting themap display fordirect ions.
Consultin gthe symbols ormap display for
direct ionsmay cause youtodivert your
atten tionfrom driving andincrease yourrisk
of an acciden t. G
WARN
ING
Please donot use theVoice ControlSystem
in an emergen cy,asthe toneof your voice
may change inastres sfulsituation .This could cause
adelay incompleting yourphone call
in atimely manner. Thiscould distract youin
an emergency situationandcause youtobe
involved inan accident. Operat
ion
You canusevoice controlto:
R enter astate
R enter aprovince
R enter acity
R enter adistrict (center)
R enter astreet
R enter anintersec tion
R enter ahouse number
R enter anentire address
R enter azip code
R find address
R enter apoint ofinterest
R select oneofyour previous destinations
R call uproute information
R store adestination
R displa ythe map
R enlarge/reduce thesize ofthe map
R listen tothe destination memory
R start andstop route guidance
R switch theguida nceinstruct ionsonand off
To select thenavigation application:
X Vehicles withVoice Control buttons on
the Multi-fu nctionSteering Wheel:Press
the ? button.
or
X Vehicles withLever forVoice Control:
Pull theVoice Control levertoward you. 184
Navigat
ionVoiceControl