2012 MERCEDES-BENZ GLK SUV reset sun roof
[x] Cancel search: reset sun roofPage 20 of 381

On-board computer (4-button mul-
tifunction steering wheel)
Displaying service messages .........312
Display messages ..........................245
Individual vehicle settings ..............225
Message memory .......................... 245
Operating ...................................... .225
Range ............................................ 226
Standard displa y............................ 226
Time/date ..................................... 227
Trip computer ................................ 226
Opening and closing the side trim
panels ................................................. 121
Operating safety Diagnostics connection ...................26
Operating system
see On-board computer
Outside temperature
Display (12-button multifunction
steering wheel) .............................. 227
Display (4-button multifunction
steering wheel) .............................. 225
Overhead control panel ......................39
Override feature Rear side windows ...........................64 P
Paint code .......................................... 364
Paintwork (cleaning instructions) ...319
Panic alarm .......................................... 42
Panorama sliding sunroof Important safety information ...........92
Opening/closing .............................. 92
Opening/closing the roller sun-
blind ................................................. 93
Problem (malfunction) .....................94
Rain closing feature .........................92
Resetting ......................................... 93
Parking ............................................... 164
Important safety notes ..................164
Parking brake ................................ 165
Position of exterior mirror, front-
passenger side ............................... 105
Reversing camera ..........................196
see PARKTRONIC Parking aid
Active Parking Assist .....................192
see Exterior mirrors
see PARKTRONIC
Parking brake .................................... 165
Display message (12-button mul-
tifunction steering wheel) ..............253
Display message (4-button multi-
function steering wheel) ................248
Notes/function .............................. 165
Warning lamp ................................. 291
Parking lamp
Display message (12-button mul-
tifunction steering wheel) ..............262
Display message (4-button multi-
function steering wheel) ................259
Parking lamps
Changing bulbs .............................. 120
Switching on/off ........................... 112
PARKTRONIC
Deactivating/activating .................190
Driving system ............................... 188
Function/notes ............................. 188
Important safety notes ..................188
Problem (fault) ............................... 192
Sensor range ................................. 188
Trailer towing ................................. 191
Warning displa y............................. 189
PASSENGER AIRBAG OFF warning
lamp ...................................................... 56
Petrol .................................................. 366
Plastic trim (cleaning instructions) .322
Power windows see Side windows
PRE-SAFE ®
(preventative occupant
protection) Display message (12-button mul-
tifunction steering wheel) ..............254
Display message (4-button multi-
function steering wheel) ................249
PRE-SAFE ®
(preventive occupant
safety system) Operation ........................................ .48
PRE-SAFE ®
Brake
Activating/deactivating .................237
Display message (12-button mul-
tifunction steering wheel) ..............255 Index
17
Page 23 of 381

Side lamps
Changing bulbs .............................. 120
Switching on/off ........................... 112
Side windows
Convenience closing ........................90
Convenience opening ......................90
Important safety notes ....................88
Opening/closing .............................. 89
Problem (malfunction) .....................91
resetting .......................................... 91
Sliding sunroof
see Panorama sliding sunroof
Snow chains ...................................... 353
Socket Centre console .............................. 308
Luggage compartment ...................308
Rear compartment .........................308
Sockets
General notes ................................ 307
Spare wheel
Storage location ............................ 328
Storing ........................................... 328
Specialist workshop ............................ 27
Speed, controlling see Cruise control
Speed Limit Assist
Activating/deactivating the warn-
ing function ................................... .236
Displaying ...................................... 236
Display message (12-button mul-
tifunction steering wheel) ..............271
Display message in the multifunc-
tion displa y.................................... 203
Important safety notes ..................202
Speedometer
Activating/deactivating the addi-
tional speedometer ........................239
Digital ............................................ 231
In the instrument cluster (12-but-
ton multifunction steering wheel) ....33
In the instrument cluster (4-but-
ton multifunction steering wheel) ....31
Segments ...................................... 228
Selecting the unit of measure-
ment .............................................. 238
see Instrument cluster SPEEDTRONIC
Deactivating variable .....................177
Display message (12-button mul-
tifunction steering wheel) ..............275
Display message (4-button multi-
function steering wheel) ................270
Function/notes ............................. 176
Important safety notes ..................176
LIM indicator lamp .........................176
Permanent ..................................... 178
Selecting ........................................ 176
Variabl e......................................... 176
SRS (Supplemental Restraint Sys-
tem)
Display message (12-button mul-
tifunction steering wheel) ..............256
Display message (4-button multi-
function steering wheel) ................250
Introduction ..................................... 43
Warning lamp ................................. 291
Warning lamp (function) ................... 43
Starting (engine) ................................ 148
Steering Display message (12-button mul-
tifunction steering wheel) ..............281
Display message (4-button multi-
function steering wheel) ................279
Steering wheel
Adjusting (electrically) ...................102
Adjusting (manually). .....................102
Buttons (12-button multifunction
steering wheel) .............................. 228
Buttons (4-button multifunction
steering wheel) .............................. 225
Cleaning ......................................... 322
Gearshift paddles ........................... 159
Important safety notes ..................101
Storing settings (memory func-
tion) ............................................... 106
Steering wheel gearshift paddles ....159
Stowage areas ................................... 296
Stowage compartments Armrest (under) ............................. 297
Centre console .............................. 297
Cup holder ..................................... 305
Glove compartment .......................297
Important safety information .........296 20
Index
Page 94 of 381

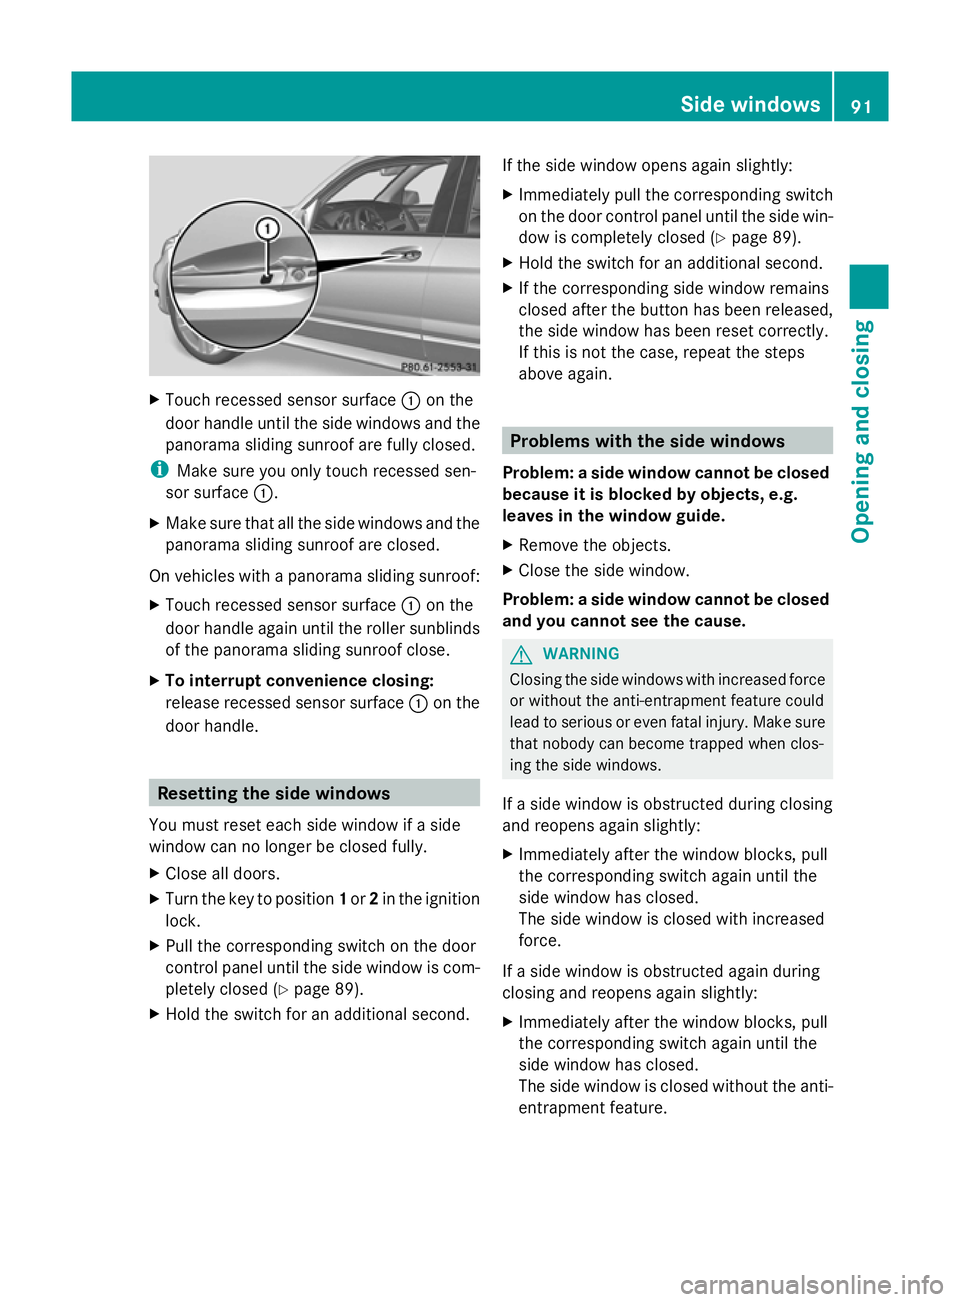
X
Touch recessed sensor surface :on the
door handle until the side windows and the
panorama sliding sunroof are fully closed.
i Make sure you only touch recessed sen-
sor surface :.
X Make sure that all the side windows and the
panorama sliding sunroof are closed.
On vehicles with a panorama sliding sunroof:
X Touch recessed sensor surface :on the
door handle again until the roller sunblinds
of the panorama sliding sunroof close.
X To interrupt convenience closing:
release recessed sensor surface :on the
door handle. Resetting the side windows
You must reset each side window if a side
window can no longer be closed fully.
X Close all doors.
X Turn the key to position 1or 2in the ignition
lock.
X Pull the corresponding switch on the door
control panel until the side window is com-
pletely closed (Y page 89).
X Hold the switch for an additional second. If the side window opens again slightly:
X
Immediately pull the corresponding switch
on the door control panel until the side win-
dow is completely closed (Y page 89).
X Hold the switch for an additional second.
X If the corresponding side window remains
closed after the button has been released,
the side window has been reset correctly.
If this is not the case, repeat the steps
above again. Problems with the side windows
Problem: a side window cannot be closed
because it is blocked by objects, e.g.
leaves in the window guide.
X Remove the objects.
X Close the side window.
Problem: a side window cannot be closed
and you cannot see the cause. G
WARNING
Closing the side windows with increased force
or without the anti-entrapment feature could
lead to serious or even fatal injury. Make sure
that nobody can become trapped when clos-
ing the side windows.
If a side window is obstructed during closing
and reopens again slightly:
X Immediately after the window blocks, pull
the corresponding switch again until the
side window has closed.
The side window is closed with increased
force.
If a side window is obstructed again during
closing and reopens again slightly:
X Immediately after the window blocks, pull
the corresponding switch again until the
side window has closed.
The side window is closed without the anti-
entrapment feature. Side windows
91Opening and closing Z
Page 96 of 381

feature, it opens again slightly. The rain-
closing feature is then deactivated.
The panorama sliding sunroof does not close
if:
R it is raised at the rear.
R it is blocked.
R no rain is falling on the area of the wind-
screen being monitored by the rain sensor,
e.g. because the vehicle is under a bridge. Operating the panorama sliding sun-
roof roller sunblinds
General notes The roller sunblinds shield the vehicle interior
from sunlight. The two roller sunblinds can
only be opened and closed together when the
panorama sliding sunroof is closed. G
WARNING
Make sure that nobody can become trapped
as you open or close the roller sunblinds.
Opening and closing Overhead control panel
:
To open
; To open
= To close
X Turn the key to position 1or 2in the ignition
lock.
X Press or pull the 3switch in the corre-
sponding direction. i
If you press the 3switch beyond the
point of resistance, an automatic opening/
closing process is started in the corre-
sponding direction. You can stop automatic
operation by pressing again.
Resetting the panorama sliding sunroof
and the roller sunblinds Reset the panorama sliding sunroof and the
roller sunblinds if the panorama sliding sun-
roof or the roller sunblinds do not move
smoothly.
X
Turn the key to position 1or 2in the ignition
lock.
X Press the 3switch to the point of resist-
ance in the direction of arrow ;and hold
it until the panorama sliding sunroof has
opened about 10 cm.
X Pull the 3switch repeatedly to the point
of resistance in the direction of arrow =
until the panorama sliding sunroof is fully
closed.
X Keep the 3switch pulled for an addi-
tional second.
X Press the 3switch to the point of resist-
ance in the direction of arrow ;and hold
it until the roller sunblinds are open
10 cm.
X Pull the 3switch repeatedly to the point
of resistance in the direction of arrow =
until the roller sunblinds are fully closed.
X Keep the 3switch pulled for an addi-
tional second.
X Make sure that the panorama sliding sun-
roof and the roller sunblinds can be fully
opened and closed again (Y page 92).
X If this is not the case, repeat the steps
above again.
! If the panorama sliding sunroof and the
roller sunblind cannot be fully opened or
closed after resetting, contact a qualified
specialist workshop. Sliding sunroof
93Opening and closing Z
Page 342 of 381

!
You should have all work involving the
battery carried out at a qualified specialist
workshop. In the exceptional case that it is
necessary for you to disconnect the battery
yourself, make sure that:
R you switch off the engine and remove the
key. On vehicles with KEYLESS-GO,
ensure that the ignition is switched off.
Check that all the indicator lamps in the
instrument cluster are off. Otherwise,
electronic components, such as the
alternator, may be damaged.
R you first remove the negative terminal
clamp and then the positive terminal
clamp. Never swap the terminal clamps.
Otherwise, the vehicle's electronic sys-
tem may be damaged.
R in vehicles with automatic transmission,
the transmission is locked in position P
after disconnecting the battery. The vehi-
cle is secured against rolling away. You
can then no longer move the vehicle.
The battery and the cover of the positive
terminal clamp must be fitted securely dur-
ing operation.
In order for the battery to achieve the maxi-
mum possible service life, it must always be
sufficiently charged.
Have the battery charge checked more fre-
quently if you use the vehicle mainly for short
trips or if you leave it standing idle for a
lengthy period. Consult a qualified specialist
workshop if you wish to leave your vehicle
parked up for a long period of time.
Like other batteries, the vehicle battery may
discharge over time if you do not use the
vehicle. In such cases, have the battery dis-
connected at a qualified specialist workshop.
You can also charge the battery with a
charger recommended by Mercedes-Benz.
For more information, please contact a quali-
fied specialist workshop.
i When you park the vehicle, remove the
key if you do not require any electrical con-
sumers. The vehicle will then use very little
energy, thus conserving battery power. i
If the power supply has been interrupted,
e.g. if the battery was discharged, you will
have to:
R set the clock; see the separate operating
instructions.
For vehicles with Audio 20 and a 4-button
multifunction steering wheel, see "Date/
Time" (Y page 227).
R reset the panorama sliding sunroof
(Y page 93).
R reset the function for automatically fold-
ing the exterior mirrors in/out by folding
the mirrors out once (Y page 104). Charging the battery
G
WARNING
Only charge the battery in a well-ventilated
area. As the battery is being charged, gases
can escape and generate minor explosions.
This could injure you and other persons or
cause damage to the paintwork or acid cor-
rosion on the vehicle.
You can obtain information on battery charg-
ers which allow the battery to be charged
while still installed from a qualified specialist
workshop. G
WARNING
There is a risk of acid burns during the charg-
ing process due to the gases which escape
from the battery. Do not lean over the battery
during the charging process. G
WARNING
Battery acid is caustic. Avoid contact with the
skin, eyes or clothing.
! Only charge the installed battery with a
battery charger which has been tested and
approved by Mercedes-Benz. These battery
chargers allow the battery to be charged
while still installed in the vehicle.
! Only use battery chargers with a maxi-
mum charging voltage of 14.8 V. Battery (vehicle)
339Breakdown assistance Z