2012 MERCEDES-BENZ GLK SUV window
[x] Cancel search: windowPage 138 of 381
Windows misted up on the outside
X
Activate the windscreen wipers.
X Press the _button repeatedly until the
O orP symbol appears in the dis-
play.
i You should only select this setting until
the windscreen is clear again. Rear window heating
Switching on/off G
WARNING
Clear all windows of ice or snow before setting
off. Otherwise, impaired visibility could
endanger you and others.
The rear window heating has a high current
draw. You should therefore switch it off as
soon as the window is clear. It otherwise
switches off automatically after several
minutes.
If the battery voltage is too low, the rear win-
dow heating may switch off.
X Turn the key to position 2in the ignition
lock.
X Press the ¤button.
The indicator lamp in the ¤button lights
up or goes out.
Problems with the rear window heating The rear window heating has switched off
prematurely or cannot be activated.
X
Switch off any consumers that are not
required, e.g. reading lamps or interior
lighting.
When the battery is sufficiently charged,
the rear window heating is activated again
automatically. Activating/deactivating air-recircula-
tion mode
You can deactivate the flow of fresh air if
unpleasant odours are entering the vehicle
from outside. The air already inside the vehi-
cle will then be recirculated.
The operation of air-recirculation mode is the
same for all control panels. G
WARNING
Only switch over to air-recirculation mode
briefly at low outside temperatures. Other-
wise, the windows could mist up, thus impair-
ing visibility and endangering yourself and
others. This may prevent you from observing
the traffic conditions, thereby causing an
accident.
X Turn the key to position 2in the ignition
lock.
X To activate: press thegbutton.
The indicator lamp in the gbutton lights
up.
i In the event of high pollution levels 11
or at
high outside temperatures, air-recircula-
tion mode is automatically activated. When
air-recirculation mode is activated auto-
matically, the indicator lamp in the g
button is not lit.
Outside air is added after about
30 minutes.
X To deactivate: press thegbutton.
The indicator lamp in the gbutton goes
out.
11 THERMOTRONIC automatic climate control only. Operating the climate control system
135Climate control Z
Page 139 of 381
i
Air-recirculation mode deactivates auto-
matically:
R after approximately five minutes at out-
side temperatures below approximately
5 †
R after approximately five minutes if cool-
ing with air dehumidification is deactiva-
ted
R after approximately 30 minutes at out-
side temperatures above approximately
5 † with the "cooling with air dehumidi-
fication" function switched on. Convenience opening/closing using
the air-recirculation button G
WARNING
Make sure that nobody can become trapped
between the side window and the door frame
as the side windows are opened and closed.
Make sure that all objects and body parts are
clear of the side windows when they are being
opened or closed. You or the objects could be
drawn in or become trapped between the side
window and the door frame as the window
moves. If there is a risk of entrapment, oper-
ate the Wswitch to move the side window
in the opposite direction.
Make sure that nobody can become trapped
as the panorama sliding sunroof is opened
and closed. If there is a risk of entrapment,
operate the 3switch to move the pano-
rama sliding sunroof in the opposite direction.
X Convenience closing feature: press and
hold the gbutton until the side win-
dows and the panorama sliding sunroof are
closed.
The indicator lamp in the gbutton lights
up. Air-recirculation mode is activated.
X Convenience opening feature: press and
hold the gbutton until the side win-
dows and the panorama sliding sunroof
have opened. The side windows and the panorama sliding sunroof move back to
their original position.
The indicator lamp in the
gbutton goes
out. Air-recirculation mode is deactivated.
i If you open the side windows or the pan-
orama sliding sunroof manually after clos-
ing with the convenience closing feature,
they will remain in this position when
opened using the convenience opening fea-
ture. Activating/deactivating the residual
heat function
The "Residual heat" function is only available
with THERMOTRONIC automatic climate con-
trol.
It is possible to make use of the residual heat
of the engine to continue heating the station-
ary vehicle for up to 30 minutes after the
engine has been switched off. The heating
time depends on the temperature that has
been set for the vehicle interior.
i The blower will run at a low speed regard-
less of the airflow setting.
i If you activate the residual heat function
at high temperatures, only the ventilation
will be activated. The blower runs at
medium speed.
X Turn the key to position 0in the ignition
lock or remove it.
X To activate: press theÌbutton.
The indicator lamp in the Ìbutton lights
up.
X To deactivate: press theÌbutton.
The indicator lamp in the Ìbutton goes
out.
i Residual heat is deactivated automati-
cally:
R after approximately 30 minutes
R when the ignition is switched on
R if the battery voltage drops
R when the auxiliary heating is activated 136
Operating the climate control systemClimate control
Page 145 of 381
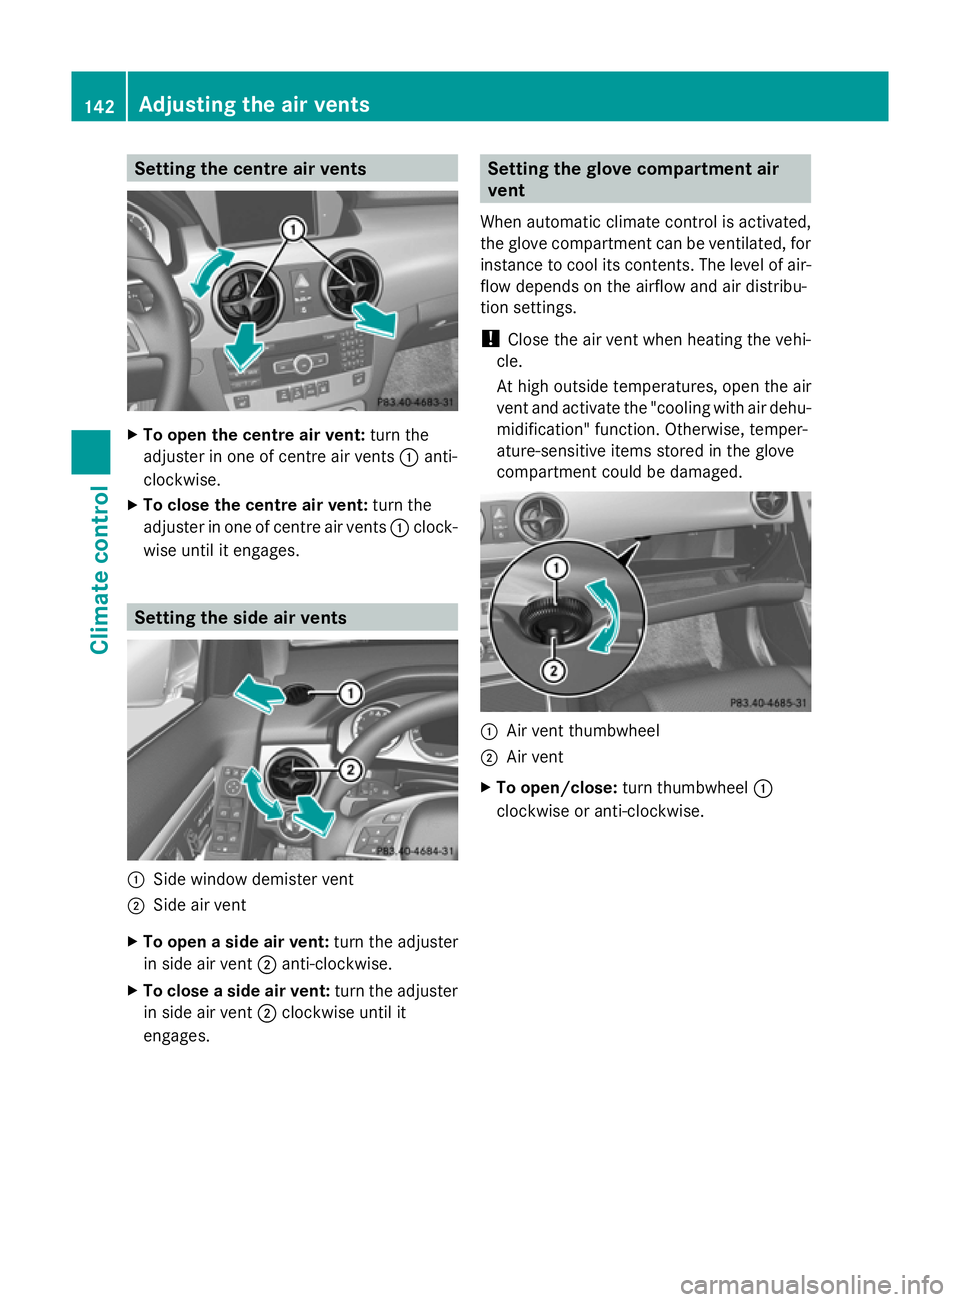
Setting the centre air vents
X
To open the centre air vent: turn the
adjuster in one of centre air vents :anti-
clockwise.
X To close the centre air vent: turn the
adjuster in one of centre air vents :clock-
wise until it engages. Setting the side air vents
:
Side window demister vent
; Side air vent
X To open a side air vent: turn the adjuster
in side air vent ;anti-clockwise.
X To close a side air vent: turn the adjuster
in side air vent ;clockwise until it
engages. Setting the glove compartment air
vent
When automatic climate control is activated,
the glove compartment can be ventilated, for
instance to cool its contents. The level of air-
flow depends on the airflow and air distribu-
tion settings.
! Close the air vent when heating the vehi-
cle.
At high outside temperatures, open the air
vent and activate the "cooling with air dehu-
midification" function. Otherwise, temper-
ature-sensitive items stored in the glove
compartment could be damaged. :
Air vent thumbwheel
; Air vent
X To open/close: turn thumbwheel :
clockwise or anti-clockwise. 142
Adjusting the air ventsClimate control
Page 172 of 381
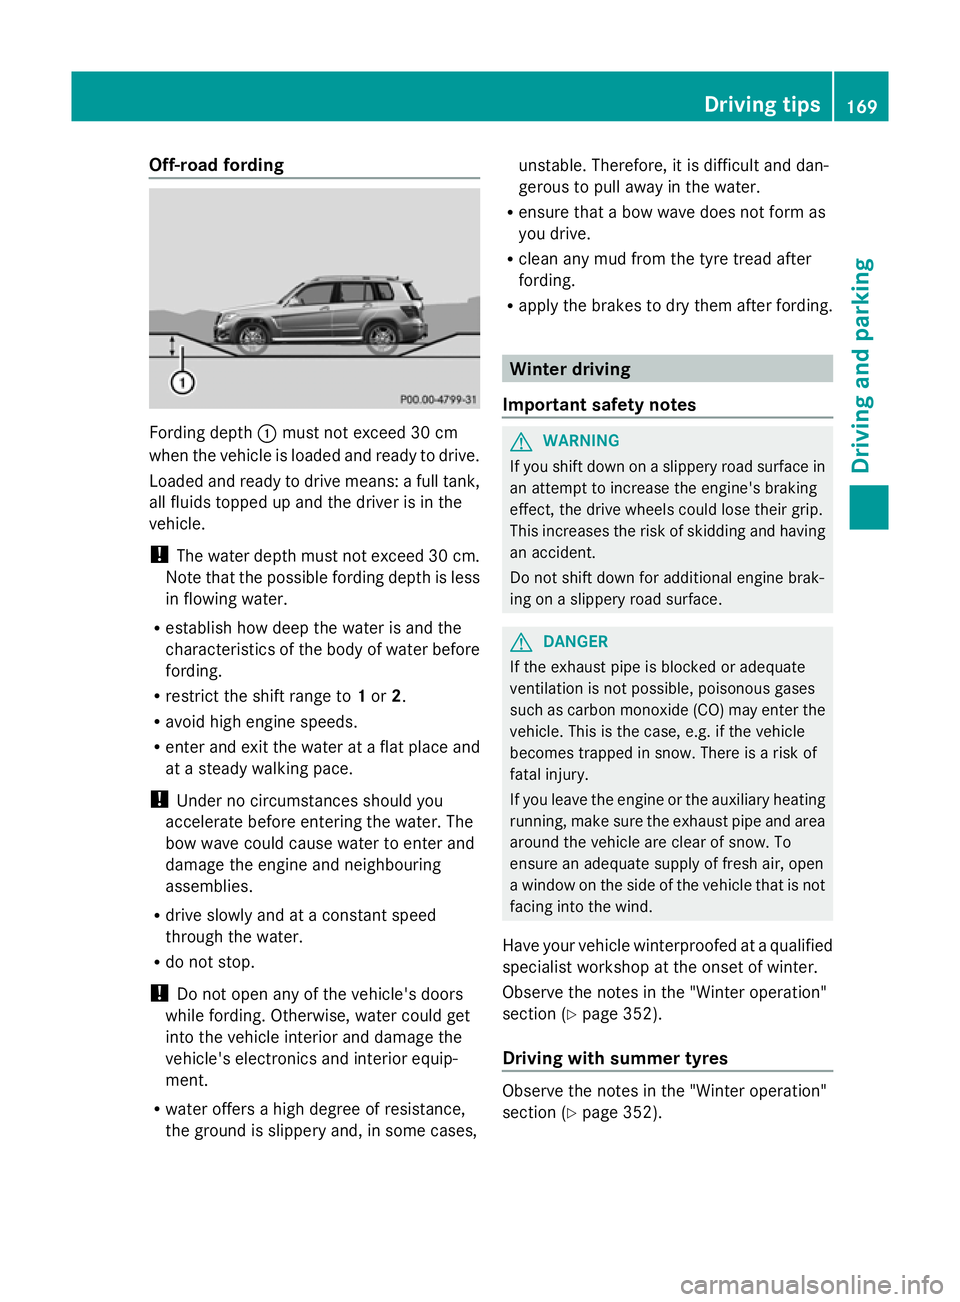
Off-road fording
Fording depth
:must not exceed 30 cm
when the vehicle is loaded and ready to drive.
Loaded and ready to drive means: a full tank,
all fluids topped up and the driver is in the
vehicle.
! The water depth must not exceed 30 cm.
Note that the possible fording depth is less
in flowing water.
R establish how deep the water is and the
characteristics of the body of water before
fording.
R restrict the shift range to 1or 2.
R avoid high engine speeds.
R enter and exit the water at a flat place and
at a steady walking pace.
! Under no circumstances should you
accelerate before entering the water. The
bow wave could cause water to enter and
damage the engine and neighbouring
assemblies.
R drive slowly and at a constant speed
through the water.
R do not stop.
! Do not open any of the vehicle's doors
while fording. Otherwise, water could get
into the vehicle interior and damage the
vehicle's electronics and interior equip-
ment.
R water offers a high degree of resistance,
the ground is slippery and, in some cases, unstable. Therefore, it is difficult and dan-
gerous to pull away in the water.
R ensure that a bow wave does not form as
you drive.
R clean any mud from the tyre tread after
fording.
R apply the brakes to dry them after fording. Winter driving
Important safety notes G
WARNING
If you shift down on a slippery road surface in
an attempt to increase the engine's braking
effect, the drive wheels could lose their grip.
This increases the risk of skidding and having
an accident.
Do not shift down for additional engine brak-
ing on a slippery road surface. G
DANGER
If the exhaust pipe is blocked or adequate
ventilation is not possible, poisonous gases
such as carbon monoxide (CO) may enter the
vehicle. This is the case, e.g. if the vehicle
becomes trapped in snow. There is a risk of
fatal injury.
If you leave the engine or the auxiliary heating
running, make sure the exhaust pipe and area
around the vehicle are clear of snow. To
ensure an adequate supply of fresh air, open
a window on the side of the vehicle that is not
facing into the wind.
Have your vehicle winterproofed at a qualified
specialist workshop at the onset of winter.
Observe the notes in the "Winter operation"
section (Y page 352).
Driving with summer tyres Observe the notes in the "Winter operation"
section (Y
page 352). Driving tips
169Driving and parking Z
Page 174 of 381
R
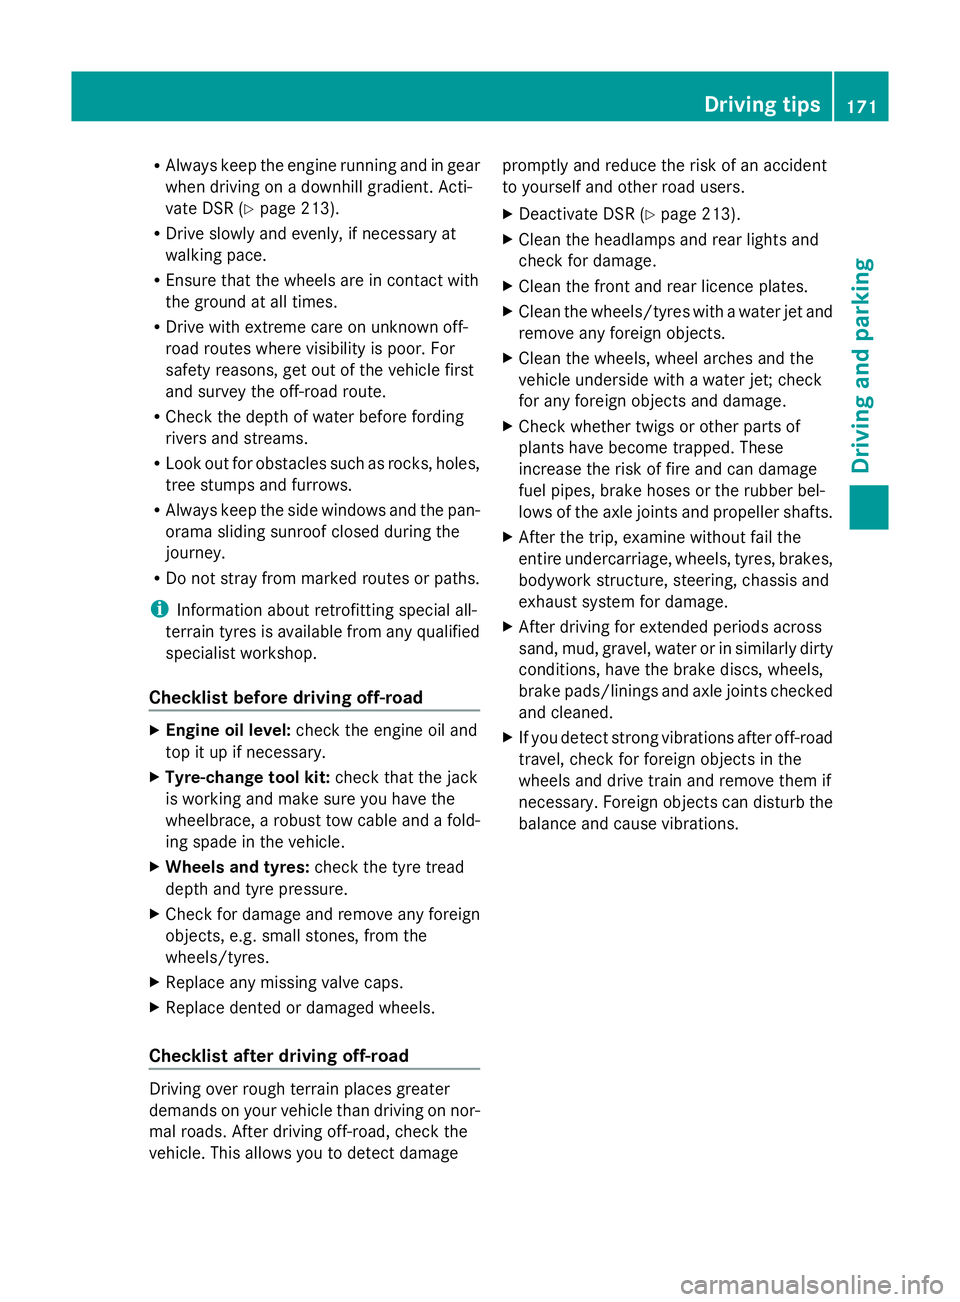
Always keep the engine running and in gear
when driving on a downhill gradient. Acti-
vate DSR (Y page 213).
R Drive slowly and evenly, if necessary at
walking pace.
R Ensure that the wheels are in contact with
the ground at all times.
R Drive with extreme care on unknown off-
road routes where visibility is poor. For
safety reasons, get out of the vehicle first
and survey the off-road route.
R Check the depth of water before fording
rivers and streams.
R Look out for obstacles such as rocks, holes,
tree stumps and furrows.
R Always keep the side windows and the pan-
orama sliding sunroof closed during the
journey.
R Do not stray from marked routes or paths.
i Information about retrofitting special all-
terrain tyres is available from any qualified
specialist workshop.
Checklist before driving off-road X
Engine oil level: check the engine oil and
top it up if necessary.
X Tyre-change tool kit: check that the jack
is working and make sure you have the
wheelbrace, a robust tow cable and a fold-
ing spade in the vehicle.
X Wheels and tyres: check the tyre tread
depth and tyre pressure.
X Check for damage and remove any foreign
objects, e.g. small stones, from the
wheels/tyres.
X Replace any missing valve caps.
X Replace dented or damaged wheels.
Checklist after driving off-road Driving over rough terrain places greater
demands on your vehicle than driving on nor-
mal roads. After driving off-road, check the
vehicle. This allows you to detect damage promptly and reduce the risk of an accident
to yourself and other road users.
X Deactivate DSR ( Ypage 213).
X Clean the headlamps and rear lights and
check for damage.
X Clean the front and rear licence plates.
X Clean the wheels/tyres with a water jet and
remove any foreign objects.
X Clean the wheels, wheel arches and the
vehicle underside with a water jet; check
for any foreign objects and damage.
X Check whether twigs or other parts of
plants have become trapped. These
increase the risk of fire and can damage
fuel pipes, brake hoses or the rubber bel-
lows of the axle joints and propeller shafts.
X After the trip, examine without fail the
entire undercarriage, wheels, tyres, brakes,
bodywork structure, steering, chassis and
exhaust system for damage.
X After driving for extended periods across
sand, mud, gravel, water or in similarly dirty
conditions, have the brake discs, wheels,
brake pads/linings and axle joints checked
and cleaned.
X If you detect strong vibrations after off-road
travel, check for foreign objects in the
wheels and drive train and remove them if
necessary. Foreign objects can disturb the
balance and cause vibrations. Driving tips
171Driving and parking Z
Page 233 of 381
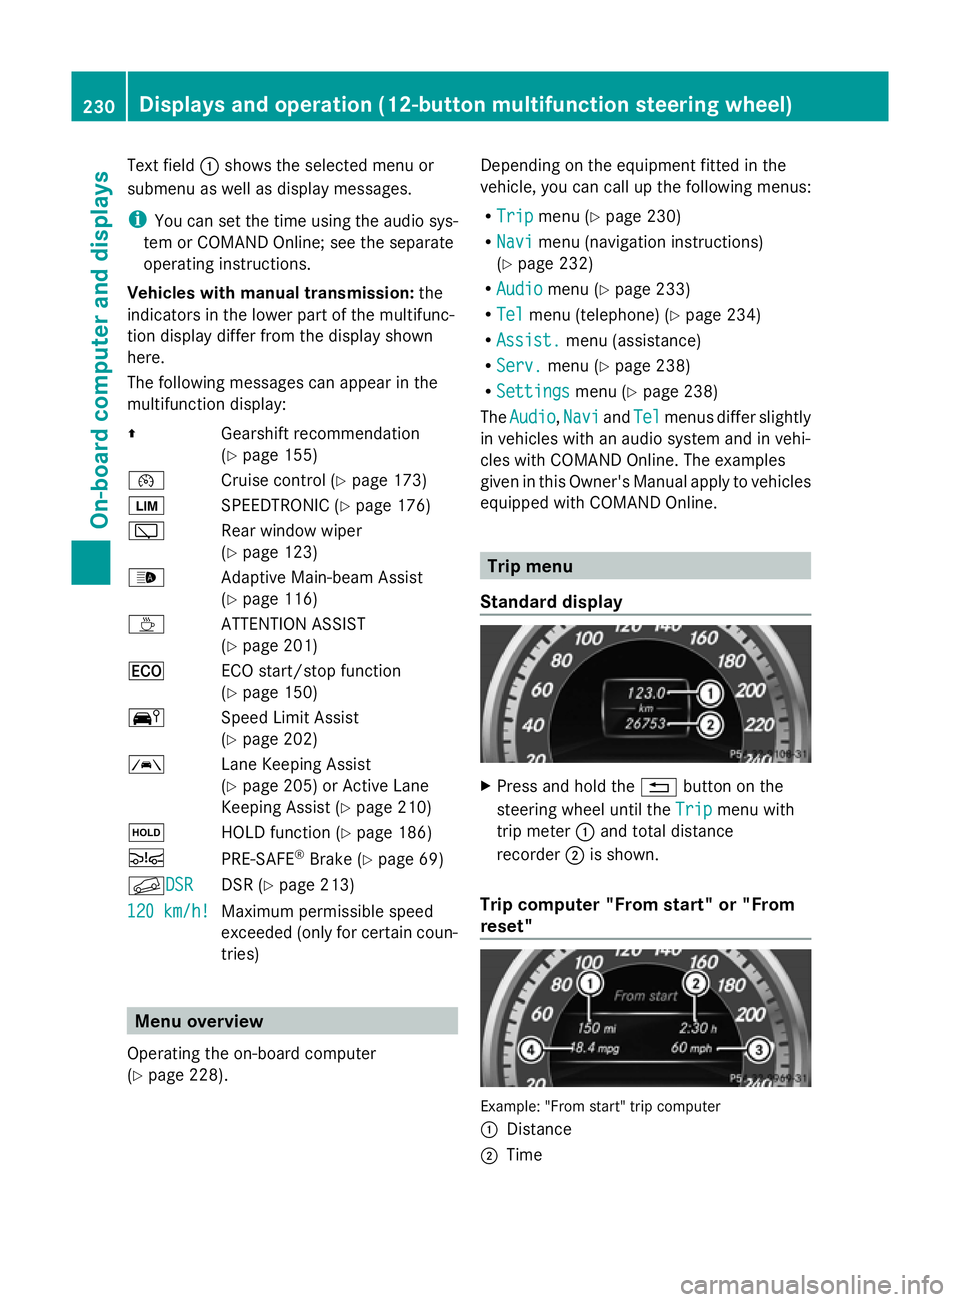
Text field
:shows the selected menu or
submenu as well as display messages.
i You can set the time using the audio sys-
tem or COMAND Online; see the separate
operating instructions.
Vehicles with manual transmission: the
indicators in the lower part of the multifunc-
tion display differ from the display shown
here.
The following messages can appear in the
multifunction display:
Z Gearshift recommendation
(Ypage 155)
¯ Cruise control (Y page 173)
È SPEEDTRONIC (Y page 176)
è Rear window wiper
(Ypage 123)
_ Adaptive Main-beam Assist
(Ypage 116)
À ATTENTION ASSIST
(Ypage 201)
¤ ECO start/stop function
(Ypage 150)
Ä Speed Limit Assist
(Ypage 202)
à Lane Keeping Assist
(Ypage 205) or Active Lane
Keeping Assist (Y page 210)
ë HOLD function (Y page 186)
Ä PRE-SAFE®
Brake (Y page 69)
fDSR DSR DSR (Y
page 213)
120 km/h! 120 km/h! Maximum permissible speed
exceeded (only for certain coun-
tries) Menu overview
Operating the on-board computer
(Y page 228). Depending on the equipment fitted in the
vehicle, you can call up the following menus:
R
Trip Trip menu (Y page 230)
R Navi Navi menu (navigation instructions)
(Y page 232)
R Audio
Audio menu (Y page 233)
R Tel
Tel menu (telephone) (Y page 234)
R Assist.
Assist. menu (assistance)
R Serv.
Serv. menu (Y page 238)
R Settings
Settings menu (Ypage 238)
The Audio
Audio ,Navi
Navi andTel
Tel menus differ slightly
in vehicles with an audio system and in vehi-
cles with COMAND Online. The examples
given in this Owner's Manual apply to vehicles
equipped with COMAND Online. Trip menu
Standard display X
Press and hold the %button on the
steering wheel until the Trip Tripmenu with
trip meter :and total distance
recorder ;is shown.
Trip computer "From start" or "From
reset" Example: "From start" trip computer
:
Distance
; Time 230
Displays and operation (12-button multifunction steering wheel)On-board computer and displays
Page 254 of 381
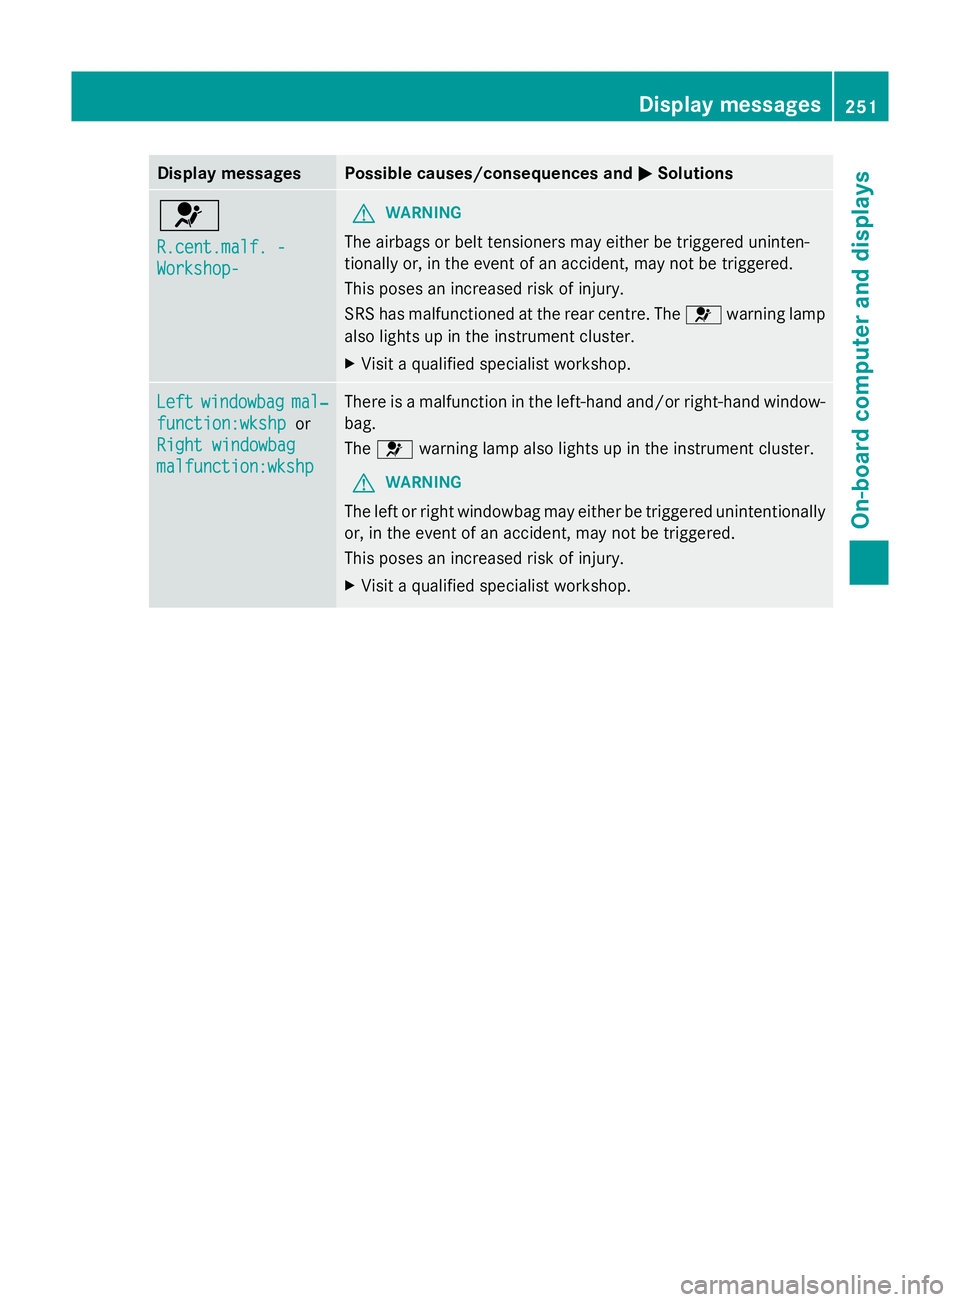
Display messages Possible causes/consequences and
M
MSolutions 6
R.cent.malf. - R.cent.malf. -
Workshop- Workshop- G
WARNING
The airbags or belt tensioners may either be triggered uninten-
tionally or, in the event of an accident, may not be triggered.
This poses an increased risk of injury.
SRS has malfunctioned at the rear centre. The 6warning lamp
also lights up in the instrument cluster.
X Visit a qualified specialist workshop. Left Left
windowbag
windowbag mal‐
mal‐
function:wkshp
function:wkshp or
Right windowbag
Right windowbag
malfunction:wkshp malfunction:wkshp There is a malfunction in the left-hand and/or right-hand window-
bag.
The
6 warning lamp also lights up in the instrument cluster.
G WARNING
The left or right windowbag may either be triggered unintentionally
or, in the event of an accident, may not be triggered.
This poses an increased risk of injury.
X Visit a qualified specialist workshop. Display
messages
251On-board computer and displays Z
Page 260 of 381
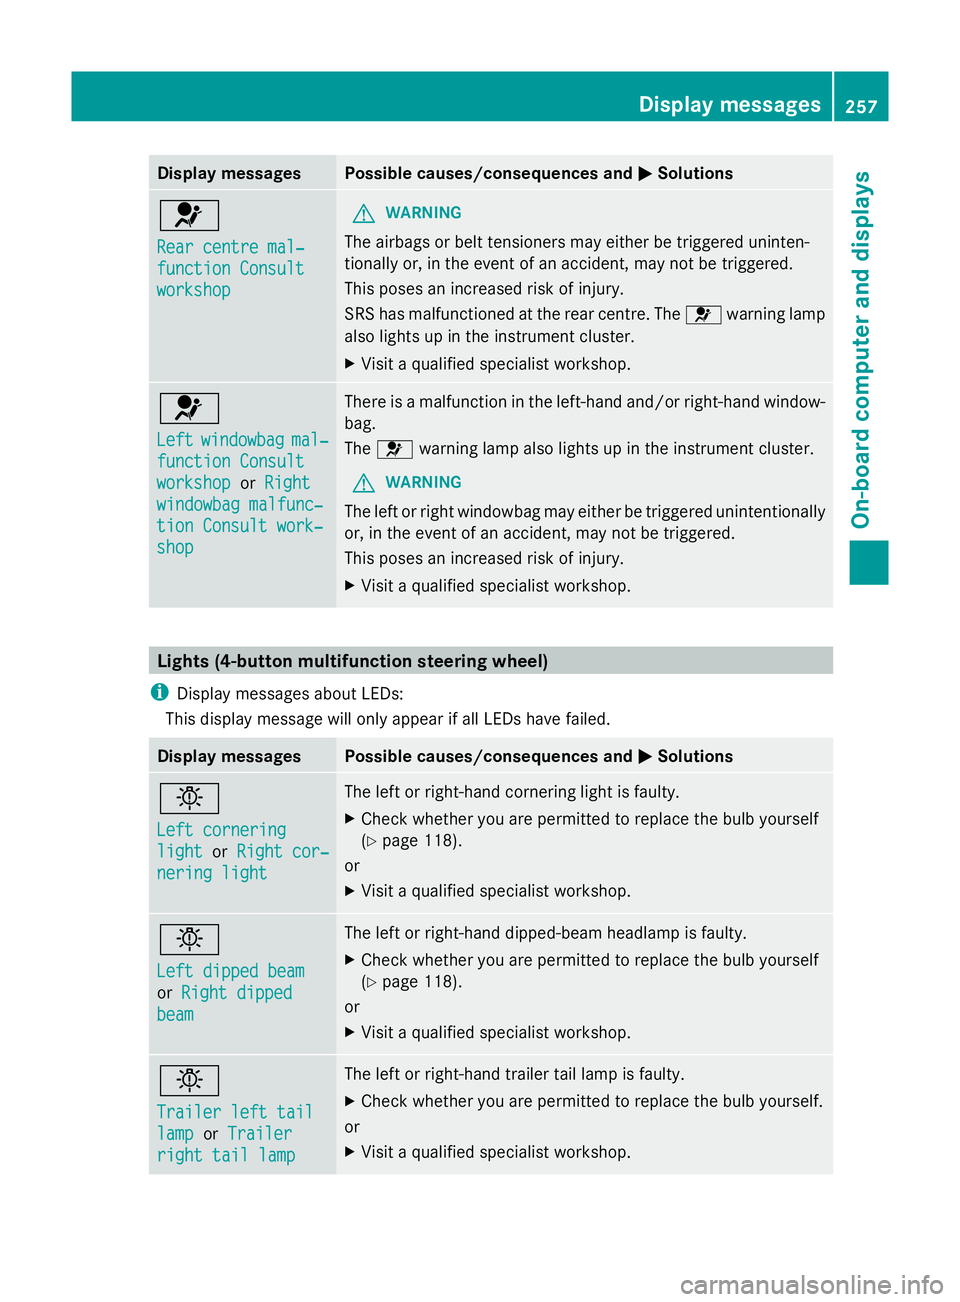
Display messages Possible causes/consequences and
M
MSolutions 6
Rear centre mal‐ Rear centre mal‐
function Consult function Consult
workshop workshop G
WARNING
The airbags or belt tensioners may either be triggered uninten-
tionally or, in the event of an accident, may not be triggered.
This poses an increased risk of injury.
SRS has malfunctioned at the rear centre. The 6warning lamp
also lights up in the instrument cluster.
X Visit a qualified specialist workshop. 6
Left Left
windowbag
windowbag mal‐
mal‐
function Consult
function Consult
workshop workshop orRight
Right
windowbag malfunc‐
windowbag malfunc‐
tion Consult work‐ tion Consult work‐
shop shop There is a malfunction in the left-hand and/or right-hand window-
bag.
The
6 warning lamp also lights up in the instrument cluster.
G WARNING
The left or right windowbag may either be triggered unintentionally
or, in the event of an accident, may not be triggered.
This poses an increased risk of injury.
X Visit a qualified specialist workshop. Lights (4-button multifunction steering wheel)
i Display messages about LEDs:
This display message will only appear if all LEDs have failed. Display messages Possible causes/consequences and
M MSolutions b
Left cornering Left cornering
light light
orRight cor‐
Right cor‐
nering light
nering light The left or right-hand cornering light is faulty.
X
Check whether you are permitted to replace the bulb yourself
(Y page 118).
or
X Visit a qualified specialist workshop. b
Left dipped beam Left dipped beam
or
Right dipped Right dipped
beam
beam The left or right-hand dipped-beam headlamp is faulty.
X
Check whether you are permitted to replace the bulb yourself
(Y page 118).
or
X Visit a qualified specialist workshop. b
Trailer left tail Trailer left tail
lamp lamp
orTrailer
Trailer
right tail lamp
right tail lamp The left or right-hand trailer tail lamp is faulty.
X
Check whether you are permitted to replace the bulb yourself.
or
X Visit a qualified specialist workshop. Display
messages
257On-board computer and displays Z