2012 MERCEDES-BENZ GLK SUV battery
[x] Cancel search: batteryPage 284 of 381
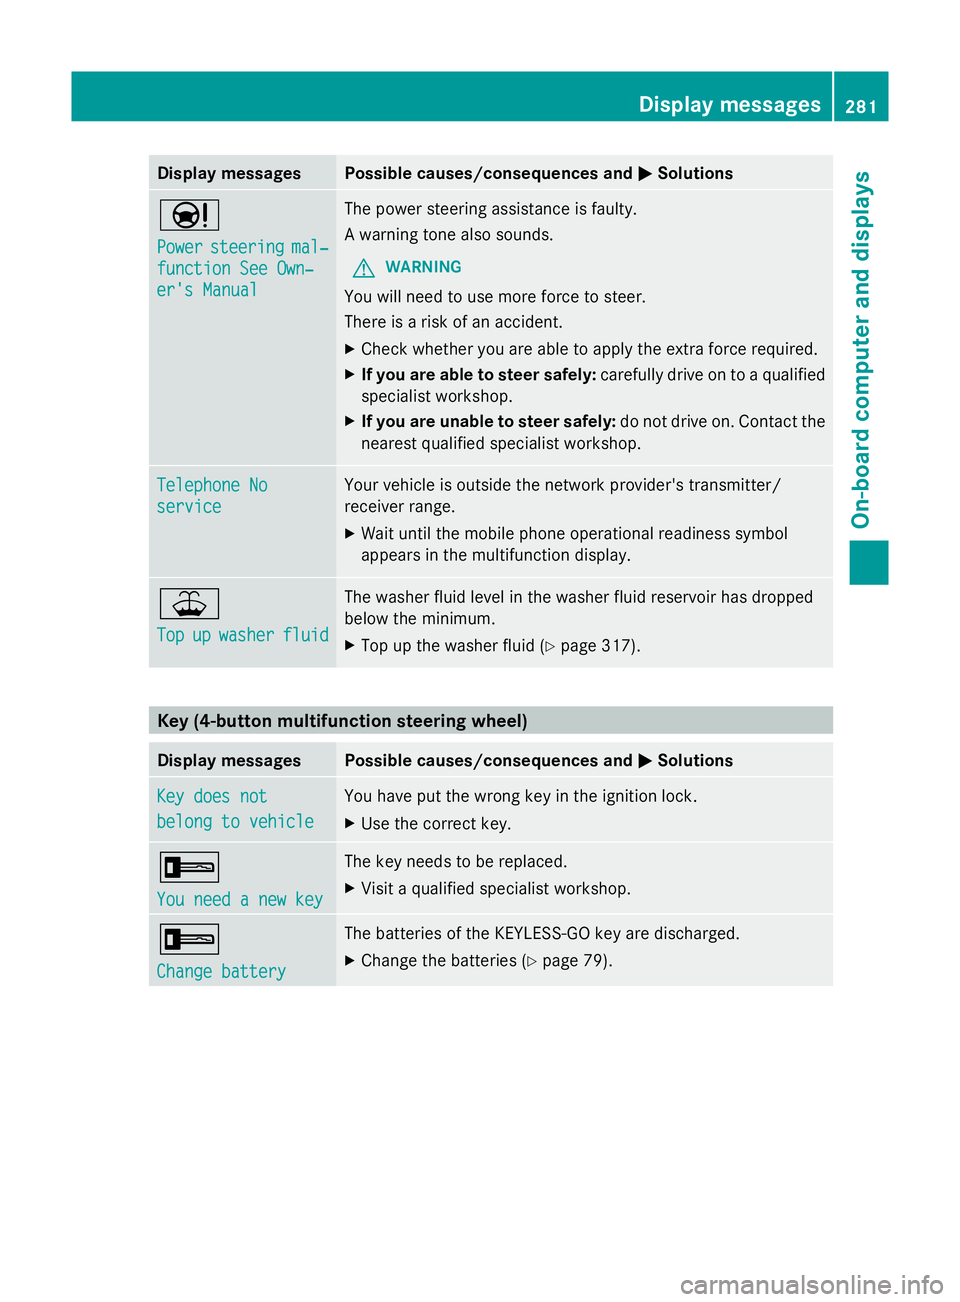
Display messages Possible causes/consequences and
M
MSolutions Ð
Power Power
steering steering mal‐
mal‐
function See Own‐
function See Own‐
er's Manual er's Manual The power steering assistance is faulty.
A warning tone also sounds.
G WARNING
You will need to use more force to steer.
There is a risk of an accident.
X Check whether you are able to apply the extra force required.
X If you are able to steer safely: carefully drive on to a qualified
specialist workshop.
X If you are unable to steer safely: do not drive on. Contact the
nearest qualified specialist workshop. Telephone No Telephone No
service service Your vehicle is outside the network provider's transmitter/
receiver range.
X
Wait until the mobile phone operational readiness symbol
appears in the multifunction display. ¥
Top Top
up
upwasher
washer fluid
fluid The washer fluid level in the washer fluid reservoir has dropped
below the minimum.
X
Top up the washer fluid ( Ypage 317). Key (4-button multifunction steering wheel)
Display messages Possible causes/consequences and
M MSolutions Key does not
Key does not
belong to vehicle belong to vehicle You have put the wrong key in the ignition lock.
X
Use the correct key. +
You need a new key You need a new key The key needs to be replaced.
X
Visit a qualified specialist workshop. +
Change battery Change battery The batteries of the KEYLESS-GO key are discharged.
X
Change the batteries ( Ypage 79). Display
messages
281On-board computer and displays Z
Page 310 of 381
X
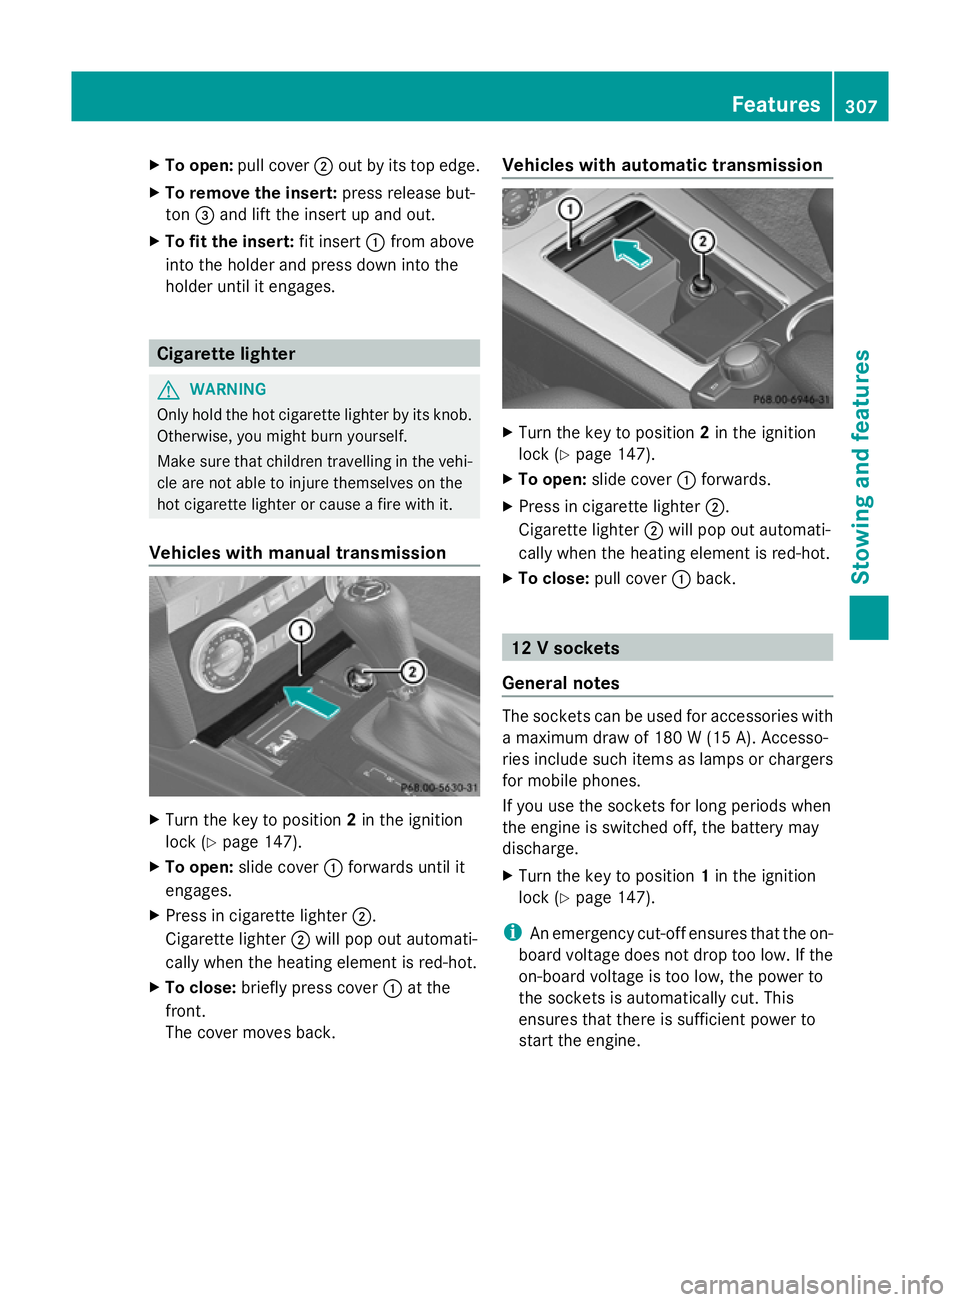
To open: pull cover ;out by its top edge.
X To remove the insert: press release but-
ton =and lift the insert up and out.
X To fit the insert: fit insert:from above
into the holder and press down into the
holder until it engages. Cigarette lighter
G
WARNING
Only hold the hot cigarette lighter by its knob.
Otherwise, you might burn yourself.
Make sure that children travelling in the vehi-
cle are not able to injure themselves on the
hot cigarette lighter or cause a fire with it.
Vehicles with manual transmission X
Turn the key to position 2in the ignition
lock (Y page 147).
X To open: slide cover :forwards until it
engages.
X Press in cigarette lighter ;.
Cigarette lighter ;will pop out automati-
cally when the heating element is red-hot.
X To close: briefly press cover :at the
front.
The cover moves back. Vehicles with automatic transmission
X
Turn the key to position 2in the ignition
lock (Y page 147).
X To open: slide cover :forwards.
X Press in cigarette lighter ;.
Cigarette lighter ;will pop out automati-
cally when the heating element is red-hot.
X To close: pull cover :back. 12 V sockets
General notes The sockets can be used for accessories with
a maximum draw of 180 W (15 A). Accesso-
ries include such items as lamps or chargers
for mobile phones.
If you use the sockets for long periods when
the engine is switched off, the battery may
discharge.
X
Turn the key to position 1in the ignition
lock (Y page 147).
i An emergency cut-off ensures that the on-
board voltage does not drop too low. If the
on-board voltage is too low, the power to
the sockets is automatically cut. This
ensures that there is sufficient power to
start the engine. Features
307Stowing an d features Z
Page 315 of 381
Useful information
i This Owner's Manual describes all mod-
els, series and optional equipment for your
vehicle that were available at the time of
going to press. National variations are pos-
sible. Note that your vehicle may not be
equipped with all of the functions descri-
bed. This is also the case for systems and
functions relevant to safety.
i Read the information on qualified special-
ist workshops: (Y page 27). Service
ASSYST PLUS
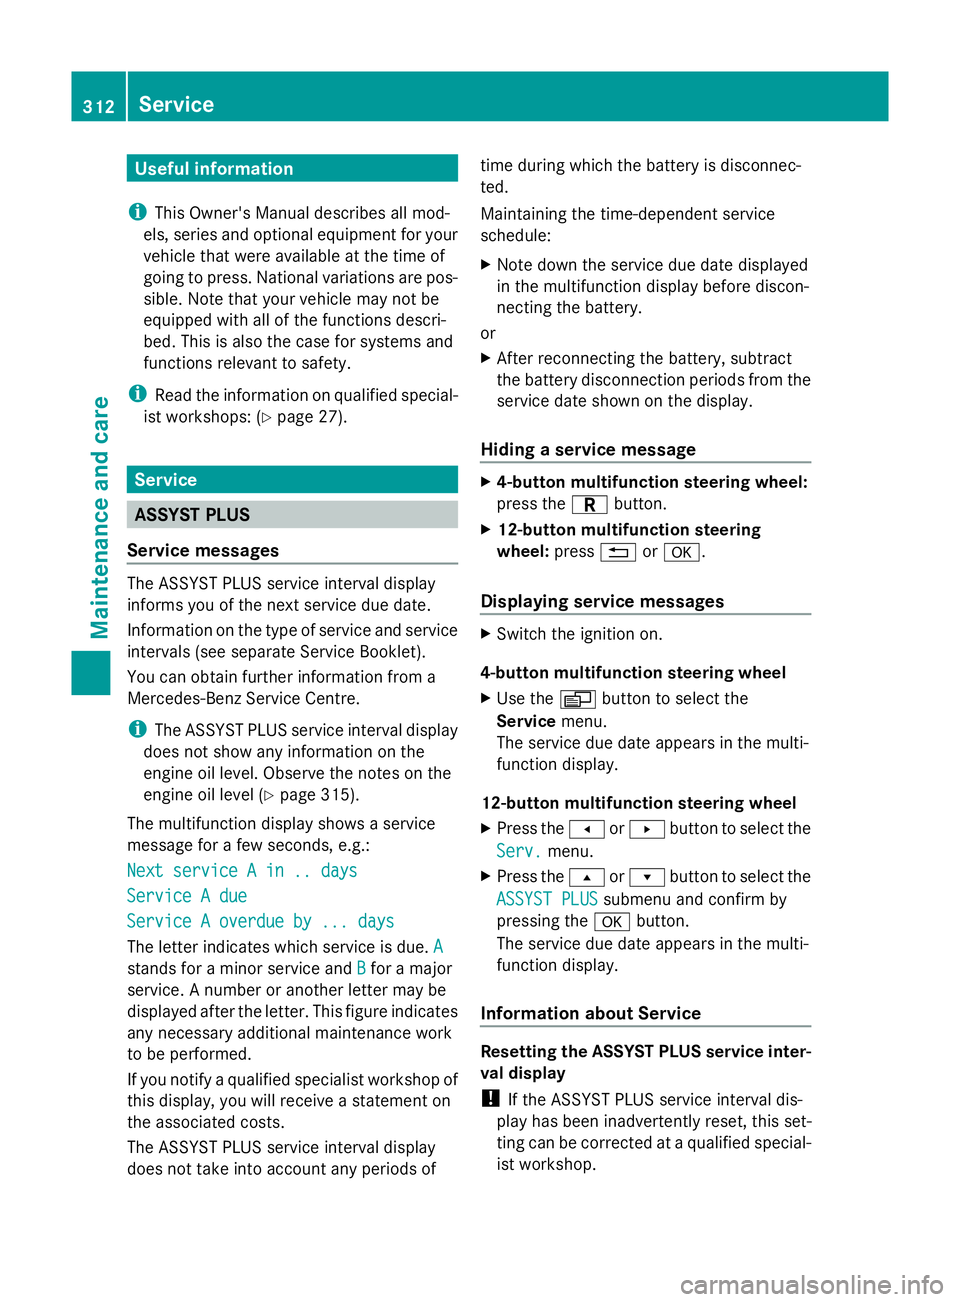
Service messages The ASSYST PLUS service interval display
informs you of the next service due date.
Information on the type of service and service
intervals (see separate Service Booklet).
You can obtain further information from a
Mercedes-Benz Service Centre.
i The ASSYST PLUS service interval display
does not show any information on the
engine oil level. Observe the notes on the
engine oil level (Y page 315).
The multifunction display shows a service
message for a few seconds, e.g.:
Next service A in .. days
Next service A in .. days
Service A due Service A due
Service A overdue by ... days Service A overdue by ... days
The letter indicates which service is due. A A
stands for a minor service and B
Bfor a major
service. A number or another letter may be
displayed after the letter. This figure indicates
any necessary additional maintenance work
to be performed.
If you notify a qualified specialist workshop of
this display, you will receive a statement on
the associated costs.
The ASSYST PLUS service interval display
does not take into account any periods of time during which the battery is disconnec-
ted.
Maintaining the time-dependent service
schedule:
X
Note down the service due date displayed
in the multifunction display before discon-
necting the battery.
or
X After reconnecting the battery, subtract
the battery disconnection periods from the
service date shown on the display.
Hiding a service message X
4-button multifunction steering wheel:
press the Cbutton.
X 12-button multifunction steering
wheel: press%ora.
Displaying service messages X
Switch the ignition on.
4-button multifunction steering wheel
X Use the Vbutton to select the
Service menu.
The service due date appears in the multi-
function display.
12-button multifunction steering wheel
X Press the toru button to select the
Serv.
Serv. menu.
X Press the sorr button to select the
ASSYST PLUS ASSYST PLUS submenu and confirm by
pressing the abutton.
The service due date appears in the multi-
function display.
Information about Service Resetting the ASSYST PLUS service inter-
val display
! If the ASSYST PLUS service interval dis-
play has been inadvertently reset, this set-
ting can be corrected at a qualified special-
ist workshop. 312
ServiceMaintenance and care
Page 322 of 381
pressure cleaner nozzle. Information about
the correct distance is available from the
equipment manufacturer.
Move the high-pressure cleaner nozzle
around when cleaning your vehicle.
Do not aim directly at any of the following:
R tyres
R door gaps, roof gaps, joints etc.
R electrical components
R battery
R connectors
R lights
R seals
R trim elements
R ventilation slots
Damaged seals or electrical components
can lead to leaks or failures.
Cleaning the wheels !
Do not use acidic wheel cleaning products
to remove brake dust. This could damage
wheel bolts and brake components.
! Do not park up the vehicle for an extended
period straight after cleaning it, particularly
after having cleaned the wheels with wheel
cleaner. Wheel cleaners could cause
increased corrosion of the brake discs and
brake pads/linings. For this reason, you
should drive for a few minutes after clean-
ing. Braking heats the brake discs and the
brake pads/linings, thus drying them. The
vehicle can then be parked up.
Cleaning the paintwork Scratches, corrosive deposits, areas affected
by corrosion and damage caused by inade-
quate care cannot always be completely
repaired. In such cases, visit a qualified spe-
cialist workshop.
X Remove impurities immediately, where
possible, whilst avoiding rubbing too hard.
X Soak insect remains with insect remover
and rinse off the treated areas afterwards. X
Soak bird droppings with water and rinse
off the treated areas afterwards.
X Remove coolant, brake fluid, tree resin,
oils, fuels and greases by rubbing gently
with a cloth soaked in petroleum ether or
lighter fluid.
X Use tar remover to remove tar stains.
X Use silicone remover to remove wax.
! Do not affix:
R stickers
R films
R magnetic plates or similar items
to painted surfaces. You could otherwise
damage the paintwork.
Care and treatment of matt paintwork If your vehicle has a clear matt finish, observe
the following instructions in order to avoid
damage to the paintwork due to incorrect
care.
These notes also apply to light-alloy wheels
with a clear matt finish.
!
Never polish the vehicle or the light alloy
wheels. Polishing makes the paintwork
shiny.
! The following may cause the paint to
become shiny and thus reduce the matt
effect:
R Vigorous rubbing with unsuitable mate-
rials.
R Frequent use of car washes.
R Washing the vehicle in direct sunlight.
! Never use paint cleaner, buffing or pol-
ishing products, or gloss preserver, e.g.
wax. These products are only suitable for
high-gloss surfaces. Their use on vehicles
with matt finish leads to considerable sur-
face damage (shiny, spotted areas).
Always have paintwork repairs carried out
at a qualified specialist workshop.
! Do not use wash programs with a hot wax
treatment under any circumstances. Care
319Maintenance and care Z
Page 328 of 381

Useful information
............................326
Where will I find...? ...........................326
Flat tyre ............................................. 329
Battery (vehicle) ................................ 337
Jump-starting .................................... 341
Towing and tow-starting ..................342
Electrical fuses ................................. 346 325Breakdown assistance
Page 340 of 381
X
Stow plug ?and the air hose in the lower
section of the blower housing.
X Stow the tyre inflation compressor in the
vehicle.
Lowering the vehicle G
WARNING
Tyre pressure that is too high or too low can
lead to a blow-out of the fitted emergency
spare wheel/spare wheel, particularly when
driving with a heavy load and increasing
speed. There is a risk of accident.
Check the tyre pressure of the emergency
spare wheel or spare wheel and adjust it.
When doing so, observe the specified tyre
pressure.
! Inflate the collapsible emergency spare
wheel using the tyre inflation compressor
before lowering the vehicle. The wheel rim
could otherwise be damaged.
X Place the ratchet ring spanner onto the
hexagon nut of the jack so that the letters
AB are visible.
X Turn the ratchet ring spanner until the vehi-
cle is once again standing firmly on the
ground.
X Place the jack to one side. G
WARNING
The wheels could work loose if the wheel nuts
and bolts are not tightened to the specified
tightening torque. There is a risk of accident. Have the tightening torque immediately
checked at a qualified specialist workshop
after a wheel is changed.
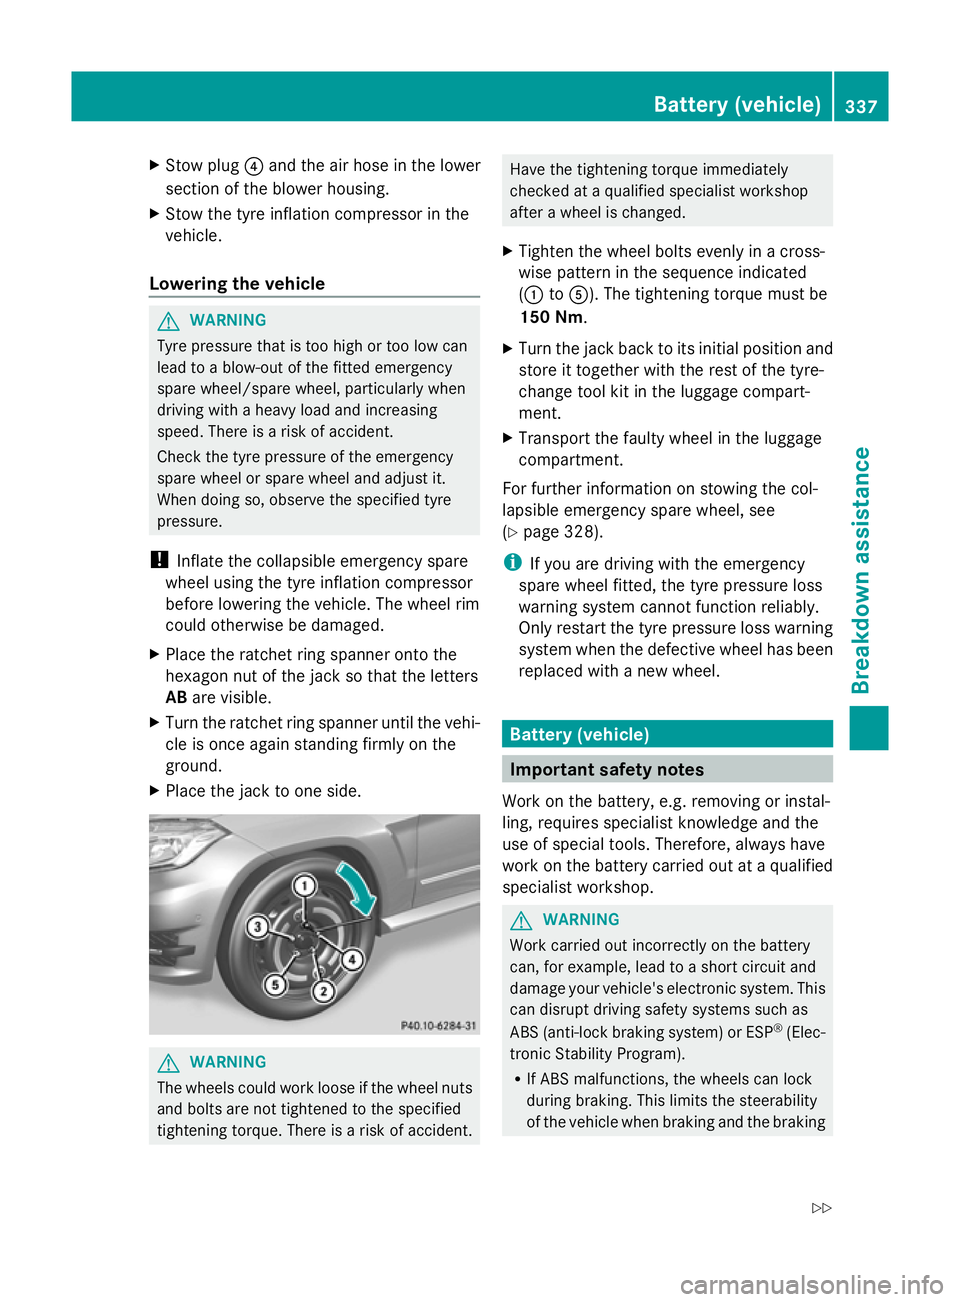
X Tighten the wheel bolts evenly in a cross-
wise pattern in the sequence indicated
(: toA). The tightening torque must be
150 Nm.
X Turn the jack back to its initial position and
store it together with the rest of the tyre-
change tool kit in the luggage compart-
ment.
X Transport the faulty wheel in the luggage
compartment.
For further information on stowing the col-
lapsible emergency spare wheel, see
(Y page 328).
i If you are driving with the emergency
spare wheel fitted, the tyre pressure loss
warning system cannot function reliably.
Only restart the tyre pressure loss warning
system when the defective wheel has been
replaced with a new wheel. Battery (vehicle)
Important safety notes
Work on the battery, e.g. removing or instal-
ling, requires specialist knowledge and the
use of special tools. Therefore, always have
work on the battery carried out at a qualified
specialist workshop. G
WARNING
Work carried out incorrectly on the battery
can, for example, lead to a short circuit and
damage your vehicle's electronic system. This
can disrupt driving safety systems such as
ABS (anti-lock braking system) or ESP ®
(Elec-
tronic Stability Program).
R If ABS malfunctions, the wheels can lock
during braking. This limits the steerability
of the vehicle when braking and the braking Battery (vehicle)
337Breakdown assistance
Z
Page 341 of 381
distance may increase. There is a risk of
accident.
R If ESP ®
malfunctions, the vehicle will not be
stabilised if it starts to skid or a wheel starts
to spin. There is a risk of accident.
You should therefore have all work involving
the battery carried out at a qualified specialist
workshop. G
WARNING
Comply with safety precautions and take pro-
tective measures when handling batteries. Risk of explosion
Fire, naked flames and
smoking are prohibited
when handling the battery.
Avoid creating sparks.
Battery acid is caustic.
Avoid contact with the skin,
eyes or clothing.
Wear suitable protective
clothing, in particular
gloves, an apron and a face
mask.
Immediately rinse acid
splashes off with clean
water. Consult a doctor if
necessary.
Wear eye protection.
Keep children away.
Observe this Owner's Man-
ual.
G
WARNING
For safety reasons, Mercedes-Benz recom-
mends that you only use batteries which have been tested and approved for your vehicle by
Mercedes-Benz. These batteries provide
increased impact protection to prevent vehi-
cle occupants from suffering acid burns
should the battery be damaged in the event
of an accident.
To prevent acid burns, observe the following
safety notes when handling batteries:
R do not lean over the battery.
R do not place any metal objects on a battery.
Otherwise, you could cause a short circuit
and the battery's gas mixture could ignite.
R make sure that you do not create an elec-
trostatic charge, e.g. by wearing synthetic
clothing or as a result of friction on fabrics.
Therefore, you should not pull or slide the
battery over carpets or other synthetic
materials.
R never touch the battery first. To discharge
a possible electrostatic charge, step out of
the vehicle first and touch the bodywork.
R do not wipe the battery using a cloth. The
battery may explode as a result of electro-
static charge or due to flying sparks. H
Environmental note Batteries contain pollutants.
It is illegal to dispose of them
with the household rubbish.
They must be collected sep-
arately and disposed of in an
environmentally responsible
recycling system. Dispose of batteries in an
environmentally responsible
manner. Take discharged
batteries to a qualified spe-
cialist workshop or to a col-
lection point for used batter-
ies.
! Have the battery checked regularly at a
qualified specialist workshop.
Observe the service intervals in the Service
Booklet or contact a qualified specialist
workshop for more information. 338
Battery (vehicle)Breakdown assistance
Page 342 of 381

!
You should have all work involving the
battery carried out at a qualified specialist
workshop. In the exceptional case that it is
necessary for you to disconnect the battery
yourself, make sure that:
R you switch off the engine and remove the
key. On vehicles with KEYLESS-GO,
ensure that the ignition is switched off.
Check that all the indicator lamps in the
instrument cluster are off. Otherwise,
electronic components, such as the
alternator, may be damaged.
R you first remove the negative terminal
clamp and then the positive terminal
clamp. Never swap the terminal clamps.
Otherwise, the vehicle's electronic sys-
tem may be damaged.
R in vehicles with automatic transmission,
the transmission is locked in position P
after disconnecting the battery. The vehi-
cle is secured against rolling away. You
can then no longer move the vehicle.
The battery and the cover of the positive
terminal clamp must be fitted securely dur-
ing operation.
In order for the battery to achieve the maxi-
mum possible service life, it must always be
sufficiently charged.
Have the battery charge checked more fre-
quently if you use the vehicle mainly for short
trips or if you leave it standing idle for a
lengthy period. Consult a qualified specialist
workshop if you wish to leave your vehicle
parked up for a long period of time.
Like other batteries, the vehicle battery may
discharge over time if you do not use the
vehicle. In such cases, have the battery dis-
connected at a qualified specialist workshop.
You can also charge the battery with a
charger recommended by Mercedes-Benz.
For more information, please contact a quali-
fied specialist workshop.
i When you park the vehicle, remove the
key if you do not require any electrical con-
sumers. The vehicle will then use very little
energy, thus conserving battery power. i
If the power supply has been interrupted,
e.g. if the battery was discharged, you will
have to:
R set the clock; see the separate operating
instructions.
For vehicles with Audio 20 and a 4-button
multifunction steering wheel, see "Date/
Time" (Y page 227).
R reset the panorama sliding sunroof
(Y page 93).
R reset the function for automatically fold-
ing the exterior mirrors in/out by folding
the mirrors out once (Y page 104). Charging the battery
G
WARNING
Only charge the battery in a well-ventilated
area. As the battery is being charged, gases
can escape and generate minor explosions.
This could injure you and other persons or
cause damage to the paintwork or acid cor-
rosion on the vehicle.
You can obtain information on battery charg-
ers which allow the battery to be charged
while still installed from a qualified specialist
workshop. G
WARNING
There is a risk of acid burns during the charg-
ing process due to the gases which escape
from the battery. Do not lean over the battery
during the charging process. G
WARNING
Battery acid is caustic. Avoid contact with the
skin, eyes or clothing.
! Only charge the installed battery with a
battery charger which has been tested and
approved by Mercedes-Benz. These battery
chargers allow the battery to be charged
while still installed in the vehicle.
! Only use battery chargers with a maxi-
mum charging voltage of 14.8 V. Battery (vehicle)
339Breakdown assistance Z