2012 MERCEDES-BENZ GLK SUV set clock
[x] Cancel search: set clockPage 11 of 381

Setting the air vents
......................141
Setting the climate mode .............. .132
Setting the temperature ................132
Switching air-recirculation mode
on/off ............................................ 135
Switching on/off ........................... 131
Switching residual heat on/off ......136
Switching the rear window heat-
ing on/off ...................................... 135
Switching the ZONE function on/
off .................................................. 134
THERMATIC automatic climate
control (2-zone) ............................. 129
THERMOTRONIC (3-zone) auto-
matic climate control .....................130
Clock
Setting (4-button multifunction
steering wheel) .............................. 227
Coat hooks ......................................... 303
Cockpit Overview .......................................... 30
see Instrument cluster
Collapsible emergency spare
wheel
see Emergency spare wheel
COMAND Online
see separate operating instructions
Combination switch ..........................113
Constant headlamp mode see Daytime driving lights
Consumption statistics
On-board computer (12-button
multifunction steering wheel) ........230
On-board computer (4-button
multifunction steering wheel) ........226
Convenience closing feature ..............90
Convenience opening/closing (air-
recirculation mode) ........................... 136
Convenience opening feature ............90
Coolant (engine) Checking the level .........................316
Display message (12-button mul-
tifunction steering wheel) ..............267
Display message (4-button multi-
function steering wheel) ................264
Important safety notes ..................371
Temperature gauge (12-button
multifunction steering wheel) ........227 Temperature gauge (4-button
multifunction steering wheel)
........224
Warning lamp ................................. 292
Cooling
see Climate control
Cornering lamps
Changing bulbs .............................. 121
Cornering light function
Display message (12-button mul-
tifunction steering wheel) ..............260
Display message (4-button multi-
function steering wheel) ................257
Function/notes ............................. 115
Crash-responsive emergency light-
ing ....................................................... 118
Cruise control Cruise control lever .......................174
Deactivating ................................... 175
Display message (12-button mul-
tifunction steering wheel) ..............275
Display message (4-button multi-
function steering wheel) ................270
Driving system ............................... 173
Important safety notes ..................173
LIM indicator lamp .........................174
Selecting ........................................ 174
Setting a speed .............................. 175
Storing and maintaining current
speed ............................................ .174
Cup holder
Centre console .............................. 305
Important safety notes ..................305
Rear compartment .........................305 D
Dashboard lighting see Instrument cluster lighting
Data
see Technical data
Date
Setting (4-button multifunction
steering wheel) .............................. 227
Daytime driving lamps
Switching on/off (on-board com-
puter, 12-button multifunction
steering wheel) .............................. 2398
Index
Page 24 of 381
Rear
............................................... 298
Under driver's seat/front-
passenger seat .............................. 298
Stowage net ....................................... 298
Stowage space Stowage net ................................... 298
Summer opening
see Convenience opening feature
Summer tyres .................................... 352
Sun visor ............................................ 305
Supplement Restraint System see SRS (Supplemental Restraint
System)
Surround lighting (12-button mul-
tifunction steering wheel) ................240
Switching off the alarm (ATA) ............72 T
Tailgate Display message (12-button mul-
tifunction steering wheel) ..............279
Display message (4-button multi-
function steering wheel) ................278
Emergency unlocking .......................88
Important safety notes ....................85
Limiting the opening angle ...............88
Opening/closing (automatically
from inside) ...................................... 87
Opening/closing (automatically
from outside) ................................... 86
Opening/closing (from outside) .......85
Opening dimensions ......................372
Tail lamp
Display message (12-button mul-
tifunction steering wheel) ..............261
Display message (4-button multi-
function steering wheel) ................258
Tank
see Fuel tank
Tank content
Displaying the range (12-button
multifunction steering wheel) ........231
Displaying the range (4-button
multifunction steering wheel) ........226 Fuel gauge (12-button multifunc-
tion steering wheel)
.........................33
Fuel gauge (4-button multifunc-
tion steering wheel) .........................31
Technical data
Capacities ...................................... 365
Information .................................... 362
Trailer loads ................................... 374
Tyres/wheels ................................. 357
Vehicle data ................................... 372
Telephone
Accepting a call ............................. 235
Display message (12-button mul-
tifunction steering wheel) ..............281
Menu (on-board computer) ............234
Number from the phone book ....... .235
Redialling ....................................... 236
Rejecting/ending a call .................235
Telephone compartment ................297
Temperature
Coolant (12-button multifunction
steering wheel) .............................. 227
Coolant (4-button multifunction
steering wheel) .............................. 224
Outside temperature (12-button
multifunction steering wheel) ........227
Outside temperature (4-button
multifunction steering wheel) ........225
Setting (climate control) ................132
TEMPOMAT
Function/notes ............................. 173
Theft-deterrent system
ATA (Anti-Theft Alarm system) .........72
Immobiliser ...................................... 71
Time
Setting the clock (4-button multi-
function steering wheel) ................227
see Separate Owner's manual
TIREFIT kit .......................................... 329
Top Tether ............................................ 58
Total distance recorder Displaying (12-button multifunc-
tion steering wheel) .......................230
Displaying (4-button multifunc-
tion steering wheel) .......................226
Tow-away protection ..........................72 Index
21
Page 87 of 381
You could therefore be locked out if:
R the vehicle is being pushed.
R the vehicle is being towed.
R the vehicle is being tested on a dynamom-
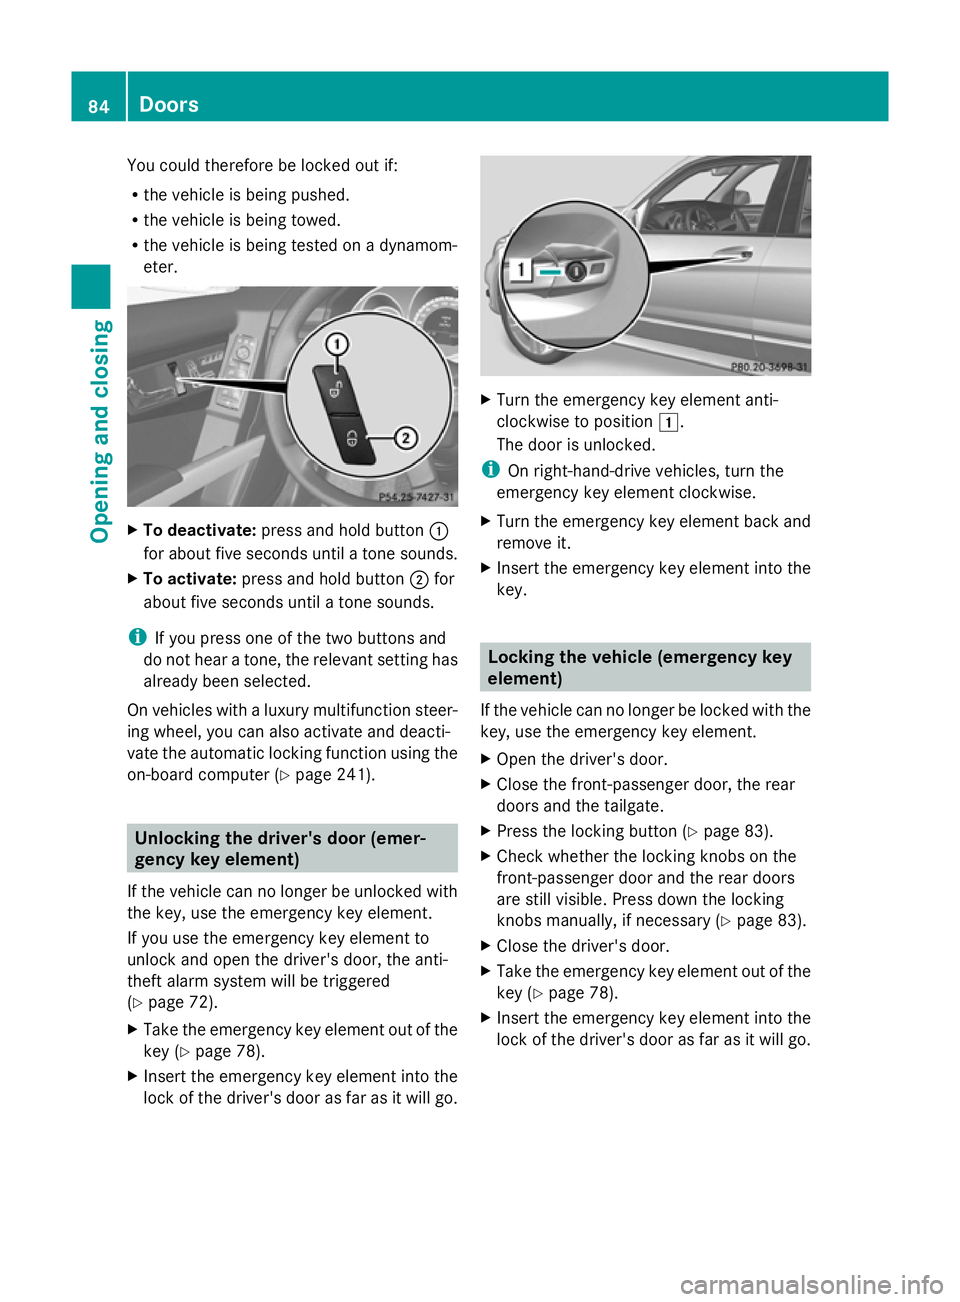
eter. X
To deactivate: press and hold button :
for about five seconds until a tone sounds.
X To activate: press and hold button ;for
about five seconds until a tone sounds.
i If you press one of the two buttons and
do not hear a tone, the relevant setting has
already been selected.
On vehicles with a luxury multifunction steer-
ing wheel, you can also activate and deacti-
vate the automatic locking function using the
on-board computer (Y page 241).Unlocking the driver's door (emer-
gency key element)
If the vehicle can no longer be unlocked with
the key, use the emergency key element.
If you use the emergency key element to
unlock and open the driver's door, the anti-
theft alarm system will be triggered
(Y page 72).
X Take the emergency key element out of the
key (Y page 78).
X Insert the emergency key element into the
lock of the driver's door as far as it will go. X
Turn the emergency key element anti-
clockwise to position 1.
The door is unlocked.
i On right-hand-drive vehicles, turn the
emergency key element clockwise.
X Turn the emergency key element back and
remove it.
X Insert the emergency key element into the
key. Locking the vehicle (emergency key
element)
If the vehicle can no longer be locked with the
key, use the emergency key element.
X Open the driver's door.
X Close the front-passenger door, the rear
doors and the tailgate.
X Press the locking button (Y page 83).
X Check whether the locking knobs on the
front-passenger door and the rear doors
are still visible. Press down the locking
knobs manually, if necessary ( Ypage 83).
X Close the driver's door.
X Take the emergency key element out of the
key (Y page 78).
X Insert the emergency key element into the
lock of the driver's door as far as it will go. 84
DoorsOpening and closing
Page 91 of 381
Limiting the opening angle of the tail-
gate
Important safety notes You can limit the opening angle of the tail-
gate. This is possible in the top half of its
opening range, up to approximately 20 cm
before the stop.
This could be useful, for example, if there is
insufficient space above the tailgate.
! Make sure there is sufficient clearance to
open the tailgate fully when setting the
opening angle. The tailgate could otherwise
be damaged. Ideally, set the opening angle
outside.
Activating X
To open the tailgate: pull the handle on
the tailgate.
X To stop the opening procedure at the
desired position: press the closing button
(Y page 86 )in the tailgate or pull the handle
on the outside of the tailgate again.
X To store the position: press and hold the
closing button in the tailgate until you hear
a short tone.
The opening angle limiter is activated. The
tailgate then stops in the stored position
when opened.
i To open the tailgate fully, pull the handle
on the outside of the tailgate again after it
has stopped automatically. This does not
delete the stored position.
Deactivating X
Press and hold the closing button
(Y page 86) in the tailgate until you hear
two short tones. Tailgate emergency release
Important safety notes !
The tailgate swings upwards and to the
rear when opened. Therefore, make sure
that there is sufficient clearance above and
behind the tailgate.
If the tailgate can no longer be opened from
outside the vehicle, use the emergency
release on the inside of the tailgate.
i Tailgate opening dimensions
(Y page 372).
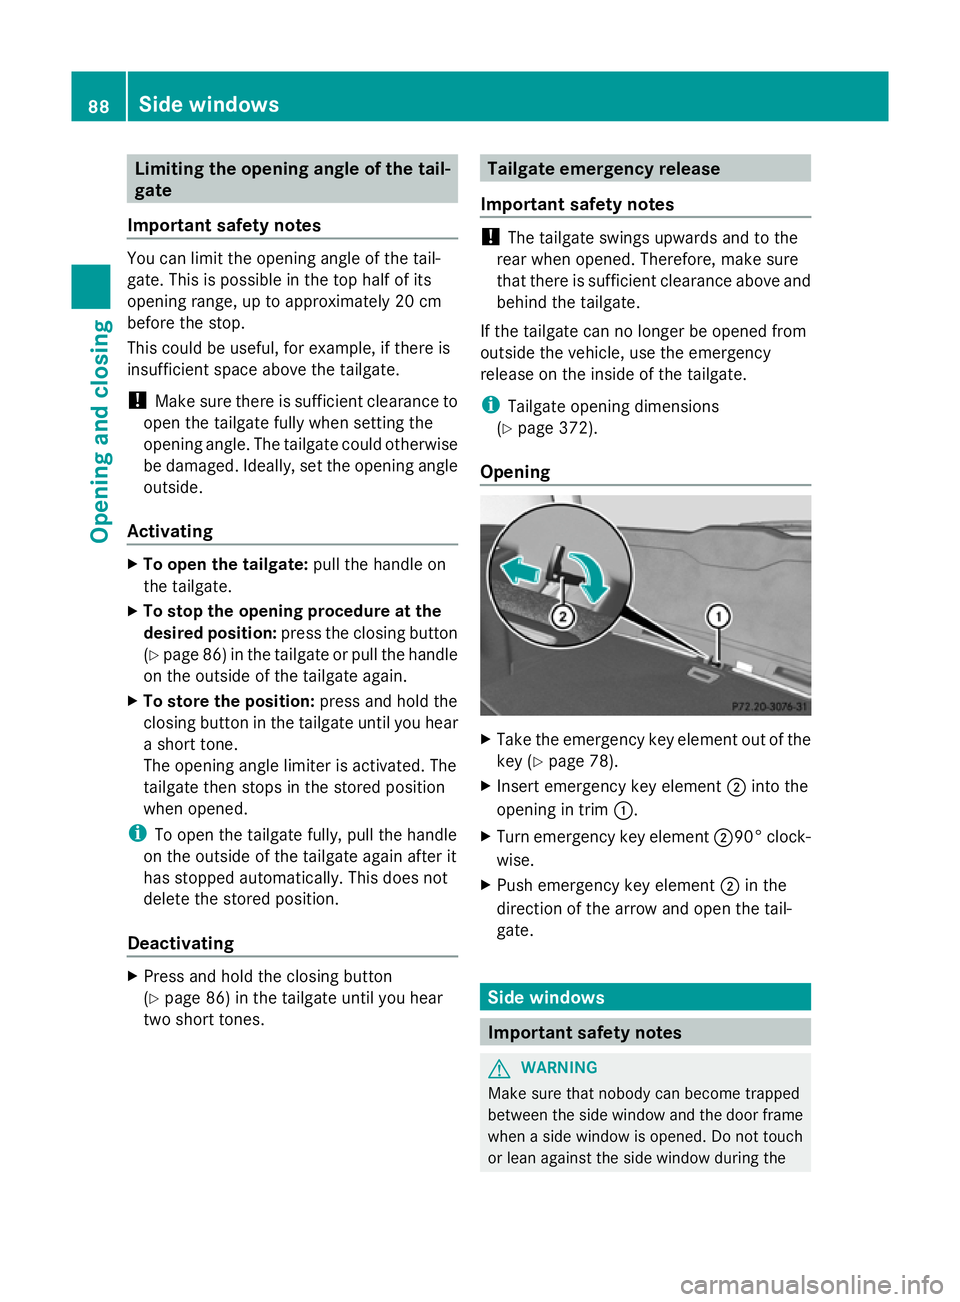
Opening X
Take the emergency key element out of the
key (Y page 78).
X Insert emergency key element ;into the
opening in trim :.
X Turn emergency key element ;90° clock-
wise.
X Push emergency key element ;in the
direction of the arrow and open the tail-
gate. Side windows
Important safety notes
G
WARNING
Make sure that nobody can become trapped
between the side window and the door frame
when a side window is opened. Do not touch
or lean against the side window during the 88
Side windowsOpening and closing
Page 113 of 381
Useful information
i This Owner's Manual describes all mod-
els, series and optional equipment for your
vehicle that were available at the time of
going to press. National variations are pos-
sible. Note that your vehicle may not be
equipped with all of the functions descri-
bed. This is also the case for systems and
functions relevant to safety.
i Read the information on qualified special-
ist workshops: (Y page 27). Exterior lighting
Important safety notes
For reasons of safety, Mercedes-Benz recom-
mends that you drive with the lights switched
on even during the daytime. In some coun-
tries, operation of the headlamps varies due
to legal requirements and self-imposed obli-
gations. Notes on driving abroad
General notes If your journey takes you to countries where
vehicles are driven on the opposite side of the
road to the country in which the vehicle is
registered, your headlamps must be switched
to symmetrical dipped beam as soon as pos-
sible after crossing the border. This prevents
oncoming traffic from being dazzled. Sym-
metrical lights do not illuminate as large an
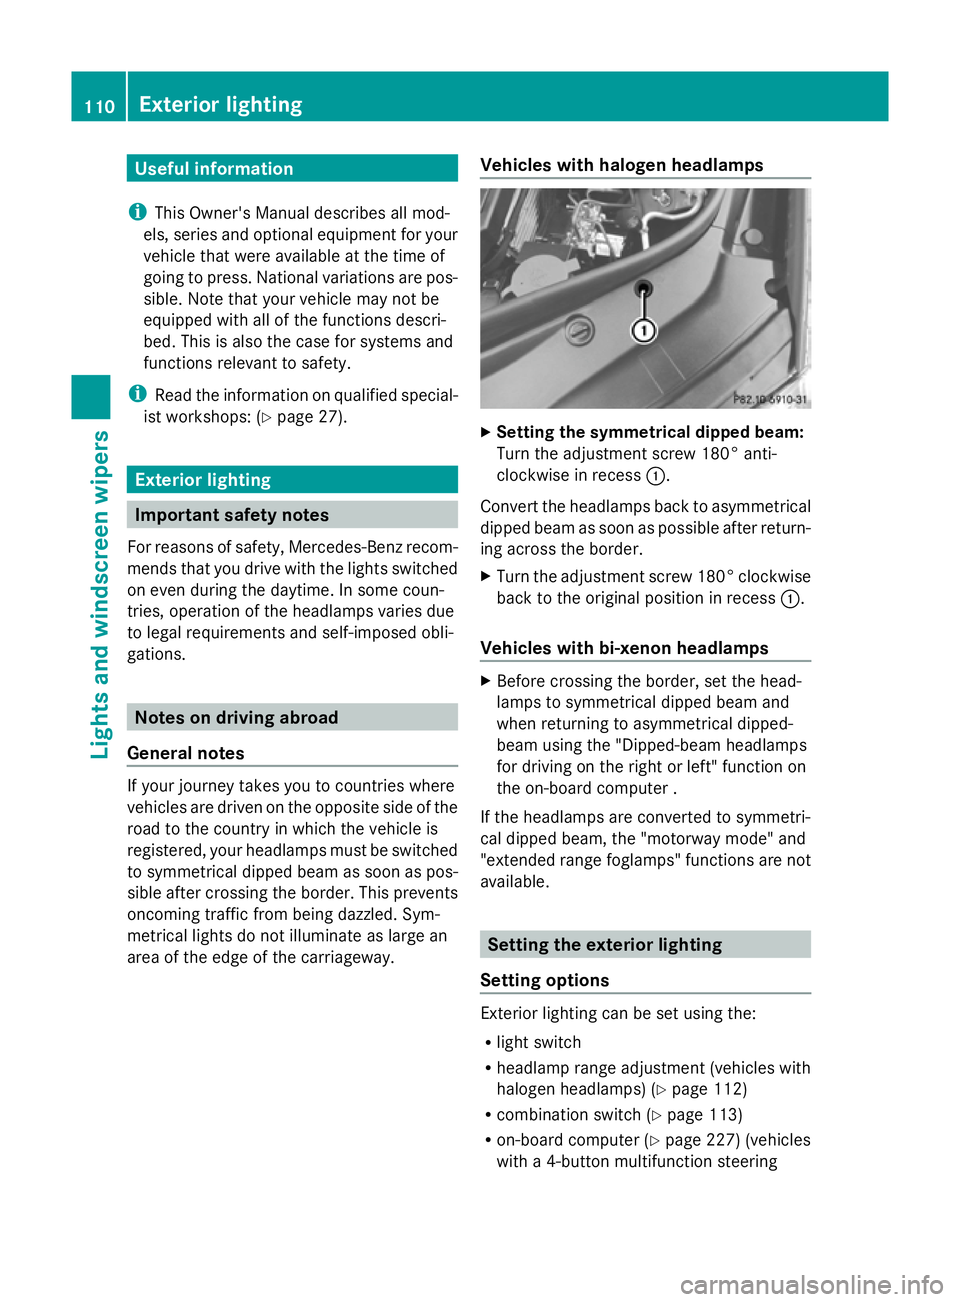
area of the edge of the carriageway. Vehicles with halogen headlamps X
Setting the symmetrical dipped beam:
Turn the adjustment screw 180° anti-
clockwise in recess :.
Convert the headlamps back to asymmetrical
dipped beam as soon as possible after return-
ing across the border.
X Turn the adjustment screw 180° clockwise
back to the original position in recess :.
Vehicles with bi-xenon headlamps X
Before crossing the border, set the head-
lamps to symmetrical dipped beam and
when returning to asymmetrical dipped-
beam using the "Dipped-beam headlamps
for driving on the right or left" function on
the on-board computer .
If the headlamps are converted to symmetri-
cal dipped beam, the "motorway mode" and
"extended range foglamps" functions are not
available. Setting the exterior lighting
Setting options Exterior lighting can be set using the:
R
light switch
R headlamp range adjustment (vehicles with
halogen headlamps) (Y page 112)
R combination switch (Y page 113)
R on-board computer (Y page 227) (vehicles
with a 4-button multifunction steering 110
Exterior lightingLights and windscreen wipers
Page 125 of 381
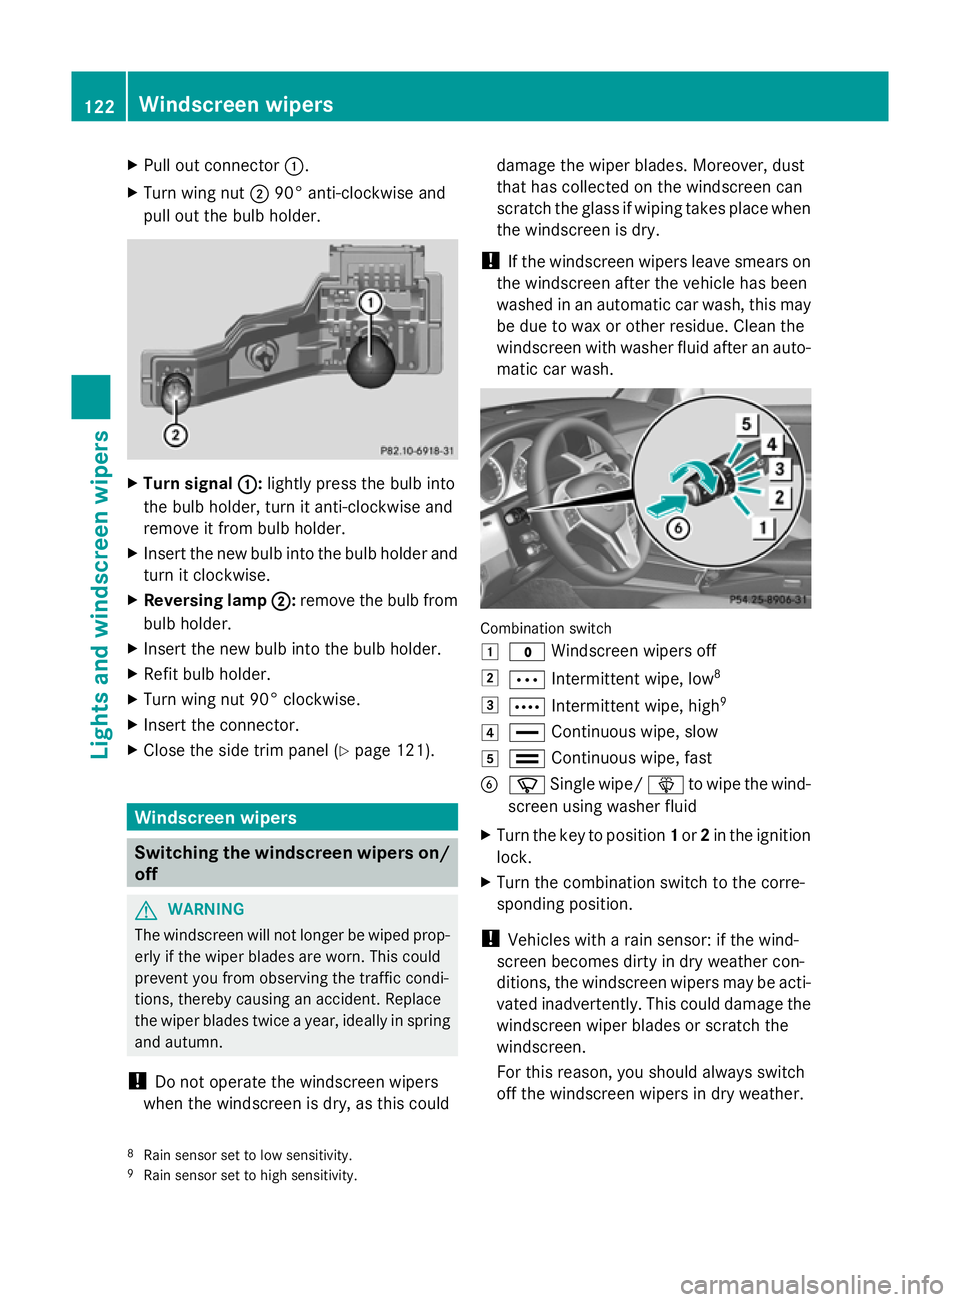
X
Pull out connector :.
X Turn wing nut ;90° anti-clockwise and
pull out the bulb holder. X
Turn signal :
:: lightly press the bulb into
the bulb holder, turn it anti-clockwise and
remove it from bulb holder.
X Insert the new bulb into the bulb holder and
turn it clockwise.
X Reversing lamp ; ;:remove the bulb from
bulb holder.
X Insert the new bulb into the bulb holder.
X Refit bulb holder.
X Turn wing nut 90° clockwise.
X Insert the connector.
X Close the side trim panel (Y page 121).Windscreen wipers
Switching the windscreen wipers on/
off G
WARNING
The windscreen will not longer be wiped prop-
erly if the wiper blades are worn. This could
prevent you from observing the traffic condi-
tions, thereby causing an accident. Replace
the wiper blades twice a year, ideally in spring
and autumn.
! Do not operate the windscreen wipers
when the windscreen is dry, as this could damage the wiper blades. Moreover, dust
that has collected on the windscreen can
scratch the glass if wiping takes place when
the windscreen is dry.
! If the windscreen wipers leave smears on
the windscreen after the vehicle has been
washed in an automatic car wash, this may
be due to wax or other residue. Clean the
windscreen with washer fluid after an auto-
matic car wash. Combination switch
1
$ Windscreen wipers off
2 Ä Intermittent wipe, low 8
3 Å Intermittent wipe, high 9
4 ° Continuous wipe, slow
5 ¯ Continuous wipe, fast
B í Single wipe/ îto wipe the wind-
screen using washer fluid
X Turn the key to position 1or 2in the ignition
lock.
X Turn the combination switch to the corre-
sponding position.
! Vehicles with a rain sensor: if the wind-
screen becomes dirty in dry weather con-
ditions, the windscreen wipers may be acti-
vated inadvertently. This could damage the
windscreen wiper blades or scratch the
windscreen.
For this reason, you should always switch
off the windscreen wipers in dry weather.
8 Rain sensor set to low sensitivity.
9 Rain sensor set to high sensitivity. 122
Windscreen wipersLights and windscreen wipers
Page 135 of 381
Switching on/off
X
To activate: press the¿button.
The indicator lamp in the ¿button lights
up.
X To deactivate: press the¿button.
The indicator lamp in the ¿button goes
out. The cooling with air dehumidification
function has a delayed switch-off feature.
Problems with the cooling with air
dehumidification function When you press the
¿button, the indica-
tor lamp in the button flashes three times or
remains off. You can no longer switch on the
cooling with air dehumidification function.
X Visit a qualified specialist workshop. Setting climate control to automatic
mode
In automatic mode, the set temperature is
maintained automatically at a constant level.
The system automatically regulates the tem-
perature of the dispensed air, the airflow and
the air distribution.
Automatic mode will achieve optimal opera-
tion if cooling with air dehumidification is also
activated. If desired, cooling with air dehu-
midification can be deactivated.
X Turn the key to position 2in the ignition
lock.
X Set the desired temperature.
X To activate: press theÃbutton.
The indicator lamp in the Ãbutton lights
up. Automatic air distribution and airflow
are activated.
X To select manually: press the_but-
ton.
or
X Press the KorI button.
The indicator lamp in the Ãbutton goes
out. Automatic air distribution and airflow
are deactivated. Setting the climate mode
This function is only available with the
THERMOTRONIC automatic climate control.
In automatic mode you can select the follow-
ing climate modes:
FOCUS high airflow that is set slightly cooler
MEDIUM medium airflow, standard setting
DIFFUSE low airflow that is set slightly warmer and with less of a draught
X Turn the key to position 2in the ignition
lock.
X Press the Ãbutton.
X Press the ñbutton repeatedly until the
desired climate mode appears in the dis-
play. Setting the temperature
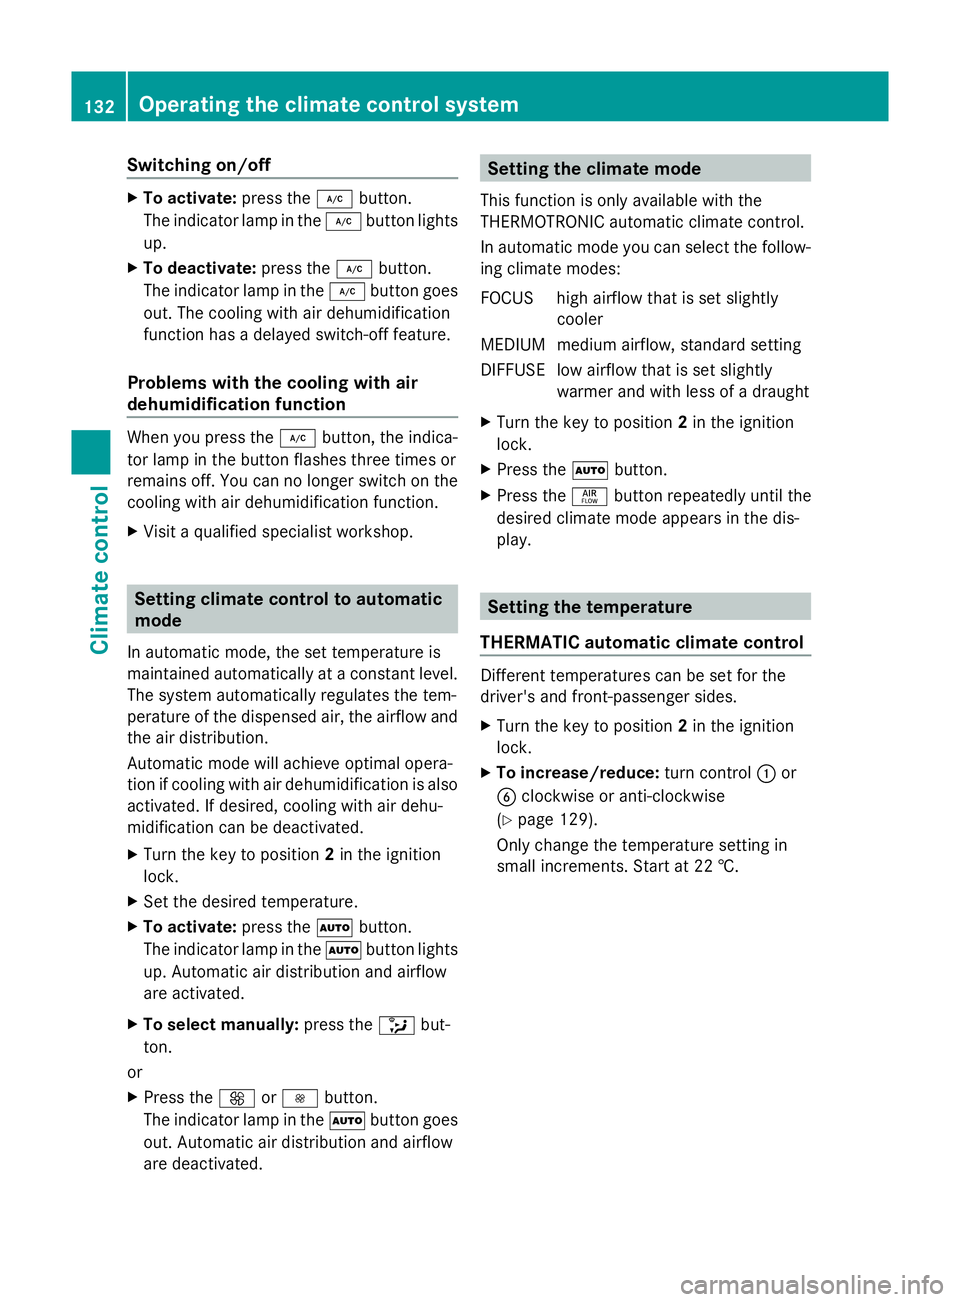
THERMATIC automatic climate control Different temperatures can be set for the
driver's and front-passenger sides.
X
Turn the key to position 2in the ignition
lock.
X To increase/reduce: turn control:or
B clockwise or anti-clockwise
(Y page 129).
Only change the temperature setting in
small increments. Start at 22 †. 132
Operating the climate control systemClimate control
Page 136 of 381
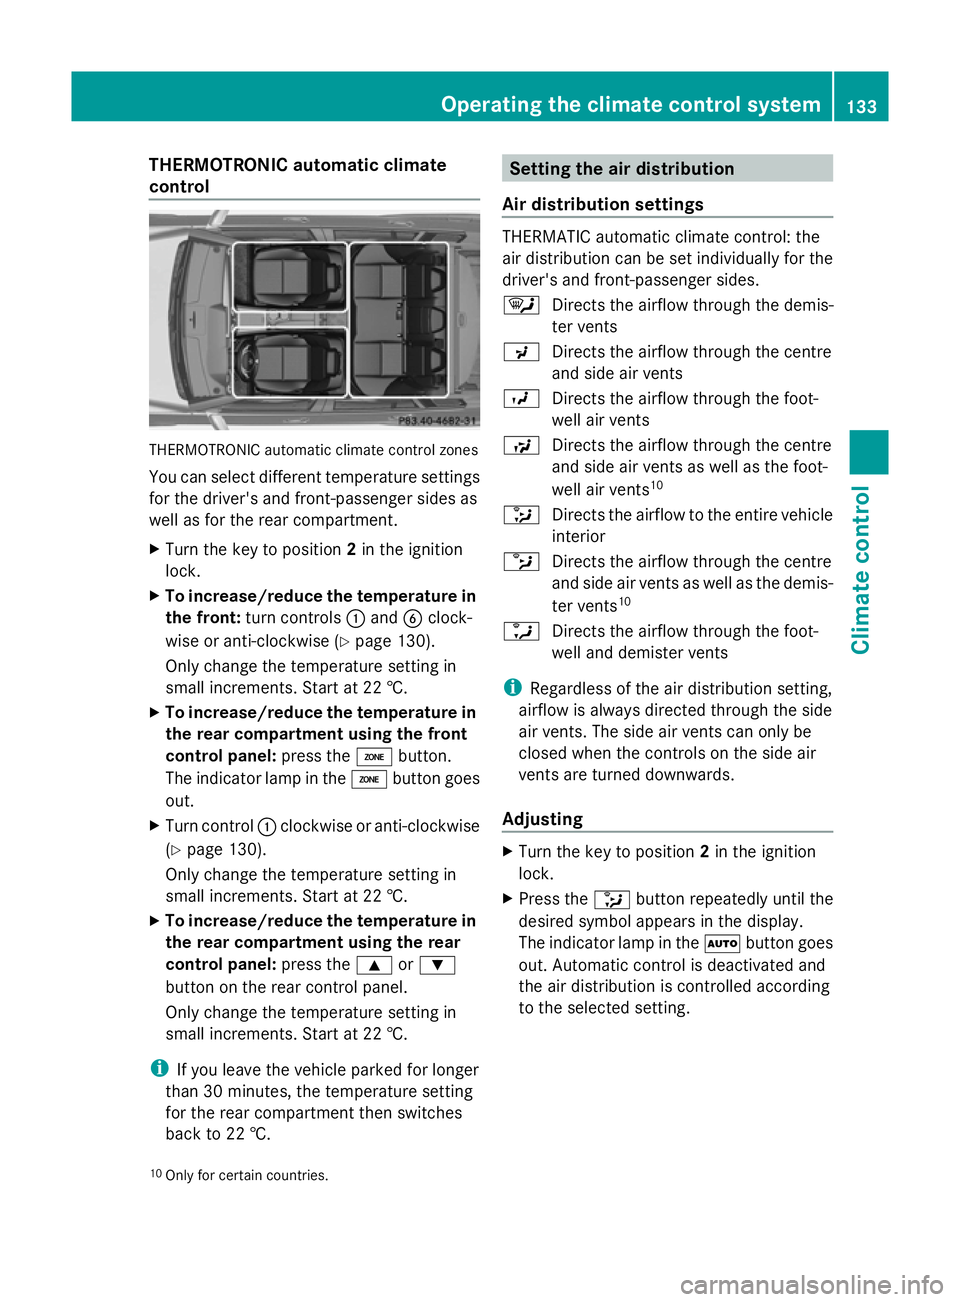
THERMOTRONIC automatic climate
control THERMOTRONIC automatic climate control zones
You can select different temperature settings
for the driver's and front-passenger sides as
well as for the rear compartment.
X Turn the key to position 2in the ignition
lock.
X To increase/reduce the temperature in
the front: turn controls :and Bclock-
wise or anti-clockwise (Y page 130).
Only change the temperature setting in
small increments. Start at 22 †.
X To increase/reduce the temperature in
the rear compartment using the front
control panel: press theábutton.
The indicator lamp in the ábutton goes
out.
X Turn control :clockwise or anti-clockwise
(Y page 130).
Only change the temperature setting in
small increments. Start at 22 †.
X To increase/reduce the temperature in
the rear compartment using the rear
control panel: press the9or:
button on the rear control panel.
Only change the temperature setting in
small increments. Start at 22 †.
i If you leave the vehicle parked for longer
than 30 minutes, the temperature setting
for the rear compartment then switches
back to 22 †. Setting the air distribution
Air distribution settings THERMATIC automatic climate control: the
air distribution can be set individually for the
driver's and front-passenger sides.
¯
Directs the airflow through the demis-
ter vents
P Directs the airflow through the centre
and side air vents
O Directs the airflow through the foot-
well air vents
S Directs the airflow through the centre
and side air vents as well as the foot-
well air vents 10
_ Directs the airflow to the entire vehicle
interior
b Directs the airflow through the centre
and side air vents as well as the demis-
ter vents 10
a Directs the airflow through the foot-
well and demister vents
i Regardless of the air distribution setting,
airflow is always directed through the side
air vents. The side air vents can only be
closed when the controls on the side air
vents are turned downwards.
Adjusting X
Turn the key to position 2in the ignition
lock.
X Press the _button repeatedly until the
desired symbol appears in the display.
The indicator lamp in the Ãbutton goes
out. Automatic control is deactivated and
the air distribution is controlled according
to the selected setting.
10 Only for certain countries. Operating the climate control system
133Climate control Z