Page 273 of 384

equipped, always use the cargo net when
transporting cargo.
Unless you are transporting cargo, the seat
backrests must remain properly locked in the
upright position.
In an accident, during hard braking or sudden
maneuvers, loose items will be thrown around
inside the vehicle. This can cause injury to
vehicle occupants unless the items are
securely fastened in the vehicle.
Always use the cargo tie-down rings.GWARNING
Never drive a vehicle with the tailgate open.
Deadly carbon monoxide (CO) gases may
enter vehicle interior resulting in
unconsciousness and death.
! Release and fold the seat cushion
upwards before folding the rear bench seat
forward. Otherwise, the backrests may be
damaged.
When the backrest is folded forwards, the
front seats cannot be moved to their
rearmost position. Otherwise, the front
seats and the rear bench seat could be
damaged.
The left-hand and right-hand backrests in the
second row of seats can be folded forwards
separately to increase the cargo
compartment capacity. On vehicles with a
third row of seats, you must fold down the
third row of seats beforehand (Y page 104) to
obtain maximum cargo compartment
enlargement.
Folding the rear bench seat forwards
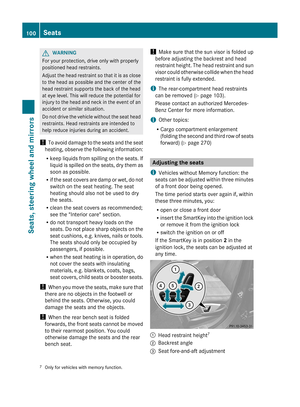
i If the driver's or front-passenger seat is
set for a larger person, it may not be
possible to fold the rear bench seat
forwards. In this case, move the front seats
as far forward as possible.
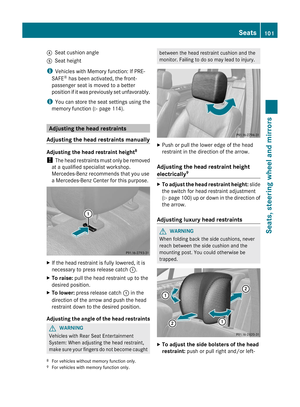
XMove the head restraints to the lowest
position ( Y page 102).XPull release loop : of seat cushion ;.XFold seat cushion ; upwards.XPull release catch = in the direction of the
arrow.
The backrest is released.
! The backrest is heavy. Therefore, take
care when folding it down. Make sure that
the head restraints are pushed all the way
in so that the backrests and seat cushions
are not damaged.
XFold the backrest forwards until it engages
in the cargo compartment position.Stowage areas271Stowing and featuresZ
Page 274 of 384
XGuide seat belts ; under respective
clips :.
Folding the rear bench seat back
XPull release catch = upwards.XFold backrest ; backwards until it
engages, making sure not to trap the seat
belts while doing so.XFold seat cushion : backwards and push
until you hear it engage.XPull up and adjust the head restraints if
necessary ( Y page 102).Securing cargo
Cargo tie-down rings
Observe the following notes on securing
loads:
R secure the load using the cargo tie down
rings.
R do not use elastic straps or nets to secure
a load, as these are only intended as an
anti-slip protection for light loads.
R do not route tie downs across sharp edges
or corners.
R pad sharp edges for protection.
Footwell of the second row of seats
There is one cargo tie-down ring : in the
footwell behind the driver’s seat and one in
the footwell behind the front-passenger seat.
Cargo compartment
There are four cargo tie down rings : in the
cargo compartment.
272Stowage areasStowing and features
Page 275 of 384

Securing hooks
Only use the mounting hooks to secure items
of luggage up to maximum of 9 lbs (4 kg) in
weight.
There are two securing hooks : on each side
of the cargo compartment.
Cargo compartment cover
Important safety notes
! When loading the vehicle, make sure that
you do not stack the load in the cargo
compartment higher than the lower edge of
the side windows. Do not place heavy
objects on top of the cargo compartment
cover.
The cargo compartment cover can be
attached behind the second or third row of
seats.
Extending and retracting the cargo
compartment cover
XTo extend: pull the cargo compartment
cover back by grab handle : and clip it
into retainers ; on the left and right.XTo retract: unhook the cargo compartment
cover from retainers ; on the left and right
and guide it forwards by grab handle :
until it is fully retracted.
Installing/removing the cargo
compartment cover
XTo remove: make sure that cargo
compartment cover ; is rolled up.XPress button :.XMove cargo compartment cover ; to the
left.XRemove cargo compartment cover ;.XTo install: if installed, remove the
protective caps from the side trim in the
third row of seats when you wish to installStowage areas273Stowing and featuresZ
Page 276 of 384

cargo compartment cover ; behind the
second row of seats.
Protective cap in the right-hand side trim on the
third row of seats
XPush in the top of the protective cap as
indicated by the arrow.
The protective cap folds out at the bottom.XRemove the lower cover from the side trim.
i Stow the protective caps in a safe place.
XWith the handle of the cargo compartment
pointing to the rear and button : facing
upwards, insert cargo compartment
cover ; into the recess of the side trim on
the left-hand side.XGuide cargo compartment cover ; in front
of the recess on the right.XPress button : and insert the right-hand
side section into the recess of the side trim.
Cargo net
Important safety notes
GWARNING
Make sure the cargo net is properly engaged
at top and bottom position and the tightening
belts are securely fastened.
Never use a damaged cargo net.
Always use cargo net when transporting
cargo. This helps to avoid personal injury from
smaller objects being thrown around in the
occupant compartment during a collision or
sudden maneuver.
The cargo net cannot prevent the movement
of large, heavier objects into the passenger
compartment in an accident. Such items must
be properly secured using the cargo tie-down
rings in the cargo compartment floor.
Passenger use of seats behind installed cargo
net is restricted because of the footwell being
taken up by the net.
It is particularly important to use a safety net
if the vehicle is loaded with small objects
above the level of the backrests. For safety
reasons, always use a cargo net when
transporting loads.
Preparing the cargo net
The cargo net can be used in two different
positions (behind the B-pillar or the C-pillar).
R The brackets behind B-pillar : are
required for the cargo compartment
enlargement ( Y page 270).
The corresponding cargo tie down rings to
tighten the net are located in the footwell
of the rear bench seat ( Y page 272).
R The brackets behind C-pillar ; are
required for the cargo compartment behind
the 2nd row of seats.
The corresponding cargo tie down rings for
tensioning the net are in the cargo
compartment or on the backrests of the
folded-down 3rd row of seats
( Y page 272).
274Stowage areasStowing and features
Page 277 of 384

XUndo the two Velcro fasteners of the
safety-net stowage.XUnroll and unfold the cargo net.
The upper and lower guide rods must
engage audibly.
Attaching the cargo net
Cargo net attached behind the C-pillar
XInsert guide rod ; into retainer : in the
direction of the arrow.XSlide guide rod ; forwards into
retainer : in the direction of the arrow.
Tightening the cargo net
Seat belt reel holder behind the front seats
XInsert belt hook : into cargo tie-down
ring ; in the direction of the arrow.XPull tensioning strap = by the loose end in
the direction of the arrow until the cargo
net is tight.XAfter driving a short distance, check the
tension of the cargo net and retighten it if
necessary.Releasing the cargo net
Seat belt reel holder behind the front seats
XPull belt adjuster : upwards in the
direction of the arrow to reduce the tension
on the tensioning strap.XUnhook belt hook ; from cargo tie-down
ring =.
Detaching and storing the cargo net
XDetach guide rod ; from bracket :
( Y page 275).XPress the red button on the upper and lower
guide rods.XFold the cargo net and roll it up.XClose the two Velcro fasteners on the cargo
net holder.
EASY-PACK load-securing kit
Components and storage
The EASY-PACK load-securing kit allows you
to use your cargo compartment for a variety
of purposes. You can keep the EASY-PACK
load-securing kit in the bag supplied and store
it together with the telescopic rod under the
cargo compartment floor.
Stowage areas275Stowing and featuresZ
Page 278 of 384

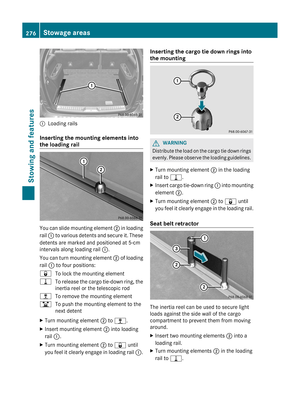
:Loading rails
Inserting the mounting elements into
the loading rail
You can slide mounting element ; in loading
rail : to various detents and secure it. These
detents are marked and positioned at 5-cm
intervals along loading rail :.
You can turn mounting element ; of loading
rail : to four positions:
&To lock the mounting element=To release the cargo tie-down ring, the
inertia reel or the telescopic rod;To remove the mounting elementBTo push the mounting element to the
next detentXTurn mounting element ; to ; .XInsert mounting element ; into loading
rail :.XTurn mounting element ; to & until
you feel it clearly engage in loading rail :.Inserting the cargo tie down rings into
the mountingGWARNING
Distribute the load on the cargo tie down rings
evenly. Please observe the loading guidelines.
XTurn mounting element ; in the loading
rail to =.XInsert cargo tie-down ring : into mounting
element ;.XTurn mounting element ; to & until
you feel it clearly engage in the loading rail.
Seat belt retractor
The inertia reel can be used to secure light
loads against the side wall of the cargo
compartment to prevent them from moving
around.
XInsert two mounting elements ; into a
loading rail.XTurn mounting elements ; in the loading
rail to =.276Stowage areasStowing and features
Page 279 of 384

XInsert inertia reel = into mounting
elements ;.XTurn mounting element ; to & until
you feel it clearly engage in the loading rail.XPress unlocking button : on inertia reel
= and pull the cargo net out in the
direction of the arrow.XPlace the load between the securing net
and the cargo compartment side wall.XUsing one hand, press locking button : of
inertia reel =.XWith your other hand, slowly extend the net
around the load until it is secure.
Telescopic rod
The telescopic rod can be used to secure the
load against the rear seats to prevent it from
moving around.
XInsert one mounting element ; into each
loading rail.XTurn mounting elements ; in the loading
rail to =.XInsert telescopic rod : into mounting
elements ;.XTurn mounting element ; to & until
you feel it clearly engage in the loading rail.Roof carrier
Important safety notesGWARNING
Only use carriers when the crossbars have
been completely mounted. The left and right
roof rails are only stabilized by means of the
crossbars mounted.
Follow the manufacturer's installation
instructions. Otherwise, an improperly
attached carrier or its load could become
detached from the vehicle.
Do not exceed the maximum roof load of
198 lb (90 kg).
Take into consideration that when the roof is
loaded, the handling characteristics are
different from those when operating the
vehicle without the roof loaded.
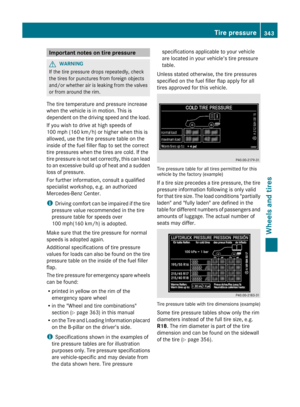
! Mercedes-Benz recommends that you
only use roof carriers that have been tested
and approved for Mercedes-Benz vehicles.
This helps to prevent damage to the
vehicle.
Position the load on the roof carrier in such
a way that the vehicle will not sustain
damage even when it is in motion.
Depending on the vehicle equipment,
ensure that when the roof carrier is
installed you can:
R raise the sliding sunroof fully
R open the tailgate fully
Attaching the roof carrier
Stowage areas277Stowing and featuresZ
Page 280 of 384

XSecure the roof carrier to roof rails :.XObserve the manufacturer's installation
instructions.
Cross bar
Points to observe before use
The maximum roof load that can be used with
additional accessories decreases by the dead
weight of the crossbars (13.7 lbs/6.2 kg).
! Note that installing the crossbar
increases the vehicle height by 50 mm
compared to the height stated in the
"Technical data" section.
The wrench and the Allen key are located with
the vehicle tool kit in the stowage space
underneath the trunk floor ( Y page 314).
i Replacement parts are available as
Mercedes-Benz accessories. Contact your
authorized Mercedes-Benz Service Center.
Installing the crossbars
GWARNING
Please follow these installation instructions
carefully. Caution should be exercised to
avoid damage to the vehicle while installing
the crossbars. Also, be careful not to injure
yourself or others while installing and
adjusting the crossbars or loading items on
them.
Each individual step of the installation
instructions, the warning notices, the general
safety precautions and the instructions for
use must be followed exactly. If the crossbars
are not mounted correctly, they and the
objects attached to them could come loose
from your vehicle and cause an accident,
thereby injuring you and other persons and/
or causing damage to property, including
damage to your vehicle.
GWARNING
Every time the crossbars are mounted, before
you set off on a journey and periodically
during longer journeys, check all the screws
on the crossbars to make sure that they are
secure, and tighten them if necessary. Repeat
these checks at regular intervals as road-
surface conditions dictate, and at least after
every 1500 miles (2500 km) of continuous
use.
Otherwise, the crossbars, mounted
accessories and the objects attached to them
could come loose from the vehicle causing an
accident, thereby injuring you and other
persons and/or causing damage to property,
including damage to your vehicle.
Do not use lubricant on the screws of the
crossbars. The screws could work loose and
the crossbars could become detached from
your vehicle, together with the objects
attached to them causing an accident,
thereby injuring you and other persons and/
or causing damage to property, including
damage to your vehicle.GWARNING
Only install the crossbars at the exact
locations designated on the roof rails. The
designated locations for the front crossbars
are between the markings engraved on the
inside of the roof rails. The designated
locations for the rear crossbars are between
the gaps on the roof rails.
Otherwise, the crossbars, mounted
accessories and the objects attached to them
could come loose from the vehicle causing an
accident, thereby injuring you and other
persons and/or causing damage to property,
including damage to your vehicle.
GWARNING
A roof load creates a greater surface area
exposed to the wind and causes the vehicle
to have a higher center of gravity, thereby
changing the vehicle's driving characteristics.
Accordingly, the additional weight on the roof
of the vehicle can have a detrimental effect
on braking, cornering and acceleration.
Never exceed the maximum permissible roof
load or the maximum permissible vehicle
278Stowage areasStowing and features