2012 MERCEDES-BENZ G-CLASS SUV steering
[x] Cancel search: steeringPage 303 of 357

carried ou
tby a qualified specialist work-
shop. Interior care
Cleaning the display !
Forc leaning, do not use any of the fol-
lowing:
R alcohol-based thinner or petrol
R abrasive cleaning agents
R commercially-available household clean-
ing agents
These may damage the display surface. Do
not put pressure on the display surface
when cleaning. This could lead to irrepara-
ble damage to the display.
X Before cleaning the display, make sure that
it is switched off and has cooled down.
X Clean the display surface using a commer-
cially available microfibre cloth and TFT/
LCD display cleaner.
X Dry the display surface using a dry micro-
fibre cloth.
Cleaning the plastic trim G
WARNING
When cleaning the steering wheel boss and
dashboard, do not use cockpit sprays or
cleaning agents containing solvents. Cleaning
agents containing solvents cause the surface
to become porous, and as aresult plastic
parts may break away and be thrown around
the interior when an airbag is deployed, which
may result in severe injuries.
! Do not affix the following to plastic surfa-
ces:
R stickers
R films
R scented oil bottles or similar items
You could otherwise damage the plastic. !
Do not allow cosmetics, insect repellent
or sunscreen to come in contact with the
plastic trim .This maintains the high-quality
look of the surfaces.
X Wipe the plastic trim with a damp, lint-free
cloth, e.g. a microfibre cloth.
X Heavy soiling: use car care and cleaning
products recommended and approved by
Mercedes-Benz.
The surface may change colour tempora-
rily. Wait until the surface is dry again.
Cleaning real wood and trim strips !
Do not use solvent-based cleaning agents
such as tar remover, wheel cleaners, pol-
ishes or waxes. There is otherwise a risk of
damaging the surface.
X Wipe the wooden trim and trim strips with
a damp, lint-free cloth, e.g. a microfibre
cloth.
X Heavy soiling: use car care and cleaning
products recommended and approved by
Mercedes-Benz.
Cleaning the seat covers !
Do not use microfibre cloths to clean gen-
uine leather or artificial leather covers, as
these are too aggressive and, if used often,
may damage the cover.
! Observe the following when cleaning:
R clean genuine leather covers carefully
with a damp cloth and then wipe the cov-
ers down with a dry cloth. Make sure that
the leather does not become soaked. It
may otherwise become rough and
cracked. Only use leather care agents
that have been tested and approved by
Mercedes-Benz. You can obtain these
from a qualified specialist workshop.
R clean artificial leather covers with a cloth
moistened with a solution containing 1%
detergent (e.g. washing-up liquid).
R clean cloth covers with a microfibre cloth
moistened with a solution containing 1% 300
CareMaintenance and care
Page 312 of 357

X
Vehicles with stainless-steel spare
wheel cover: make sure when refitting
cove rpanel ?that retainer Aengages in
recess B(Ypage 308).
X Make sure that tab ;is below when refit-
ting cover ring :(Ypage 308).
X For safety reasons, regularly check to
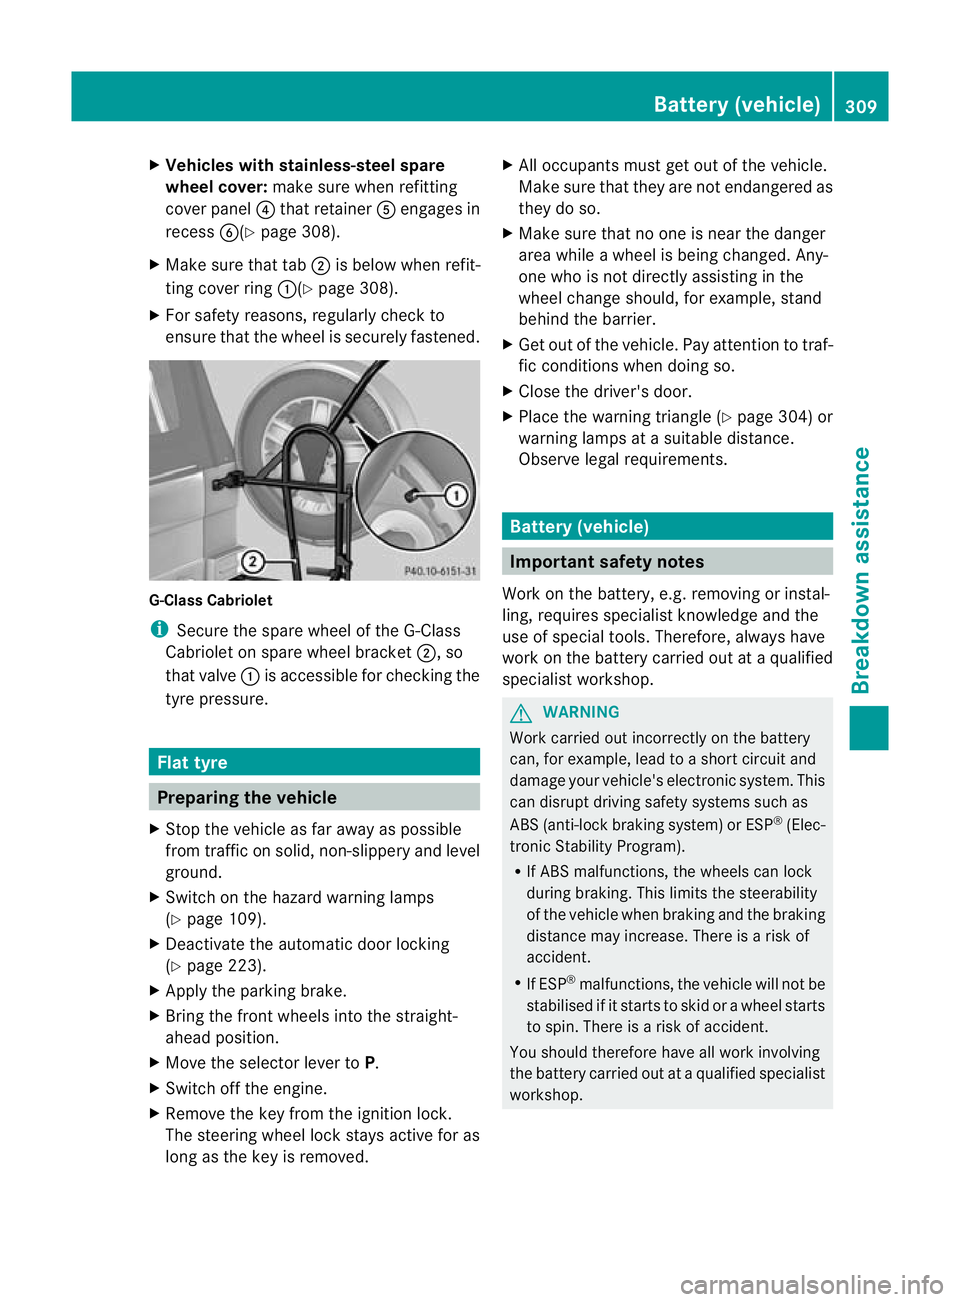
ensure that the wheel is securely fastened. G-Class Cabriolet
i
Secure the spare wheel of the G-Class
Cabriolet on spare wheel bracket ;, so
that valve :is accessible for checking the
tyre pressure. Flat tyre
Preparing the vehicle
X Stop the vehicle as far away as possible
from traffic on solid ,non-slippery and level
ground.
X Switch on the hazard warning lamps
(Y page 109).
X Deactivate the automatic door locking
(Y page 223).
X Apply the parking brake.
X Bring the front wheels into the straight-
ahead position.
X Move the selector lever to P.
X Switch off the engine.
X Remove the key from the ignition lock.
The steering wheel lock stays active for as
long as the key is removed. X
All occupants must get out of the vehicle.
Make sure that they are not endangered as
they do so.
X Make sure that no one is near the danger
area while a wheel is being changed. Any-
one who is not directly assisting in the
wheel change should, for example, stand
behind the barrier.
X Get out of the vehicle. Pay attention to traf-
fic conditions when doing so.
X Close the driver's door.
X Place the warning triangle (Y page 304) or
warning lamps at a suitable distance.
Observe legal requirements. Battery (vehicle)
Important safety notes
Work on the battery, e.g. removing or instal-
ling, requires specialist knowledge and the
use of special tools. Therefore, always have
work on the battery carried out at a qualified
specialist workshop. G
WARNING
Work carried out incorrectly on the battery
can, for example, lead to a short circuit and
damage your vehicle's electronic system. This
can disrupt driving safety systems such as
ABS (anti-lock braking system) or ESP ®
(Elec-
tronic Stability Program).
R If ABS malfunctions, the wheels can lock
during braking. This limits the steerability
of the vehicle when braking and the braking
distance may increase. There is a risk of
accident.
R If ESP ®
malfunctions, the vehicle will not be
stabilised if it starts to skid or a wheel starts
to spin. There is a risk of accident.
You should therefore have all work involving
the battery carried out at a qualified specialist
workshop. Battery (vehicle)
309Breakdown assistance Z
Page 320 of 357

Towing the vehicle with both axles on
the ground
It is important tha tyou observe the safety
instructions when towing away your vehicle
(Y page 315).
X Switch on the hazard warning lamps
(Y page 109).
i In order to signal a change of direction
when towing the vehicle with the hazard
warning lamps switched on, use the com-
bination switch as usual.Int his case, only
the turn signals for the desired direction
flash. When you reset the combination
switch, the hazard warning lamps start
flashing again.
X Turn the key to position 2in the ignition
lock (Y page 143).
X When the vehicle is stationary, depress the
brake pedal and keep it depressed.
X Shift the transfer case to neu-
tral(Y page 203).
X Shift the automatic transmission to posi-
tion N.
X Release the brake pedal.
X Release the parking brake (Y page 164).
i The transmission can only change gear
when the battery has sufficient charge.
If you cannot move the selector lever to N,
you must remove the propeller shafts to the
driven axles. Transporting the vehicle
! Only lash the vehicle down by the wheels
or wheel rims, not by parts of the vehicle
such as axle or steering components. Oth-
erwise, the vehicle could be damaged.
Use the towing eyes to pull the vehicle if it
needs to be transported on a trailer or trans-
porter (Y page 316).
X Apply the parking brake.
X Turn the key to position 2in the ignition
lock (Y page 143). X
Move the selector lever to N.
X Shift the transfer case to neu-
tral(Y page 203).
X Secure the towing cable to the towing eyes
(Y page 316).
X Make sure that the vehicle cannot roll
away.
X Release the parking brake.
X Load the vehicle onto the transporter.
As soon as the vehicle is loaded:
X Apply the parking brake.
X Shift the automatic transmission to posi-
tion P.
X Turn the key to position 0in the ignition
lock (Y page 143) and remove it.
X Secure the vehicle. Recovering
avehicle that has become
stuck
! When recovering a trapped vehicle, do not
jerk the vehicle or pull it at an angle. If the
tractive power is too high, the vehicles
could be damaged.
If the drive wheels get trapped on loose or
muddy ground, recover th evehicle with the
utmost care, especially so if the vehicle is
laden.
Never attempt to recover a vehicle with a
trailer attached.
Pull out the vehicle backwards, if possible,
using the tracks it made when it became
stuck. Towing in the event of malfunctions
General notes !
If you are removing the propeller shaft,
use M10 nuts as spacers on the M8 bolts
and secure them with M8 nuts.
New self-locking nuts must be used when
the propeller shafts are refitted. Towing and tow-starting
317Breakdown assistance Z
Page 326 of 357

Regular checking of wheels and tyres
R Regularly check the wheels and tyres of
your vehicle for damage at leas tevery 14
days, as well as after driving off-road or on
rough roads. Damage includes cuts, punc-
tures, cracks and bulges on tyres or severe
corrosio nordeformation on wheels, for
example. Damaged wheels can cause a
loss of tyre pressure.
R Regularly chec kthe tyre tread depth and
the condition of the tread across the whole
width of the tyre (Y page 323). In order to
inspect the inner side of the tyre surface,
turn the steering wheel to full lock.
R All wheels must have a valve cap to protect
the valve against dirt and moisture. Do not
fit anything onto the valve other than the
standard valve cap or avalve cap approved
by Mercedes-Ben zfor your vehicle.
Do not fit anything onto the valve, such as
tyre pressure monitoring systems.
R You should regularly check the pressure of
all your tyres including the spare wheel,
particularly prior to long trips. Adjust the
tyre pressure as necessary (Y page 328).
The service life of tyres depends on various
factors, including the following:
R driving style
R tyre pressure
R tyre mileage Tyre tread
G
WARNING
Please keep in mind that:
R tyre grip decreases rapidly on wet roads
when the tread depth is less than 3mm.
Thus, you should replace tyres that have
insufficient tread.
R winter tyres should be replaced when the
tread depth is 4mmorless, as they no lon-
ger provide adequate grip.
R the tread on a tyre may not wear evenly.
Thus, you should regularly check the tread depth and the condition of the tread across
the entire width of all tyres. If necessary,
turn the fron
twheels to full lock in order to
inspect the tyre tread more easily.
Otherwise, you could lose control of the vehi-
cle and cause an accident due to the reduced
grip of the tyres on the road. Selecting, fitting and replacing tyres
R Only fit tyres and wheels of the same type
and make.
R Only fit approved tyres of the correct size
onto the wheels.
R Tyres are supplied with a protective layer
from the factory. Run in new tyres at mod-
erate speeds for the first 100 km. They only
reach their full performance after this dis-
tance.
R Do not drive with tyres which have too little
tread depth. This otherwise significantly
reduces the traction on wet roads (aqua-
planing).
R Replace the tyres after six years at the lat-
est, regardless of wear. This also applies to
the spare wheel. Winter operation
General notes
Have your vehicle winterproofed at a qualified
specialist workshop at the onset of winter.
Observe the notes in the "Changing a wheel"
section (Y page 329). Driving with summer tyres
At temperatures below +7 †, summer tyres
lose elasticity and therefore traction and
braking power. Change the tyres on your vehi-
cle to M+S tyres. Using summer tyres at very
cold temperatures could cause tears to form,
thereby damaging the tyres permanently. Winter operation
323Wheels and tyres Z
Page 330 of 357

i
The tyre pressure values given for low
loads are minimum values which offer you
good ride comfor tcharacteristics.
However, you can also use the values given
for higher loads. These are permissible and
will not adversely affect the running of the
vehicle. Checking the tyre pressures
Important safety notes Observe the notes on tyre pressure:
(Y
page 325).
Information on air pressure for the tyres on
your vehicle can be found:
R on the vehicle's tyre and loading informa-
tion table on the B-pillar (Y page 326)
R on the tyre pressure label on the fuel filler
flap (Y page 326)
R in the "Tyre pressure information" section
R in the "Tyre pressure information" section
(Y page 325)
Checking the tyre pressure manually To determine and set the correct tyre pres-
sure, proceed as follows:
X Remove the valve cap of the tyre that is to
be checked.
X Press the tyre pressure gauge securely
onto the valve.
X Read the tyre pressure and compare it with
the recommended value on the tyre and
loading information table on the B-pillar on
the driver's side of your vehicle
(Y page 326).
X The tyre pressure is too low: increase the
tyre pressure to the recommended value.
X The tyre pressure is too high: press down
the metal pin in the valve using the tip of a
pen, for example.
Air is released from the tyre.
X Check the tyre pressure again with the tyre
pressure gauge. X
Screw the valve cap onto the valve.
X Repeatt hese steps for the other tyres. Tyre pressure monitor
Important safety notes It is the driver's responsibility to set the tyre
pressure to the recommended cold tyre pres-
sure suitable for the operating situation
(Y
page 325). Note that the correct tyre pres-
sure for the current operating situation must
first be taught-in to the tyre pressure monitor.
if there is a substantial loss of pressure, the
warning threshold for the warning message is
aligned to the reference values taught-in.
Restart the tyre pressure monitor after
adjusting to the cold tyre pressure
(Y page 328). The current pressures are
saved as new reference values. This will
ensure that a warning message will only
appearift he tyre pressure drops significantly.
The tyre pressure monitor does not warn you
of an incorrectly set tyre pressure. Observe
the notes on the recommended tyre pressure
(Y page 325).
The tyre pressure monitor is not able to warn
you of a sudden loss of pressure, e.g. if the
tyre is penetrated by a foreign object. In the
event of a sudden loss of pressure, bring the
vehicle to a halt by braking carefully. Avoid
abrupt steering manoeuvres.
If a tyre pressure monitor system is fitted, the
vehicle's wheels have sensors fitted that
monitor the tyre pressures in all four tyres.
The tyre pressure monitor warns you when
the pressure drops in one or more of the
tyres. The tyre pressure monitor only func-
tions if the correct sensors are fitted to all
wheels.
Information on tyre pressures is displayed in
the multifunction display. After a few minutes
of driving, the current tyre pressure of each
tyre is shown in the multifunction display.
The tyre pressure values indicated by the on-
board computer may differ from those meas- Tyre pressure
327Wheels and tyres Z