2012 MERCEDES-BENZ E-CLASS ESTATE check oil
[x] Cancel search: check oilPage 13 of 457
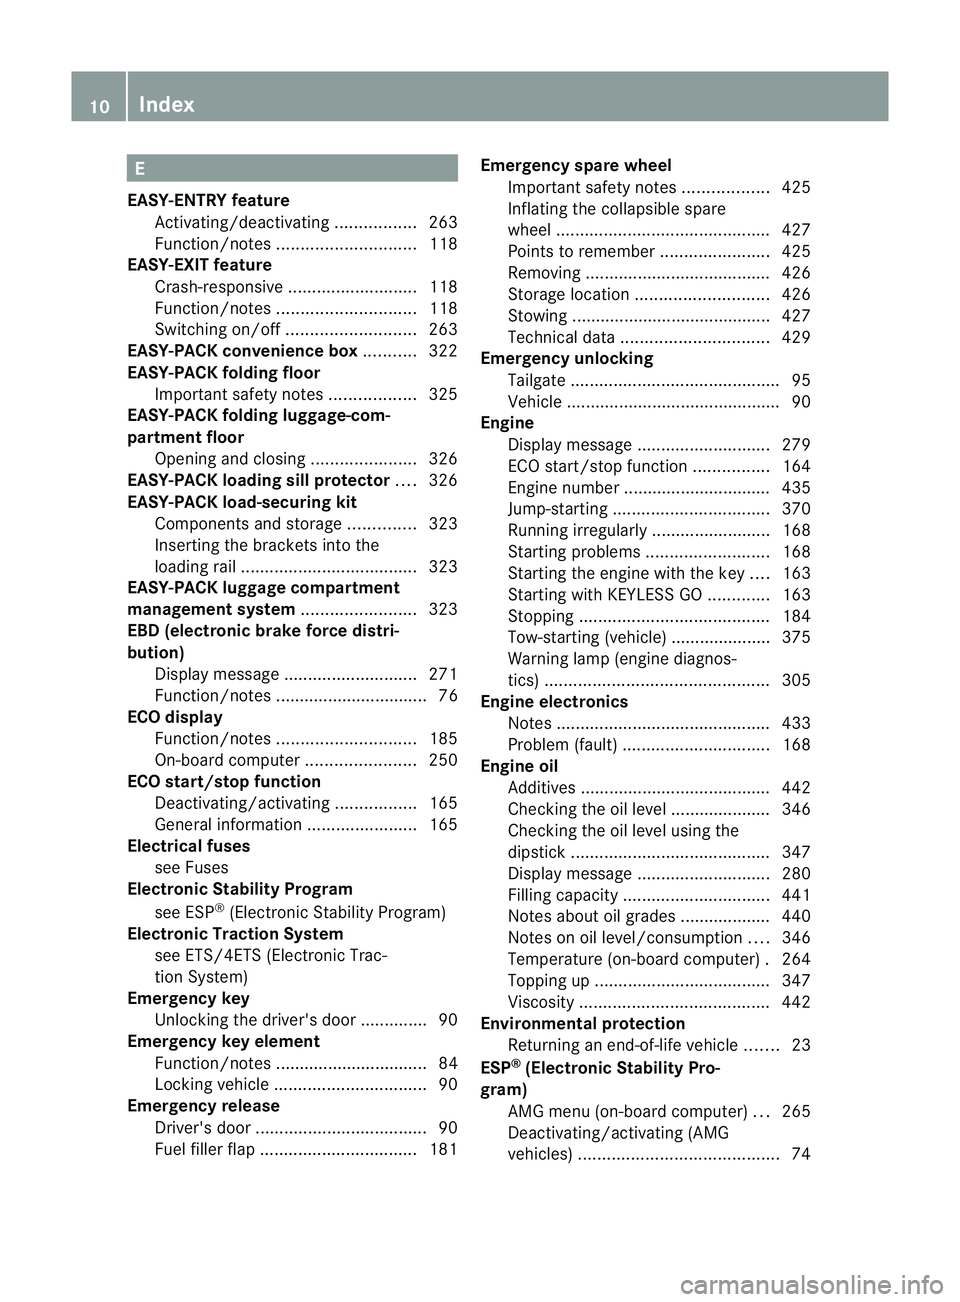
E
EASY-ENTRY feature Activating/deactivating .................263
Function/notes ............................. 118
EASY-EXIT feature
Crash-responsive ........................... 118
Function/notes ............................. 118
Switching on/off ........................... 263
EASY-PACK convenience box ...........322
EASY-PACK folding floor Important safety notes ..................325
EASY-PACK folding luggage-com-
partment floor
Opening and closing ......................326
EASY-PACK loading sill protector ....326
EASY-PACK load-securing kit Components and storag e.............. 323
Inserting the brackets into the
loading rai l..................................... 323
EASY-PACK luggage compartment
management system ........................323
EBD (electronic brake force distri-
bution)
Display message ............................ 271
Function/notes ................................ 76
ECO display
Function/notes ............................. 185
On-board computer .......................250
ECO start/stop function
Deactivating/activating .................165
General information .......................165
Electrical fuses
see Fuses
Electronic Stability Program
see ESP ®
(Electroni cStability Program)
Electronic Traction System
see ETS/4ETS (Electronic Trac-
tionS ystem)
Emergency key
Unlocking the driver's door ..............90
Emergency key element
Function/notes ................................ 84
Locking vehicle ................................ 90
Emergency release
Driver's door .................................... 90
Fuel filler fla p................................. 181Emergency spare wheel
Important safety notes ..................425
Inflating the collapsible spare
wheel ............................................. 427
Points to remember .......................425
Removing ....................................... 426
Storage location ............................ 426
Stowing .......................................... 427
Technical data ............................... 429
Emergency unlocking
Tailgate ............................................ 95
Vehicle ............................................. 90
Engine
Display message ............................ 279
ECO start/stop function ................164
Engine number ............................... 435
Jump-starting ................................. 370
Running irregularl y......................... 168
Starting problems ..........................168
Starting the engine with the key ....163
Starting with KEYLESS GO .............163
Stopping ........................................ 184
Tow-starting (vehicle) ..................... 375
Warning lamp (engine diagnos-
tics) ............................................... 305
Engine electronics
Notes ............................................. 433
Problem (fault) ............................... 168
Engine oil
Additives ........................................ 442
Checking the oil level ..................... 346
Checking the oil level using the
dipstick .......................................... 347
Display message ............................ 280
Filling capacity ............................... 441
Notes about oil grades ................... 440
Notes on oil level/consumption ....346
Temperature (on-board computer) .264
Topping up ..................................... 347
Viscosity ........................................ 442
Environmental protection
Returning an end-of-life vehicle .......23
ESP ®
(Electronic Stability Pro-
gram) AMG menu (on-board computer) ...265
Deactivating/activating (AMG
vehicles) .......................................... 7410
Index
Page 182 of 457
Problems with the transmission
Problem Possible causes/consequences and
M Solutions
The transmission has
problems shifting gear. The transmission is losing oil.
X
Have the transmission checked at a qualified specialist work-
shop immediately. The acceleration ability
is deteriorating.
The transmission no
longer changes gear. The transmission is in emergency mode.
It is only possible to shift into secondgear and reverse gear.
X Stop.
X Shift the transmission to position P.
X Switch off the engine.
X Wait at least ten seconds before restarting the engine.
X Shift the transmission to position Dor R.
If D is selected, the transmission shifts into secondgear; ifRis
selected, the transmission shifts into reverse gear.
X Have the transmission checked at a qualified specialist work-
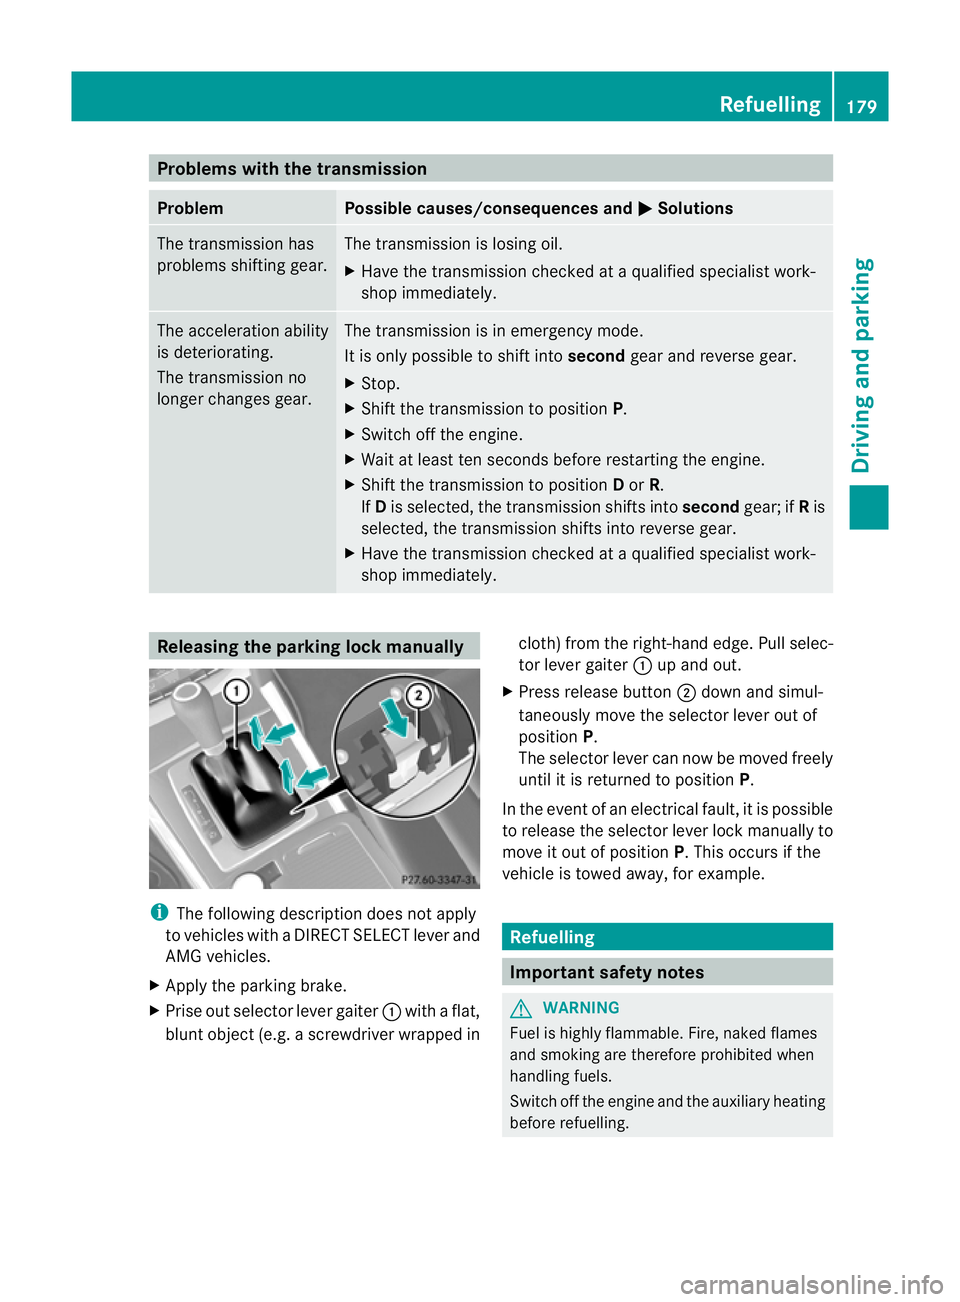
shop immediately. Releasing the parking lock manually
i
The following description does not apply
to vehicles with a DIRECT SELECT lever and
AMG vehicles.
X Apply the parking brake.
X Prise out selector lever gaiter :with a flat,
blunt object (e.g. a screwdriver wrapped in cloth) from the right-hand edge. Pull selec-
tor lever gaiter
:up and out.
X Press release button ;down and simul-
taneously move the selector lever out of
position P.
The selector lever can now be moved freely
until it is returned to position P.
In the event of an electrical fault, it is possible
to release the selector lever lock manually to
move it out of position P. This occurs if the
vehicle is towed away, for example. Refuelling
Important safety notes
G
WARNING
Fuel is highly flammable. Fire, naked flames
and smoking are therefore prohibited when
handling fuels.
Switch off the engine and the auxiliary heating
before refuelling. Refuelling
179Driving and parking Z
Page 283 of 457
Display messages Possible causes/consequences and
M Solutions
# The battery is no
tbeing charged.
Aw arning tone also sounds.
Possible causes:
R faulty alternator
R torn poly-V-belt
R a malfunction in the electronics
X Stop the vehicle immediately, paying attentio ntoroad and traf-
fic conditions, and switch off the engine.
X Secure the vehicle against rolling away (Y page 183).
X Open the bonnet.
X Check whether the poly-V-belt is torn.
If the poly-V-belt is torn:
! Do not continue driving. The engine could otherwise overheat.
X Consult a qualified specialist workshop.
If the poly-V-belt is OK:
X Visit a qualified specialist workshop. 4
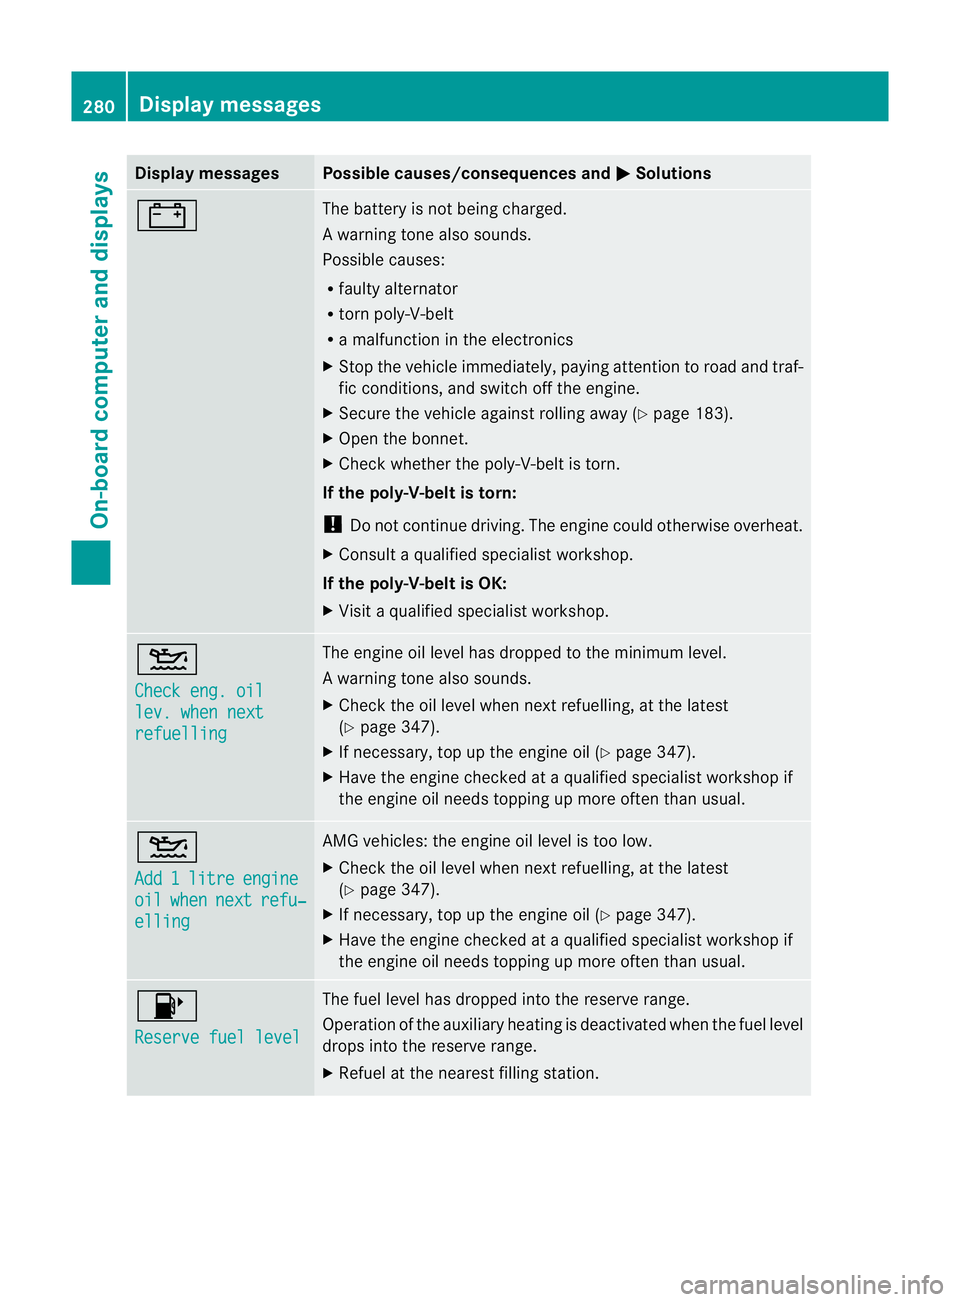
Check eng. oil
lev. when next
refuelling The engine oil level has dropped to the minimum level.
Aw
arning tone also sounds.
X Chec kthe oil level when next refuelling, at the latest
(Y page 347).
X If necessary, top up the engine oil (Y page 347).
X Have the engine checked at a qualified specialist workshop if
the engine oil needs topping up more often than usual. 4
Add
1 litre engine
oil when next refu‐
elling AMG vehicles: the engine oil level is too low.
X
Check the oil level when next refuelling, at the latest
(Y page 347).
X If necessary, top up the engine oil (Y page 347).
X Have the engine checked at a qualified specialist workshop if
the engine oil needs topping up more often than usual. 8
Reserve fuel level The fuel level has dropped into the reserve range.
Operation of the auxiliary heating is deactivated when the fuel level
drops into the reserve range.
X
Refuel at the nearest filling station. 280
Display messagesOn-board computer and displays
Page 348 of 457
X
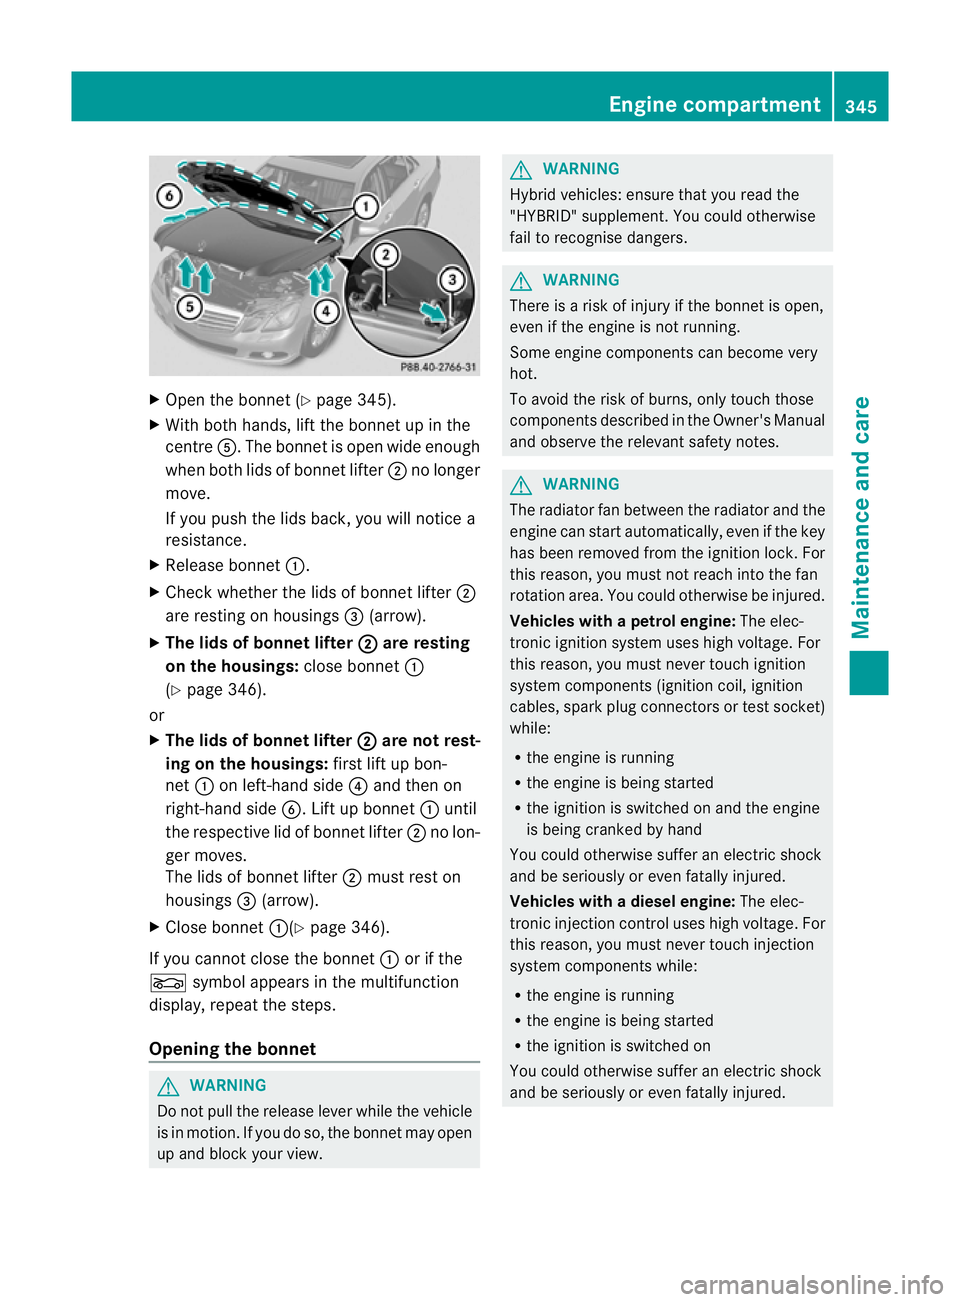
Open the bonnet (Y page 345).
X With both hands, lift the bonnet up in the
centre A.The bonnet is open wide enough
when both lids of bonnet lifter ;no longer
move.
If you push the lids back, you will notice a
resistance.
X Release bonnet :.
X Check whether the lids of bonnet lifter ;
are resting on housings =(arrow).
X The lids of bonnet lifter ; are resting
on the housings: close bonnet:
(Y page 346).
or
X The lids of bonnet lifter ; are not rest-
ing on the housings: first lift up bon-
net :on left-hand side ?and then on
right-hand side B. Lift up bonnet :until
the respective lid of bonnet lifter ;no lon-
ger moves.
The lids of bonnet lifter ;must rest on
housings =(arrow).
X Close bonnet :(Ypage 346).
If you cannot close the bonnet :or if the
L symbol appears in the multifunction
display, repeat the steps.
Opening the bonnet G
WARNING
Do not pull the release lever while the vehicle
is in motion. If you do so, the bonnet may open
up and block your view. G
WARNING
Hybrid vehicles: ensure that you read the
"HYBRID" supplement. You could otherwise
fail to recognise dangers. G
WARNING
There is a risk of injury if the bonnet is open,
even if the engine is not running.
Some engine components can become very
hot.
To avoid the risk of burns, only touch those
components described in the Owner's Manual
and observe the relevant safety notes. G
WARNING
The radiator fan between the radiator and the
engine can start automatically, even if the key
has been removed from the ignition lock. For
this reason, you must not reach into the fan
rotation area. You could otherwise be injured.
Vehicles with apetrol engine: The elec-
tronic ignitio nsystem uses high voltage. For
this reason, you mus tnever touch ignition
system components (ignition coil, ignition
cables, spark plug connectors or test socket)
while:
R the engine is running
R the engine is being started
R the ignition is switched on and the engine
is being cranked by hand
You could otherwise suffer an electric shock
and be seriously or even fatally injured.
Vehicles with adiesel engine: The elec-
tronic injection control uses high voltage. For
this reason, you must never touch injection
system components while:
R the engine is running
R the engine is being started
R the ignition is switched on
You could otherwise suffer an electric shock
and be seriously or even fatally injured. Engine compartment
345Maintenance and care Z
Page 349 of 457
G
WARNING
The windscreen wipers and wiper linkage
could be set in motion.
When the bonnet is open, you or others could
be injured by the wiper linkage.
Make sure that the windscreen wipers are
switched off. Remove the key or make sure
that no ignitio nposition has been selected
with KEYLESS-GO. All indicator lamps must be
off in the instrument panel.
! Make sure that the windscreen wipers are
not folded away from the windscreen. Oth-
erwise, you could damage the windscreen
wipers or the bonnet. X
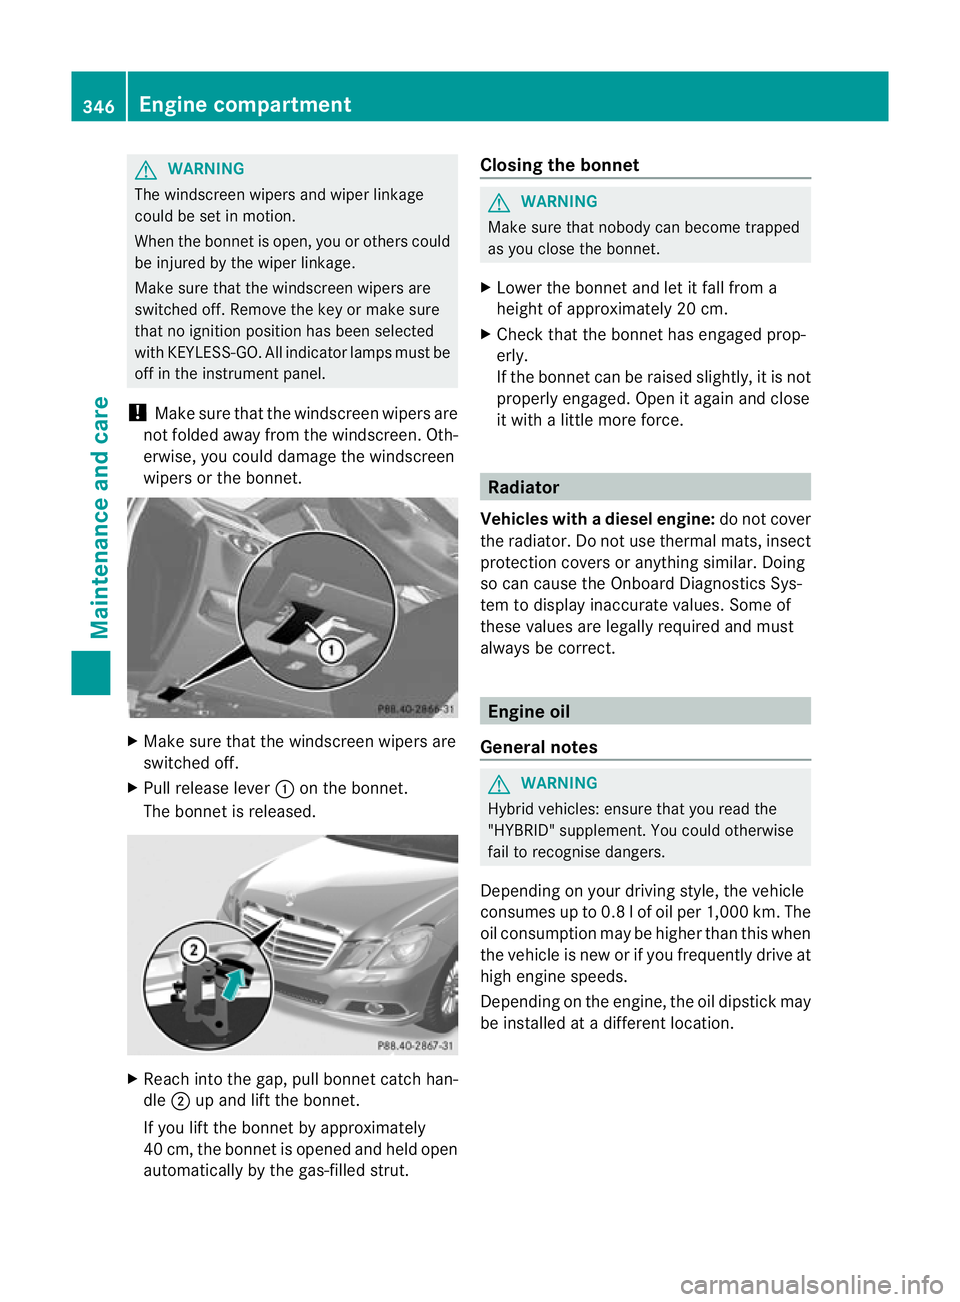
Make sure that the windscreen wipers are
switched off.
X Pull release lever :on the bonnet.
The bonnet is released. X
Reach into the gap, pull bonnet catch han-
dle ;up and lift the bonnet.
If you lift the bonnet by approximately
40 cm, the bonnet is opened and held open
automatically by the gas-filled strut. Closing the bonnet G
WARNING
Make sure that nobody can become trapped
as you close the bonnet.
X Lower the bonnet and let it fall from a
height of approximately 20 cm.
X Check that the bonnet has engaged prop-
erly.
If the bonnet can be raised slightly, it is not
properly engaged. Open it again and close
it with a little more force. Radiator
Vehicles with adiesel engine: do not cover
the radiator .Do not use thermal mats, insect
protection covers or anything similar. Doing
so can cause the Onboard Diagnostics Sys-
tem to display inaccurate values. Some of
these values are legally required and must
always be correct. Engine oil
General notes G
WARNING
Hybrid vehicles: ensure that you read the
"HYBRID" supplement. You could otherwise
fail to recognise dangers.
Depending on your driving style, the vehicle
consumes up to 0.8 l of oil per 1,000 km. The
oil consumption may be higher than this when
the vehicle is new or if you frequently drive at
high engine speeds.
Depending on the engine, the oil dipstick may
be installed at a different location. 346
Engine compartmentMaintenance and care
Page 350 of 457
When checking the oil level:
R
park the vehicle on a level surface.
R the engine should be switched off for
approximately five minutes if the engine is
at normal operating temperature.
R if the engine is not at normal operating
temperature, e.g. if the engine was only
started briefly: wait about 30 minutes
before carrying out the measurement.
Checking the oil level using the oil dip-
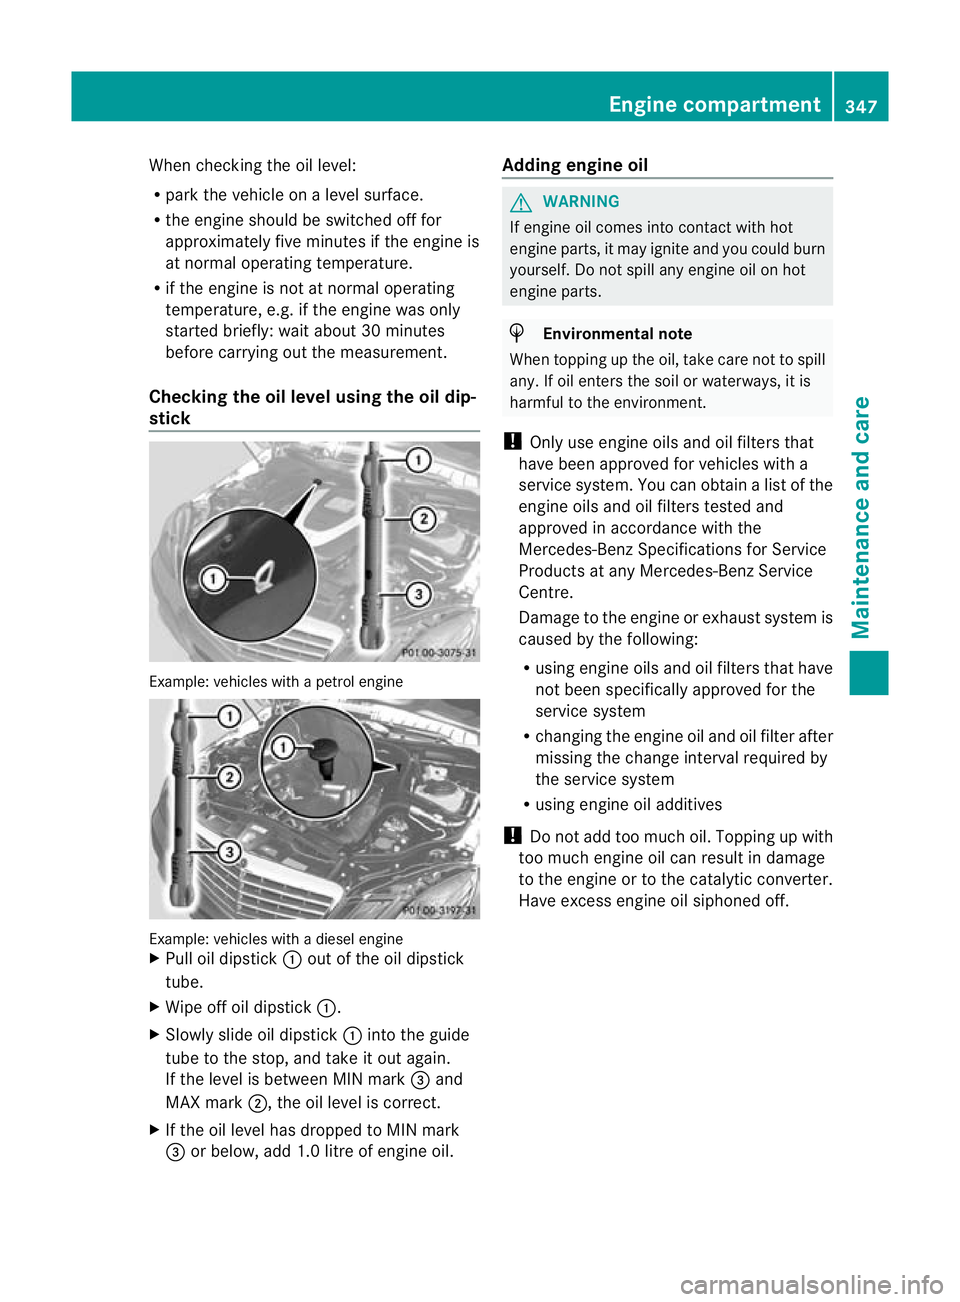
stick Example: vehicles with a petrol engine
Example: vehicles with a diesel engine
X
Pull oil dipstick :out of the oil dipstick
tube.
X Wipe off oil dipstick :.
X Slowly slide oil dipstick :into the guide
tube to the stop, and take it out again.
If the level is between MIN mark =and
MAX mark ;, the oil level is correct.
X If the oil level has dropped to MIN mark
= or below, add 1.0 litre of engine oil. Adding engine oil G
WARNING
If engine oil comes into contact with hot
engine parts, it may ignite and you could burn
yourself. Do not spill any engine oil on hot
engine parts. H
Environmental note
When topping up the oil, take care not to spill
any. If oil enters the soil or waterways, it is
harmful to the environment.
! Only use engine oils and oil filters that
have been approved for vehicles with a
service system. You can obtain a list of the
engine oils and oil filters tested and
approved in accordance with the
Mercedes-Benz Specifications for Service
Products at any Mercedes-Benz Service
Centre.
Damage to the engine or exhaust system is
caused by the following:
R using engine oils and oil filters that have
not been specifically approved for the
service system
R changing the engine oil and oil filter after
missing the change interval required by
the service system
R using engine oil additives
! Do not add too much oil. Topping up with
too much engine oil can result in damage
to the engine or to the catalytic converter.
Have excess engine oil siphoned off. Engine compartment
347Maintenance and care Z
Page 351 of 457
Example: engine oil fille
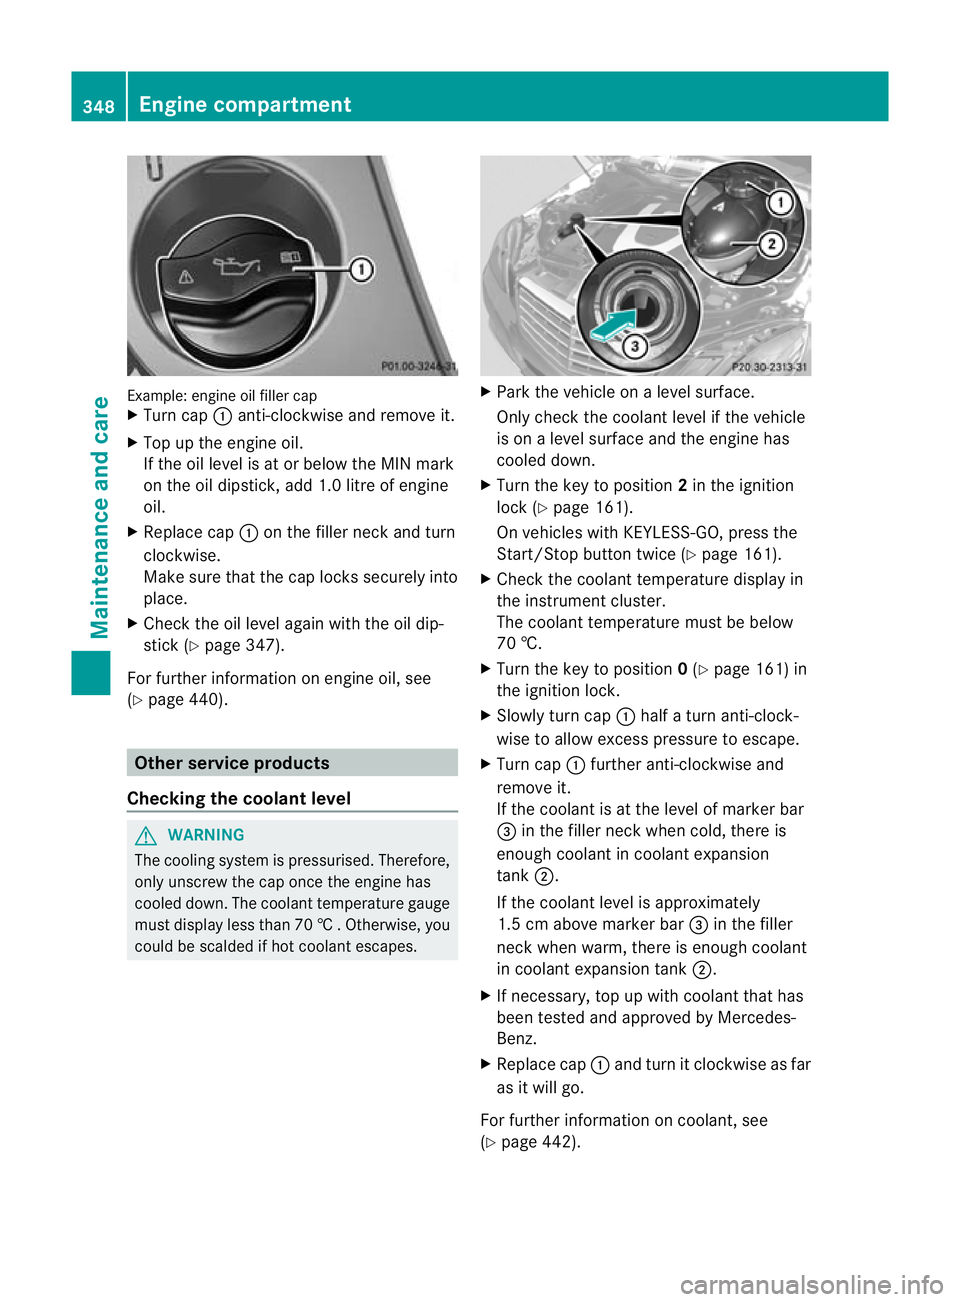
rcap
X Turn cap :anti-clockwise and remove it.
X Top up the engine oil.
If the oil level is at or below the MIN mark
on the oil dipstick, add 1. 0litre of engine
oil.
X Replace cap :on the filler neck and turn
clockwise.
Make sure that the cap locks securely into
place.
X Check the oil level again with the oil dip-
stick (Y page 347).
For further information on engine oil, see
(Y page 440). Other service products
Checking the coolant level G
WARNING
The cooling system is pressurised. Therefore,
only unscrew the cap once the engine has
cooled down. The coolan ttemperature gauge
must display less than 70 †.Otherwise, you
could be scalded if hot coolant escapes. X
Park the vehicle on a level surface.
Only check the coolant level if the vehicle
is on a level surface and the engine has
cooled down.
X Turn the key to position 2in the ignition
lock (Y page 161).
On vehicles with KEYLESS-GO, press the
Start/Stop button twice (Y page 161).
X Check the coolant temperature display in
the instrument cluster.
The coolant temperature must be below
70 †.
X Turn the key to position 0(Y page 161) in
the ignition lock.
X Slowly tur ncap : half a turn anti-clock-
wise to allow excess pressure to escape.
X Turn cap :further anti-clockwise and
remove it.
If the coolant is at the level of marker bar
= in the fille rneck when cold, there is
enough coolant in coolant expansion
tank ;.
If the coolant level is approximately
1.5 cm above marker bar =in the filler
neckw hen warm, there is enough coolant
in coolant expansion tank ;.
X If necessary, top up with coolant that has
been tested and approved by Mercedes-
Benz.
X Replace cap :and turn it clockwise as far
as it will go.
For further information on coolant, see
(Y page 442). 348
Engine compartmentMaintenance and care
Page 353 of 457
Information abou
tService Resetting the ASSYST PLUS service inter-
val display
!
If the ASSYST PLUS service interval dis-
play has been inadvertently reset, this set-
ting can be corrected at a qualified special-
ist workshop.
Have service work carried out as described
in the Service Booklet. This may otherwise
lead to increased wear and damage to the
major assemblies or the vehicle.
Aq ualified specialist workshop, e.g. a
Mercedes-Ben zService Centre, will reset the
ASSYST PLUS service interval display after
the service work has been carried out. You
can also obtain further information on main-
tenance work, for example.
Special service requirements
Arduous operating conditions or increased
loads on the vehicle will require some service
work to be performed more often than for a
vehicle in normal use. Such arduous condi-
tions include regular city driving with frequent
intermediate stops and use in mountainous
terrain or on poor road surfaces.
For example, if the vehicle is used under ardu-
ous operating conditions, have air filters,
engine oil and oil filters changed frequently
and chec kthe wheels often.F urther informa-
tion can be obtained at a qualified specialist
workshop, e.g. a Mercedes-Ben zService
Centre.
Driving abroad
An extensive Mercedes-Benz Service network
is also available in other countries. The
Service Hotline's curren ttelephone numbers
for use when you are abroad are to be found
in the "Mercedes-Benz Service24h" section
of the Service Booklet. AdBlue
®
service indicator
i For BlueTEC vehicles only. To function properly, BlueTEC exhaust gas
aftertreatment must be operated with the
reducing agent AdBlue
®
. AdBlue ®
is topped
up as part of the service. Under normal oper-
ating conditions, a full tank of AdBlue ®
should
last until the nexts ervice due date.
Depending on how and where the vehicle is
used, there may be an increase in the
AdBlue ®
consumption, resulting in the next
service due date being brought forward.
Certain display messages show that
AdBlue ®
must be topped up, e.g.
Refill AdBlue at workshop See Own‐ er's Manual
Refill AdBlue at workshop No start
in .. km
Aw
arning tone also sounds.
You can no longer start the engine when the
AdBlue ®
supply has been used up
(Y page 281).
! Have the AdBlue ®
tank topped up at a
qualified specialist workshop only. The
vehicle may otherwise be damaged or
soiled.
Before taking a trip with your vehicle outside
Europe, have the AdBlue ®
supply checked at
a qualified specialist workshop. If necessary,
have AdBlue ®
topped up. Before a longer stay
outside of Europe, consult a qualified special-
ist workshop.
Observe the notes on AdBlue ®
(Y page 440).
You can obtain further informatio nabout
BlueTEC exhaust gas aftertreatment and
AdBlue ®
from any Mercedes-Benz Service
Centre. Care
General notes
H
Environmental note
Dispose of empty packaging and cleaning
cloths in an environmentally responsible man-
ner. 350
CareMaintenance and care