2012 MERCEDES-BENZ E-CLASS ESTATE manual transmission
[x] Cancel search: manual transmissionPage 210 of 457
On vehicles with automatic transmission, you
can also shift into position
P.This deactivates
the HOLD function. RACE START
Important safety notes G
WARNING
RACE START is only available when SPORT
handling mode is activated. SPORT handling
mode will only be able to stabilise the vehicle
to a limited degree if the vehicle starts to skid
or a wheel starts to spin. The vehicle is there-
fore harder to control at the threshold range.
You could lose control of the vehicle and
cause an accident.
RACE START should only be used on closed
off circuits. Always adapt your driving style to
suit the prevailing road and weather condi-
tions.
i RACE START is only available in AMG vehi-
cles.
RACE START enables optimum acceleration
from a standing start. The precondition for
this is a suitable high-grip road surface.
Activation conditions You can activate RACE START if:
R
the doors are closed.
R the engine is running and it has reached an
operating temperature of approximately
80 †. This is the case when the engine oil
temperature in the multifunction display
stops flashing.
R SPORT handling mode is activated
(Y page 74).
R the steering wheel is in the straight-ahead
position.
R the vehicle is stationary and the brake
pedal is depressed (left foot).
R the transmission is in position D.Activating RACE START X
Depress the brake pedal with your left foot
and keep it depressed.
X Turn the drive program selector clockwise
(Y page 174) until the RSlamp lights up.
The RACE START Confirm: Paddle UP Cancel: Paddle DOWN message appears
in the multifunction display.
i If the activation conditions are no longer
fulfilled, RACE START is cancelled. The
RACE START cancelled message appears
in the multifunction display.
X To cancel: pull the left steering wheel shift
paddle (Y page 175).
or
X To confirm:p ull the right steering wheel
shif tpaddle (Y page 175).
The RACE START available Depress accelerator message appears in the mul-
tifunctio ndisplay.
i If you do not depress the accelerator
pedal fully within two seconds, RACE
START is cancelled. The RACE START not
possible See Owner's Manual message
appears in the multifunction display.
X Fully depress the accelerator pedal.
The engine speed rises to approximately
3500 rpm.
The RACE START Release brake to start message appears in the multifunc-
tion display.
i If you do not release the brake pedal
within five seconds, RACE START is cancel-
led. The RACE START cancelled message
appears in the multifunction display.
X Take your foot off the brake, but keep the
accelerator pedal depressed.
The vehicle pulls away at maximum accel-
eration.
The RACE START active message appears
in the multifunction display.
RACE START is deactivated when the vehicle
reaches a speed of approximately 50 km/h. Driving systems
207Driving and parking Z
Page 216 of 457
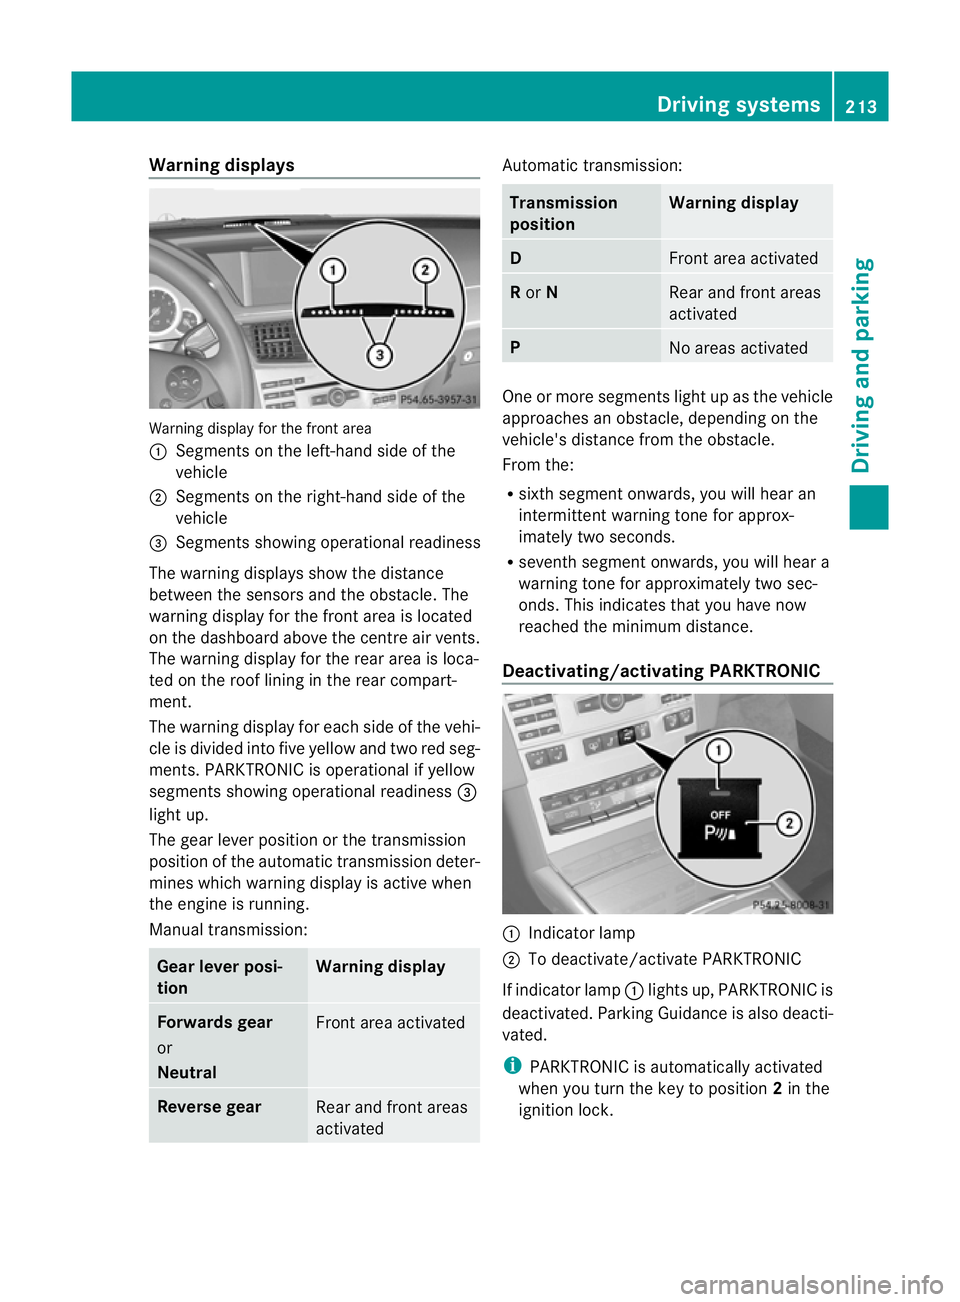
Warning displays
Warning display for the front area
:
Segments on the left-hand side of the
vehicle
; Segments on the right-hand side of the
vehicle
= Segments showing operational readiness
The warning displays show the distance
between the sensors and the obstacle. The
warning display for the front area is located
on the dashboard above the centre airv ents.
The warning display for the rear area is loca-
ted on the roof lining in the rear compart-
ment.
The warning display for each side of the vehi-
cle is divided into five yellow and two red seg-
ments. PARKTRONIC is operational if yellow
segments showing operational readiness =
light up.
The gear lever position or the transmission
position of the automatic transmission deter-
mines which warning display is active when
the engine is running.
Manual transmission: Gear lever posi-
tion Warning display
Forwards gear
or
Neutral
Front area activated
Reverse gear
Rear and front areas
activated Automatic transmission:
Transmission
position Warning display
D
Front area activated
R
or N Rear and front areas
activated
P
No areas activated
One or more segments light up as the vehicle
approaches an obstacle, depending on the
vehicle's distance from the obstacle.
From the:
R
sixth segmen tonwards, you will hea ran
intermittent warning ton efor approx-
imately two seconds.
R seventh segment onwards, you will hear a
warning tone for approximately two sec-
onds. This indicates that you have now
reached the minimum distance.
Deactivating/activating PARKTRONIC :
Indicator lamp
; To deactivate/activate PARKTRONIC
If indicator lamp :lights up, PARKTRONIC is
deactivated. Parking Guidance is also deacti-
vated.
i PARKTRONIC is automatically activated
when you turn the key to position 2in the
ignition lock. Driving systems
213Driving and parking Z
Page 220 of 457
side turn signal switched on until you have
engaged reverse gear.
Parking Guidance will only detect parking
spaces:
R that are parallel to the direction of travel
R that are at least 1.5 m wide
R that are at least 1.3 m longer than your
vehicle
Ap arking space is displayed while you are
driving past it and until you are approximately
15 m away from it.
Parking Important safety notes
G
WARNING
PARKTRONIC and Parking Guidance are
merely parking aids and may no tdetec tall
obstacles. They do not relieve you of the
responsibility of paying attention.
You are always responsible for safety and
must continue to pay attention to your imme-
diate surroundings when parking and
manoeuvring. You could otherwise endanger
yourself and others.
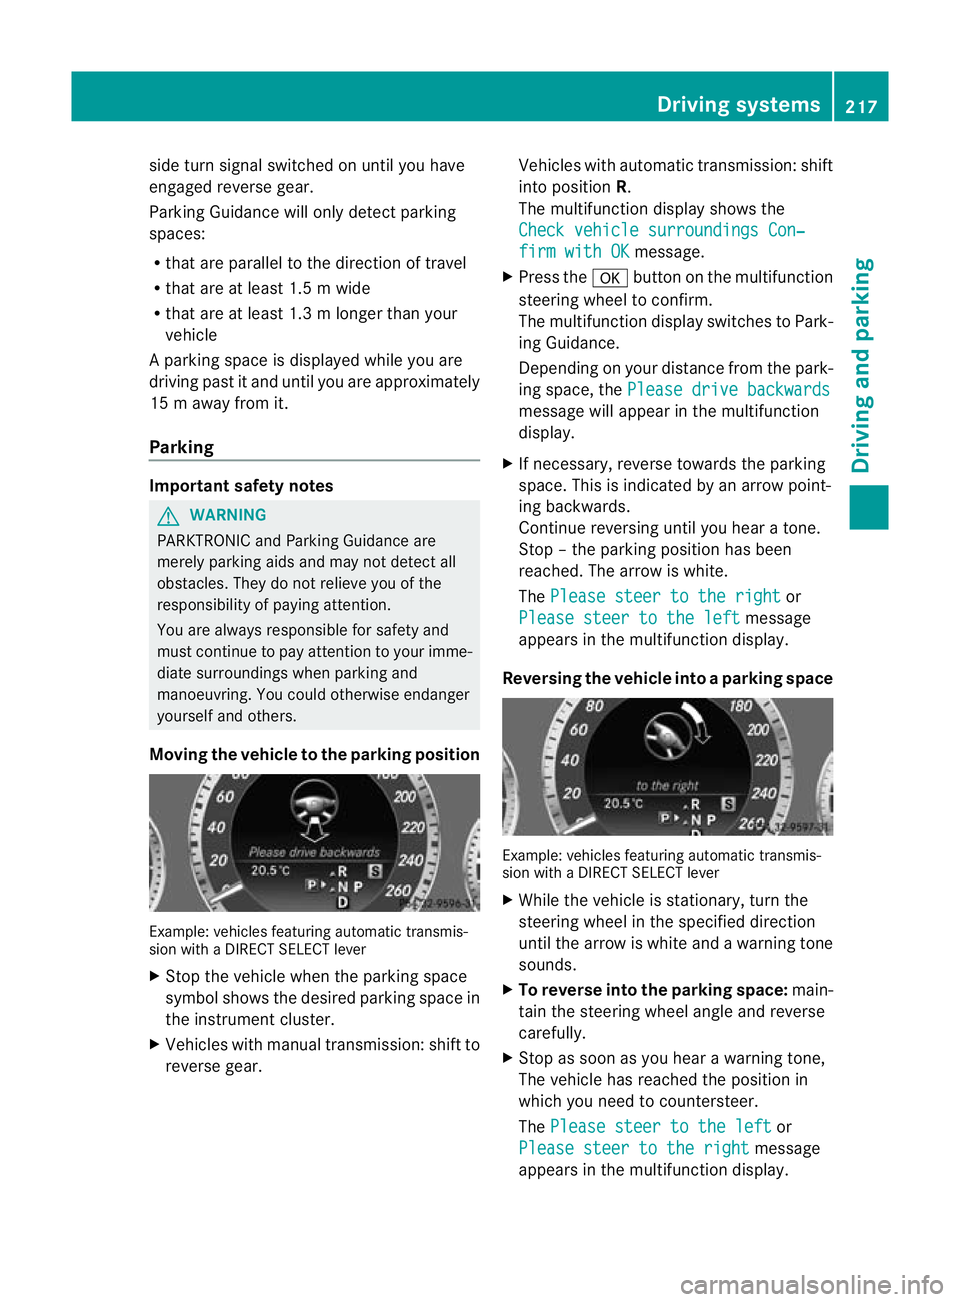
Moving the vehicle to th eparking position Example: vehicles featuring automatic transmis-
sion with a DIRECT SELECT lever
X Stop the vehicle whe nthe parking space
symbol shows the desired parking space in
the instrument cluster.
X Vehicles with manual transmission: shift to
reverse gear. Vehicles with automatic transmission: shift
into position
R.
The multifunction display shows the
Check vehicle surroundings Con‐ firm with OK message.
X Press the abutton on the multifunction
steering wheel to confirm.
The multifunction display switches to Park-
ing Guidance.
Depending on your distance from the park-
ing space, the Please drive backwards message will appearint
he multifunction
display.
X If necessary, reverse towards the parking
space. This is indicated by an arrow point-
ing backwards.
Continue reversing until you hear a tone.
Stop –the parking position has been
reached. The arrow is white.
The Please steer to the right or
Please steer to the left message
appears in the multifunction display.
Reversing the vehicle into aparking space Example: vehicles featuring automatic transmis-
sion with a DIRECT SELECT lever
X
While the vehicle is stationary, turn the
steering wheel in the specified direction
until the arrow is white and a warning tone
sounds.
X To reverse into the parking space: main-
tain the steering wheel angl eand reverse
carefully.
X Stop as soo nas you hear a warning tone,
The vehicle has reached the position in
which you need to countersteer.
The Please steer to the left or
Please steer to the right message
appears in the multifunction display. Driving systems
217Driving and parking Z
Page 261 of 457
In the
Serv. menu, you have the following
options:
R call up display messages in the message
memory (Y page 268)
R restart the tyre pressure loss warning sys-
tem (Y page 385)
R check the tyre pressure electronically
(Y page 386)
R call up when a service is due
(Y page 349) Settings menu
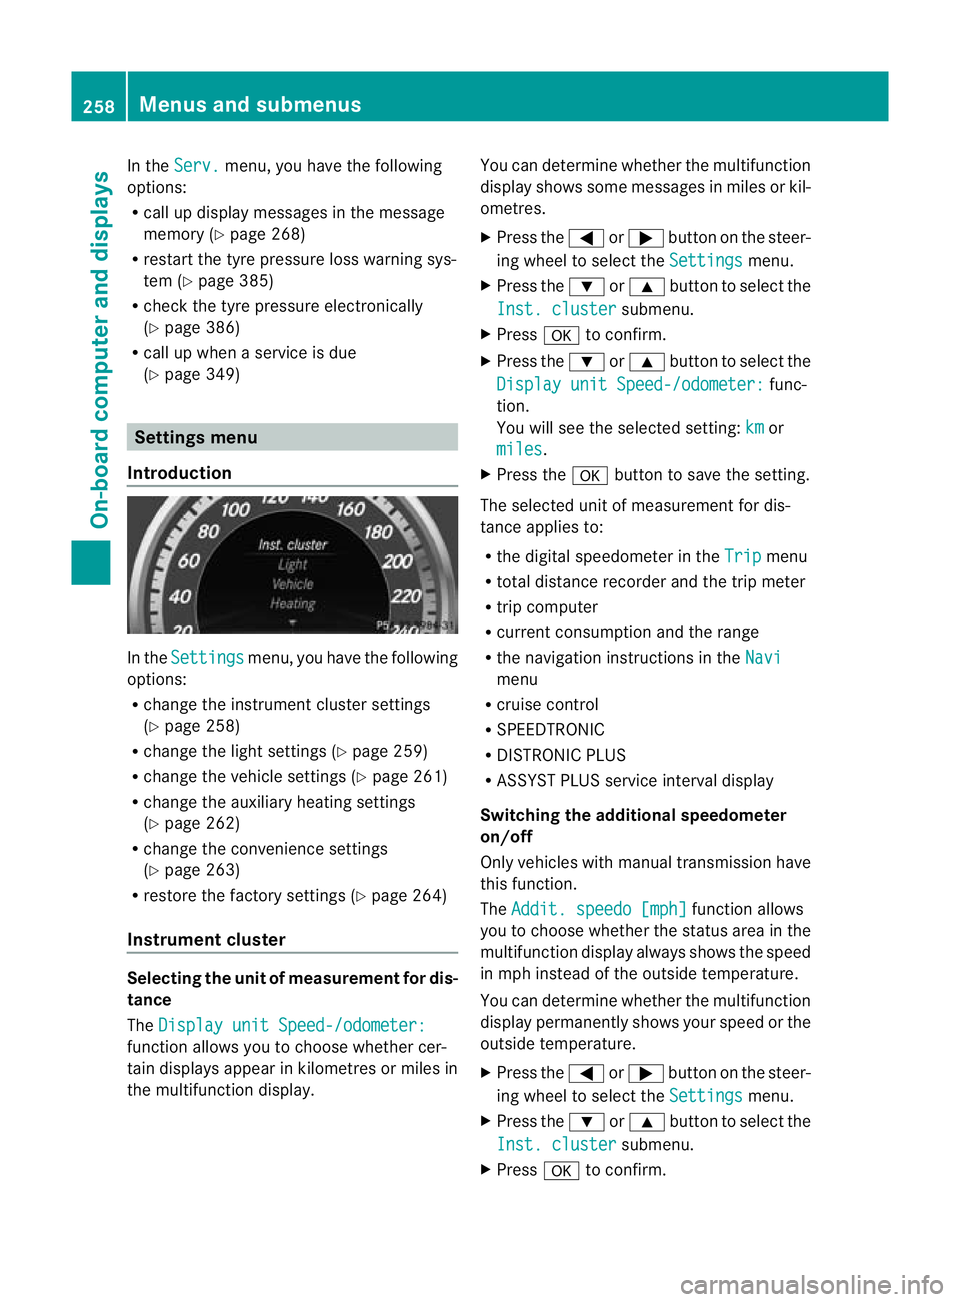
Introduction In the
Settings menu, you have the following
options:
R change the instrument cluster settings
(Y page 258)
R change the lights ettings (Ypage 259)
R change the vehicle settings (Y page 261)
R change the auxiliary heating settings
(Y page 262)
R change the convenience settings
(Y page 263)
R restore the factory settings (Y page 264)
Instrument cluster Selecting the unit of measurement for dis-
tance
The
Display unit Speed-/odometer: function allows you to choose whether cer-
tain displays appear in kilometres or miles in
the multifunction display. You can determine whether the multifunction
display shows some messages in miles or kil-
ometres.
X
Press the =or; button on the steer-
ing wheel to select the Settings menu.
X Press the :or9 button to select the
Inst. cluster submenu.
X Press ato confirm.
X Press the :or9 button to select the
Display unit Speed-/odometer: func-
tion.
You will see the selected setting: km or
miles .
X Press the abutton to save the setting.
The selected unit of measuremen tfor dis-
tance applies to:
R the digital speedometer in the Trip menu
R total distance recorder and the trip meter
R trip computer
R current consumption and the range
R the navigation instructions in the Navi menu
R cruise control
R SPEEDTRONIC
R DISTRONIC PLUS
R ASSYST PLUS service interval display
Switching the additional speedometer
on/off
Only vehicles with manual transmission have
this function.
The Addit. speedo [mph] function allows
you to choose whether the status area in the
multifunction display always shows the speed
in mph instead of the outside temperature.
You can determine whether the multifunction
display permanently shows your speed or the
outside temperature.
X Press the =or; button on the steer-
ing wheel to select the Settings menu.
X Press the :or9 button to select the
Inst. cluster submenu.
X Press ato confirm. 258
Menus and submenusOn-board computer and displays
Page 274 of 457
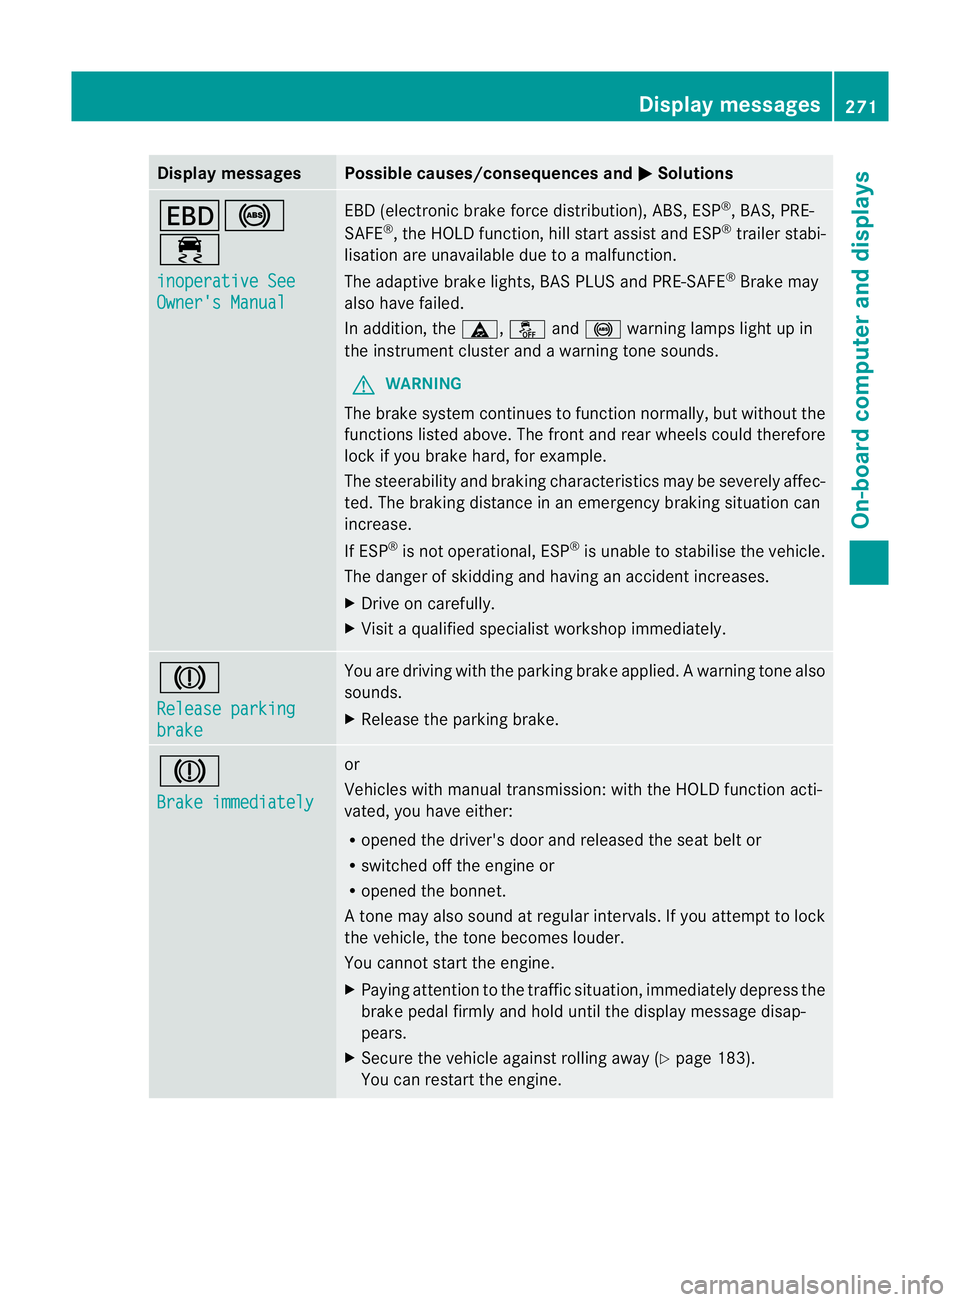
Display messages Possible causes/consequences and
M Solutions
T!
÷
inoperative See
Owner's Manual EBD (electronic brake force distribution), ABS, ESP
®
, BAS, PRE-
SAFE ®
, the HOLD function ,hill start assist and ESP ®
trailer stabi-
lisatio nare unavailable due to a malfunction.
The adaptive brake lights, BAS PLUS and PRE-SAFE ®
Brake may
also have failed.
In addition, the ä,åand! warning lamps light up in
the instrument cluster and a warning tone sounds.
G WARNING
The brake system continues to function normally, but withou tthe
functions listed above. The front and rear wheels could therefore
lock if you brake hard, for example.
The steerability and braking characteristics may be severely affec-
ted. The braking distance in an emergency braking situation can
increase.
If ESP ®
is not operational, ESP ®
is unable to stabilise the vehicle.
The danger of skidding and having an accident increases.
X Drive on carefully.
X Visit a qualified specialist workshop immediately. J
Release parking
brake You are driving with the parking brake applied.
Awarning tone also
sounds.
X Release the parking brake. J
Brake immediately or
Vehicles with manual transmission
:with the HOL Dfunction acti-
vated, you have either:
R opened the driver's door and released the seat belt or
R switched off the engine or
R opened the bonnet.
At one may also sound at regular intervals. If you attempt to lock
the vehicle, the tone becomes louder.
You cannot start the engine.
X Paying attention to the traffic situation, immediately depress the
brake pedal firmly and hold until the display message disap-
pears.
X Secure the vehicle against rolling away (Y page 183).
You can restart the engine. Display messages
271On-board computer and displays Z
Page 373 of 457
Jump-starting
G
WARNING
Hybrid vehicles: it is imperative that you read the "HYBRID" supplement. Otherwise, you may not
recognise dangers. G
WARNING
There is a risk of acid burns when jump-starting a vehicle due to the gases which escape from
the battery. Do not lean over the battery while the engine is being jump-started. G
WARNING
Gases escaping from the battery during jump-starting may cause minor explosions. Avoid cre-
ating sparks. Keep naked flames away from the battery, and do not smoke.
Comply with the important safety precautions when handling batteries. You will find these under
"Battery (vehicle) -important safety notes" in the index. G
WARNING
Non-combusted fuel can collect in the exhaust system and ignite. There is a risk of fire. Avoid
repeated and lengthy starting attempts.
! Vehicles with apetrol engine: avoid repeated and lengthy starting attempts. Otherwise,
the non-combusted fuel may damage the catalytic converter.
Do not use a rapid charging device to start th evehicle. If your vehicle's battery is discharged,
the engine can be jump-started from another vehicle or from a second battery using jump
leads. Observe the following points:
R The battery is not accessible in all vehicles. If the other vehicle's batter yis not accessible,
jump-start the vehicle using a second battery or ajump-starting device.
R vehicles with apetrol engine: only jump-star tthe vehicle when the engine and exhaust
system are cold.
R do not start the engine if the battery is frozen. Let the battery thaw first.
R jump-starting may only be performed from batteries with a nominal voltage of 12 V.
R only use jump leads that have a sufficient cross-section and insulated terminal clamps.
R if the battery is fully discharged, leave the battery that is being used to jump-start connected
for a few minutes before attempting to start. This charges the empty battery a little.
R make sure that the two vehicles do not touch.
Make sure that:
R The jump leads are not damaged.
R Non-insulated parts of the terminal clamps do not come into contact with other metal parts
while the jump leads are connected to the battery.
R the jump leads cannot come into contact with parts such as the V-belt pulley or the fan.
These parts move when the engine is started and while it is running.
X Firmly depress the parking brake.
X Manual transmission: engage neutral.370
Jump-startingBreakdown assistance
Page 376 of 457
The battery must be connected and charged.
Otherwise, you:
R
cannot turn the key in the ignition lock to
position 2
R cannot shift the transmission to position
N on vehicles with automatic transmission
Vehicles with automatic transmission:
release the selector lever lock manually to
move it out of position P(Y page 179).
i Deactivate the automatic locking feature
(Y page 90). You could otherwise be locked
out when pushing or towing the vehicle.
Deactivate tow-away protection
(Y page 79) before the vehicle is towed. Fitting/removing the towing eye
Fitting the towing eye G
WARNING
The exhaust tail pipe may be hot. You could
burn yourself if you touch the tail pipe. Be
particularly careful when removing the rear
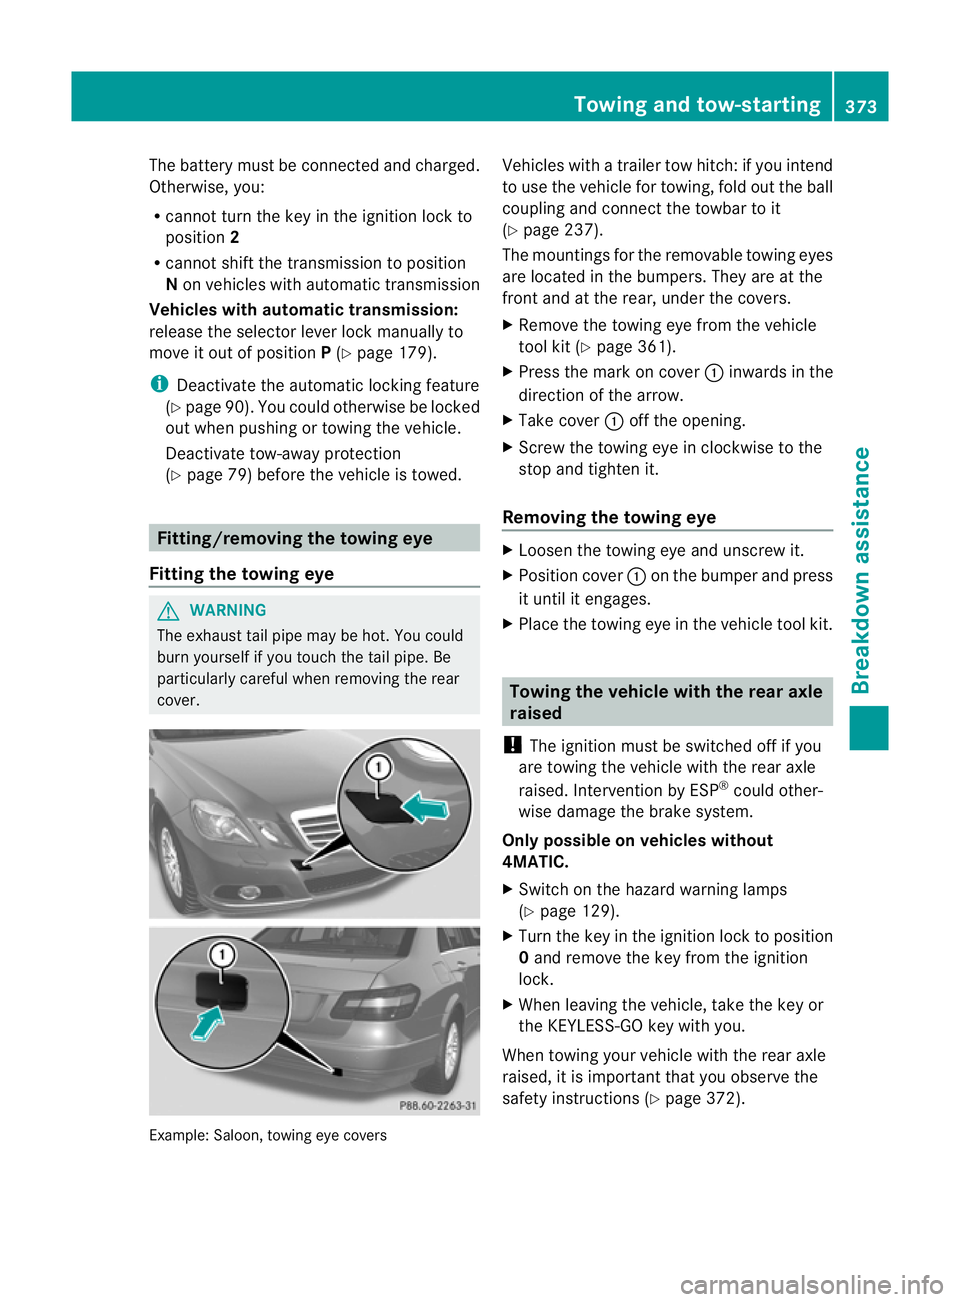
cover. Example: Saloon, towing eye covers Vehicles with a trailer tow hitch: if you intend
to use the vehicle for towing, fold out the ball
coupling and connect the towbar to it
(Y
page 237).
The mountings for the removable towing eyes
are located in the bumpers. They are at the
front and at the rear, under the covers.
X Remove the towing eye from the vehicle
tool kit (Y page 361).
X Press the mark on cover :inwards in the
direction of the arrow.
X Take cover :off the opening.
X Screw the towing eye in clockwise to the
stop and tighten it.
Removing the towing eye X
Loosen the towing eye and unscrew it.
X Position cover :on the bumper and press
it until it engages.
X Place the towing eye in the vehicle tool kit. Towing the vehicle with the rear axle
raised
! The ignition must be switched off if you
are towing the vehicle with the rear axle
raised. Intervention by ESP ®
could other-
wise damage the brake system.
Only possible on vehicles without
4MATIC.
X Switch on the hazard warning lamps
(Y page 129).
X Turn the key in the ignition lock to position
0and remove the key from the ignition
lock.
X When leaving the vehicle, take the key or
the KEYLESS-GO key with you.
When towing your vehicle with the rear axle
raised, it is importan tthat you observe the
safety instructions (Y page 372). Towing and tow-starting
373Breakdown assistance Z
Page 377 of 457
Towing the vehicle with both axles on
the ground
G
WARNING
The powe rassistance for the steering and the
brake force booster do not work when the
engine is not running. You will then need
much more effort to brake and steer the vehi-
cle. Adapt your style of driving accordingly.
It is important that you observe the safety
instructions when towing away your vehicle
(Y page 372).
The automatic transmission automatically
shifts to position Pwhen you open the driver's
or front-passenger door or when you remove
the key from the ignition lock. In order to
ensure that the automatic transmission stays
in position Nwhen towing the vehicle, you
must observe the following points:
X Make sure that the vehicle is stationary and
that the key is in position 0in the ignition
lock.
X Turn the key to position 2in the ignition
lock.
On vehicles with KEYLESS-GO, use the key
instead of the Start/Stop button
(Y page 161).
X Depress and hold the brake pedal.
X Shift the automatic transmission to posi-
tion N.
X Vehicles with manual transmission:
depress the clutch pedal.
X Engage neutral.
X Release the brake pedal.
X Release the parking brake.
X Switch on the hazard warning lamps
(Y page 129).
X Leave the key in position 2in the ignition
lock.
i When towing with the hazard warning
lamps switched on, use the combination
switch as usual to signal achange of direc-
tion. In this case, only the turn signals for
the desired direction flash. When the com- bination switch is reset, the hazard warning
lamps start flashing again. Transporting the vehicle
! Only lash the vehicle down by the wheels
or wheel rims, not by parts of the vehicle
such as axle or steering components. Oth-
erwise, the vehicle could be damaged.
The towing eyes or trailer tow hitch can be
used to pull the vehicle onto a trailer or trans-
porter if you wish to transport it.
X Vehicles with manual transmission:
shift to neutral.
X Vehicles with automatic transmission:
turn the key to position 2in the ignition
lock.
X Shift the automatic transmission to posi-
tion N.
As soon as the vehicle is loaded:
X Prevent the vehicle from rolling away by
applying the parking brake.
X Vehicles with manual transmission:
engage first or reverse gear.
X Vehicles with automatic transmission:
shift the automatic transmission to posi-
tion P.
X Turn the key in the ignition lock to position
0and remove the key from the ignition
lock.
X Secure the vehicle. Notes for 4MATIC vehicles
! Vehicles with 4MATIC must not be towed
with the front or rear axle raised; otherwise,
the transmission may be damaged.
If the vehicle has transmission damage or
damage to the front or rear axle, have it trans-
ported on a transporter or trailer.
In the event of damage to the electrical
system 374
Towing and tow-startingBreakdown assistance