2012 MERCEDES-BENZ E-CLASS ESTATE key battery
[x] Cancel search: key batteryPage 186 of 457
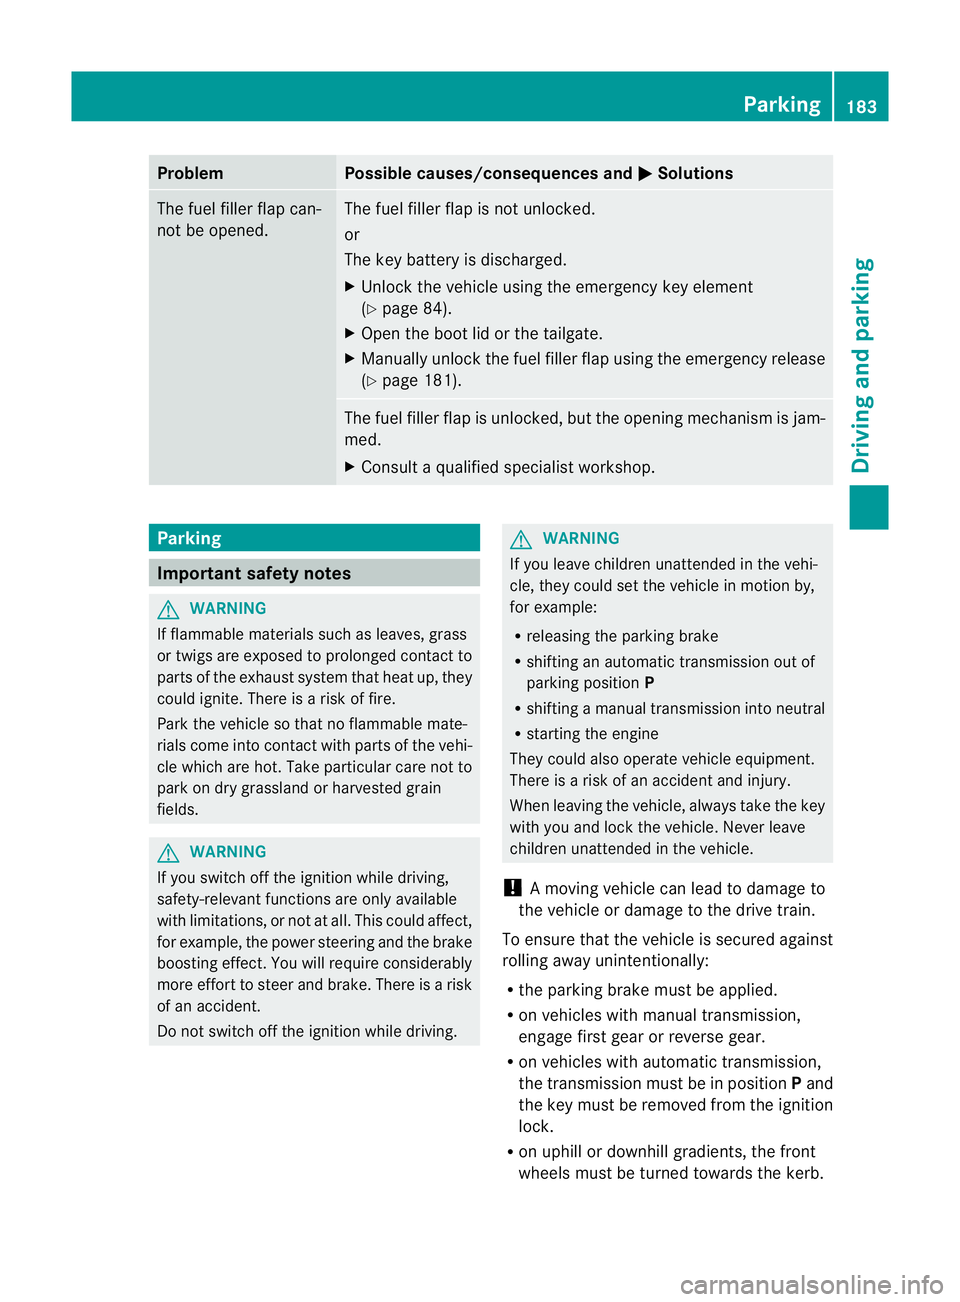
Problem Possible causes/consequences and
M Solutions
The fuel filler flap can-
not be opened. The fuel filler flap is not unlocked.
or
The key battery is discharged.
X
Unlock the vehicle using the emergency key element
(Y page 84).
X Open the boot lid or the tailgate.
X Manually unlock the fuel filler flap using the emergency release
(Y page 181). The fuel filler flap is unlocked, but the opening mechanism is jam-
med.
X
Consult a qualified specialist workshop. Parking
Important safety notes
G
WARNING
If flammable materials such as leaves, grass
or twigs are exposed to prolonged contact to
parts of the exhaust system that heat up, they
could ignite. There is a risk of fire.
Park the vehicle so that no flammable mate-
rials come into contact with parts of the vehi-
cle which are hot. Take particular care not to
park on dry grassland or harvested grain
fields. G
WARNING
If you switch off the ignition while driving,
safety-relevant functions are only available
with limitations, or not at all. This could affect,
for example, the power steering and the brake
boosting effect.Y ou will require considerably
more effort to steer and brake. There is a risk
of an accident.
Do not switch off the ignition while driving. G
WARNING
If you leave children unattended in the vehi-
cle, they could set the vehicle in motion by,
for example:
R releasing the parking brake
R shifting an automatic transmission out of
parking position P
R shifting a manual transmission into neutral
R starting the engine
They could also operate vehicle equipment.
There is a risk of an accident and injury.
When leaving the vehicle, always take the key
with you and lock the vehicle. Never leave
children unattended in the vehicle.
! Am oving vehicle can lead to damage to
the vehicle or damage to the drive train.
To ensure that the vehicle is secured against
rolling away unintentionally:
R the parking brake must be applied.
R on vehicles with manual transmission,
engage first gear or reverse gear.
R on vehicles with automatic transmission,
the transmission must be in position Pand
the key must be removed from the ignition
lock.
R on uphill or downhill gradients, the front
wheels must be turned towards the kerb. Parking
183Driving and parking Z
Page 188 of 457
They could also operate vehicle equipment.
There is a risk of an accident and injury.
When leaving the vehicle, always take the key
with you and lock the vehicle. Never leave
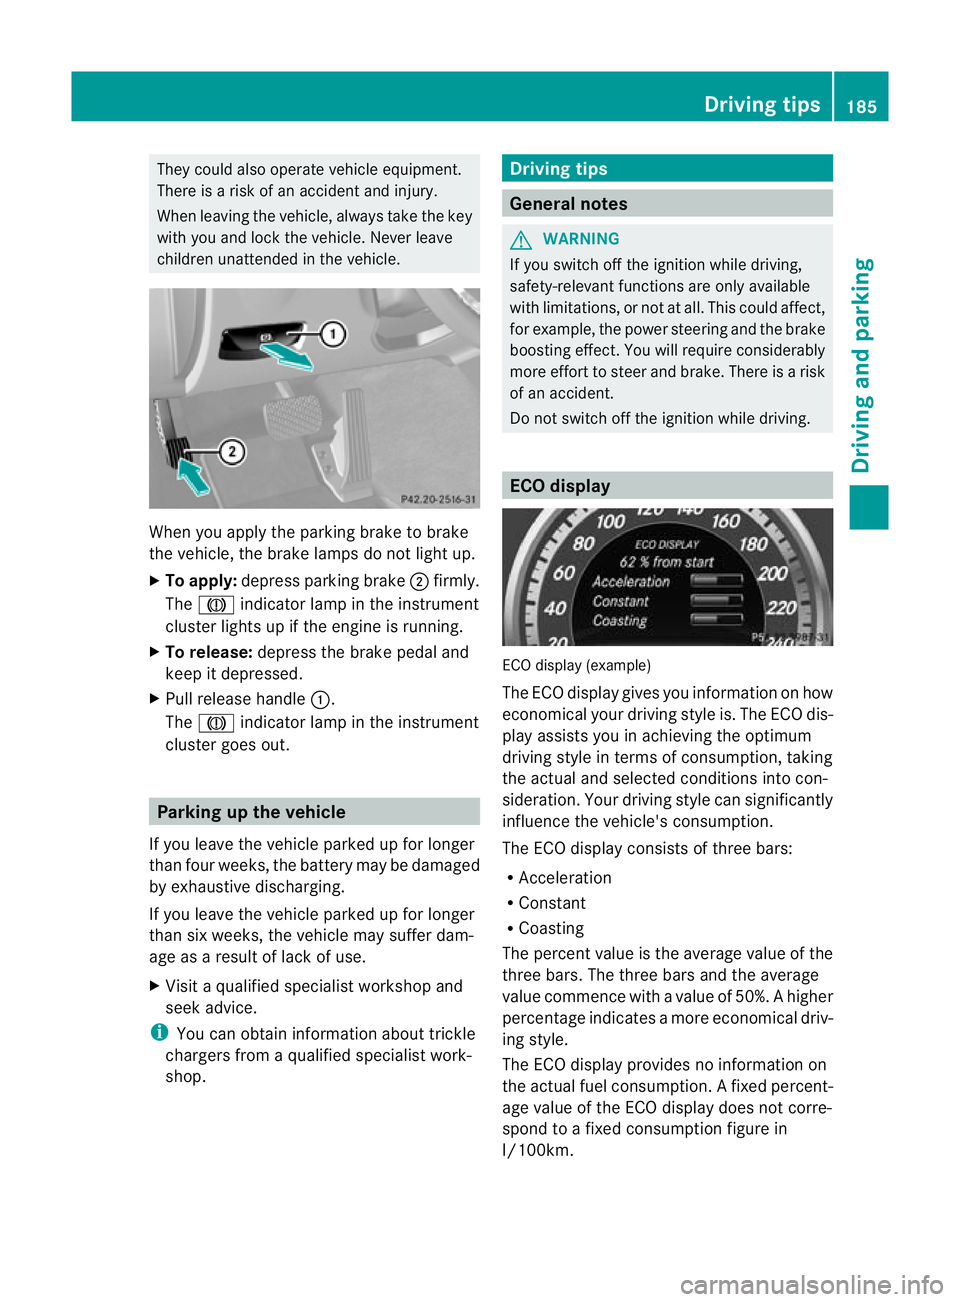
children unattended in the vehicle. When you apply the parking brake to brake
the vehicle, the brake lamps do not light up.
X To apply: depress parking brake ;firmly.
The J indicator lamp in the instrument
cluster lights up if the engine is running.
X To release: depress the brake pedal and
keep it depressed.
X Pull release handle :.
The J indicator lamp in the instrument
cluster goes out. Parking up the vehicle
If you leave the vehicle parked up for longer
than four weeks, the battery may be damaged
by exhaustive discharging.
If you leave the vehicle parked up for longer
than six weeks, the vehicle may suffer dam-
age as a result of lack of use.
X Visit a qualified specialist workshop and
seek advice.
i You can obtain information about trickle
chargers from a qualified specialist work-
shop. Driving tips
General notes
G
WARNING
If you switch off the ignition while driving,
safety-relevan tfunctions are only available
with limitations, or no tatall. This could affect,
for example, the power steering and the brake
boosting effect .You will require considerably
more effort to steer and brake. There is a risk
of an accident.
Do not switch off the ignition while driving. ECO display
ECO display (example)
The ECO display gives you information on how
economical your driving style is. The ECO dis-
play assists you in achieving the optimum
driving style in terms of consumption, taking
the actual and selected conditions into con-
sideration. Your driving style can significantly
influence the vehicle's consumption.
The ECO display consists of three bars:
R Acceleration
R Constant
R Coasting
The percent value is the average value of the
three bars. The three bars and the average
value commence with a value of 50%. Ahigher
percentage indicates a mor eeconomical driv-
ing style.
The ECO display provides no information on
the actual fuel consumption. Afixed percent-
age value of the ECO display does not corre-
spond to a fixed consumption figure in
l/100km. Driving tips
185Driving and parking Z
Page 243 of 457

Saloon
To release and lowe
rthe ball coupling
(Saloon):
X Grasp release wheel Awith you rhand
such that the thumb is in the thumb rest
and turn it anti-clockwise.
The ball coupling unlocks and lowers. Indi-
cator lamp ?flashes. Estate
To release and lower the ball coupling
(Estate):
X Grasp release wheel ?with your hand
such that the thumb is in the thumb rest
and turn it anti-clockwise.
The ball coupling unlocks and lowers. Indi-
cator lamp =flashes. X
Press the ball coupling in the direction of
the arrow until it engages behind the
bumper.
Saloon: indicator lamp ?and the display
in the multifunction display go out.
Estate: indicator lamp =and the display
in the multifunction display go out.
i Fold the ball coupling back in if you are
no tu sing the trailer tow hitch. Trailer power supply
! You can connect accessories with a
power rating of up to 240 W to the perma-
nent power supply and with a power rating
of up to 180 W to the power supply that is
switched on via the ignition lock.
The trailer battery may not be charged from
the power supply.
X To switch the connected power supply
on or off: turn the key in the ignition lock
to position 2or 0respectively
(Y page 161).
When it leaves the factory, your vehicle's
trailer socket is equipped with a permanent
power supply and a power supply that is
switched on via the ignition lock.
The permanent power supply is supplied via
trailer socket pin 9.
The power supply that is switched on via the
ignition lock is supplied via trailer socket pin
10. 240
Towing
atrailerDriving an d parking
Page 335 of 457
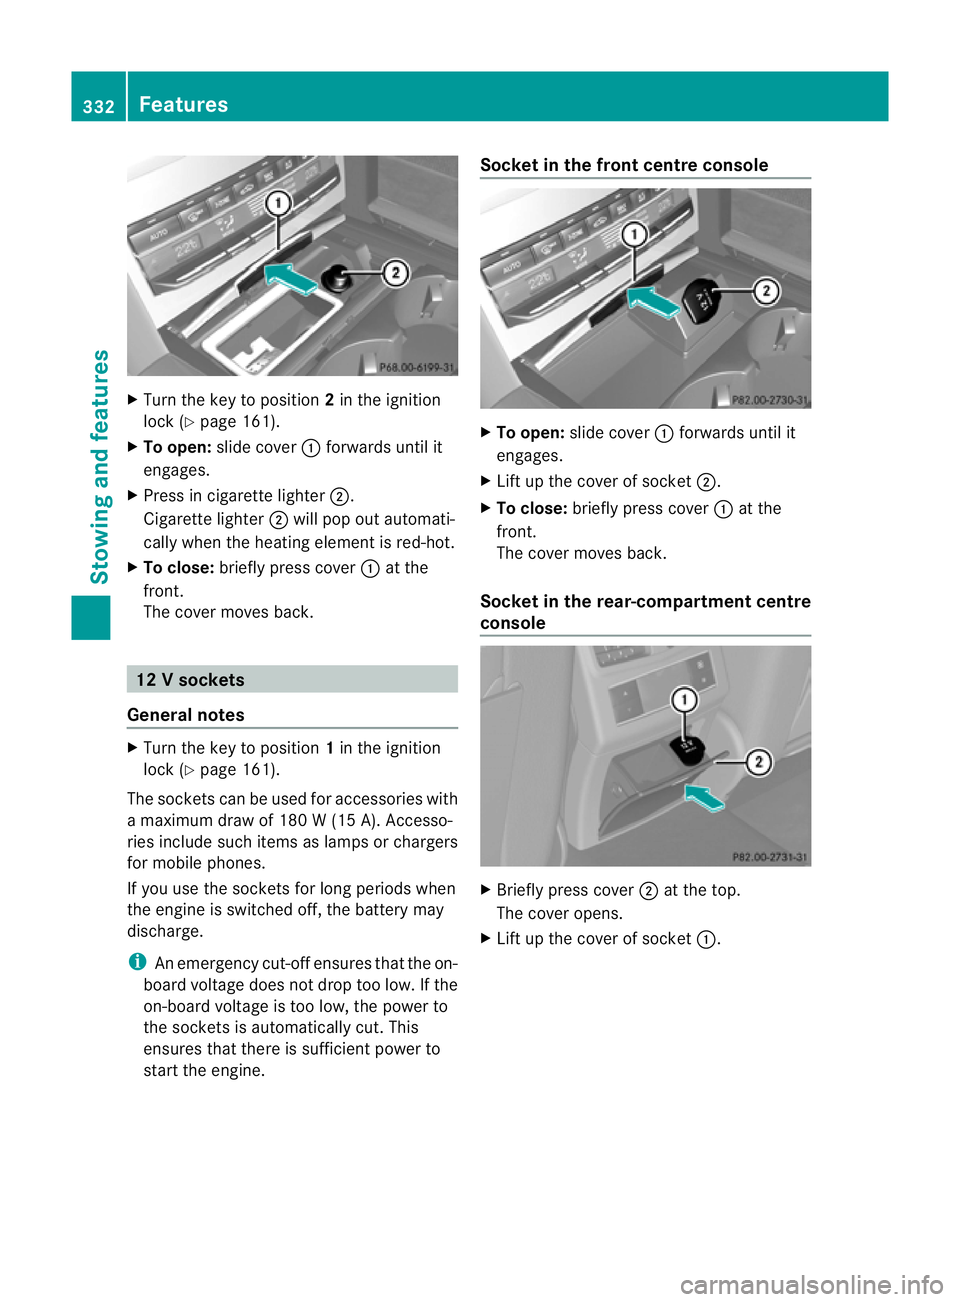
X
Turn the key to position 2in the ignition
lock (Y page 161).
X To open: slide cover :forwards until it
engages.
X Press in cigarette lighter ;.
Cigarette lighter ;will pop out automati-
cally when the heating element is red-hot.
X To close: briefly press cover :at the
front.
The cover moves back. 12
Vsockets
General notes X
Turn the key to position 1in the ignition
lock (Y page 161).
The sockets can be used for accessories with
a maximum draw of 180 W (15 A). Accesso-
ries include such items as lamps or chargers
for mobile phones.
If you use the sockets for long periods when
the engine is switched off ,the battery may
discharge.
i An emergency cut-offe nsures thatthe on-
board voltage does not drop too low. If the
on-board voltage is too low, the power to
the sockets is automatically cut. This
ensures that there is sufficient power to
start the engine. Socket in the front centre console
X
To open: slide cover :forwards until it
engages.
X Lift up the cover of socket ;.
X To close: briefly press cover :at the
front.
The cover moves back.
Socket in the rear-compartment centre
console X
Briefly press cover ;at the top.
The cover opens.
X Lift up the cover of socket :.332
FeaturesStowing and features
Page 371 of 457
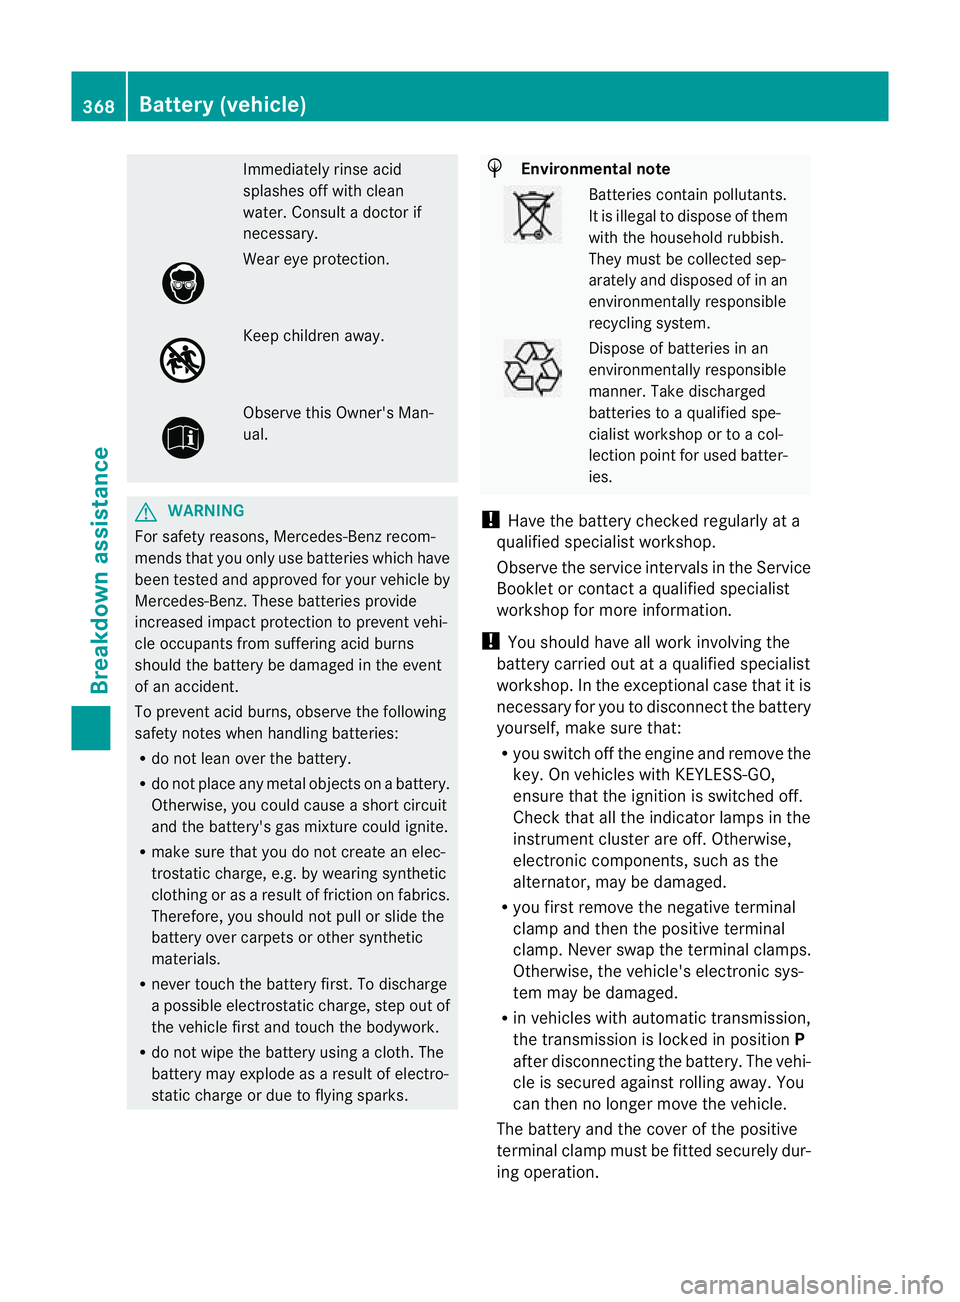
Immediately rinse acid
splashes off with clean
water. Consul
tadoctor if
necessary. Wear eye protection.
Keep children away.
Observe this Owner's Man-
ual.
G
WARNING
For safety reasons, Mercedes-Benz recom-
mends that you only use batteries which have
been tested and approved for your vehicle by
Mercedes-Benz.T hese batteries provide
increased impact protection to prevent vehi-
cle occupants from suffering acid burns
should the battery be damaged in the event
of an accident.
To prevent acid burns, observe the following
safety notes when handling batteries:
R do not lean over the battery.
R do not place any metal objects on a battery.
Otherwise, you could cause a short circuit
and the battery's gas mixture could ignite.
R make sure that you do not create an elec-
trostatic charge, e.g. by wearing synthetic
clothing or as a result of friction on fabrics.
Therefore, you should not pull or slide the
battery over carpets or other synthetic
materials.
R never touch the battery first. To discharge
a possible electrostatic charge, step out of
the vehicle first and touch the bodywork.
R do not wipe the battery using a cloth. The
battery may explode as a result of electro-
static charge or due to flying sparks. H
Environmental note Batteries contain pollutants.
It is illegal to dispose of them
with the household rubbish.
They must be collected sep-
arately and disposed of in an
environmentally responsible
recycling system. Dispose of batteries in an
environmentally responsible
manner. Take discharged
batteries to a qualified spe-
cialist workshop or to a col-
lection point for used batter-
ies.
! Have the battery checked regularly at a
qualified specialist workshop.
Observe the service intervals in the Service
Booklet or contact a qualified specialist
workshop for more information.
! You should have all work involving the
battery carried out at aqualified specialist
workshop. In the exceptional case that it is
necessary for you to disconnect the battery
yourself, make sure that:
R you switch off the engine and remove the
key. On vehicles with KEYLESS-GO,
ensure that the ignition is switched off.
Chec kthat all the indicator lamps in the
instrument cluster are off. Otherwise,
electronic components, such as the
alternator, may be damaged.
R you first remove the negative terminal
clamp and then the positive terminal
clamp. Never swap the terminal clamps.
Otherwise, the vehicle's electronic sys-
tem may be damaged.
R in vehicles with automatic transmission,
the transmission is locked in position P
after disconnecting the battery. The vehi-
cle is secured against rolling away.Y ou
can then no longer move the vehicle.
The battery and the cover of the positive
terminal clamp must be fitted securely dur-
ing operation. 368
Battery (vehicle)Breakdown assistance
Page 372 of 457
In order for the battery to achieve the maxi-
mum possible service life, it must always be
sufficiently charged.
The vehicle battery, like other batteries, can
discharge over time if you do not use the
vehicle .Insuch cases, have the battery dis-
connected at a qualified specialist workshop.
You can also charge the battery with a
charge rrecommended by Mercedes-Benz.
For more information, please contact a quali-
fied specialist workshop.
Have the battery charge checked more fre-
quently if you use the vehicle mainly for short
trips or if you leave it standing idle for a
lengthy period. Consult a qualified specialist
workshop if you wish to leave your vehicle
parked up for a long period of time.
i When you park the vehicle, remove the
key if you do not require any electrical con-
sumers. The vehicle will then use very little
energy, thus conserving battery power.
i After an interruption of the power supply,
e.g. the battery was discharged, you have
to:
R set the clock. Information on setting the
clock can be found in the separate oper-
ating instructions.
On vehicles with COMAND Online and a
navigation system, the clock is set auto-
matically.
R reset the function for folding the exterior
mirrors in/out automatically, by folding
the mirrors out once (Y page 120).Charging the battery
G
WARNING
Only charge the battery in a well-ventilated
area. As the battery is being charged, gases
can escape and generate minor explosions.
This could injure you and other persons or
cause damage to the paintwork or acid cor-
rosion on the vehicle. You can obtain information on battery charg-
ers which allow the batter
yto be charged
while still installed from a qualified specialist
workshop. G
WARNING
There is a risk of acid burns during the charg-
ing process due to the gases which escape
from the battery. Do not lean over the battery
during the charging process. G
WARNING
Battery acid is caustic. Avoid contact with the
skin, eyes or clothing.
! Only charge the installed battery with a
battery charger which has been tested and
approved by Mercedes-Benz. These battery
chargers allow the battery to be charged
while still installed in the vehicle.
! Only use battery chargers with a maxi-
mum charging voltage of 14.8 V.
! Only charge the battery using the jump-
start connection point.
The jump-starting connection point is in the
engine compartment (Y page 370).
Read the battery charger's operating instruc-
tions before charging the battery.
X Open the bonnet (Y page 345).
X Connect the battery charger to the positive
terminal and earth point in the same order
as when connecting the donor battery in
the jump-starting procedure
(Y page 370). Battery (vehicle)
369Breakdown assistance Z
Page 376 of 457
The battery must be connected and charged.
Otherwise, you:
R
cannot turn the key in the ignition lock to
position 2
R cannot shift the transmission to position
N on vehicles with automatic transmission
Vehicles with automatic transmission:
release the selector lever lock manually to
move it out of position P(Y page 179).
i Deactivate the automatic locking feature
(Y page 90). You could otherwise be locked
out when pushing or towing the vehicle.
Deactivate tow-away protection
(Y page 79) before the vehicle is towed. Fitting/removing the towing eye
Fitting the towing eye G
WARNING
The exhaust tail pipe may be hot. You could
burn yourself if you touch the tail pipe. Be
particularly careful when removing the rear
cover. Example: Saloon, towing eye covers Vehicles with a trailer tow hitch: if you intend
to use the vehicle for towing, fold out the ball
coupling and connect the towbar to it
(Y
page 237).
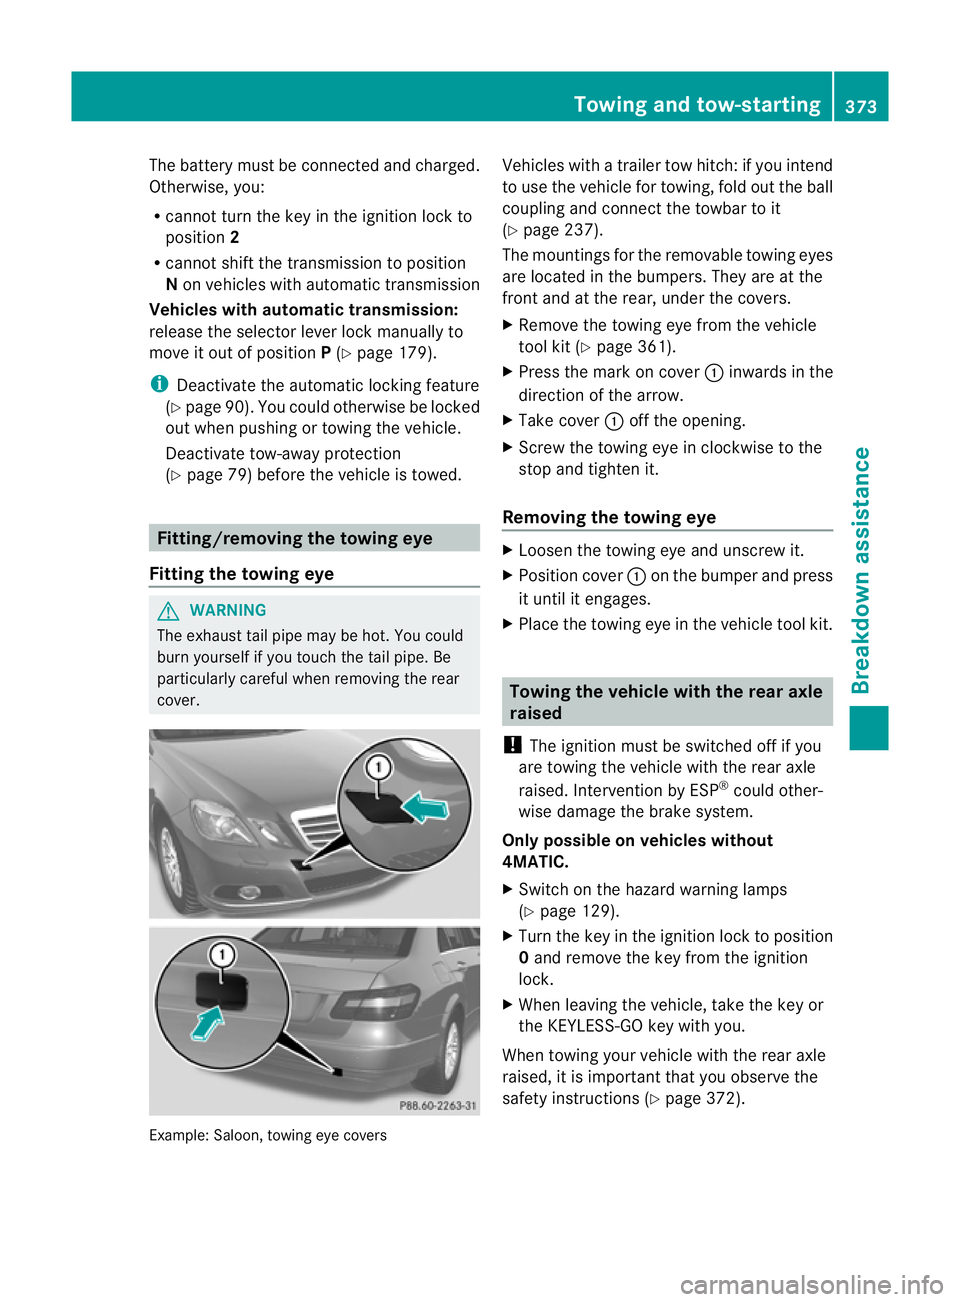
The mountings for the removable towing eyes
are located in the bumpers. They are at the
front and at the rear, under the covers.
X Remove the towing eye from the vehicle
tool kit (Y page 361).
X Press the mark on cover :inwards in the
direction of the arrow.
X Take cover :off the opening.
X Screw the towing eye in clockwise to the
stop and tighten it.
Removing the towing eye X
Loosen the towing eye and unscrew it.
X Position cover :on the bumper and press
it until it engages.
X Place the towing eye in the vehicle tool kit. Towing the vehicle with the rear axle
raised
! The ignition must be switched off if you
are towing the vehicle with the rear axle
raised. Intervention by ESP ®
could other-
wise damage the brake system.
Only possible on vehicles without
4MATIC.
X Switch on the hazard warning lamps
(Y page 129).
X Turn the key in the ignition lock to position
0and remove the key from the ignition
lock.
X When leaving the vehicle, take the key or
the KEYLESS-GO key with you.
When towing your vehicle with the rear axle
raised, it is importan tthat you observe the
safety instructions (Y page 372). Towing and tow-starting
373Breakdown assistance Z
Page 378 of 457
If the battery is defective, the automatic
transmission will be locked in position P. To
shift the automatic transmission to position
N, you must provide powert o the vehicle's
electrical system in the same way as when
jump-starting (Y page 370).
Have the vehicle transported on a transporter
or trailer. Tow-starting (emergency engine
starting)
! Vehicles with automatic transmission
must not be tow-started. The transmission
may otherwise be damaged.
When tow-starting, it is important that you
observe the safety instructions (Y page 372)
and the legal requirements in each respective
country.
X Switch on the hazard warning lamps
(Y page 129).
X Fit the towing eye (Y page 373).
X Secure the rigid towing bar or the towing
rope.
X Depress and hold the brake pedal.
X Turn the key to position 2in the ignition
lock.
X Depress the clutch pedal and keep it
depressed.
X Engage neutral.
X Release the brake pedal.
X Tow-start the vehicle.
X Engage second gear.
X Release the clutch pedal slowly; do not
depress the accelerator pedal while doing
so.
The engine is started.
X Depress the clutch pedal and shift to neu-
tral.
X Stop at a suitable place.
X Depress the parking brake.
X Remove the rigid towing bar or towing rope. X
Remove the towing eye (Y page 373).
X Switch off the hazard warning lamps.
Before tow-starting the following conditions
must be fulfilled:
R the battery is connected.
R the engine has cooled down.
R the exhaust system has cooled down.
You can find information on "Jump-starting"
at (Y page 370). Electrical fuses
Important safety notes
G
WARNING
Only use fuses that have been approved for
Mercedes-Benz vehicles and which have the
correct fuse rating for the systems con-
cerned. Do not attempt to repair or bridge
faulty fuses. Using fuses which have not been
approved or attempting to repair or bridge
faulty fuses could cause the fuse to be over-
loaded and result in a fire. Have the cause
traced and rectified at a qualified specialist
workshop.
! Only use fuses that have been approved
for Mercedes-Benz vehicles and which
have the correc tfuse rating for the system
concerned. Otherwise, components or sys-
tems could be damaged.
The fuses in your vehicle serve to close down
faulty circuits. If afuse blows, all the compo-
nents on the circuit and their functions stop
operating.
Blown fuses must be replace dwith fuses of
the same rating, which you can recognise by
the colour and fuse rating. The fuse ratings
are listed in the fuse allocation chart.
If the newly inserted fuse also blows, have the
cause traced and rectified at a qualified spe-
cialist workshop, e.g. a Mercedes-Benz
Service Centre. Electrical fuses
375Breakdown assistance Z