2012 MERCEDES-BENZ E-CLASS ESTATE airbag
[x] Cancel search: airbagPage 61 of 457
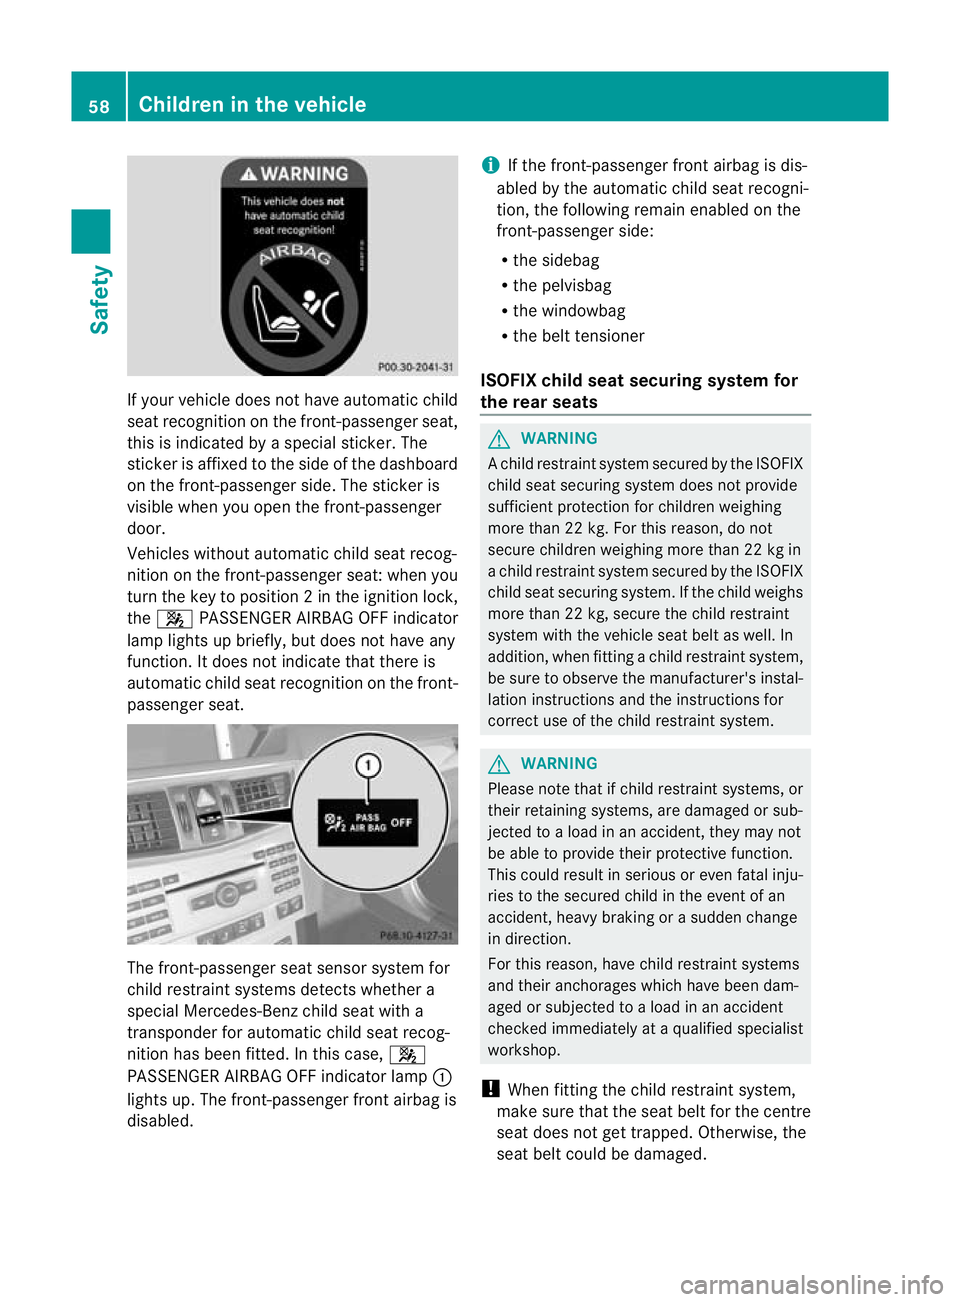
If yourv
ehicle does not have automatic child
seat recognition on the front-passenger seat,
this is indicated by a special sticker. The
sticker is affixed to the side of the dashboard
on the front-passenger side. The sticker is
visible when you open the front-passenger
door.
Vehicles without automatic child seat recog-
nition on the front-passenger seat: when you
turn the key to position 2inthe ignition lock,
the 4 PASSENGER AIRBAG OFF indicator
lamp lights up briefly, but does not have any
function. It does not indicate that there is
automatic child seat recognition on the front-
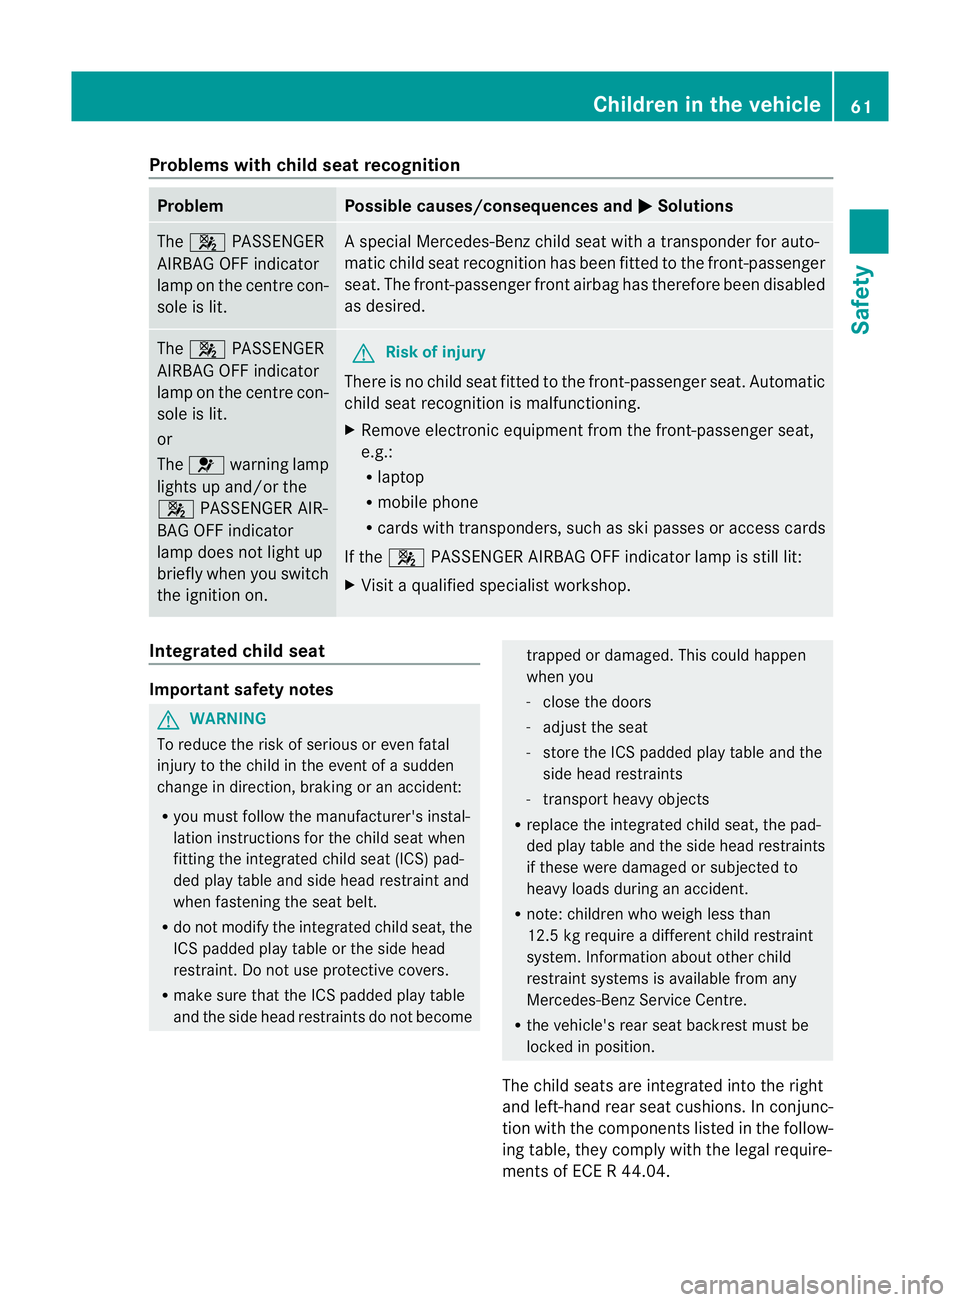
passenger seat. The front-passenger seat sensor system for
child restraint systems detects whether a
special Mercedes-Ben zchild seat with a
transponder for automatic child seat recog-
nition has been fitted. In this case, 4
PASSENGER AIRBAG OFF indicator lamp :
lights up. The front-passenger front airbag is
disabled. i
If the front-passenger front airbag is dis-
abled by the automatic child seat recogni-
tion, the following remain enabled on the
front-passenger side:
R the sidebag
R the pelvisbag
R the windowbag
R the belt tensioner
ISOFIX child seat securing system for
the rear seats G
WARNING
Ac hild restraint system secured by the ISOFIX
child seat securing system does not provide
sufficient protection for children weighing
more than 22 kg. For this reason, do not
secure children weighing more than 22 kg in
a child restraint system secured by the ISOFIX
child seat securing system. If the child weighs
more than 22 kg, secure the child restraint
system with the vehicle seat belt as well. In
addition, when fitting a child restraint system,
be sure to observe the manufacturer's instal-
lation instructions and the instructions for
correct use of the child restraint system. G
WARNING
Please note that if child restraint systems, or
their retaining systems, are damaged or sub-
jected to a load in an accident, they may not
be able to provide their protective function.
This could result in serious or even fatal inju-
ries to the secured child in the event of an
accident, heavy braking or a sudden change
in direction.
For this reason, have child restraint systems
and their anchorages which have been dam-
aged or subjected to a load in an accident
checked immediately at a qualified specialist
workshop.
! When fitting the child restraint system,
make sure that the seat belt for the centre
seat does not get trapped. Otherwise, the
seat belt could be damaged. 58
Children in the vehicleSafety
Page 64 of 457
Problems with child seat recognition
Problem Possible causes/consequences and
M Solutions
The
4 PASSENGER
AIRBAG OFF indicator
lamp on the centre con-
sole is lit. As
pecial Mercedes-Benz child seat with a transponder for auto-
matic child seat recognition has been fitted to the front-passenger
seat. The front-passenger fron tairbag has therefore been disabled
as desired. The
4 PASSENGER
AIRBAG OFF indicator
lamp on the centre con-
sole is lit.
or
The 6 warning lamp
lights up and/or the
4 PASSENGER AIR-
BAG OFF indicator
lamp does not light up
briefly when you switch
the ignition on. G
Risk of injury
There is no child seat fitted to the front-passenger seat .Automatic
child seat recognition is malfunctioning.
X Remove electronic equipmen tfrom the front-passenge rseat,
e.g.:
R laptop
R mobile phone
R cards with transponders, such as ski passes or access cards
If the 4 PASSENGER AIRBAG OFF indicator lamp is still lit:
X Visit a qualified specialist workshop. Integrated child seat
Important safety notes
G
WARNING
To reduce the risk of serious or even fatal
injury to the child in the event of a sudden
change in direction, braking or an accident:
R you must follow the manufacturer's instal-
lation instructions for the child seat when
fitting the integrated child seat (ICS) pad-
ded play table and side head restraint and
when fastening the seat belt.
R do not modify the integrated child seat, the
ICS padded play table or the side head
restraint. Do not use protective covers.
R make sure that the ICS padded play table
and the side head restraints do not become trapped or damaged. This could happen
when you
- close the doors
- adjust the seat
- store the ICS padded play table and the
side head restraints
- transport heavy objects
R replace the integrated child seat, the pad-
ded play table and the side head restraints
if these were damaged or subjected to
heavy loads during an accident.
R note: children who weigh less than
12.5 kg require a different child restraint
system. Information about other child
restraint systems is available from any
Mercedes-Benz Service Centre.
R the vehicle's rear seat backrest must be
locked in position.
The child seats are integrated into the right
and left-hand rear seat cushions. In conjunc-
tion with the componentsl isted in the follow-
ing table, they comply with the legal require-
ments of ECE R 44.04. Children in the vehicle
61Safety Z
Page 68 of 457
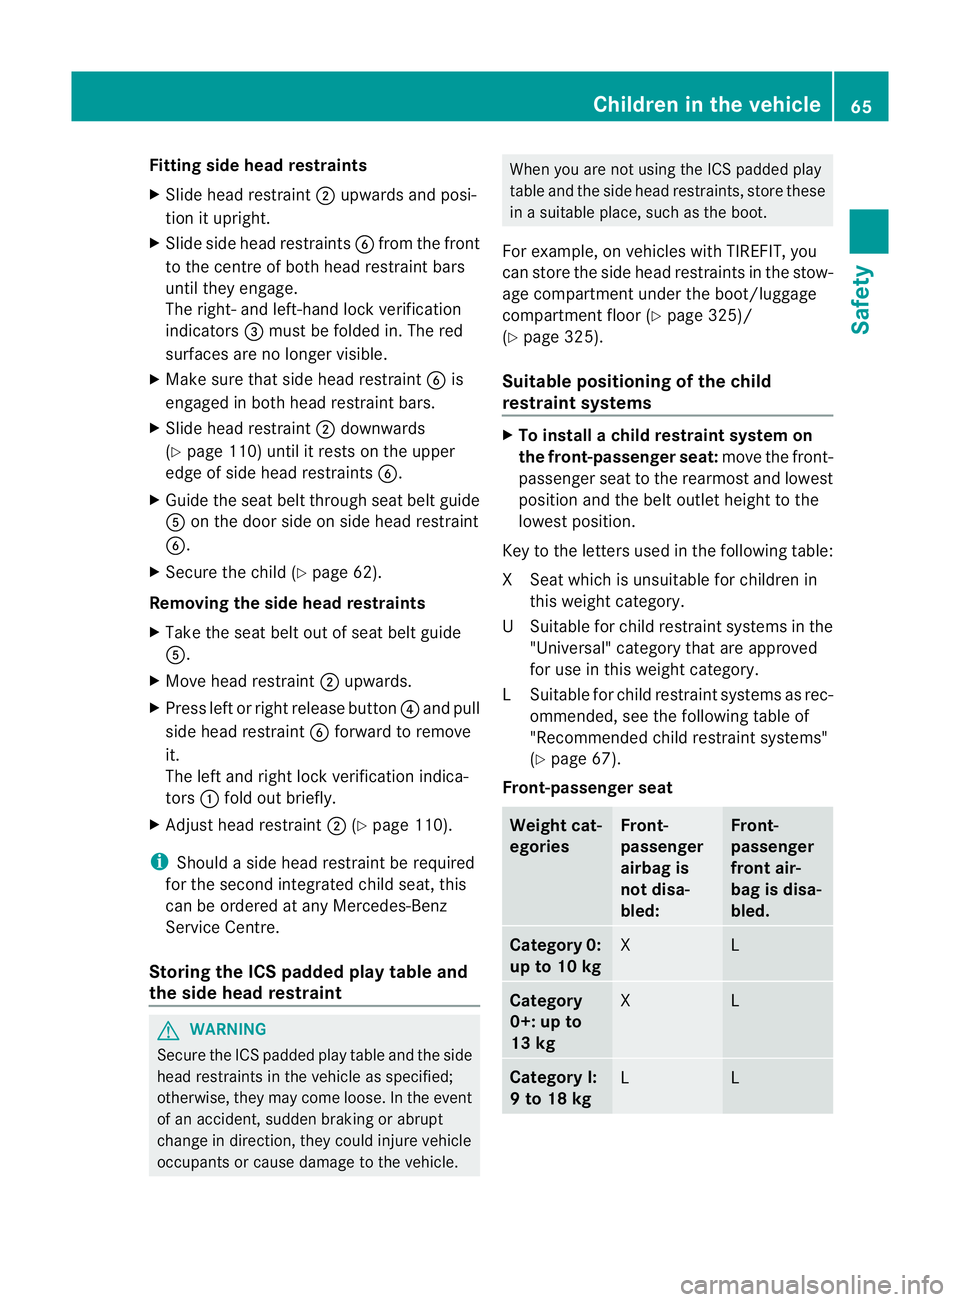
Fitting side head restraints
X
Slide head restraint ;upwards and posi-
tio nitu pright.
X Slide side head restraints Bfrom the front
to the centre of both head restraint bars
until they engage.
The right -and left-hand lock verification
indicators =must be folded in. The red
surfaces are no longe rvisible.
X Make sure that side head restraint Bis
engaged in both head restraint bars.
X Slide head restraint ;downwards
(Y page 110) until it rests on the upper
edge of side head restraints B.
X Guide the seat belt through seat belt guide
A on the door side on side head restraint
B.
X Secure the child (Y page 62).
Removing the side head restraints
X Take the seat belt out of seat belt guide
A.
X Move head restraint ;upwards.
X Press left or right release button ?and pull
side head restraint Bforward to remove
it.
The left and right lock verification indica-
tors :fold out briefly.
X Adjust head restraint ;(Ypage 110).
i Should a side head restraint be required
for the second integrated child seat, this
can be ordered at any Mercedes-Benz
Service Centre.
Storing the ICS padded play table and
the side head restraint G
WARNING
Secure the ICS padded play table and the side
head restraints in the vehicle as specified;
otherwise, they may com eloose. In the event
of an accident, sudden braking or abrupt
change in direction, they could injure vehicle
occupants or cause damage to the vehicle. When you are not using the ICS padded play
table and the side head restraints, store these
in a suitable place, such as the boot.
For example, on vehicles with TIREFIT, you
can store the side head restraints in the stow-
age compartment under the boot/luggage
compartment floor (Y page 325)/
(Y page 325).
Suitable positioning of the child
restraint systems X
To install a child restraint system on
the front-passenger seat: move the front-
passenger seat to the rearmost and lowest
position and the belt outlet height to the
lowest position.
Key to the letters used in the following table:
XS eat which is unsuitable for children in
this weight category.
US uitable for child restraint systems in the
"Universal" category that are approved
for use in this weigh tcategory.
LS uitable for child restraint systems as rec-
ommended, see the following table of
"Recommended child restraint systems"
(Y page 67).
Front-passenger seat Weight cat-
egories Front-
passenger
airbag is
not disa-
bled: Front-
passenger
front air-
bag is disa-
bled.
Categor
y0:
up to 10 kg X L
Category
0+: up to
13 kg
X L
Category I:
9 to 18 kg
L LChildren in the vehicle
65Safety Z
Page 69 of 457
Weight cat-
egories Front-
passenger
airbag is
not disa-
bled: Front-
passenger
front air-
bag is disa-
bled.
Category II:
15 to 25 kg
L L
Group III:
22 to 36 kg
L L
Vehicles with automatic chil
dseat recog-
nition in the front-passenger seat: a "Uni-
versal" category child restrain tsystem with a
transponder fo rautomatic child seat recog-
nition must be fitted when the front-
passenger airbag is disabled. The 4
PASSENGER AIRBAG OFF indicator lamp
must be lit.
Rear seats Weight cat-
egories Left, right Centre
Categor
y0:
up to 10 kg U U
Category
0+: up to
13 kg
U U
Category I:
9 to 18 kg U U
Category II:
15 to 25 kg
U U
Group III:
22 to 36 kg
U U
i
Vehicles with a folding bench sea tinthe
load compartment( Estate):information on
child restraint systems on the folding
bench sea tcan be obtained at any
Mercedes-Benz Service Centre.
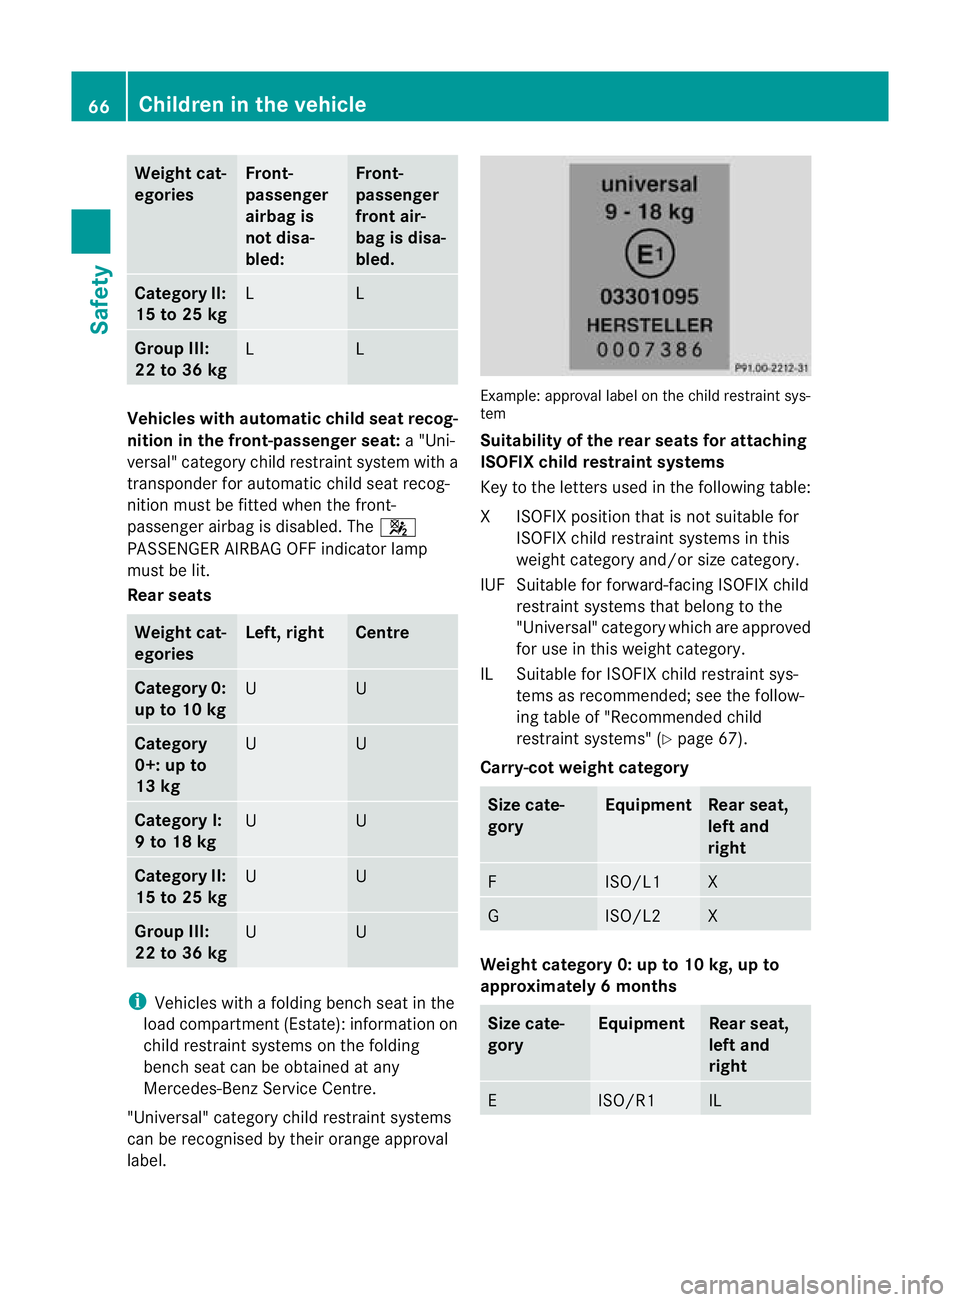
"Universal" category child restraint systems
can be recognised by their orange approval
label. Example
:approval label on the child restraint sys-
tem
Suitability of the rear seats for attaching
ISOFIX child restraint systems
Key to the letters used in the following table:
XI SOFIX position tha tis not suitable for
ISOFIX child restraint systems in this
weight category and/or size category.
IUF Suitable for forward-facing ISOFIX child restraint systems that belong to the
"Universal" category which are approved
for use in this weight category.
IL Suitable for ISOFIX child restraint sys- tems as recommended; see the follow-
ing table of "Recommended child
restraint systems" (Y page 67).
Carry-cot weight category Size cate-
gory Equipment Rear seat,
left and
right
F ISO/L1 X
G ISO/L2 X
Weight category 0: up to 10 kg, up to
approximately 6 months
Size cate-
gory Equipment Rear seat,
left and
right
E ISO/R1 IL66
Children in the vehicleSafety
Page 109 of 457
Useful information
i This Owner's Manual describes all mod-
els, series and optional equipment for your
vehicle that were available at the time of
going to press. National variations are pos-
sible. Note that your vehicle may not be
equipped with all of the functions descri-
bed. This is also the case for systems and
functions relevant to safety.
i Read the information on qualified special-
ist workshops: (Y page 25). Correct driver's seat position
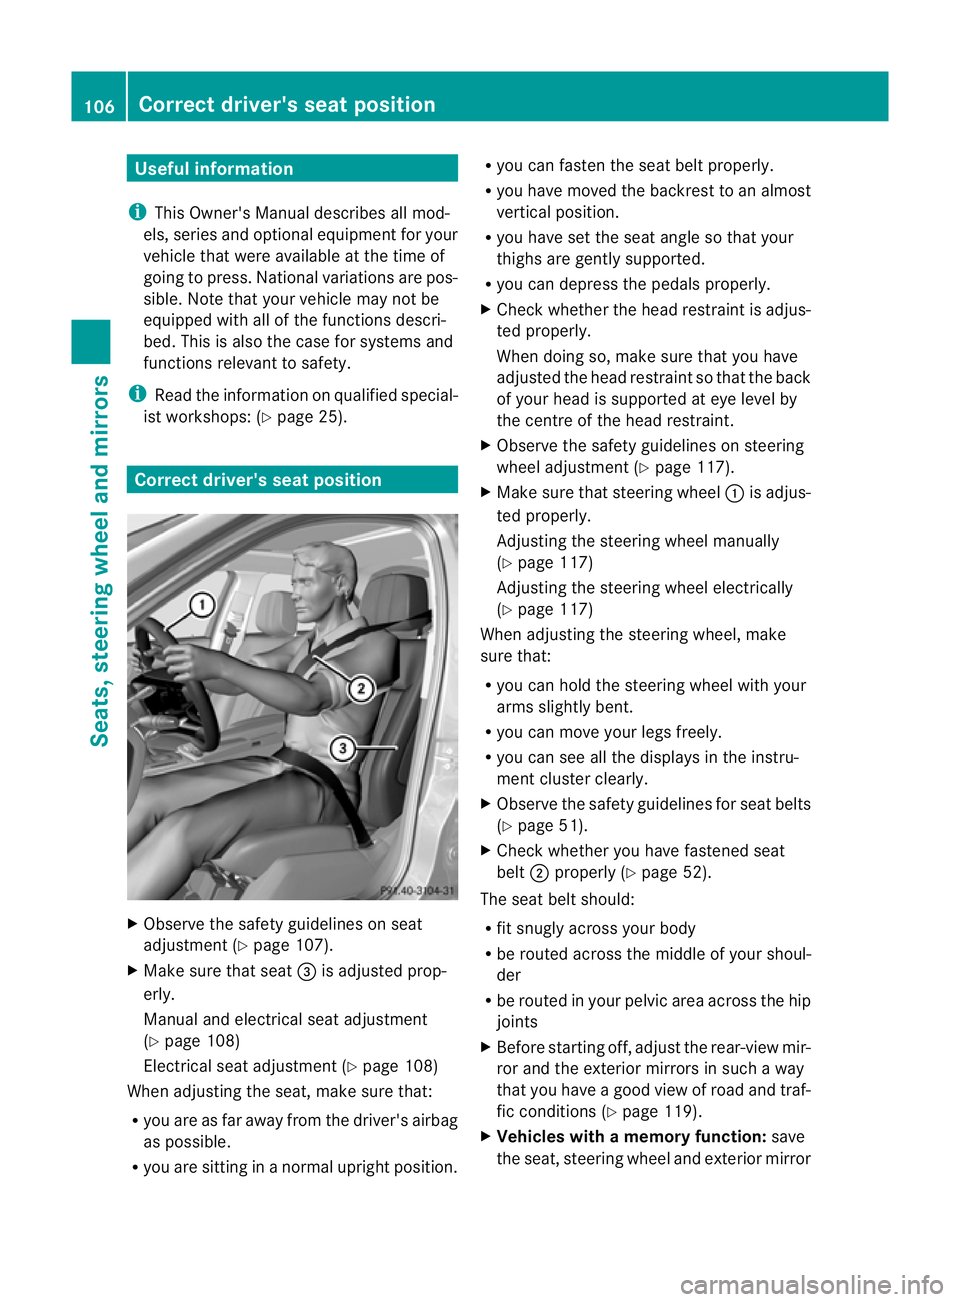
X
Observe the safety guidelines on seat
adjustment (Y page 107).
X Make sure that seat =is adjusted prop-
erly.
Manual and electrical seat adjustment
(Y page 108)
Electrical seat adjustment (Y page 108)
When adjusting the seat, make sure that:
R you are as far away from the driver's airbag
as possible.
R you are sitting in a normal upright position. R
you can fasten the seat belt properly.
R you have moved the backrest to an almost
vertical position.
R you have set the seat angle so that your
thighs are gently supported.
R you can depress the pedals properly.
X Check whether the head restraint is adjus-
ted properly.
When doing so, make sure that you have
adjusted the head restraint so that the back
of your head is supported at eye level by
the centre of the head restraint.
X Observe the safety guidelines on steering
wheel adjustment (Y page 117).
X Make sure that steering wheel :is adjus-
ted properly.
Adjusting the steering wheel manually
(Y page 117)
Adjusting the steering wheel electrically
(Y page 117)
When adjusting the steering wheel, make
sure that:
R you can hold the steering wheel with your
arms slightly bent.
R you can move your legs freely.
R you can see all the displays in the instru-
ment cluster clearly.
X Observe the safety guidelines for seat belts
(Y page 51).
X Check whether you have fastened seat
belt ;properly (Y page 52).
The seat belt should:
R fit snugly across your body
R be routed across the middle of your shoul-
der
R be routed in your pelvic area across the hip
joints
X Before starting off, adjust the rear-view mir-
ror and the exterior mirrors in such a way
that you have a good view of road and traf-
fic conditions (Y page 119).
X Vehicles with a memory function: save
the seat, steering wheel and exterior mirror 106
Correct driver's seat positionSeats, steering wheel and mirrors
Page 110 of 457
settings with the memory function
(Y
page 121). Seats
Important safety notes
G
WARNING
The seats can still be adjusted when there is
no key in the ignition lock. For this reason,
children should never be left unsupervised in
the vehicle. They could adjust the seats and
become trapped. G
WARNING
Only adjust the driver's seat when the vehicle
is stationary. You will otherwise be distracted
from the road and traffic conditions and you
could lose control of the vehicle as a result of
the seat moving. This could cause an acci-
dent. G
WARNING
If you adjust the seat height carelessly, you or
others could be trapped and thereby injured.
Children in particular could unintentionally
press the buttons to electrically adjust the
seats and become trapped.
Take care that:
R while moving the seats, your hands do not
get under the lever assembly of the seat
adjustment system.
R children in the vehicle do not slide their
hands under the levers. G
WARNING
Make sure that nobody can become trapped
when adjusting the seats.
Observe the notes on airbags.
Secure children as recommended; see the
"Children in the vehicle" section. G
WARNING
Make sure that the back of your head is sup-
ported at eye level by the central area of the head restraint. If your head is not supported
correctly by the head restraint, you could suf-
fer a severe neck injury in the event of an
accident. Never drive if the head restraints are
not engaged and set correctly.
G
WARNING
As eat belt can only offer its intended degree
of protection when the backrest is almost ver-
tical and the occupant is sitting upright. Avoid
seat positions that do not allow the seat belt
to be routed correctly. Adjust the backrest so
that it is as upright as possible. Never travel
with the backrest reclined too far backwards.
You could otherwise be seriously or even
fatally injured in the event of an accident or
sudden braking.
! To avoid damage to the seats and the seat
heating, observe the following information:
R do not spill any liquids on the seats. If
liquid is spilled on the seats, dry them as
soon as possible.
R if the seat covers are damp or wet, do not
switch on the seat heating. The seat
heating should also not be used to dry
the seats.
R clean the seat covers as recommended;
see the "Interior care" section.
R do not transport heavy loads on the
seats. Do not place sharp objects on the
seat cushions, e.g. knives, nails or tools.
The seats should only be occupied by
passengers, if possible.
R when the seat heating is in operation, do
not cover the seats with insulating mate-
rials, e.g. blankets, coats, bags, seat cov-
ers, child seats or booster seats.
! To avoid damage to the seats and the seat
heating, observe the following information:
R do not spill any liquids on the seats. If
liquid is spilled on the seats, dry them as
soon as possible.
R if the seat covers are damp or wet, do not
switch on the seat heating. The seat Seats
107Seats, steering wheel and mirrors Z
Page 133 of 457
only the turn signal lamp on the corre-
sponding side of the vehicle will flash.
X To switch off the hazard warning
lamps: press button :.
The hazard warning lamps automatically
switch on if:
R an airbag is deployed.
R the vehicle decelerates rapidly from a
speed of more than 70 km/ha nd comes to
a standstill.
The hazard warning lamps switch off auto-
matically if the vehicle reaches a speed of
over 10 km/h again after a full brake appli-
cation.
i The hazard warning lamps still operate if
the ignition is switched off. Headlamp cleaning system
The headlamps are cleaned automatically if
the "Wipe with washe rfluid" function is oper-
ated five times (Y page 137) while the lights
are on and the engine is running. When you
switch off the ignition, the automatic head-
lamp cleaning system is reset and counting is
resumed from 0. Intelligent Light System
General notes The Intelligent Light System is a system that
adjusts the headlamps automatically to suit
the prevailing driving and weathe
rconditions.
It offers advanced functions for improved illu-
mination of the road surface, e.g. depending
on the vehicle speed or weather conditions.
The system includes the active light function,
cornering light function, motorway mode and
extended range foglamps. The system is only
active when it is dark.
You can activate or deactivate the "Intelligent
Light System" using the on-board computer
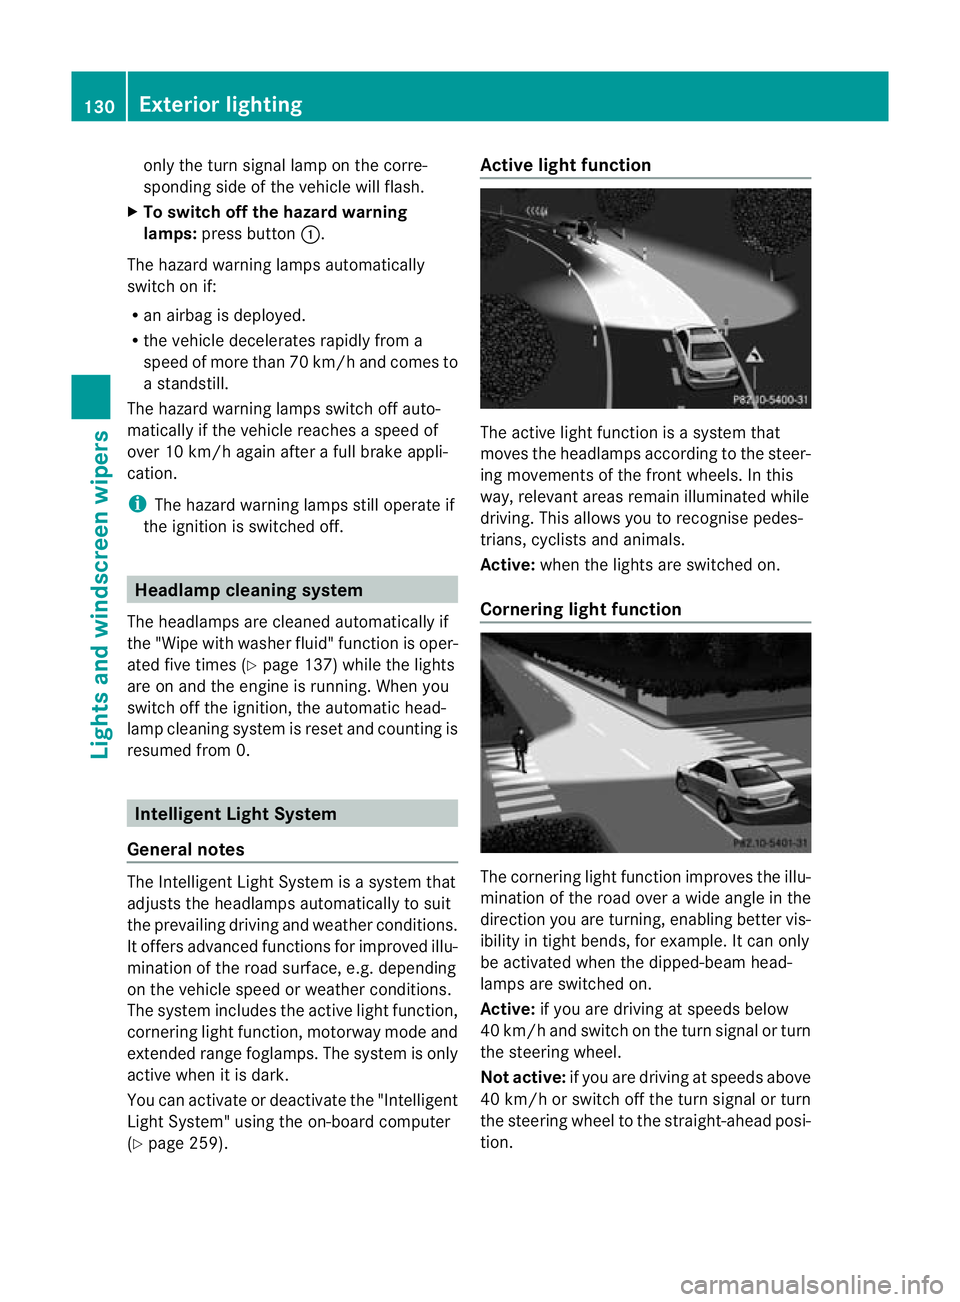
(Y page 259). Active light function
The active light function is a system that
moves the headlamps according to the steer-
ing movements of the front wheels. In this
way, relevant areas remain illuminated while
driving. This allows you to recognise pedes-
trians, cyclists and animals.
Active: when the lights are switched on.
Cornering light function The cornering light function improves the illu-
mination of the road over a wide angle in the
direction you are turning, enabling better vis-
ibility in tight bends, for example. It can only
be activated when the dipped-beam head-
lamps are switched on.
Active:
if you are driving at speeds below
40 km/ha nd switch on the tur nsignal or turn
the steering wheel.
Not active: if you are driving at speeds above
40 km/h or switch off the turn signal or turn
the steering wheel to the straight-ahead posi-
tion. 130
Exterior lightingLights and windscreen wipers
Page 275 of 457
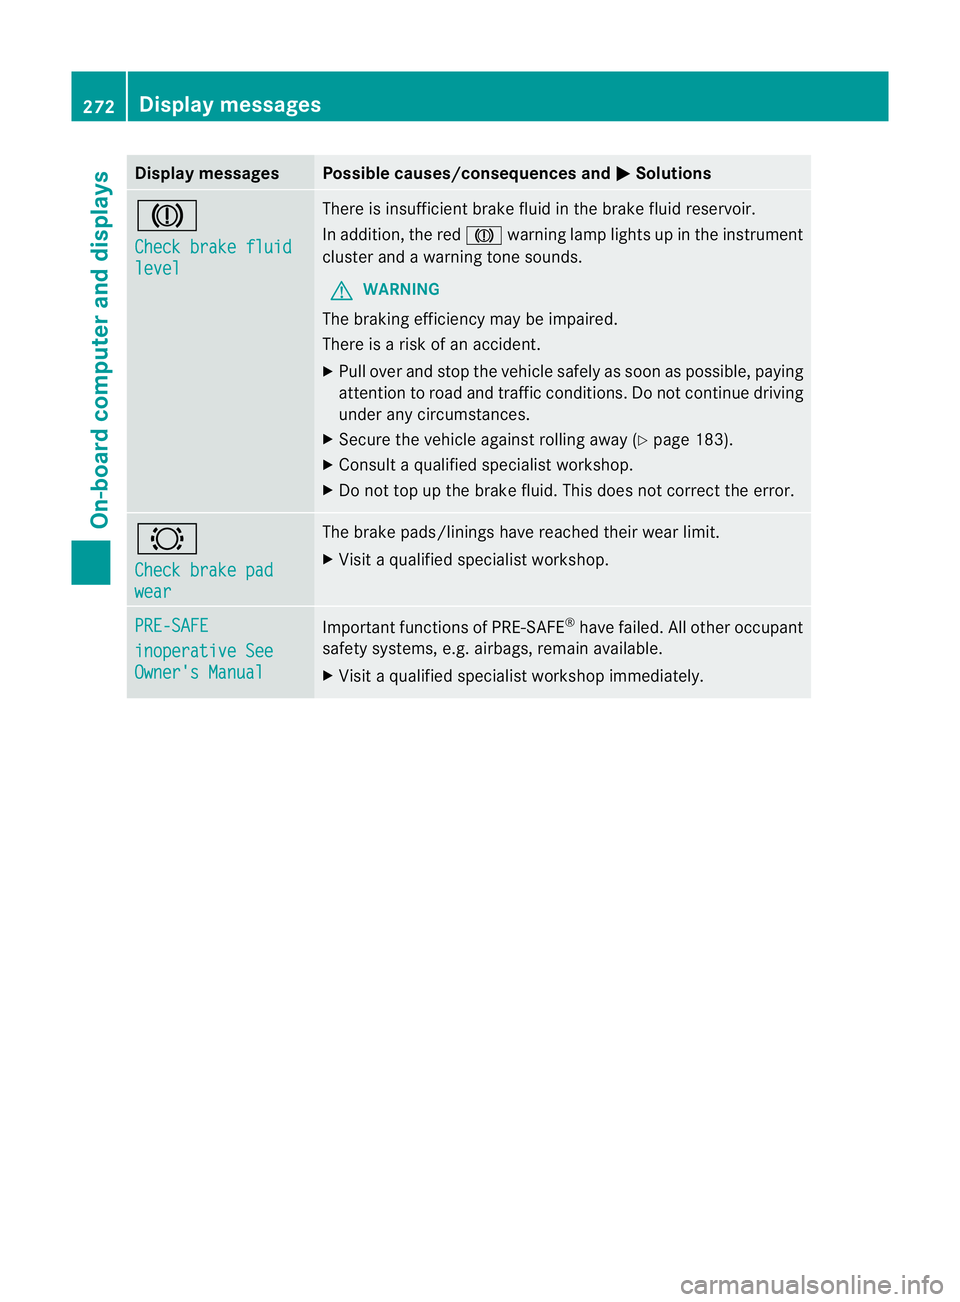
Display messages Possible causes/consequences and
M Solutions
J
Check brake fluid
level There is insufficien
tbrake fluid in the brake flui dreservoir.
In addition, the red Jwarning lamp lights up in the instrument
cluster and a warning tone sounds.
G WARNING
The braking efficiency may be impaired.
There is a risk of an accident.
X Pull over and stop the vehicle safely as soon as possible, paying
attention to road and traffic conditions .Donot continue driving
under any circumstances.
X Secure the vehicle against rolling away (Y page 183).
X Consult a qualified specialist workshop.
X Do not top up the brake fluid. This does not correct the error. #
Check brake pad
wear The brake pads/linings have reached their wear limit.
X
Visit a qualified specialist workshop. PRE-SAFE
inoperative See
Owner's Manual Important functions of PRE-SAFE
®
have failed. All other occupant
safety systems, e.g. airbags, remain available.
X Visit a qualified specialist workshop immediately. 272
Display messagesOn-board computer and displays