2012 MERCEDES-BENZ CLS SHOOTING BRAKE torque
[x] Cancel search: torquePage 23 of 405
Tyre pressure monitor
Checking the tyre pressure elec-
tronically ........................................ 360
Function/notes ............................. 360
Restarting ...................................... 361
Warning lamp ................................. 288
Warning message .......................... 361
Tyres
Changing awheel .......................... 362
Checking ........................................ 355
Direction of rotatio n...................... 362
Display message ............................ 268
Important safety notes ..................354
MOExtended tyres .........................356
Replacing ....................................... 362
Service life ..................................... 355
Storing ........................................... 363
Tyr esize (data) .............................. 367
Tyr etread ...................................... 355
see Flat tyre U
Unladen weight ................................. 394
Unlocking Emergency unlocking .......................84
From inside the vehicle (central
unlocking button) ............................. 83V
Vanity mirror (in sun visor) ..............305
Variable SPEEDTRONIC see SPEEDTRONIC
Vehicle
Correct use ...................................... 25
Data acquisition ............................... 25
Display message ............................ 272
Electronics ..................................... 383
Equipment ....................................... 23
Implied warranty .............................. 25
Individua lsettings .......................... 239
Leaving parked up .........................167
Locking (in an emergency) ...............84
Locking (key )................................... 77
Lowering ........................................ 366
Pulling away ................................... 149
Raising ........................................... 364
Registration ..................................... 24Securing from rolling away
............363
Towing away .................................. 346
Transporting .................................. 349
Unlocking (in an emergency) ...........84
Unlocking (key )................................ 77
Vehicle data ................................... 394
Vehicle data ....................................... 394
Vehicle dimensions ...........................394
Vehicle emergency locking ................84
Vehicle identification number see VIN
Vehicle identification plate ..............384
Vehicle level AIRMATIC ...................................... 188
AMG RIDE CONTROL sports sus-
pension .......................................... 190
Vehicle level (display message) .......261
Vehicle tool kit .................................. 335
Vehicle weights ................................. 394
Video Operating the DVD ......................... 234
VIN ...................................................... 384 W
Warning and indicator lamps ABS ................................................ 279
Brakes ........................................... 278
Distance warning signa l................. 287
ESP ®
.............................................. 281
ESP ®
OFF ....................................... 282
Fuel tank ........................................ 285
LIM (cruise control) ........................ 172
LIM (DISTRONIC PLUS) ..................178
LIM (variable SPEEDTRONIC) .........175
Overview .................................. 32, 276
PASSENGER AIRBAG OFF ................55
Reserve fuel ................................... 285
Seat bel t........................................ 277
SRS ................................................ 284
Tyr ep ressure monitor ...................288
Warning triangle ................................ 334
Washer fluid Display message ............................ 275
Wheel bol ttightening torque ...........366
Wheel chock ...................................... 36320
Index
Page 24 of 405
Wheels
Changing/replacing .......................362
Changing awheel .......................... 362
Checking ........................................ 355
Cleaning ......................................... 327
Cleaning (warning) .........................363
Emergency spare wheel .................377
Fitting anew wheel ........................ 366
Fitting awheel ............................... 363
Important safety notes ..................354
Removing awheel .......................... 365
Storing ........................................... 363
Tightening torque ........................... 366
Whee lsize/tyre size ...................... 367
Windowbag
Operation ........................................ .46
Windows
Cleaning ......................................... 328
see Side windows
Windscreen
Demisting ...................................... 136
Windscreen washe rfluid
see Windscreen washer system
Windscreen washer system
Notes ............................................. 393
Topping up ..................................... 323
Windscreen wipers
Problem (malfunction) ...................128
Rea rwindow wiper ........................ 126
Replacing the wiper blades ............126
Switching on/off ........................... 125
Winter operation
Important safety notes ..................356
Radiator cover ............................... 321
Slippery road surfaces ...................171
Snow chains .................................. 357
Winter tyres
Limiting the speed (on-board com-
puter) ............................................. 242
M+S tyres ...................................... 356
Wiper blades
Cleaning ......................................... 328
Important safety notes ..................126
Replacing ....................................... 126
Replacing (on the rear window) .....127
Replacing (windscreen) ..................126
Wooden trim (cleaning instruc-
tions) .................................................. 331Workshop
see Qualified specialist workshop Index
21
Page 70 of 405
If ESP
®
detects that the vehicle is deviating
from the direction desired by the driver, one
or more wheels are braked to stabilise the
vehicle .The engine output is also modified to
keep the vehicle on the desired course within
physical limits. ESP ®
assists the driver when
pulling away on wet or slippery roads. ESP ®
can also stabilise the vehicle during braking.
If ESP ®
intervenes, the ÷ESP®
warning
lamp flashes in the instrumentc luster.
If ESP ®
intervenes:
X Do not deactivate ESP ®
under any circum-
stances.
X When pulling away, only depress the accel-
erator pedal as far as is necessary.
X Adapt your driving style to suit the prevail-
ing road and weathe rconditions.
i Only use wheels with the recommended
tyre sizes. Only then will ESP ®
function
properly.
ETS/4ETS (Electronic Traction System) Traction control is part of ESP
®
.
Traction control brakes the drive wheels indi-
vidually if they spin. This enables you to pull
away and accelerate on slippery surfaces, for
example if the road surface is slippery on one
side. On vehicles with 4MATIC, more drive
torque is also transferred to the wheel or
wheels with traction.
Traction control remains active if you deacti-
vate ESP ®
.
Deactivating/activating ESP ®
(except
AMG vehicles) G
WARNING
If you deactivate ESP ®
, ESP ®
no longer sta-
bilises the vehicle. There is an increased risk
of skidding and an accident.
Only deactivate ESP ®
in the situations descri-
bed in the following. X
To deactivate: (Ypage 237).
The å ESP®
OFF warning lamp in the
instrument cluster lights up.
X To activate: (Ypage 237).
The å ESP®
OFF warning lamp in the
instrument cluster goes out.
ESP ®
is activated automatically when the
engine is started.
The ECO start/stop function switches the
engine off automatically if the vehicle stops
moving. When pulling away again, the engine
starts automatically. ESP ®
remains in its pre-
viously selected status. Example: if ESP ®
was
deactivated before the engine was switched
off, ESP ®
remains deactivated when the
engine is switched on again.
If ESP ®
is deactivated and one or more wheels
start to spin, the ÷ESP®
warning lamp in
the instrument cluster flashes. In such situa-
tions, ESP ®
will not stabilise the vehicle.
It may be best to deactivate ESP ®
in the fol-
lowing situations:
R when using snow chains
R in deep snow
R on sand or gravel
If you deactivate ESP ®
:
R ESP ®
no longer improves driving stability.
R traction control is still activated.
R ESP ®
still provides support when you
brake.
R engine torque is not limited and the drive
wheels are able to spin. The spinning of the
wheels results in a cutting action for better
traction. Driving safety systems
67Safety Z
Page 71 of 405
Deactivating/activating ESP
®
(AMG
vehicles) Activating/deactivating SPORT handling
mode
G
WARNING
Whe nSPORT handling mode is activated,
there is a greater risk of skidding and acci-
dents.
Only activate SPORT handling mode in the sit-
uations described in the following. X
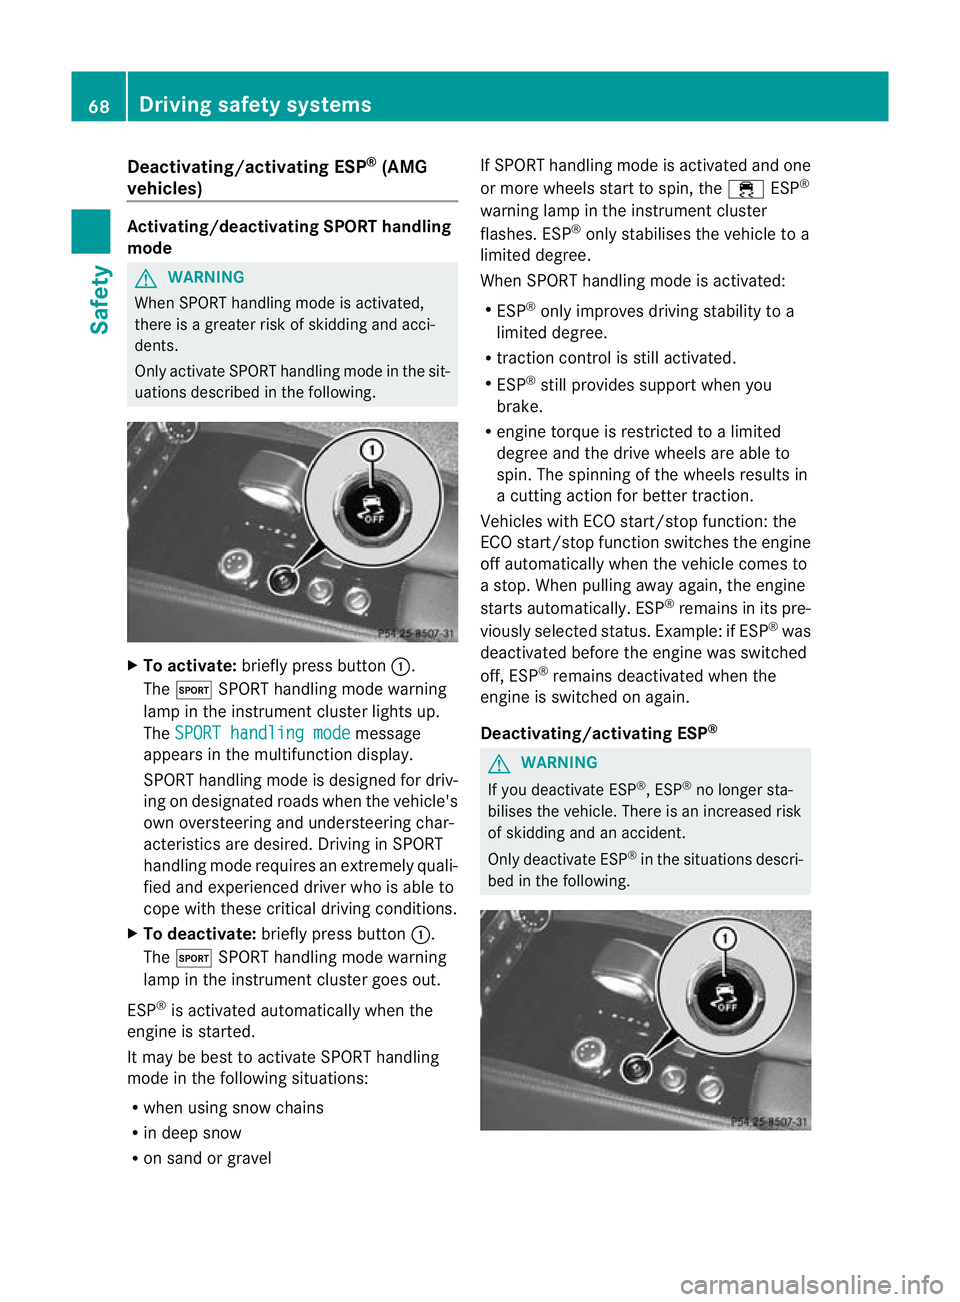
To activate: briefly press button :.
The M SPORT handling mode warning
lamp in the instrument cluster lights up.
The SPORT handling mode message
appears in the multifunction display.
SPORT handling mode is designed for driv-
ing on designated roads when the vehicle's
own oversteering and understeering char-
acteristics are desired. Driving in SPORT
handling mode requires an extremely quali-
fied and experienced driver who is able to
cope with these critical driving conditions.
X To deactivate: briefly press button :.
The M SPORT handling mode warning
lamp in the instrument cluster goes out.
ESP ®
is activated automatically when the
engine is started.
It may be best to activate SPORT handling
mode in the following situations:
R when using snow chains
R in deep snow
R on sand or gravel If SPORT handling mode is activated and one
or more wheels start to spin, the
÷ESP®
warning lamp in the instrument cluster
flashes. ESP ®
only stabilises the vehicle to a
limited degree.
When SPORT handling mode is activated:
R ESP ®
only improves driving stability to a
limited degree.
R traction control is still activated.
R ESP ®
still provides support when you
brake.
R engine torque is restricted to a limited
degree and the drive wheels are able to
spin. The spinning of the wheels results in
a cutting action for better traction.
Vehicles with ECO start/stop function: the
ECO start/stop function switches the engine
off automatically when the vehicle comes to
a stop. When pulling away again, the engine
starts automatically. ESP ®
remains in its pre-
viously selected status. Example: if ESP ®
was
deactivated before the engine was switched
off, ESP ®
remains deactivated when the
engine is switched on again.
Deactivating/activating ESP ® G
WARNING
If you deactivate ESP ®
, ESP ®
no longer sta-
bilises the vehicle. There is an increased risk
of skidding and an accident.
Only deactivate ESP ®
in the situations descri-
bed in the following. 68
Driving safety systemsSafety
Page 72 of 405
X
To deactivate: press button:until the
å ESP®
OFF warning lamp lights up in
the instrument cluster.
The ÷OFF message appears in the mul-
tifunctio ndisplay.
Deactivate ESP ®
when driving on designa-
ted roads when the vehicle's own over-
steering and understeering characteristics
are desired. Driving without ESP ®
requires
an extremely qualified and experienced
drive rwho is able to cope with these critical
driving conditions.
X To activate: briefly press button :.
The å ESP®
OFF warning lamp in the
instrumentc luster goes out. The ÷ON message appears in the multifunction dis-
play.
ESP ®
is activated automatically when the
engine is started.
If ESP ®
is deactivated and one or more wheels
start to spin, the ÷ESP®
warning lamp in
the instrumen tcluster does not flash. In such
situations, ESP ®
will not stabilise the vehicle.
It may be best to deactivate ESP ®
in the fol-
lowing situations:
R when using snow chains
R in deep snow
R on sand or gravel
If you deactivate ESP ®
:
R ESP ®
no longer improves driving stability.
R traction control is still activated.
R PRE-SAFE ®
is no longer available; nor is it
activated if you brake firmly and ESP ®
inter-
venes.
R PRE-SAFE ®
Brake is no longer available; it
is also not activated if you brake firmly and
ESP ®
intervenes.
R ESP ®
still provides support when you
brake.
R engine torque is no longer limited and the
drive wheels are able to spin .The spinning
of the wheels results in a cutting action for
better traction. Vehicles with ECO start/stop function: the
ECO start/stop function switches the engine
off automatically when the vehicle comes to
a stop. When pulling away again, the engine
starts automatically
.ESP ®
remains in its pre-
viously selected status. Example :ifESP®
was
deactivated before the engine was switched
off, ESP ®
remains deactivated when the
engine is switched on again.
ESP ®
trailer stabilisation G
WARNING
If road and weather conditions are poor,
traile rstabilisation will not be able to prevent
the vehicle/trailer combination from swerv-
ing .Trailers with a high centre of gravity can
tip over before ESP ®
can detect this. There is
a risk of an accident.
Always adapt yourd riving style to the prevail-
ing road and weather conditions.
If yourv ehicle/trailer combination begins to
lurch, you can only stabilise the vehicle/
trailer combination by depressing the brake
firmly.
In this situation, ESP ®
assists you and can
detec tifthe vehicle/trailer combination
begins to lurch. ESP ®
slows the vehicle down
by braking and limiting the engine output until
the vehicle/trailer combination has stabi-
lised.
Trailer stabilisation is active above speeds of
about 65 km/h.
Trailer stabilisation does not work if ESP ®
is
deactivated or disabled because of a mal-
function. EBD (electronic brake force distribu-
tion)
i Observe the "Important safety notes" sec-
tion (Y page 64). Driving safety systems
69Safety Z
Page 369 of 405
X
Unscrew the uppermost wheel bolt com-
pletely.
X Screw centring pin :into the thread
instead of the wheel bolt.
X Unscrew the remaining wheel bolts fully.
X Remove the wheel.
Fitting anew wheel G
WARNING
Oiled or greased wheel bolts or damaged
wheel bolts/hub threads can cause the wheel
bolts to come loose .As a result, you could
lose a wheel while driving. There is a risk of
accident.
Never oil or grease wheel bolts. In the event
of damage to the threads, contact a qualified
specialist workshop immediately.H ave the
damaged wheel bolts or hub threads
replaced/renewed. Do no tcontinue driving. G
WARNING
If you tighten the wheel bolts or wheel nuts
when the vehicle is raised, the jack could tip
over. There is a risk of injury.
Only tighten the wheel bolts or wheel nuts
when the vehicle is on the ground.
Always pay attention to the instructions and
safety notices in "Changing a wheel"
(Y page 362).
Only use wheel bolts that have been designed
for the wheel and the vehicle. For safety rea-
sons, Mercedes-Benz recommends that you
only use wheel bolts which have been
approved for Mercedes-Benz vehicles and the
respective wheel.
! AMG vehicle with ceramic brake
discs: during removal and repositioning of
the wheel, the wheel rim can strike the
ceramic-brake disc and damage it. There-
fore, take precautions and have a second
person assist you. Alternatively, you can
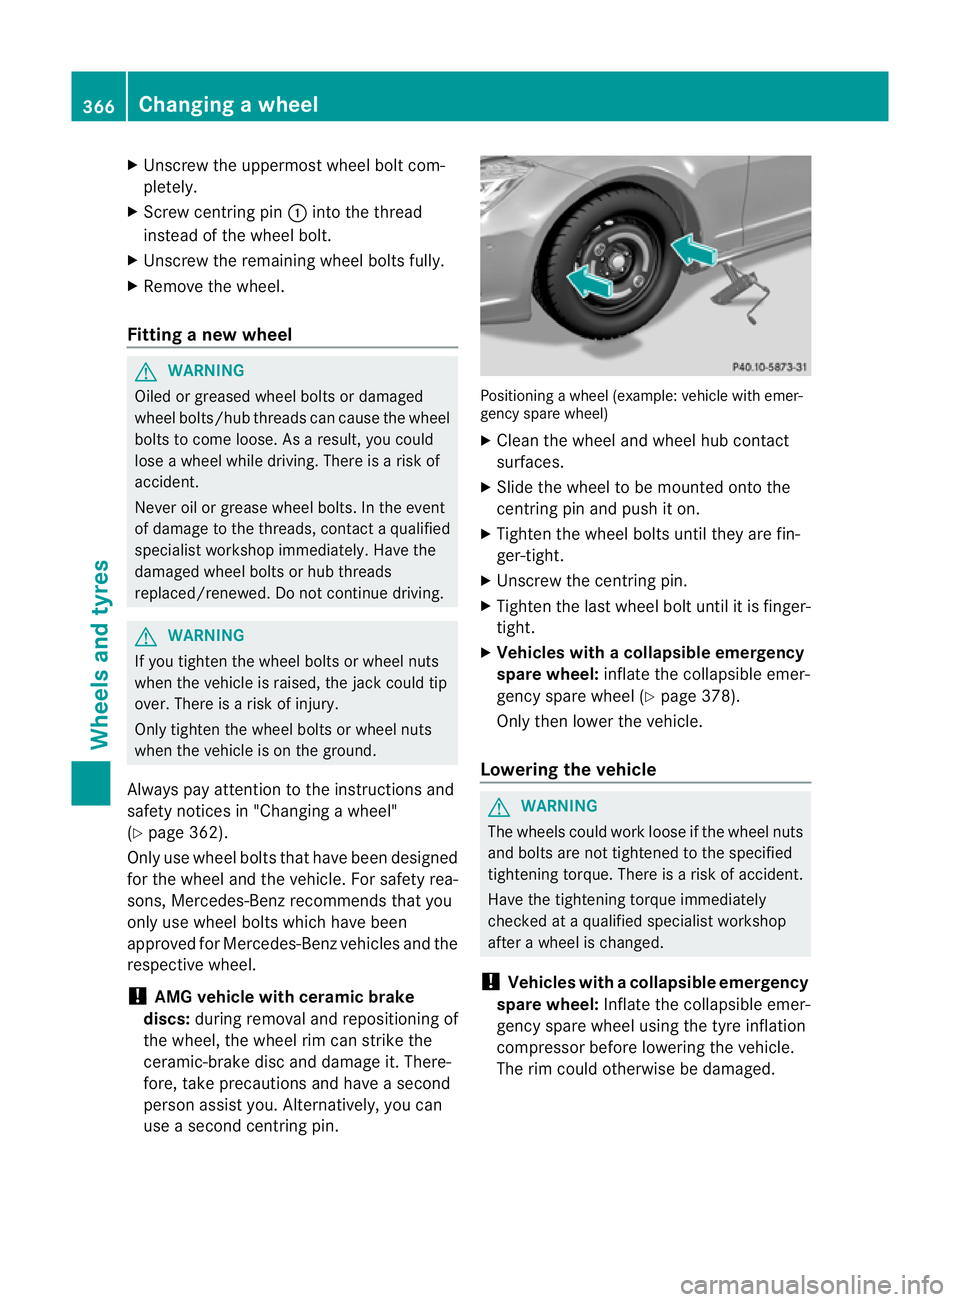
use a second centring pin. Positioning a wheel (example: vehicle with emer-
gency spare wheel)
X
Clean the wheel and wheel hub contact
surfaces.
X Slide the wheel to be mounted onto the
centring pin and push it on.
X Tighten the wheel bolts until they are fin-
ger-tight.
X Unscrew the centring pin.
X Tighten the last wheel bolt until it is finger-
tight.
X Vehicles with acollapsible emergency
spare wheel: inflate the collapsible emer-
gency spare wheel (Y page 378).
Only then lower the vehicle.
Lowering the vehicle G
WARNING
The wheels could work loose if the wheel nuts
and bolts are not tightene dto the specified
tightening torque. There is a risk of accident.
Have the tightening torque immediately
checked at a qualified specialist workshop
after a wheel is changed.
! Vehicles with acollapsible emergency
spare wheel: Inflate the collapsible emer-
gency spare wheel using the tyre inflation
compressor before lowering th evehicle.
The rim could otherwise be damaged. 366
Changing
awheelWheels and tyres
Page 370 of 405

Tightening wheel bolts (example: vehicle with
emergency spare wheel)
X Turn the crank of the jack anti-clockwise
until the vehicle is once again standing
firmly on the ground.
X Place the jack to one side.
X Tighten the wheel bolts evenly in a cross-
wise pattern in the sequence indicated
(: toA). The tightening torque must be
130 Nm.
X Turn the jack back to its initial position.
X Stow the jack and the rest of the vehicle
tools in the boot again.
X Check the air pressure of the newly fitted
wheel and adjust accordingly.
Observe the recommended tyre pressure
(Y page 357).
i Vehicles with tire pressure control sys-
tem: all fitted wheels must be equipped
with functioning sensors. Wheel and tyre combinations
General notes
! For safety reasons, Mercedes-Benz rec-
ommends that you only use tyres and
wheels which have been approved by
Mercedes-Benz specifically for your vehi-
cle. These are specially adapted to the control
systems, such as ABS or ESP
®
and are
marked as follows:
R MO =Mercedes-BenzO riginal
R MOE =Mercedes-BenzO riginal Extended
(tyres featuring run-flat characteristics)
R MO1 =Mercedes-BenzO riginal (only cer-
tain AMG tyres)
Mercedes-Benz Original Extended tyres
may only be used on wheels that have been
specifically approved by Mercedes-Benz.
Only use tyres, wheels or accessories tes-
ted and approved by Mercedes-Benz. Cer-
tain characteristics, e.g. handling, vehicle
noise emissions or fuel consumption, may
otherwise be adversely affected. In addi-
tion, when driving with aload, tyre dimen-
sion variations could cause the tyres to
come into contact with the bodywork and
axle components.T his could result in dam-
age to the tyres or the vehicle.
Mercedes-Ben zaccepts no liability for
damage resulting from the use of tyres,
wheels or accessories othe rthan those tes-
ted and approved.
Further information about wheels, tyres
and approved combinations can be
obtained from any qualified specialist
workshop.
! Retreaded tyres are neither tested nor
recommended by Mercedes-Benz, since
previous damage cannot always be detec-
ted on retreaded tyres. As a result,
Mercedes-Ben zcannot guarantee vehicle
safety if retreaded tyres are fitted. Do not
fit used tyres if you have no information
about their previous usage.
! Large wheels :the lower the section width
for a certain wheel size, the lower the ride
comfort is on poor road surfaces. Roll com-
fort and suspension comfort are reduced
and the risk of damage to the wheels and
tyres as a result of driving over obstacles
increases. Wheel and tyre combinations
367Wheels and tyres Z