2012 MERCEDES-BENZ CLS SHOOTING BRAKE change wheel
[x] Cancel search: change wheelPage 202 of 405

Activating/deactivating the reversing
camera
X
To activate: make sure that the key is in
position 2in the ignition lock.
X Make sure that the "Activation by R gear"
setting is active in COMAND Online; see the
separate COMAND Online operating
instructions.
X Engage reverse gear.
The area behind the vehicle is shown with
guide lines in the COMAND display.
X To change the function mode for vehi-
cles with trailer tow hitch: using the
COMAND controller, select symbol :for
the "Reverse parking" function or sym-
bol ;for "Coupling up a trailer" (see the
separate COMAND Online operating
instructions).
The symbol of the selected function is high-
lighted.
To deactivate: the reversing camera is deac-
tivated if you:
R shif tthe transmission to position P
R drive forwards 10 m
R shift the transmission from Rto another
position (after 15 seconds)
R drive forwards at a speed of over
10 km/h Displays in the COMAND display G
WARNING
Using the reversing camera can be dangerous
if you are colour-blind or if your ability to dis-
tinguish colours is impaired.
Only use the reversing camera if you can see
and distinguish between all the coloured
guide lines that are displayed by the reversing
camera in the COMAND display. G
WARNING
Please note that objects not at ground level
may appear to be further away than they
actually are. These include:
R the bumper of a vehicle that is parked
behind your vehicle
R a trailer drawbar
R the ball coupling of a trailer tow hitch
R the tail-end of a lorry
R slanted posts
The lines are only guides, not accurate meas-
urements of the distance to an obstacle.
Therefore, you should never pass the red line
when approaching an obstacle. You could oth-
erwise cause an accident and injure yourself
and others. :
White guide line without turning the steer-
ing wheel, vehicle width including the
exterior mirrors (static)
; Yellow guide line at a distance of approx-
imately 4.0 mfrom the rear of the vehicle Driving systems
199Driving and parking Z
Page 214 of 405
conditions. Alway
spay attention to traffic
conditions and your surroundings. Otherwise,
you may fail to recognise dangers in time,
cause an acciden tand injure yoursel fand oth-
ers.
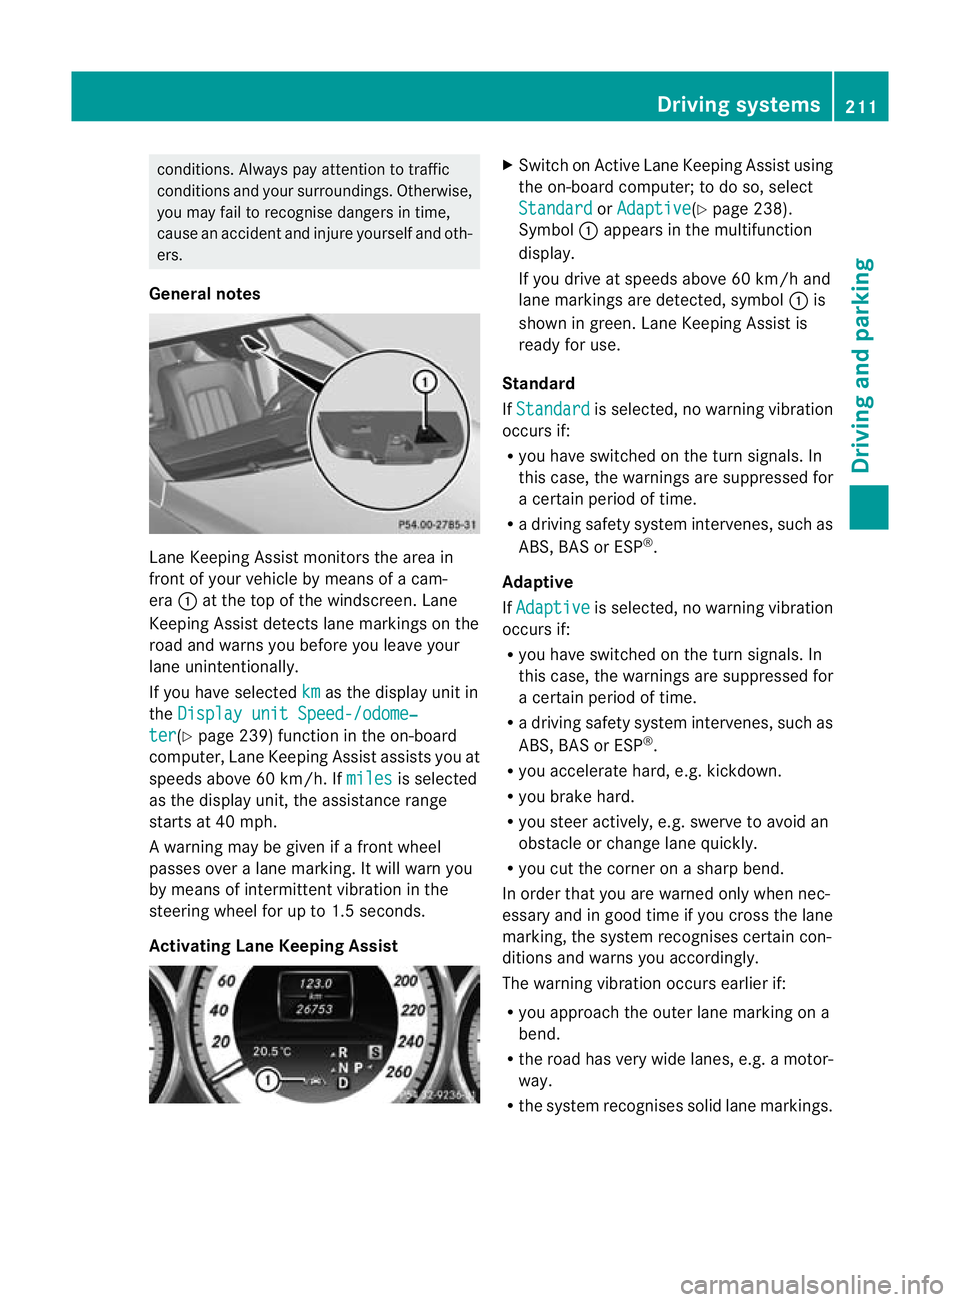
General notes Lane Keeping Assist monitors the area in
front of your vehicle by means of a cam-
era :at the top of the windscreen. Lane
Keeping Assist detects lane markings on the
road and warns you before you leave your
lane unintentionally.
If you have selected km as the display uni
tin
the Display unit Speed-/odome‐ ter (Y
page 239) function in the on-board
computer, Lane Keeping Assist assists you at
speeds above 60 km/h. If miles is selected
as the display unit, the assistance range
starts at 40 mph.
A warning may be given if a front wheel
passes ove ralane marking. It will warn you
by means of intermittent vibration in the
steering wheel for up to 1. 5seconds.
Activating Lane Keeping Assist X
Switch on Active Lane Keeping Assist using
the on-board computer; to do so, select
Standard or
Adaptive (Y
page 238).
Symbol :appears in the multifunction
display.
If you drive at speeds above 60 km/h and
lane markings are detected, symbol :is
shown in green. Lane Keeping Assist is
ready for use.
Standard
If Standard is selected, no warning vibration
occurs if:
R you have switched on the turn signals. In
this case, the warnings are suppressed for
a certain period of time.
R a driving safety system intervenes, such as
ABS, BAS or ESP ®
.
Adaptive
If Adaptive is selected, no warning vibration
occurs if:
R you have switched on the turn signals. In
this case, the warnings are suppressed for
a certain period of time.
R a driving safety system intervenes, such as
ABS, BAS or ESP ®
.
R you accelerate hard, e.g. kickdown.
R you brake hard.
R you steer actively, e.g. swerve to avoid an
obstacle or change lane quickly.
R you cut the corner on a sharp bend.
In order that you are warned only when nec-
essary and in good time if you cross the lane
marking, the system recognises certain con-
ditions and warns you accordingly.
The warning vibration occurs earlier if:
R you approach the outer lane marking on a
bend.
R the road has very wide lanes, e.g. a motor-
way.
R the system recognises solid lane markings. Driving systems
211Driving and parking Z
Page 235 of 405
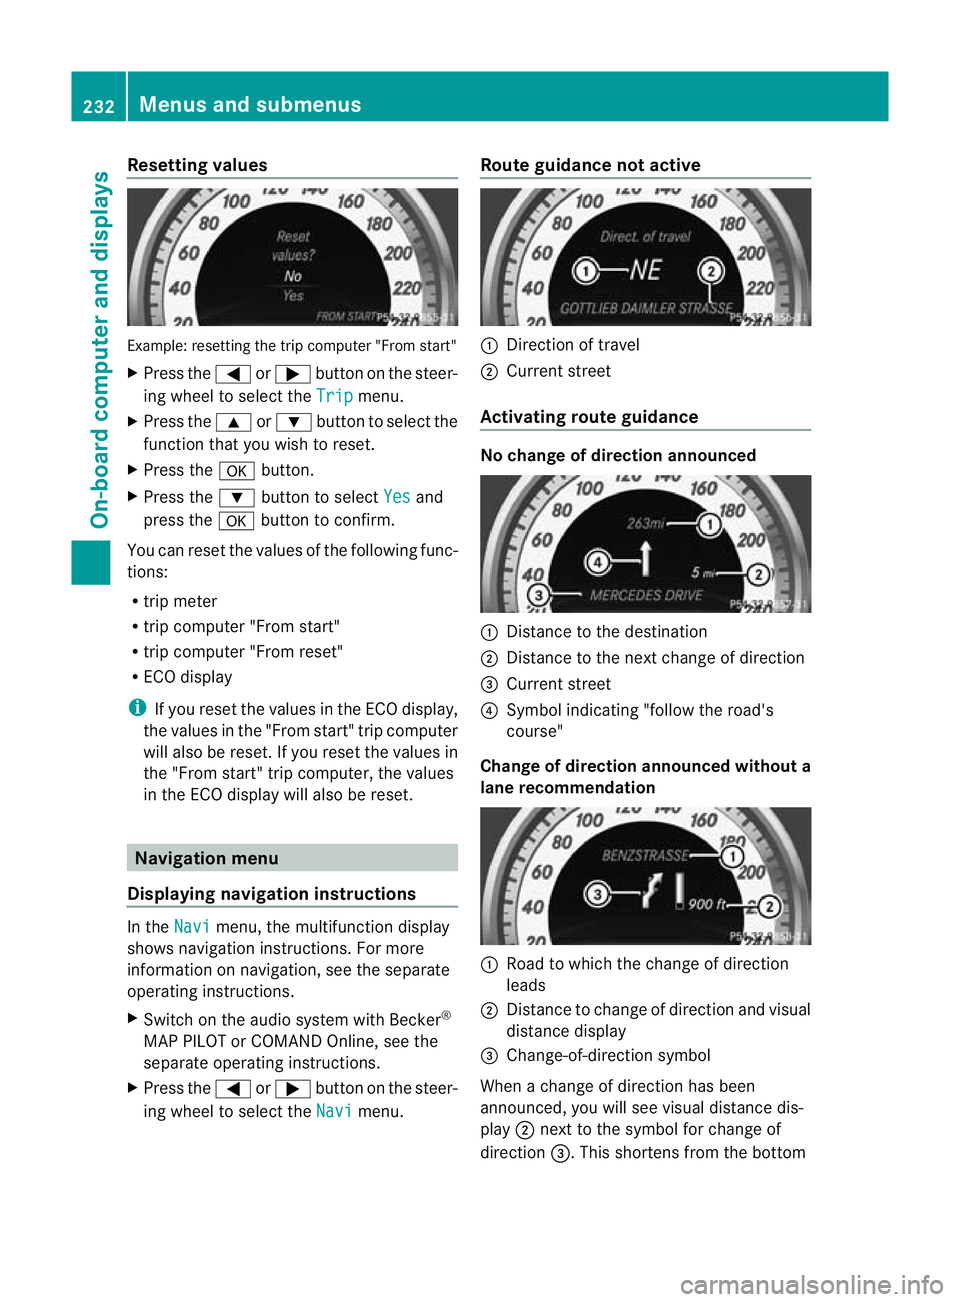
Resetting values
Example: resetting the trip computer "From start"
X
Press the =or; button on the steer-
ing wheel to select the Trip menu.
X Press the 9or: button to select the
function that you wish to reset.
X Press the abutton.
X Press the :button to select Yes and
press the abutton to confirm.
You can reset the values of the following func-
tions:
R trip meter
R trip computer "From start"
R trip computer "From reset"
R ECO display
i If you reset the value sinthe ECO display,
the values in the "From start" trip computer
will also be reset. If you reset the values in
the "From start" trip computer, the values
in the ECO display will also be reset. Navigation menu
Displaying navigation instructions In the
Navi menu, the multifunction display
shows navigation instructions. For more
information on navigation, see the separate
operating instructions.
X Switch on the audio system with Becker ®
MAP PILOT or COMAND Online, see the
separate operating instructions.
X Press the =or; button on the steer-
ing wheel to select the Navi menu.Route guidance not active :
Direction of travel
; Current street
Activating route guidance No change of direction announced
:
Distance to the destination
; Distance to the next change of direction
= Current street
? Symbol indicating "follow the road's
course"
Change of direction announced without a
lane recommendation :
Road to which the change of direction
leads
; Distance to change of direction and visual
distance display
= Change-of-direction symbol
When a change of direction has been
announced, you will see visual distance dis-
play ;next to the symbol for change of
direction =.This shortens from the bottom 232
Menus and submenusOn-board computer and displays
Page 236 of 405
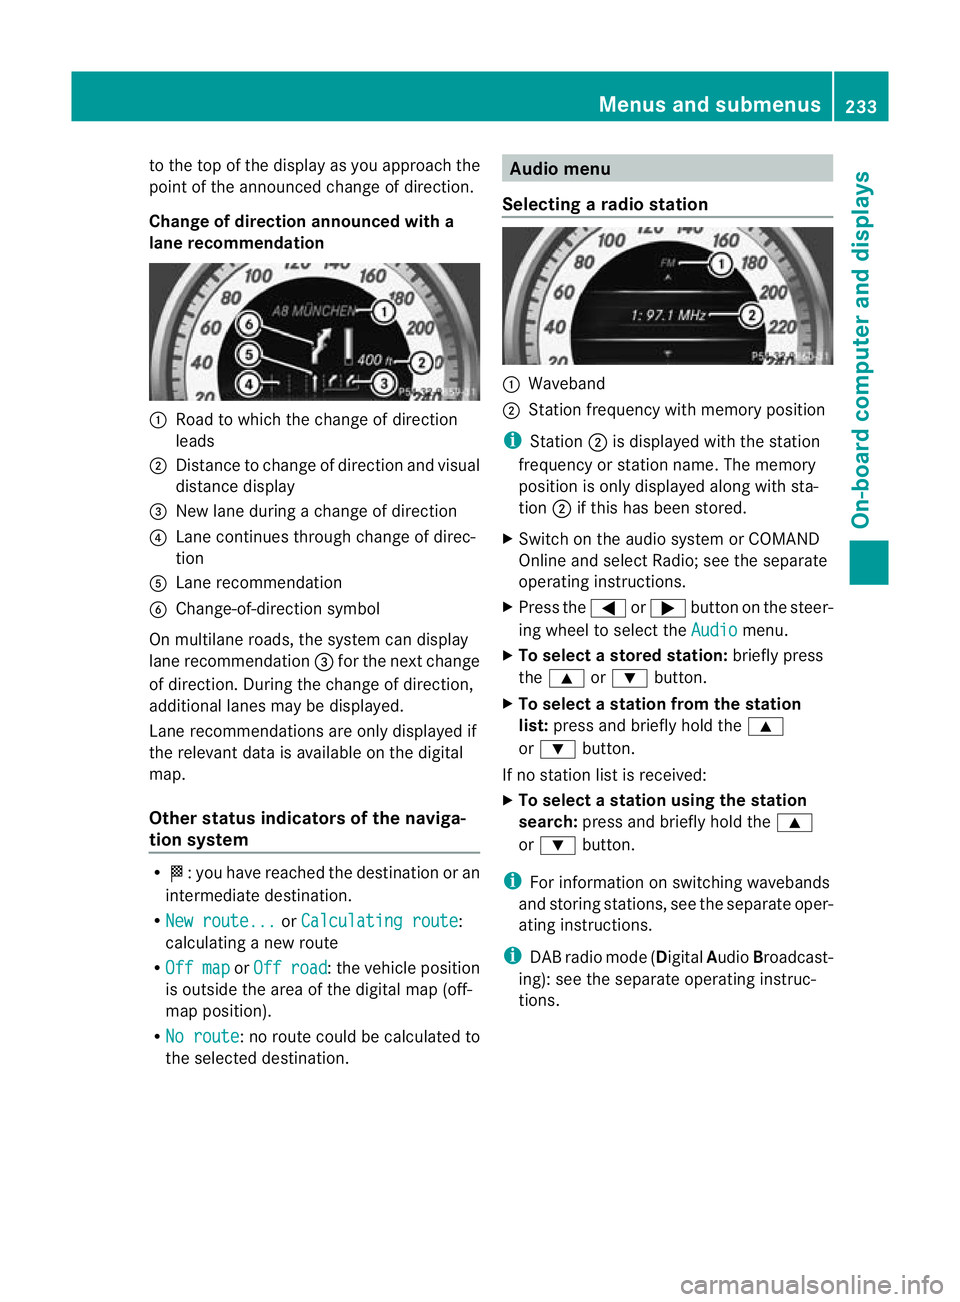
to the top of the display as you approach the
point of the announced change of direction.
Change of direction announced with a
lane recommendation :
Road to which the change of direction
leads
; Distance to change of directio nand visual
distance display
= New lane during a change of direction
? Lane continues through change of direc-
tion
A Lane recommendation
B Change-of-direction symbol
On multilane roads, the system can display
lane recommendation =for the next change
of direction. During the change of direction,
additional lanes may be displayed.
Lane recommendations are only displayed if
the relevant data is availabl eonthe digital
map.
Other status indicators of the naviga-
tion system R
O:y ou have reached the destination or an
intermediate destination.
R New route... or
Calculating route :
calculating a new route
R Off map or
Off road :t
he vehicle position
is outside the area of the digital map (off-
map position).
R No route :n
o route could be calculated to
the selected destination. Audio menu
Selecting aradio station :
Waveband
; Station frequency with memory position
i Station ;is displayed with the station
frequency or station name. The memory
position is only displayed along with sta-
tion ;if this has bee nstored.
X Switch on the audio syste morCOMAND
Online and select Radio; see the separate
operating instructions.
X Press the =or; button on the steer-
ing wheel to select the Audio menu.
X To select astore dstation: briefly press
the 9 or: button.
X To select a station from the station
list: press and briefly hold the 9
or : button.
If no statio nlist is received:
X To select astation using the station
search: press and briefly hold the 9
or : button.
i For informatio nonswitching wavebands
and storing stations, see the separate oper-
ating instructions.
i DABradio mode ( DigitalAudioBroadcast-
ing): see the separate operating instruc-
tions. Menus and submenus
233On-board computer and displays Z
Page 237 of 405
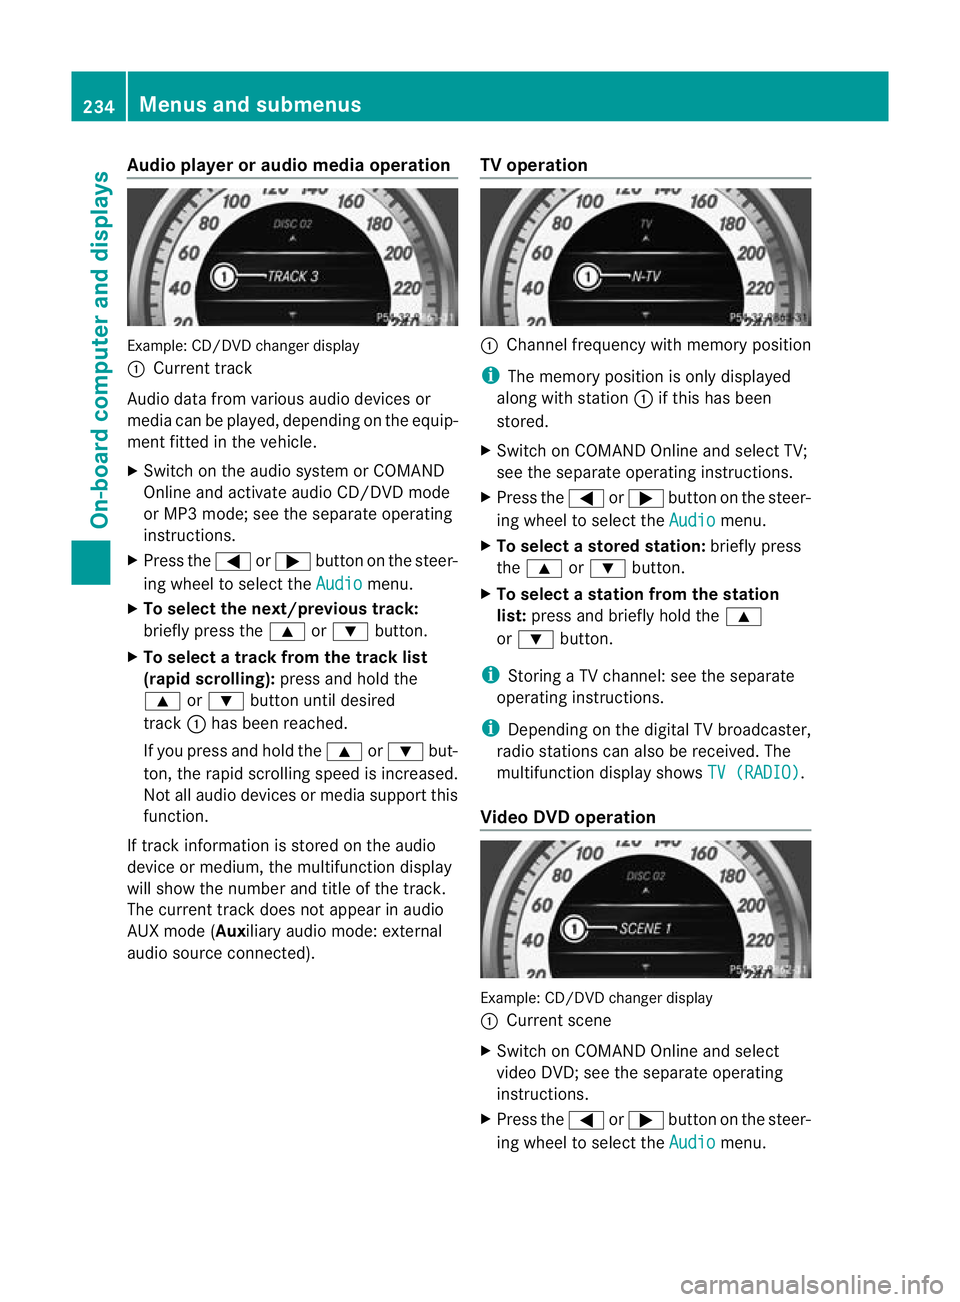
Audio player or audio media operation
Example: CD/DV
Dchanger display
: Current track
Audio data from various audiod evices or
media can be played, depending on the equip-
ment fitted in the vehicle.
X Switch on the audio system or COMAND
Online and activate audio CD/DVD mode
or MP3 mode; see the separate operating
instructions.
X Press the =or; button on the steer-
ing wheel to select the Audio menu.
X To select the next/previous track:
briefly press the 9or: button.
X To select a track from the track list
(rapid scrolling): press and hold the
9 or: button until desired
track :has been reached.
If you press and hold the 9or: but-
ton, the rapid scrolling speed is increased.
Not all audio devices or media support this
function.
If track information is stored on the audio
device or medium, the multifunction display
will show the number and title of the track.
The curren ttrack does not appear in audio
AUX mode (Auxiliary audio mode: external
audio source connected). TV operation :
Channel frequency with memory position
i The memory position is only displayed
along with station :if this has been
stored.
X Switch on COMAND Online and select TV;
see the separate operating instructions.
X Press the =or; button on the steer-
ing wheel to select the Audio menu.
X To selectas toredstation: briefly press
the 9 or: button.
X To select a station from the station
list: press and briefly hold the 9
or : button.
i Storing a TV channel :see the separate
operating instructions.
i Depending on the digital TV broadcaster,
radio stations can also be received. The
multifunction display shows TV (RADIO) .
Video DVD operation Example: CD/DVD changer display
:
Current scene
X Switch on COMAND Online and select
video DVD; see the separate operating
instructions.
X Press the =or; button on the steer-
ing wheel to select the Audio menu.234
Menus and submenusOn-board computer and displays
Page 242 of 405
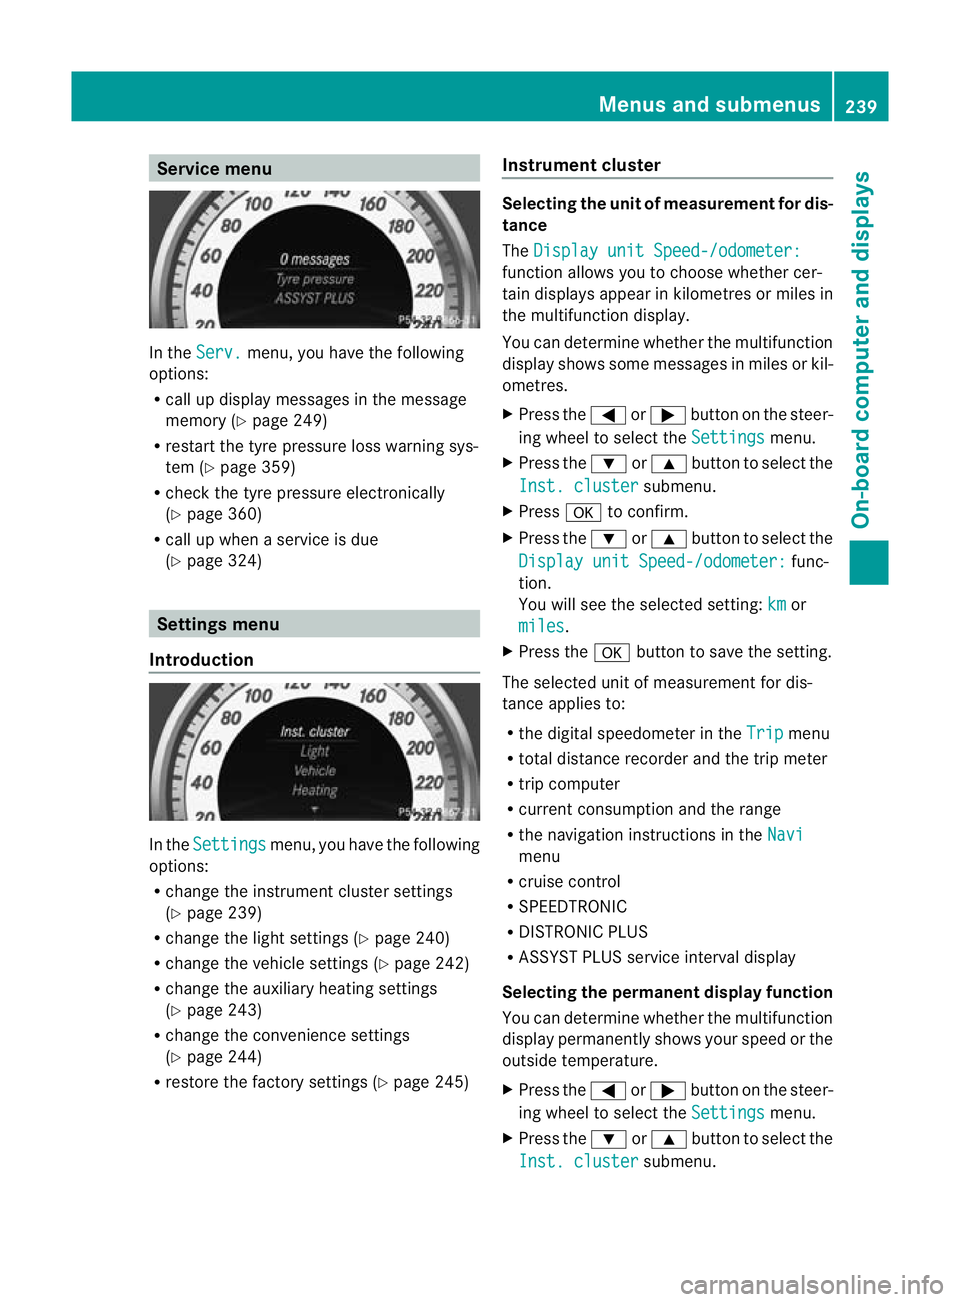
Service menu
In the
Serv. menu, you have the following
options:
R call up display messages in the message
memory (Y page 249)
R restart the tyre pressure loss warning sys-
tem (Y page 359)
R check the tyre pressure electronically
(Y page 360)
R call up when a service is due
(Y page 324) Settings menu
Introduction In the
Settings menu, you have the following
options:
R change the instrument cluster settings
(Y page 239)
R change the light settings (Y page 240)
R change the vehicle settings (Y page 242)
R change the auxiliary heating settings
(Y page 243)
R change the convenience settings
(Y page 244)
R restore the factory settings (Y page 245)Instrument cluster Selecting the unit of measurement for dis-
tance
The
Display unit Speed-/odometer: function allows you to choose whether cer-
tain displays appear in kilometres or miles in
the multifunction display.
You can determine whether the multifunction
display shows some messages in miles or kil-
ometres.
X
Press the =or; button on the steer-
ing wheel to select the Settings menu.
X Press the :or9 button to select the
Inst. cluster submenu.
X Press ato confirm.
X Press the :or9 button to select the
Display unit Speed-/odometer: func-
tion.
You will see the selected setting: km or
miles .
X Press the abutton to save the setting.
The selected unit of measurement for dis-
tance applies to:
R the digital speedometer in the Trip menu
R total distance recorder and the trip meter
R trip computer
R current consumption and the range
R the navigation instructions in the Navi menu
R cruise control
R SPEEDTRONIC
R DISTRONIC PLUS
R ASSYST PLUS service interval display
Selecting the permanent display function
You can determine whether the multifunction
display permanently shows your speed or the
outside temperature.
X Press the =or; button on the steer-
ing wheel to select the Settings menu.
X Press the :or9 button to select the
Inst. cluster submenu.Menus and submenus
239On-board computer and displays Z
Page 244 of 405
left-side traffic or
Intell. Light System: System inoperative Inactive
for right-side traffic (Y
page 241)
display message instead of the Intell.Light System function in the
Light sub-
menu.
Further information on the Intelligent Light
System (Y page 119).
Setting the dipped-beam headlamps for
driving on the left/right
X Press the =or; button on the steer-
ing wheel to select the Settings menu.
X Press the :or9 button to select the
Light submenu.
X Press ato confirm.
X Press the :or9 button to select the
Dipped beams Setting for: function.
You will see the selected setting: Right-side traffic or
Left-side traffic .
X Press the abutton to save the setting.
If you change the setting, conversion does
not take place until the next time the vehi-
cle is stationary.
This function is only available on vehicles with
the Intelligent Light System.
You can use this function to switch between
symmetrical and asymmetrical dipped beam
(Y page 114).
If you set the dipped-beam headlamps for
driving on the right/left, then motorway
mode and the extended range foglamps are
unavailable.
Aq ualified specialist workshop can set the
dipped-beam headlamps for driving on the
right or left .
Switching Adaptive Highbeam Assis ton/
off
X Press the =or; button on the steer-
ing wheel to select the Settings menu.
X Press the :or9 button to select the
Light submenu.
X Press ato confirm. X
Press the :or9 button to select the
Adapt. main beam function.
If the Adapt. main beam function has
been switched on, the cone of light and the
_ symbol in the upper multifunction
display are shown in red.
X Press the abutton to save the setting.
For further information about Adaptive High-
beam Assist, see (Y page 121).
Setting the brightness of the ambient
lighting
X Press the =or; button on the steer-
ing wheel to select the Settings menu.
X Press the :or9 button to select the
Light submenu.
X Press ato confirm.
X Press the :or9 button to select the
Amb. light +/- function.
You will see the selected setting.
X Press ato confirm.
X Press the :or9 button to adjust the
brightness to any level from Off to
Level 5 (bright).
X Press the aor% button to save the
setting.
Setting the ambient lighting colour
X Press the =or; button on the steer-
ing wheel to select the Settings menu.
X Press the :or9 button to select the
Light submenu.
X Press ato confirm.
X Press the :or9 button to select the
Ambient light colour function.
X Press ato confirm.
X Press the :or9 button to set the
colour to SOLAR ,
NEUTRAL or
POLAR .
X Press the aor% button to save the
setting. Menus and submenus
241On-board computer and displays Z
Page 247 of 405
ignitable material such as dry grass or fuels.
The material could otherwise ignite and set
the vehicle alight .Choose your parking spot
accordingly.
Operating the auxiliary heating is thus pro-
hibited at filling stations or when your vehicle
is being refuelled. You must therefore switch
off the auxiliary heating at filling stations.
! Operating the auxiliary heating/ventila-
tion draws on the vehicle battery. After you
have heated or ventilated the vehicle a
maximum of two times, drive for a longer
distance.
This function is only available on vehicles with
auxiliary heating (Y page 138).
In the Heating submenu, you can select a
stored departure time or change a departure
time.
The auxiliary heating timer function calcu-
lates the switch-on time according to the out-
side temperature so that the vehicle is pre-
heated by the departure time. When the
departure time is reached, the auxiliary heat-
ing continues to heat for a further five
minutes and then switches off. The auxiliary
heating adopts the THERMATIC or
THERMOTRONIC temperature setting.
You can switch off the auxiliary heating by
using the remote control or the auxiliary heat-
ing button on the centre console.
i Switch the auxiliary heating on regularly
once a month for about ten minutes.
Selecting the departure time or deactivat-
ing a selected departure time
X Press the =or; button on the steer-
ing wheel to select the Settings menu.
X Press the :or9 button to select the
Heating submenu.
X Press ato confirm.
You will see the selected setting.
X Press ato confirm. X
Press the :or9 button to select
one of the three departure times or Timer off (no timer active).
X Press ato confirm.
If a departure time is selected, the yellow
indicator lamp lights up on the auxiliary
heating button.
Changing the departure time
X Press the =or; button on the steer-
ing wheel to select the Settings menu.
X Press the :or9 button to select the
Heating submenu.
X Press ato confirm.
You will see the selected setting.
X Press ato confirm.
X Press the :or9 button to select A ,
B or
Change C .
X Press ato confirm.
You can now change the departure time.
X Press the =or; button to select the
display to be changed: hours, minutes.
X Press the :or9 button to set the
selected display.
X Press the abutton to store the entry.
The yellow indicator lamp on the auxiliary
heating button lights up.
Convenience Activating/deactivating the EASY-
ENTRY/EXIT feature
G
WARNING
The steering wheel moves when the EASY-
ENTRY/EXIT feature is active. There is a risk
of occupants becoming trapped. Before acti-
vating the EASY-ENTRY/EXIT feature, make
sure that nobody can become trapped.
Do not leave children unsupervised in the
vehicle, even if they are secured in a child
restraint system. The children could open the
driver's door and thereby unintentionally acti-
vate the EASY-ENTRY/EXIT feature and
become trapped. 244
Menus and submenusOn-board computer and displays