Page 128 of 405
X
Insert bulb holder =into the lamp and turn
it clockwise.
X Reinsert the lamp cluster.
X Tighten four nuts :.
X Push in connector ;until it engages.
X Insert the side panelling. Windscreen wipers
Switching the windscreen wipers on/
off G
WARNING
The windscree nwill not longer be wiped prop-
erly if the wiper blades are worn .This could
prevent you from observing the traffic condi-
tions, thereby causing an accident. Replace
the wiper blades twice a year, ideally in spring
and autumn.
! Do not operate the windscreen wipers
when the windscreen is dry, as this could
damage the wiper blades. Moreover, dust
that has collected on the windscreen can
scratch the glass if wiping takes place when
the windscreen is dry.
If it is necessary to switch on the wind-
screen wipers in dry weather conditions,
always operate them using washer fluid.
! If the windscreen wipers leave smears on
the windscreen after the vehicle has been
washed in an automatic car wash, this may
be due to wax or other residue. Cleant he
windscreen with washer fluid after an auto-
matic car wash.
! Intermittent wiping with rain sensor: due
to optical influences and the windscreen
becoming dirty in dry weather conditions,
the windscreen wipers may be activated
inadvertently. This could damage the wind-
screen wiper blades or scratch the wind-
screen.
For this reason, you should always switch
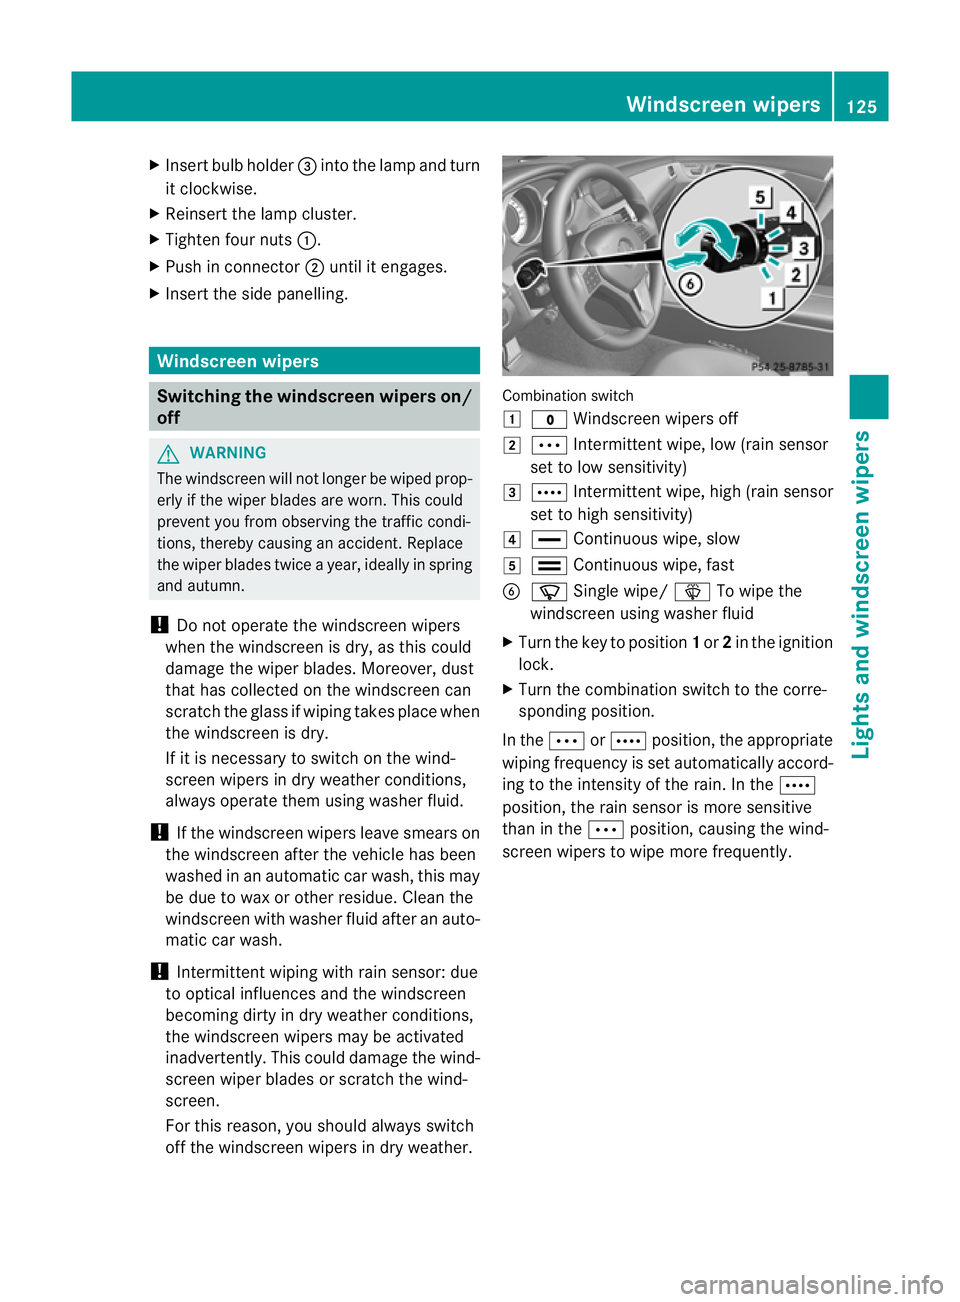
off the windscreen wipers in dry weather. Combination switch
1
$ Windscreen wipers off
2 Ä Intermittent wipe, low (rain sensor
set to low sensitivity)
3 Å Intermittent wipe, high (rain sensor
set to high sensitivity)
4 ° Continuous wipe, slow
5 ¯ Continuous wipe, fast
B í Single wipe/ îTo wipe the
windscreen using washer fluid
X Turn the key to position 1or 2in the ignition
lock.
X Turn the combination switch to the corre-
sponding position.
In the ÄorÅ position, the appropriate
wiping frequency is set automatically accord-
ing to the intensity of the rain. In the Å
position, the rain sensor is more sensitive
than in the Äposition, causing the wind-
screen wipers to wipe more frequently. Windscreen wipers
125Lights and windscreen wipers Z
Page 226 of 405
You can find more information about instal-
ling the trailer electrics at a qualified special-
ist workshop. Bulb failure indicator for LED lamps
i If LED lamps are fitted in the trailer, an
erro rmessage may appear in the multi-
function display even if there is no fault. The
reason for the error message could be that
the curren thas falle nbelow the minimum
of 50 mA.
To ensure reliable operation of the bulb failure
indicator, each LED chain in the trailer lighting
must be guaranteed a minimum current of
50 mA. Trailer with 7-pin connector
General notes Trailers with 7-pin connector:
you can
make a connection to the 13-pin connector
on the ball coupling using an adapter plug or,
if necessary, an adapter cable. Both can be
obtained in a qualified specialist workshop.
Fitting the adapter !
Make sure that there is sufficien tcable
play so that the cable canno tbecome
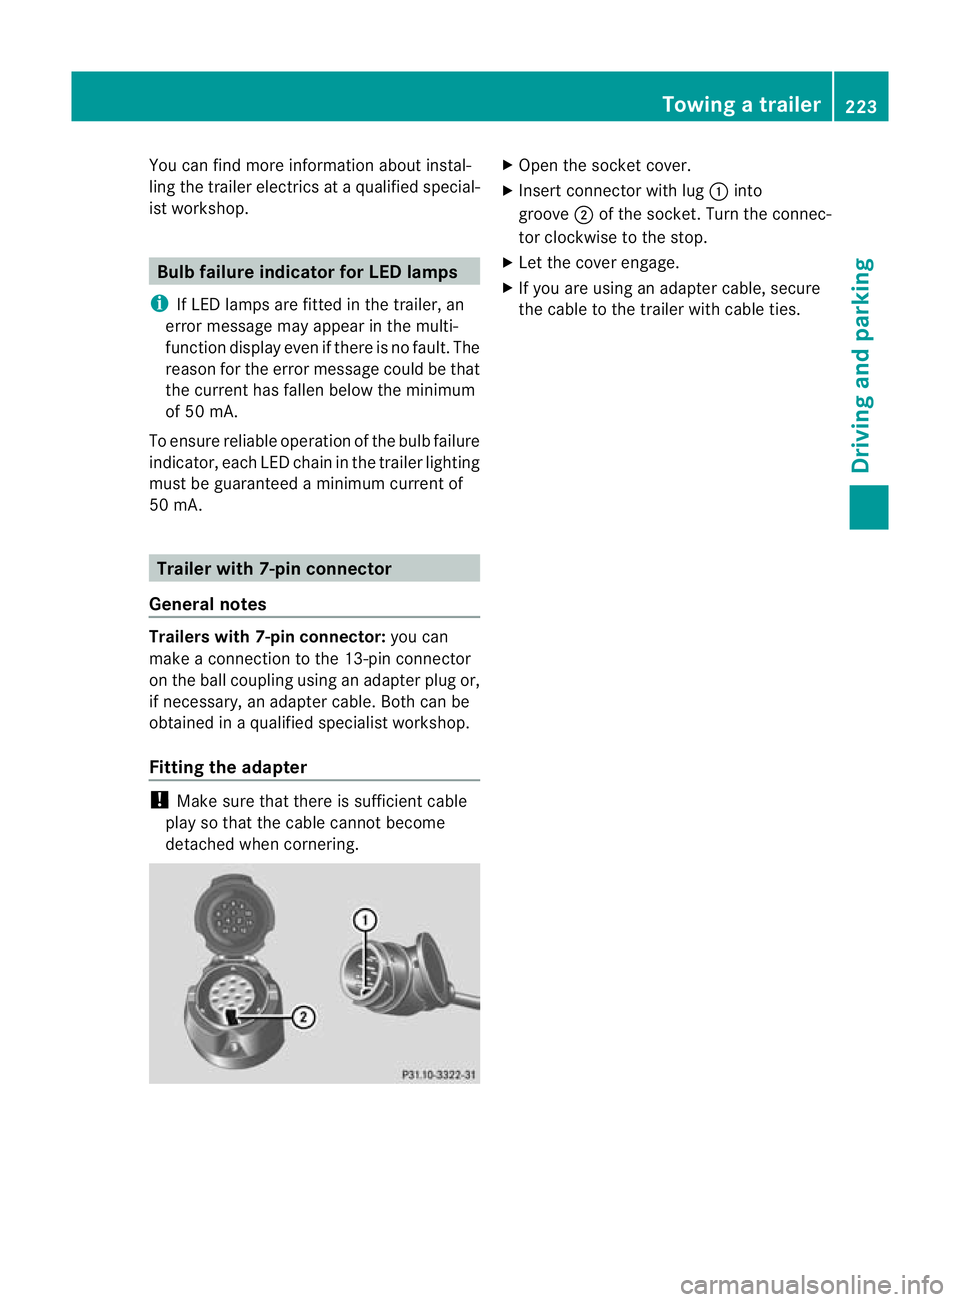
detached when cornering. X
Open the socket cover.
X Insert connector with lug :into
groove ;of the socket. Turn the connec-
tor clockwise to the stop.
X Let the cover engage.
X If you are using an adapter cable, secure
the cable to the trailer with cable ties. Towing
atrailer
223Driving an d parking Z
Page 258 of 405
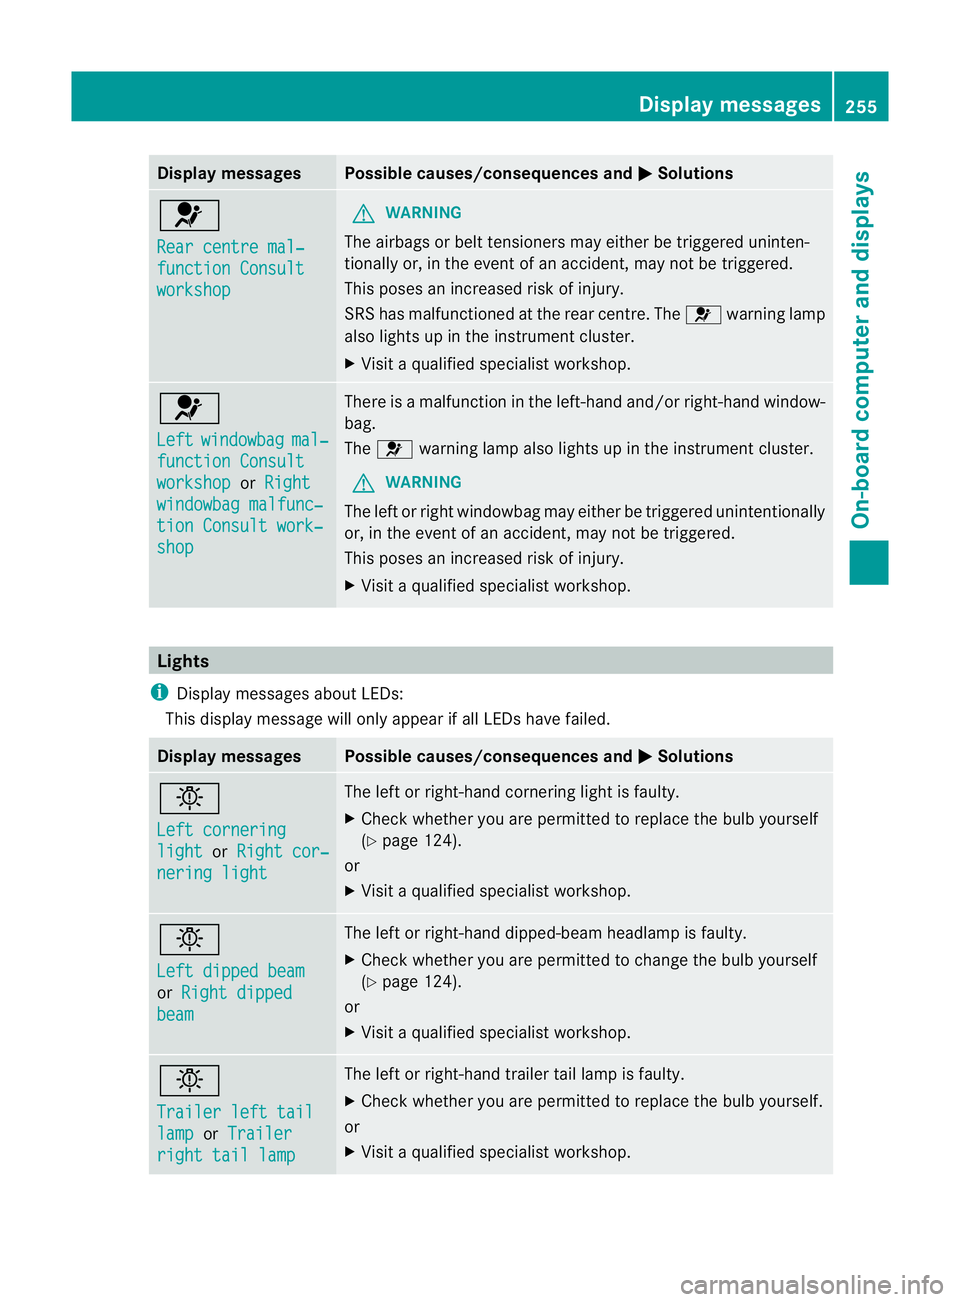
Display messages Possible causes/consequences and
M Solutions
6
Rear centre mal‐
function Consult
workshop G
WARNING
The airbags or belt tensioners may either be triggered uninten-
tionally or, in the event of an accident, may no tbe triggered.
This poses an increased risk of injury.
SRS has malfunctioned at the rear centre. The 6warning lamp
also lights up in the instrument cluster.
X Visit a qualified specialist workshop. 6
Left
windowbag mal‐
function Consult
workshop or
Right windowbag malfunc‐
tion Consult work‐
shop There is a malfunction in the left-hand and/or right-hand window-
bag.
The
6 warning lamp also lights up in the instrument cluster.
G WARNING
The left or right windowbag may either be triggered unintentionally
or, in the event of an accident, may not be triggered.
This poses an increased risk of injury.
X Visit a qualified specialist workshop. Lights
i Display messages about LEDs:
This display message will only appear if all LEDs have failed. Display messages Possible causes/consequences and
M Solutions
b
Left cornering
light or
Right cor‐ nering light The left or right-hand cornering light is faulty.
X
Check whether you are permitted to replace the bulb yourself
(Y page 124).
or
X Visit a qualified specialist workshop. b
Left dipped beam
or
Right dipped beam The left or right-hand dipped-beam headlamp is faulty.
X
Check whether you are permitted to change the bulb yourself
(Y page 124).
or
X Visit a qualified specialist workshop. b
Trailer left tail
lamp or
Trailer right tail lamp The left or right-hand trailer tail lamp is faulty.
X
Check whether you are permitted to replace the bulb yourself.
or
X Visit a qualified specialist workshop. Display messages
255On-board computer and displays Z
Page 259 of 405
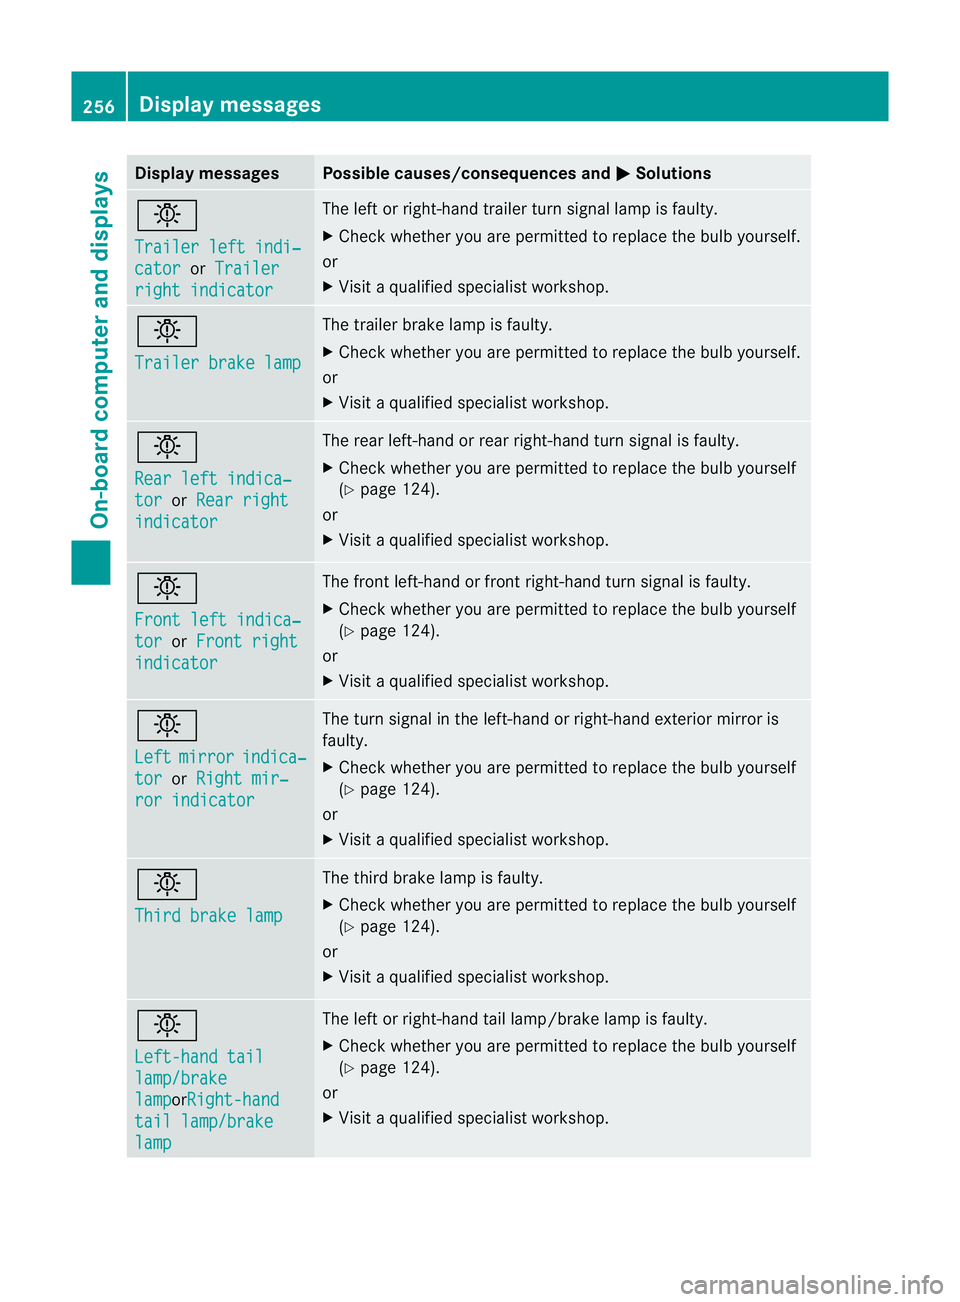
Display messages Possible causes/consequences and
M Solutions
b
Trailer left indi‐
cator or
Trailer right indicator The lef
torright-hand trailer tur nsignal lamp is faulty.
X Check whether you are permitted to replace the bulb yourself.
or
X Visit a qualified specialist workshop. b
Trailer brake lamp The trailer brake lamp is faulty.
X
Check whether you are permitted to replace the bulb yourself.
or
X Visit a qualified specialist workshop. b
Rear left indica‐
tor or
Rear right indicator The rear left-hand or rear right-hand tur
nsignal is faulty.
X Check whether you are permitted to replace the bulb yourself
(Y page 124).
or
X Visit a qualified specialist workshop. b
Front left indica‐
tor or
Front right indicator The front left-hand or front right-hand turn signal is faulty.
X
Check whether you are permitted to replace the bulb yourself
(Y page 124).
or
X Visit a qualified specialist workshop. b
Left
mirror indica‐
tor or
Right mir‐ ror indicator The turn signal in the left-hand or right-hand exterior mirror is
faulty.
X
Check whether you are permitted to replace the bulb yourself
(Y page 124).
or
X Visit a qualified specialist workshop. b
Third brake lamp The third brake lamp is faulty.
X
Check whether you are permitted to replace the bulb yourself
(Y page 124).
or
X Visit a qualified specialist workshop. b
Left-hand tail
lamp/brake
lamp orRight-hand
tail lamp/brake
lamp The left or right-hand tail lamp/brake lamp is faulty.
X
Check whether you are permitted to replace the bulb yourself
(Y page 124).
or
X Visit a qualified specialist workshop. 256
Display messagesOn-board computer and displays
Page 260 of 405
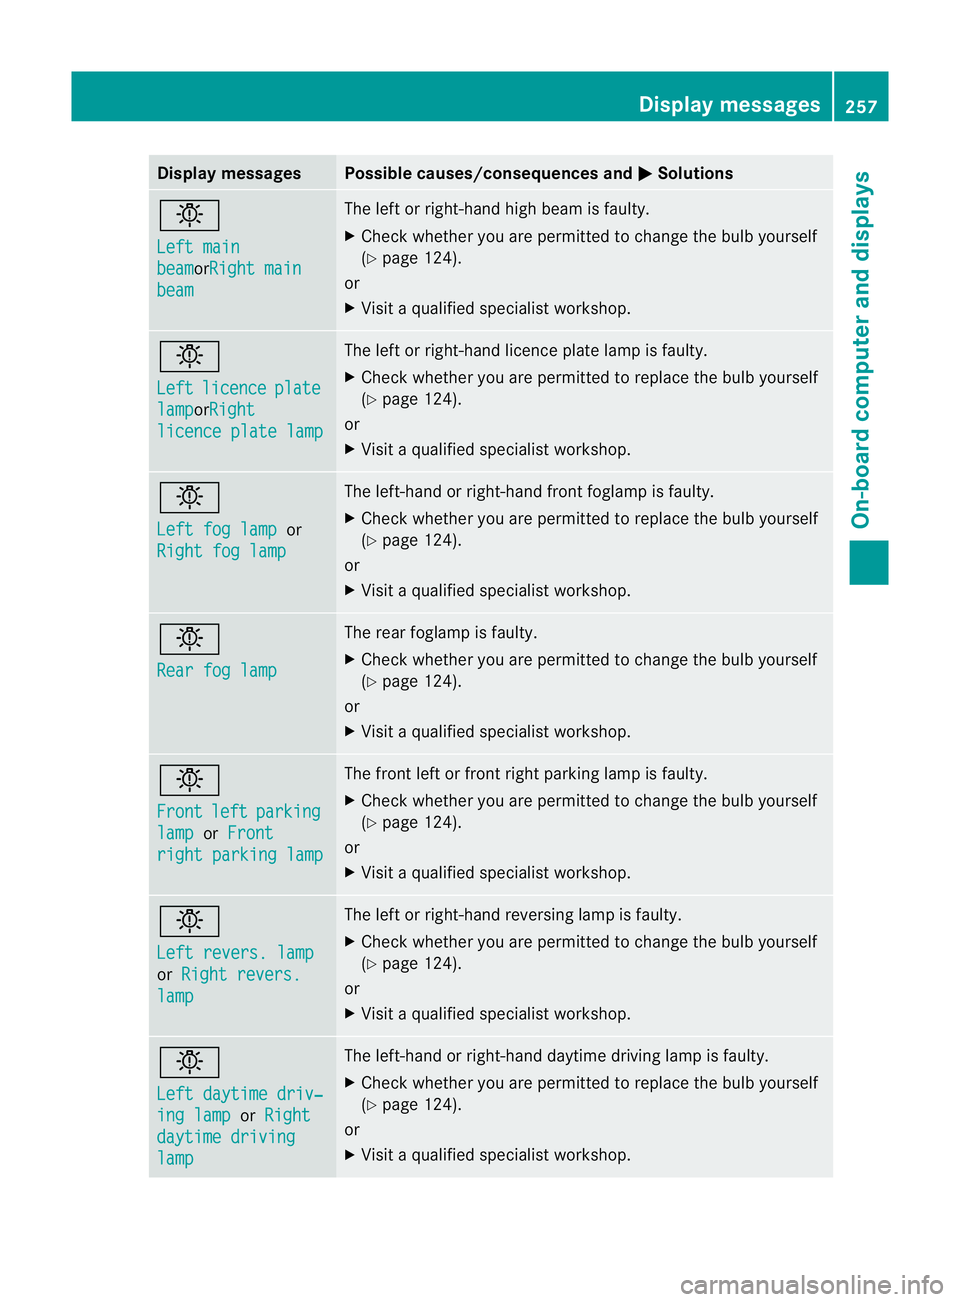
Display messages Possible causes/consequences and
M Solutions
b
Left main
beam orRight main
beam The lef
torright-hand high beam is faulty.
X Check whether you are permitted to change the bulb yourself
(Y page 124).
or
X Visit a qualified specialist workshop. b
Left
licence plate
lamp orRight
licence plate lamp The left or right-hand licence plate lamp is faulty.
X
Check whether you are permitted to replace the bulb yourself
(Y page 124).
or
X Visit a qualified specialist workshop. b
Left fog lamp
or
Right fog lamp The left-hand or right-hand front foglamp is faulty.
X Check whether you are permitted to replace the bulb yourself
(Y page 124).
or
X Visit a qualified specialist workshop. b
Rear fog lamp The rear foglamp is faulty.
X
Check whether you are permitted to change the bulb yourself
(Y page 124).
or
X Visit a qualified specialist workshop. b
Front
left parking
lamp or
Front right parking lamp The front left or front right parking lamp is faulty.
X
Check whether you are permitted to change the bulb yourself
(Y page 124).
or
X Visit a qualified specialist workshop. b
Left revers. lamp
or
Right revers. lamp The left or right-hand reversing lamp is faulty.
X
Check whether you are permitted to change the bulb yourself
(Y page 124).
or
X Visit a qualified specialist workshop. b
Left daytime driv‐
ing lamp or
Right daytime driving
lamp The left-hand or right-hand daytime driving lamp is faulty.
X Check whether you are permitted to replace the bulb yourself
(Y page 124).
or
X Visit a qualified specialist workshop. Display messages
257On-board computer and displays Z