2012 MERCEDES-BENZ CLS COUPE change time
[x] Cancel search: change timePage 209 of 373
R
ESP ®
is deactivated.
R the transmission is not in position D.
R al ossoft yrep ressure or adefective tyre
ha sb eend etecte dand displayed.
Activ eLaneK eeping Assist does not detect
roa dand traffi cconditions .Aninappropriate
brake applicatio nmay be interrupted at any
tim eif:
R you steer slightly in th eopposite direction.
R you use aturn signal.
R you clearly brake or accelerate.
Al ane-correcting brak eapplicatio nisinter-
rupted automaticallyi f:
R ad riving safety system intervenes, such as
ESP ®
,P RE-SAFE ®
Brake or Active Blind
Spot Assist.
R lane markings can no longer be recognised.
Activating Active Lane Keeping Assist X
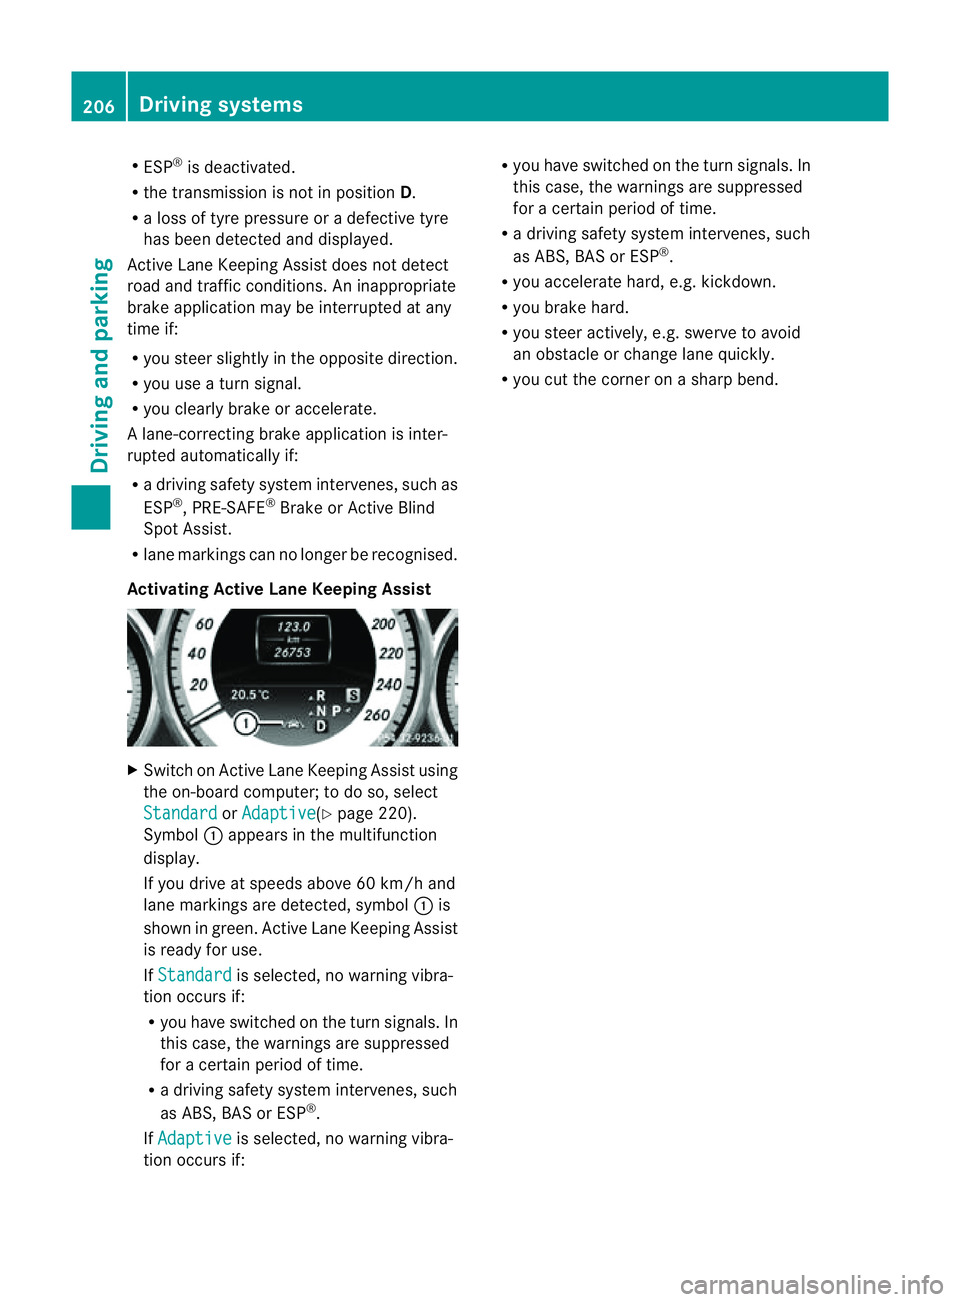
Switch on Active Lane Keeping Assist using
the on-board computer; to do so, select
Standard or
Adaptive (Y
page 220).
Symbol :appears in the multifunction
display.
If you drive at speeds above 60 km/h and
lane markings are detected, symbol :is
shown in green. Active Lane Keeping Assist
is ready for use.
If Standard is selected, no warning vibra-
tion occurs if:
R you have switched on the turn signals. In
this case, the warnings are suppressed
for acertain period of time.
R ad riving safety system intervenes, such
as ABS,B AS or ESP ®
.
If Adaptive is selected, no warning vibra-
tion occurs if: R
you have switched on the turn signals. In
this case, the warnings are suppressed
for acertain period of time.
R ad riving safety system intervenes, such
as ABS,B AS or ESP ®
.
R you accelerate hard, e.g. kickdown.
R you brake hard.
R you steer actively, e.g. swerve to avoid
an obstacle or change lane quickly.
R you cut the corner on asharp bend. 206
Driving systemsDriving and parking
Page 226 of 373
Setting the dipped-beam headlamps for
driving on the left/right
X Press the =or; button on the steer-
ing wheel to select the Settings menu.
X Press the :or9 button to select the
Light submenu.
X Press ato confirm.
X Press the :or9 button to select the
Dipped beams Setting for: function.
You will see the selected setting: Right-side traffic or
Left-side traffic .
X Press the abutton to save the setting.
If you change the setting, conversion does
not take place until the next time the vehi-
cle is stationary.
This function is only available on vehicles with
the Intelligent Light System.
You can use this function to switch between
symmetrical and asymmetrical dipped beam
(Y page 110).
If you set the dipped-beam headlamps for
driving on the right/left ,then motorway
mode and the extended range foglamps are
unavailable.
Aq ualified specialist worksho pcan set the
dipped-beam headlamps for driving on the
right or left .
Switchin gAdaptive Highbeam Assis ton/
off
X Press the =or; button on the steer-
ing wheel to select the Settings menu.
X Press the :or9 button to select the
Light submenu.
X Press ato confirm.
X Press the :or9 button to select the
Adapt. main beam function.
If the Adapt. main beam function has
been switched on, the coneofl ight and the
_ symbol in the upper multifunction
display are shown in red.
X Press the abutton to save the setting.
For further information about Adaptive High-
beam Assist ,see (Y page 117). Setting the brightness of the ambient
lighting
X
Press the =or; button on the steer-
ing wheel to select the Settings menu.
X Press the :or9 button to select the
Light submenu.
X Press ato confirm.
X Press the :or9 button to select the
Amb. light +/- function.
You will see the selected setting.
X Press ato confirm.
X Press the :or9 button to adjust the
brightness to any level from Off to
Level 5 (bright).
X Press the aor% button to save the
setting.
Setting the ambient lighting colour
X Press the =or; button on the steer-
ing wheel to select the Settings menu.
X Press the :or9 button to select the
Light submenu.
X Press ato confirm.
X Press the :or9 button to select the
Ambient light colour function.
X Press ato confirm.
X Press the :or9 button to set the
colour to SOLAR ,
NEUTRAL or
POLAR .
X Press the aor% button to save the
setting.
Activating/deactivating the surround
lighting and exterior lighting delayed
switch-off
X Press the =or; button on the steer-
ing wheel to select the Settings menu.
X Press the :or9 button to select the
Light submenu.
X Press ato confirm. Menus and submenus
223On-boardcomputer and displays Z
Page 229 of 373
!
Operating the auxiliary heating/ventila-
tion draws on the vehicle battery. After you
have heated or ventilated the vehicle a
maximum of two times, drive for alonger
distance.
This function is only available on vehicles with
auxiliary heating (Y page 132).
In the Heating submenu, you can select a
stored departure time or change adeparture
time.
The auxiliary heating timer function calcu-
lates the switch-on time according to the out-
side temperature so that the vehicle is pre-
heated by the departure time. When the
departure time is reached, the auxiliary heat-
ing continues to heat for afurther five
minutes and then switches off. The auxiliary
heating adopts the THERMATIC or
THERMOTRONIC temperature setting.
You can switch off the auxiliary heating by
using the remote control or the auxiliary heat-
ing button on the centre console.
i Switch the auxiliary heating on regularly
once amonth for aboutt en minutes.
Selecting the departure time or deactivat-
ing aselected departure time
X Press the =or; button on the steer-
ing wheel to select the Settings menu.
X Press the :or9 button to select the
Heating submenu.
X Press ato confirm.
You will see the selected setting.
X Press ato confirm.
X Press the :or9 button to select
one of the three departure times or Timeroff (no timer active).
X Press ato confirm.
If ad eparture time is selected, the yellow
indicator lamp lights up on the auxiliary
heating button. Changing the departure time
X
Press the =or; button on the steer-
ing wheel to select the Settings menu.
X Press the :or9 button to select the
Heating submenu.
X Press ato confirm.
You will see the selected setting.
X Press ato confirm.
X Press the :or9 button to select A ,
B or
Change C .
X Press ato confirm.
You can now change the departure time.
X Press the =or; button to select the
displaytobec hanged: hours, minutes.
X Press the :or9 button to set the
selected display.
X Press the abutton to store the entry.
The yellow indicator lamp on the auxiliary
heating button lights up.
Convenience Activating/deactivating the EASY-
ENTRY/EXIT feature
G
WARNING
The steering wheel moves when the EASY-
ENTRY/EXIT feature is active. There is arisk
of occupants becoming trapped. Before acti-
vating the EASY-ENTRY/EXIT feature, make
sure that nobody can become trapped.
Do not leave children unsupervised in the
vehicle, even if they are secured in achild
restraint system. The children could open the
driver's door and thereby unintentionally acti-
vate the EASY-ENTRY/EXIT feature and
become trapped.
X Press the =or; button on the steer-
ing wheel to select the Settings menu.
X Press the :or9 button to select the
Convenience submenu.
X Press ato confirm. 226
Menus and submenusOn-board computer and displays
Page 242 of 373
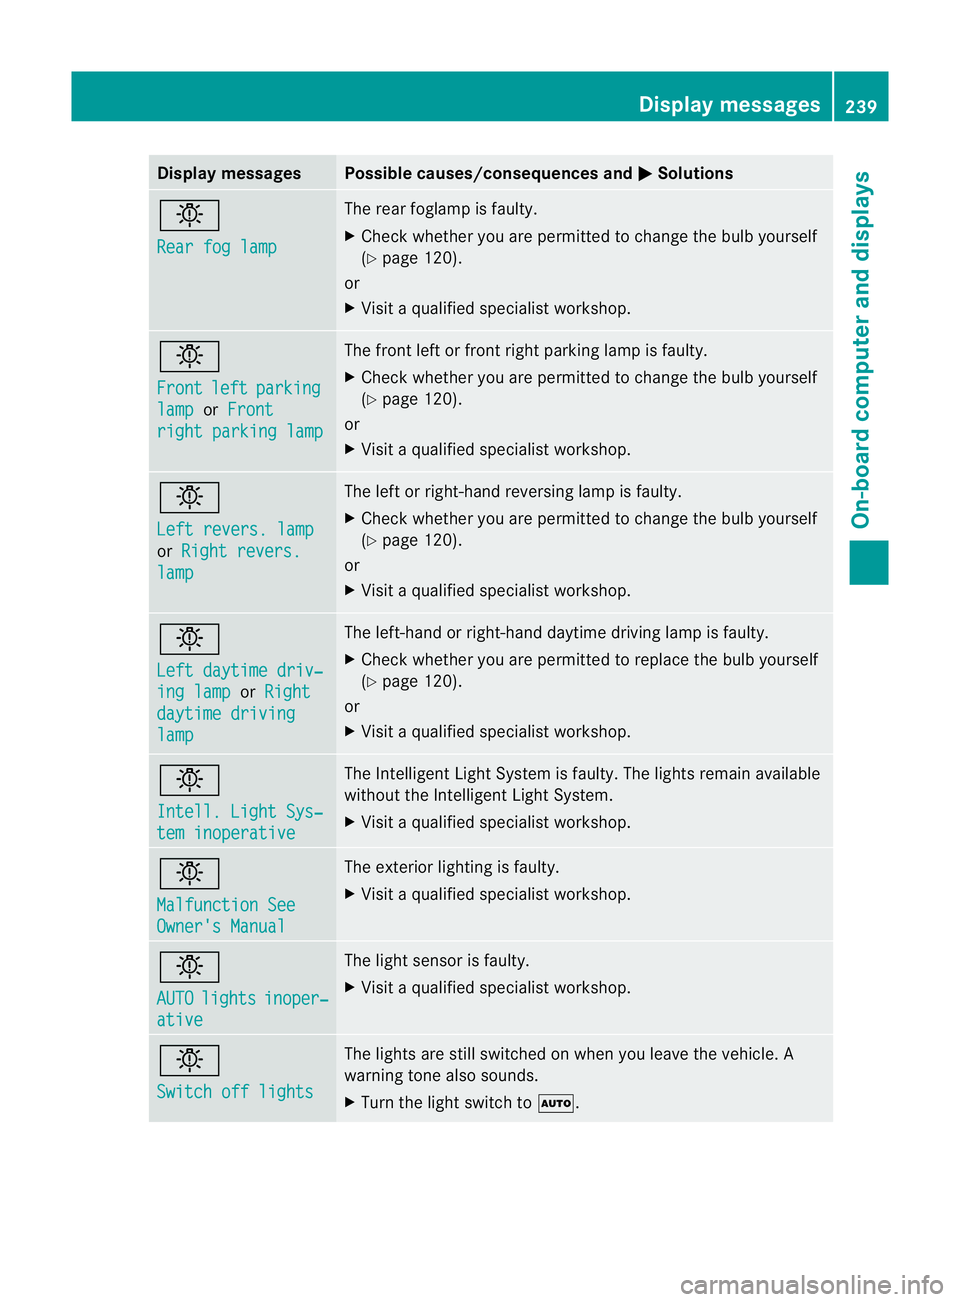
Display messages Possible causes/consequences and
M Solutions
b
Rea
rf og lamp The rear foglam
pisfaulty.
X Chec kwhether you are permitted to change the bulb yourself
(Y page 120).
or
X Visit aqualified specialist workshop. b
Front
left parking
lamp or
Front right parking lamp The front left or front right parking lamp is faulty.
X
Check whether you are permitted to change the bulb yourself
(Y page 120).
or
X Visit aqualified specialist workshop. b
Left revers. lamp
or
Right revers. lamp The left or right-hand reversing lamp is faulty.
X
Check whether you are permitted to change the bulb yourself
(Y page 120).
or
X Visit aqualified specialist workshop. b
Left daytime driv‐
ing lamp or
Right daytime driving
lamp The left-hand or right-hand daytime driving lamp is faulty.
X
Check whether you are permitted to replace the bulb yourself
(Y page 120).
or
X Visit aqualified specialist workshop. b
Intell. Light Sys‐
tem inoperative The Intelligent Light System is faulty. The lights remain available
without the Intelligent Light System.
X
Visit aqualified specialist workshop. b
Malfunction See
Owner's Manual The exterior lighting is faulty.
X
Visit aqualified specialist workshop. b
AUTO
lights inoper‐
ative The light sensor is faulty.
X
Visit aqualified specialist workshop. b
Switch off lights The lights are still switched on when you leave the vehicle. A
warning tone also sounds.
X
Turn the light switch to Ã. Display messages
239On-board computer and displays Z
Page 275 of 373
Useful information
i This Owner's Manual describes all mod-
els, series and optional equipment for your
vehicle that were available at the time of
going to press. National variation sare pos-
sible. Not ethat your vehicle may not be
equipped with all of the function sdescri-
bed. This is also the case for system sand
function srelevan ttosafety.
i Read the information on qualified special-
ist workshops: (Y page 23). Stowage areas
Loading guidelines
G
WARNING
Secure and position the load as described in
the loading guidelines.
Otherwise, vehicle occupants could
be injured by the load being thrown around in
the even tofsharp braking, asudden change
in direction or an accident.
You will find further information in the "Secur-
ing aload" section.
Even if you follow all the loading guidelines,
the load will increase the risk of injury in the
event of an accident. G
WARNING
Keep the boot lid closed while the vehicle is
in operation. Otherwise, you could be pois-
oned by exhaust fumes enteringt he vehicle.
The handling characteristics of aladen vehi-
cle are dependent on the distribution of the
load within the vehicle. For this reason, you
should observe the following notes when
transporting aload:
R when transporting aload, never exceed the
maximum permissible gross vehicle weight or the permissible axle loads for the vehicle
(including occupants).
R position heavy loads as far forwards as pos-
sible and as low down in the boot as pos-
sible.
R the load must not protrude above the upper
edge of the seat backrests.
R always place the load against the rear or
front seat backrests. Make sure that the
seat backrests are securely locked into
place.
R always place the load behind unoccupied
seats if possible.
R secure the load with sufficiently stronga nd
wear-resistant lashing material. pad sharp
edges for protection.
i Load restraintsa re available at any quali-
fied specialist workshop, e.g. aMercedes-
Benz Service Centre. Stowage compartments
Important safety notes G
WARNING
The stowage compartments must be closed
when items are stored in them. Luggage nets
are not designed to secure heavy items of
luggage.
You or other vehicle occupants could be
injured by objectsb eing thrown around if you:
R brake sharply
R change direction suddenly
R are involved in an accident
Sharp-edged and fragile objectsm ust not be
placed in the luggagen et.
Do not place hard objectsint he map pockets.
Objectsm ust not protrude from the map
pockets. 272
Stowage areasStowing and features
Page 317 of 373
If you come into contact with the tyre sealant,
observe the following:
R Rinse off the tyre sealant from yours kin
immediately with water.
R If the tyre sealant comes into contact with
youre yes, immediately rinse them thor-
oughly wit hclean water.
R If tyr esealant is swallowed ,immediately
rinse your mout hout thoroughl yand drink
plenty of water. Do no tind ucev omiting,
and see kmedical attention immediately.
R Immediately change out of clothing which
has come into contact with tyre sealant.
R If an allergic reaction occurs ,seek medical
attention immediately.
! Do not operate the tyre inflation com-
pressor for longer than eight minutes at a
time without abreak. It may otherwise
overheat.
The tyre inflation compressor can be oper-
ated again onceith as cooled down.TIREFI
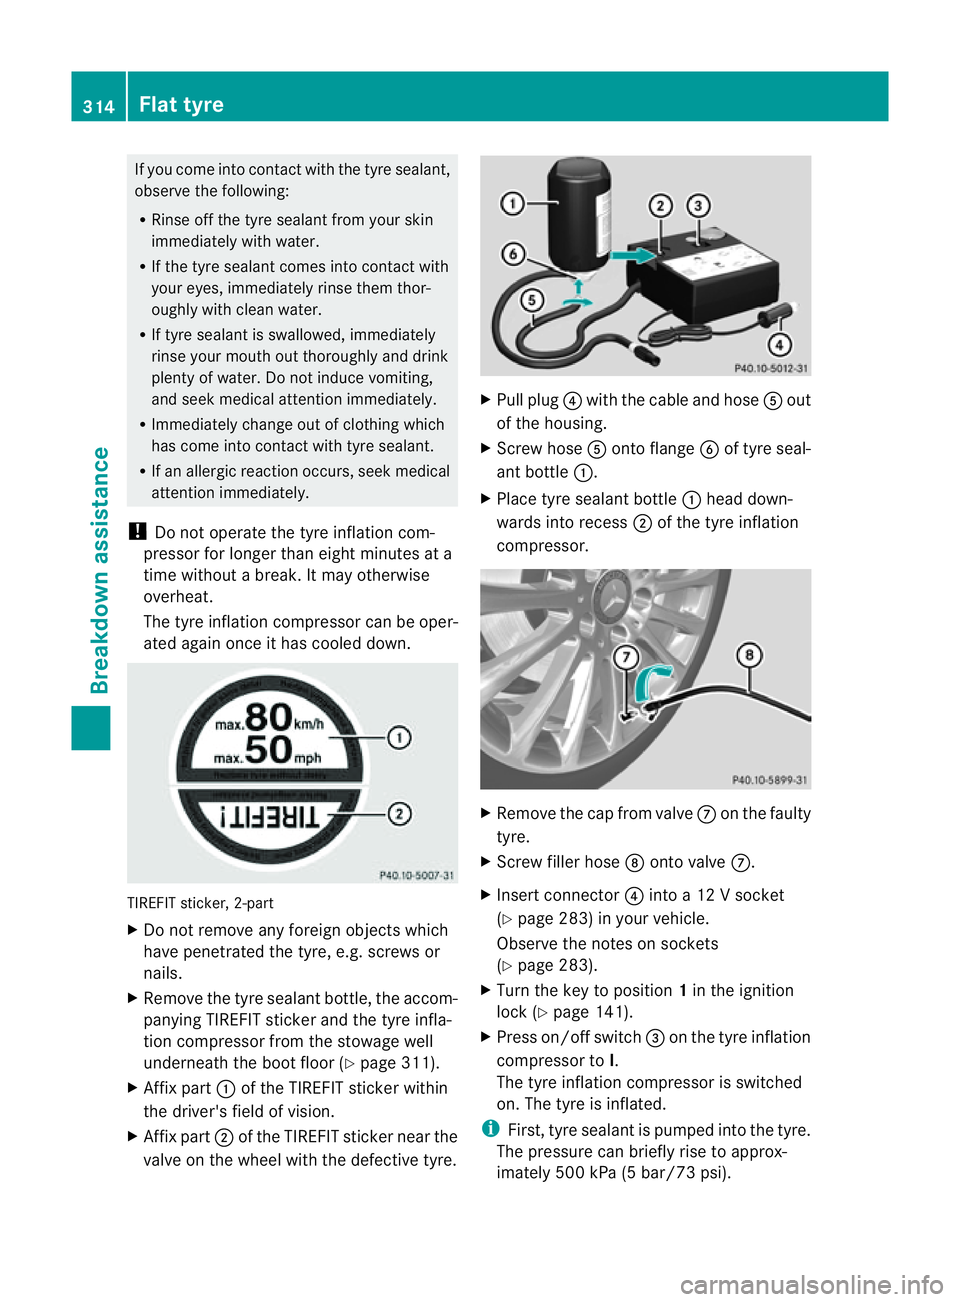
Tsticker, 2-part
X Do not remove any foreign objects which
have penetrated the tyre, e.g. screws or
nails.
X Remove the tyre sealant bottle, the accom-
panying TIREFI Tsticker and the tyre infla-
tion compressor from the stowage well
underneath the boot floor (Y page 311).
X Affix part :of the TIREFI Tsticker within
the driver's field of vision.
X Affix part ;of the TIREFI Tsticke rnearthe
valv eont he whee lwitht he defectiv etyre. X
Pull plug ?with the cable and hose Aout
of the housing.
X Scre whose Aonto flange Bof tyr eseal-
ant bottle :.
X Place tyr esealan tbottle : head down-
wards into recess ;of the tyr einflation
compressor. X
Remov ethe cap fro mvalve Con th efaulty
tyre.
X Screw fille rhose Dontov alveC.
X Insert connector ?into a12V socket
(Y page 283) in your vehicle.
Observe the notes on sockets
(Y page 283).
X Turn the key to position 1in the ignition
lock (Y page 141).
X Press on/offs witch=on th etyrei nflation
compressor to I.
The tyr einflatio ncompressor is switched
on. The tyre is inflated.
i First,t yre sealant is pumped into the tyre.
The pressure can briefly rise to approx-
imately 500 kPa (5 bar/73 psi). 314
Flat tyreBreakdown assistance
Page 336 of 373
message willa
ppear in the multifunction dis-
play.
The tyre pressure warning system does not
warn you of an incorrectly set tyre pressure.
Observe the notes on the recommended tyre
pressure (Y page331).
The tyre pressure loss warning system does
not replace the need to regularl ycheck your
vehicle's tyre pressures, since an even loss of
pressure on severa ltyres at the same time
cannot be detected by the tyre pressure loss
warning system.
The tyre pressure monitor is not abletow arn
you of asudden loss of pressure, e.g. if the
tyre is penetrated by aforeig nobject. In the
event of asudden loss of pressure, bring the
vehicl etoah altbybrakingcarefully. Avoid
abrupt steerin gmanoeuvres.
The function of th etyrep ressur elos sw arning
system is limite dordelayedif:
R snow chains are fitted to you rvehicle's
tyres.
R road conditions are wintry.
R you are driving on sand or gravel.
R you adopt avery sport ydriving style (cor-
nerin gath igh speeds or driving with high
rates of acceleration).
R you are driving with aheavy load (in the
vehicle or on the roof).
Restarting the tyrep ressure loss warn-
ing system Restart the tyre pressure loss warning system
if you have:
R changed the tyre pressure
R changed the wheels or tyres
R fitted new wheels or tyres
X Befor erestarting, make sure that the tyre
pressures are set properly on all four tyres
for the respective operatin gconditions.
The recommended tyre pressures can be
found in the table on the fuel filler flap. The
tyre pressure loss warning system can only
give reliable warnings if you have set the correct tyre pressure. If an incorrect tyre
pressure is set, these incorrect values will
be monitored.
X Also observe the notes in the section on
tyre pressures (Y page 331).
X Make sure that the key is in posi-
tion 2(Ypage 141)int he ignition lock.
X Press =or; on the steering wheel
to select the Serv. menu.
X Press the 9or: button to select
Tyre pressure .
X Press the abutton.
The Run Flat Indicator active Restart with OK message appears in the
multifunction display.
If you wish to confirm the restart:
X Press button a.
The Tyre press. now OK? message
appears in the multifunction display.
X Press the 9or: button to select
Yes .
X Press the abutton.
The Run Flat Indicator restarted message appears in the multifunction dis-
play.
After
ateach-in period, the tyre pressure
loss warning system will monitor the set
tyre pressures of all four tyres.
If you wish to cancel the restart:
X Press button %.
or
X When the Tyre press. now OK? message
appears, press the 9or: button to
select Cancel .
X Press the abutton.
The tyre pressure values stored at the last
restart will continue to be monitored. Tyrep
ressure
333Wheels and tyres Z
Page 338 of 373
Warning messages of the tyre pressure
monitor If the tyre pressure monitor detects
asignifi-
cant pressure loss on one or more tyres, a
warning message is show ninthe multifunc-
tion display. Awarning tone also sounds and
th et yrep ressure warning lamp light supin
th ei nstrumen tcluster.
Eac htyret hatisa ffected by asignificant loss
of pressure is highlighted in th epressure dis-
play.
X If the Please correc ttyrep ressure message appear
sinthemultifunction dis-
play, check th etyrep ressure on all four
wheels and correct it if necessary.
i If th ewheel positions on th evehicle are
interchanged, th etyrep ressure smay be
displayed for th ewrongpositions for a
short time. This is rectified after afew
minute sofdriving,and th etyrep ressures
are displayed for th ecorrec tpositions.
Restarting th etyrep ressure monitor When you restar
tthe tyre pressure monitor,
all existing warning messages are deleted and
the warning lamps go out. The monitor uses
the currently set tyre pressures as the refer-
ence values for monitoring. In most cases, the
tyre pressure monitor will automatically
detect the new referencev alues after you
have changed th etyrep ressure .However,
you can also define reference values man-
uallyasd escribed here. The tyre pressure
monitor then monitors the new tyre pressure
values.
X Use the table on the inside of the fuel filler
flap to ensure that the tyre pressure is set
correctly in all four tyres for the current
operating conditions.
Also observe the notes in the section on
tyre pressures (Y page 331).
X Make sure that the key is in position 2in
the ignition lock. X
Press the =or; button on the steer-
ing wheel to select the Serv. menu.
X Press the 9or: button to select
Tyre pressure .
X Press the abutton.
The multifunction display shows the cur-
rent tyre pressure for each tyre or the
Tyre pressures will be displayed after a few minutes of driving mes-
sage.
X Press the :button.
The multifunction display shows the Use current pressure values as new ref‐
erence values message.
If you wish to confirm the restart:
X Press the abutton.
The Tyre press. monitor restarted message appears in the multifunction dis-
play.
After you have driven for
afew minutes, the
system checksw hether the current tyre
pressures are within the specified range.
The new tyre pressures are then accepted
as reference values and monitored.
If you wish to cancel the restart:
X Press the %button.
The tyre pressure values stored at the last
restart will continue to be monitored.
Radio typea pproval for the tyrep res-
sure monitor In certain countries,
aradio type approval for
the tyre pressure monitor may be required.
The radio type approval number for the tyre
pressure monitor can be found online at:
http://www.mercedes-benz.de/
betriebsanleitung. Tyrep
ressure
335Wheels and tyres Z