2012 MERCEDES-BENZ B-CLASS steering
[x] Cancel search: steeringPage 228 of 340
Problem Possible causes/consequences and
M Solutions!
The yellow
ABS
warning
lamp is lit while the
engine is running. ABS is temporarily unavailable. BAS, COLLISION PREVENTION
ASSIST,
ESP®
, EBD
(electronic brake force distribution), the HOLD
function and hill start assist are therefore also deactivated, for
example.
Possible causes are:
R Self-diagnosis is not yet complete.
R The on-board voltage may be insufficient.
ATTENTION ASSIST is deactivated.
G WARNING
The brake system continues to function normally, but without the
functions listed above. The front and rear wheels could therefore
lock if you brake hard, for example.
The steerability and braking characteristics may be severely
affected. The braking distance in an emergency braking situation
can increase.
If ESP ®
is not
operational, ESP ®
is unable to stabilize the vehicle.
There is a risk of an accident.
X Carefully drive on a suitable stretch of road, making slight
steering movements at a speed above 12 mph (20 km/h).
The functions mentioned above are available again when the
warning lamp goes out.
If the warning lamp is still on:
X Observe the additional display messages in the multifunction
display.
X Drive on carefully.
X Visit a qualified specialist workshop.226
Warning and indicator lamps in the instrument cluster
On-board computer and displays
ProCarManuals.com
Page 231 of 340
Problem Possible causes/consequences and
M Solutions֌
The yellow ESP
®
and
ESP ®
OFF warning
lamps are lit while the
engine is running. ESP
®
, BAS, the HOLD function and hill start assist are temporarily
unavailable.
COLLISION PREVENTION ASSIST may also have failed.
ATTENTION ASSIST is deactivated.
Self-diagnosis is not yet complete.
G WARNING
The brake
system continues to function normally, but without the
functions listed above.
The braking distance in an emergency braking situation can thus
increase.
If ESP ®
is not
operational, ESP ®
is unable to stabilize the vehicle.
There is an increased risk of skidding and an accident.
X Carefully drive on a suitable stretch of road, making slight
steering movements at a speed above 12 mph (20 km/h).
The functions mentioned above are available again when the
warning lamp goes out.
If the warning lamp is still on:
X Observe the additional display messages in the multifunction
display.
X Drive on carefully.
X Visit a qualified specialist workshop. Warning and indicator lamps in the instrument cluster
229
On-board computer and displays Z
ProCarManuals.com
Page 249 of 340
X
To raise: using handle :, lift up cargo
compartment floor ; in the direction of
arrow = and pull it upwards.
X Lower cargo compartment floor ; again.
To do
this,
push the trunk floor away so that
it engages in the guide on the upper level.
Cargo compartment floor ; engages in
the upper position.
i Carry out this step using both hands.
X To lower: raise cargo compartment
floor ; slightly
using
handle : and pull it
towards you.
X Lower cargo compartment floor ; again
slowly. Whilst doing so, press the trunk
floor into the lower level.
Cargo compartment floor ; engages in
the lower position. Roof carrier
Important safety notes G
WARNING
When you load the roof, the center of gravity
of the vehicle rises and the driving
characteristics change. If you exceed the
maximum roof load, the driving
characteristics, as well as steering and
braking, will be greatly impaired. There is a
risk of an accident.
Never exceed the maximum roof load and
adjust your driving style.
! Mercedes-Benz recommends that you
only use roof
carriers that have been tested
and approved for Mercedes-Benz vehicles.
This helps to prevent damage to the
vehicle.
Position the load on the roof rack in such a
way that the vehicle will not sustain
damage even when it is in motion.
Ensure that, depending on the vehicle's
equipment, you can raise the panorama
roof with power tilt/sliding panel fully and open the tailgate fully when the roof carrier
is installed.
The maximum roof load is 165 lbs((75 kg).
An incorrectly secured roof carrier or roof
load may
become detached from the vehicle.
You must therefore ensure that you observe
the roof carrier manufacturer's installation
instructions.
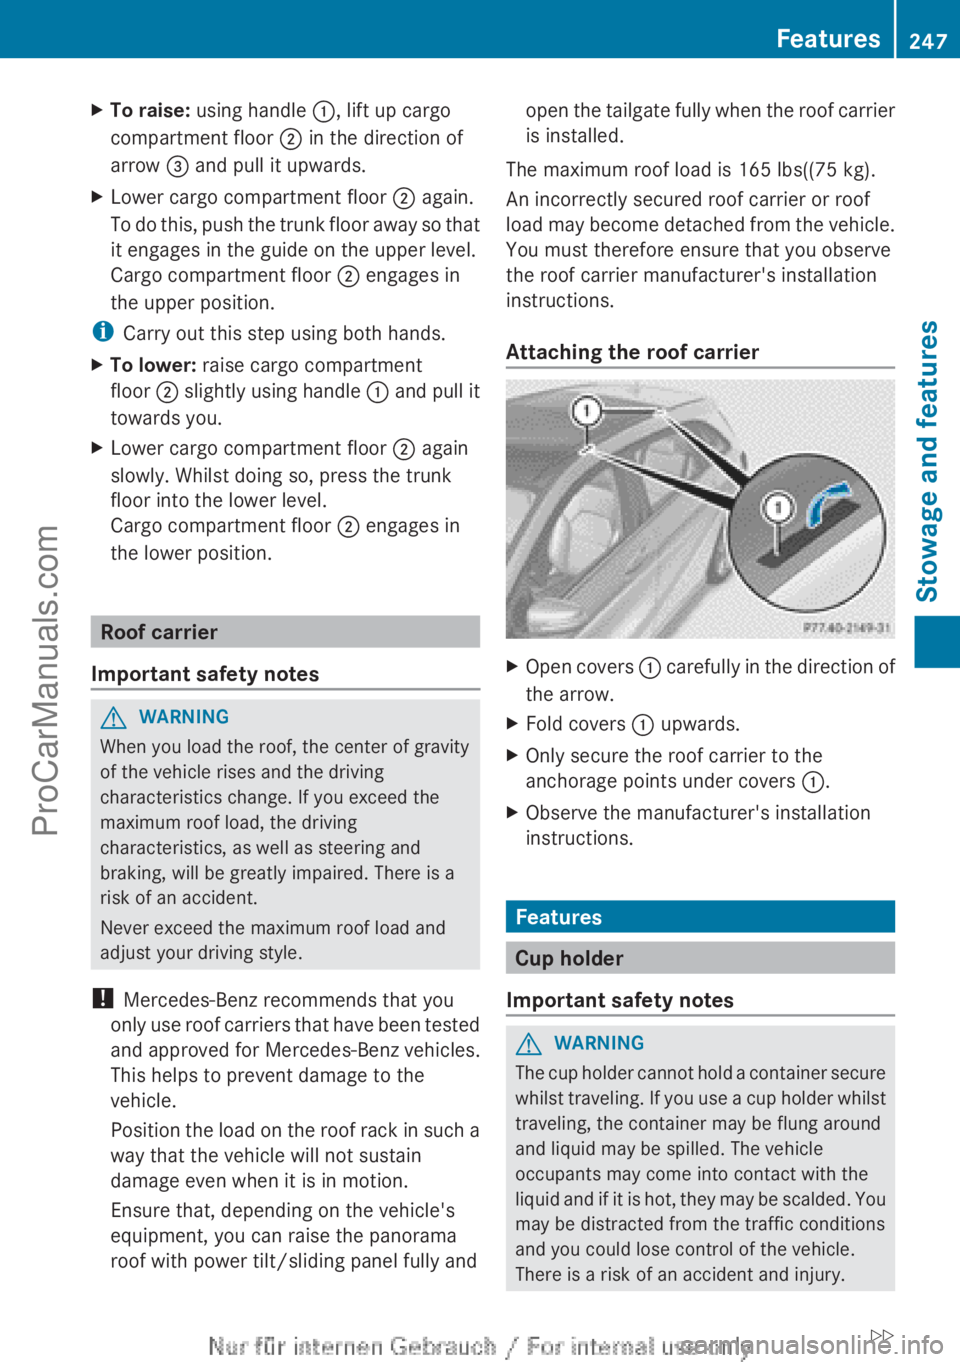
Attaching the roof carrier X
Open covers : carefully in
the direction of
the arrow.
X Fold covers : upwards.
X Only secure the roof carrier to the
anchorage points under covers :.
X Observe the manufacturer's installation
instructions. Features
Cup holder
Important safety notes G
WARNING
The cup holder cannot hold a container secure
whilst traveling. If
you use a cup holder whilst
traveling, the container may be flung around
and liquid may be spilled. The vehicle
occupants may come into contact with the
liquid and if it is hot, they may be scalded. You
may be distracted from the traffic conditions
and you could lose control of the vehicle.
There is a risk of an accident and injury. Features
247
Stowage and features
ZProCarManuals.com
Page 254 of 340

If you have questions about the activation,
contact one of the following telephone
hotlines:
R
USA: Mercedes-Benz Customer
Assistance Center at
1-800-FOR-MERCedes
(1-800-367-6372) or 1-866-990-9007
R Canada: Customer Service at
1-888-923-8367
Shortly after
successfully registering with the
mbrace service (Canada: TELEAID), a user ID
and password will be sent to you by post. USA
only: you can use this password to log onto
the mbrace area under "Owners Online" at
http://www.mbusa.com .
The mbrace system is available if:
R it has been activated and is operational
R the corresponding mobile phone network
is available for transmitting data to the
Customer Center
R a service subscription is available
R the starter battery is sufficiently charged
i Determining the location of the vehicle on
a map is only possible if:
R GPS reception is available.
R the vehicle position can be forwarded to
the Customer Assistance Center.
The mbrace system To adjust the volume during an mbrace call,
proceed as follows:
X
Press the W or X button on the
multifunction steering wheel.
or
X Use the volume controller of the audio
system/COMAND.
The mbrace system provides various
services, e.g.:
R automatic and manual emergency call
R Roadside Assistance call
R MB Info call USA only: you can find information and a
description of all available features under
"Owners
Online" at
http://www.mbusa.com.
System self-test After you have switched on the ignition, the
system carries out a self-diagnosis.
A malfunction in the system has been
detected if one of the following occurs:
R
The indicator lamp
in the SOS button does
not come on during the system self-test.
R The indicator lamp in the F Roadside
Assistance button does not light up during
self-diagnosis of the system.
R The indicator lamp in the ï MB Info call
button does not light up during self-
diagnosis of the system.
R The indicator lamp in one or more of the
following buttons continues to light up red
after the system self-diagnosis:
-SOS button
- the F Roadside Assistance call
button
- the ï MB Info call button
R The mbrace Inoperative or mbrace
Service Not Activated message
appears in the multifunction display after
the system self-diagnosis.
If a malfunction is indicated as outlined
above, the system may not operate as
expected. In the event of an emergency, help
will have to be summoned by other means.
Have the system checked at the nearest
authorized Mercedes-Benz Center or contact
the following service hotlines:
R USA: Mercedes-Benz Customer Assistance
Center at
1-800-FOR-MERCedes (1-800-367-6372)
or 1-866-990-9007
R Canada: Customer Service at
1-888-923-8367 252
Features
Stowage and features
ProCarManuals.com
Page 257 of 340
The
Call Failed message appears in the
multifunction display.
X To end a call: press the ~ button on the
multifunction steering wheel.
or
X Press the corresponding button for ending
a phone call on the audio system or on
COMAND.
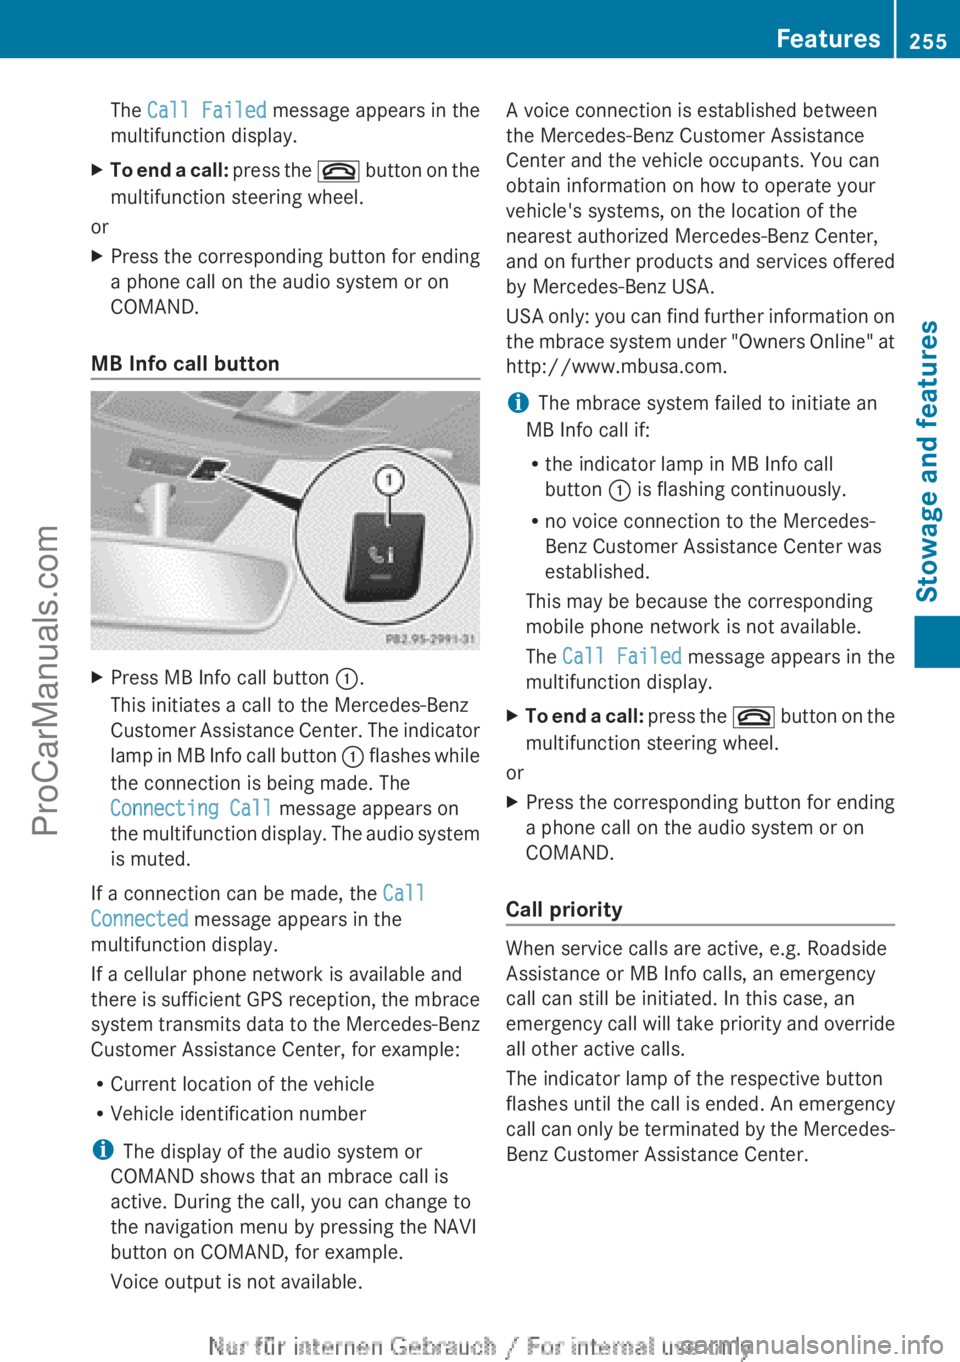
MB Info call button X
Press MB Info call button :.
This initiates a call to the Mercedes-Benz
Customer Assistance Center.
The indicator
lamp in MB Info call button : flashes while
the connection is being made. The
Connecting Call message appears on
the multifunction display. The audio system
is muted.
If a connection can be made, the Call
Connected message appears in the
multifunction display.
If a cellular phone network is available and
there is
sufficient
GPS reception, the mbrace
system transmits data to the Mercedes-Benz
Customer Assistance Center, for example:
R Current location of the vehicle
R Vehicle identification number
i The display of the audio system or
COMAND shows that an mbrace call is
active. During the call, you can change to
the navigation menu by pressing the NAVI
button on COMAND, for example.
Voice output is not available. A voice connection is established between
the Mercedes-Benz Customer Assistance
Center and the vehicle occupants. You can
obtain information on how to operate your
vehicle's systems, on the location of the
nearest authorized Mercedes-Benz Center,
and
on
further
products and services offered
by Mercedes-Benz USA.
USA only: you can find further information on
the mbrace system under "Owners Online" at
http://www.mbusa.com.
i The mbrace system failed to initiate an
MB Info call if:
R the indicator lamp in MB Info call
button : is flashing continuously.
R no voice connection to the Mercedes-
Benz Customer Assistance Center was
established.
This may be because the corresponding
mobile phone network is not available.
The Call Failed message appears in the
multifunction display.
X To end a call: press
the ~
button on the
multifunction steering wheel.
or
X Press the corresponding button for ending
a phone call on the audio system or on
COMAND.
Call priority When service calls are active, e.g. Roadside
Assistance or MB Info calls, an emergency
call can still be initiated. In this case, an
emergency call
will
take priority and override
all other active calls.
The indicator lamp of the respective button
flashes until the call is ended. An emergency
call can only be terminated by the Mercedes-
Benz Customer Assistance Center. Features
255
Stowage and features Z
ProCarManuals.com
Page 258 of 340
All other calls can be ended by pressing:
R
the ~ button on the multifunction
steering wheel
R the corresponding button on the audio
system or on COMAND for ending a
telephone call
i If an mbrace
call is initiated, audio output
is muted. The mobile phone is no longer
connected to COMAND. However, if you
would like to use your mobile phone, do so
only when the vehicle is stationary and in a
safe location.
Downloading destinations in COMAND Downloading destinations
Destination Download gives you access to a
data bank with over 15 million Points of
Interest (POIs).
These
can be downloaded on
the navigation system in your vehicle. If you
know the destination, the address can be
downloaded. Alternatively, you can obtain the
location of Points of Interest (POIs)/
important destinations in the vicinity.
Furthermore, you can download routes with
up to 20 way points.
You are prompted to confirm route guidance
to the address entered.
The system calculates the route and
subsequently starts the route guidance with
the address entered.
i If you select No, the address can be stored
in the address book.
i The Destination Download function is
available if the corresponding mobile
phone network is available and data
transfer is possible.
i You can only use the Destination
Download function if the vehicle is
equipped with a navigation system.
Route Assistance
This service is part of the mbrace PLUS
Package and cannot be purchased
separately. i
You can also use the Route Assistance
function if your
vehicle is not equipped with
a navigation system.
Within the framework of this service, you
receive a professional and reliable form of
navigation support without having to leave
your vehicle.
The customer service representative finds a
suitable route depending on your vehicle's
current position and the desired destination.
You will then be guided live through the
current route section.
Search & Send General notes
i
To use "Search & Send", your vehicle
must be equipped with mbrace and a
navigation system. You must also have an
mbrace service subscription.
"Search & Send" is a destination entry
service. A destination
address which is found
on Google Maps ®
can be transferred via
mbrace directly to your vehicle's navigation
system.
Specifying and sending the destination
address
X Go to the website http://
www.maps.google.com and enter a
destination address into the entry field.
X To send the destination address to the
e-mail address of your mbrace
account: click on the corresponding
button.
i Example:
If you select 'Send to vehicle' and then
'Mercedes-Benz', the destination address
will be sent to your vehicle.
X When the "Send" dialog window appears:
In the relevant field, enter the e-mail
address which you specified when
activating your mbrace account.
X Click "Send".256
Features
Stowage and features
ProCarManuals.com
Page 278 of 340
X
Before cleaning the display, make sure that
it is switched off and has cooled down.
X Clean the display surface using a
commercially available microfiber cloth
and TFT/LCD display cleaner.
X Dry the display surface using a dry
microfiber cloth.
Cleaning the plastic trim G
WARNING
Care products and cleaning agents containing
solvents cause surfaces in the cockpit to
become porous. As
a result, plastic parts may
come loose in the event of air bag
deployment. There is a risk of injury.
Do not use any care products and cleaning
agents to clean the cockpit.
! Do not affix the following to plastic
surfaces:
R stickers
R films
R scented oil bottles or similar items
You can otherwise damage the plastic.
! Do not allow cosmetics, insect repellent
or sunscreen to come into contact with the
plastic trim. This maintains the high-quality
look of the surfaces.
X Wipe the plastic trim with a damp, lint-free
cloth, e.g. a microfiber cloth.
X Heavy soiling: use care and cleaning
products recommended and approved by
Mercedes-Benz.
The surface may
change color temporarily.
Wait until the surface is dry again.
Cleaning the steering wheel and gear or
selector lever X
Thoroughly wipe with a damp cloth or use
leather care agents that have been
recommended and approved
by Mercedes-
Benz. Cleaning genuine wood and trim
elements !
Do not use
solvent-based cleaning agents
such as tar remover, wheel cleaners,
polishes or waxes. There is otherwise a risk
of damaging the surface.
! Do not use chrome polish on trim pieces.
The trim pieces have a chrome look but are
mostly made of anodized aluminum and
can lose their shine if chrome polish is
used. Use a damp, lint-free cloth instead
when cleaning the trim pieces.
If the chrome-plated trim pieces are very
dirty, you can use a chrome polish. If you
are unsure as to whether the trim pieces
are chrome-plated or not, consult an
authorized Mercedes-Benz Center.
X Wipe the wooden trim and trim pieces with
a damp, lint-free cloth, e.g. a microfiber
cloth.
X Heavy soiling: use car care and cleaning
products recommended and approved by
Mercedes-Benz.
Cleaning the seat covers General notes
!
Do not use microfiber cloths to clean
genuine leather, artificial leather or
Alcantara® covers.
If
used often, these can
damage the cover.
i Note that regular care is essential to
ensure that the appearance and comfort of
the covers is retained over time.
Genuine leather seat covers
Leather is a natural product.
It exhibits natural surface characteristics, for
example:
R Differences in the texture
R Signs of stretching and marking
R Slight nuances of color
These are characteristics of leather and not
material defects. 276
Care
Maintenance and care
ProCarManuals.com
Page 284 of 340

The maximum driving distance is
approximately 50 miles (80 km) when the
vehicle is partially laden and approximately
18 miles (30 km) when the vehicle is fully
laden.
In addition to the vehicle load, the driving
distance possible depends upon:
R Speed
R Road condition
R Outside temperature
The driving
distance possible in run-flat mode
may be reduced by extreme driving
conditions/maneuvers, or it can be increased
through a moderate style of driving.
The maximum permissible distance which
can be driven in run-flat mode is counted from
the moment the tire pressure loss warning
appears in the multifunction display.
You must not exceed a maximum speed of
50 mph (80 km/h).
i When replacing one or all tires, make sure
that you use only tires:
R of the size specified for the vehicle and
R marked "MOExtended"
If a tire has gone flat and cannot be
replaced with a MOExtended tire, a
standard tire may be used as a temporary
measure. Make sure that you use the
proper size and type (summer or winter
tire).
i Vehicles equipped with MOExtended tires
are not equipped with a TIREFIT kit at the
factory. It is therefore recommended that
you additionally equip your vehicle with a
TIREFIT kit if you mount tires that do not
feature run-flat properties, e.g. winter tires.
A TIREFIT kit can be obtained from a
qualified specialist workshop.
Important safety notes G
WARNING
When driving in emergency mode, the driving
characteristics deteriorate, e.g. when cornering, accelerating quickly and when
braking. There is a risk of an accident.
Do not exceed the stated maximum speed.
Avoid abrupt
steering
and driving maneuvers,
and driving over obstacles (curbs, potholes,
off-road). This applies in particular to a laden
vehicle.
Stop driving in emergency mode if:
R you hear banging noises.
R the vehicle starts to shake.
R you see smoke and smell rubber.
R ESP ®
is intervening constantly.
R there are tears in the sidewalls of the tire.
After driving in emergency mode, have the
wheel rims checked at a qualified specialist
workshop with regard to their further use. The
defective tire must be replaced in every case. TIREFIT kit
Important safety notes G
WARNING
In the following situations, the tire sealant is
unable to provide sufficient breakdown
assistance, as it is unable to seal the tire
properly:
R there are cuts
or punctures in the tire larger
than those mentioned above.
R the wheel rim is damaged.
R you have driven at very low tire pressures
or on a flat tire.
There is a risk of an accident.
Do not drive any further. Contact a qualified
specialist workshop. G
WARNING
The tire sealant is harmful and causes
irritation. It must not come into contact with
your skin, eyes or clothing or be swallowed.
Do not inhale
TIREFIT fumes. Keep tire sealant
away from children. There is a risk of injury. 282
Flat tire
Breakdown assistance
ProCarManuals.com