2012 MERCEDES-BENZ B-CLASS steering
[x] Cancel search: steeringPage 293 of 340

Position number
B identifies the charged battery of the other vehicle or an equivalent jump-
starting device.
X Press together cover : of positive clamp ; and slide it back.
X Connect positive terminal ; on your vehicle to positive terminal = of donor battery B
using the jumper cable, beginning with your own battery.
X Start the engine of the donor vehicle and run it at idling speed.
X Connect negative terminal ? of
donor
battery B to ground point A of your vehicle using
the jumper cable, connecting the jumper cable to donor battery B first.
X Start the engine.
X Before disconnecting the jumper cables, let the engine run for several minutes.
X First, remove the jumper cables from earth point A and negative terminal ?, then from
positive clamp ; and positive terminal =. Begin each time at the contacts on your own
vehicle first.
X Close cover : of positive terminal ; after removing the jumper cables.
X Have the battery checked at a qualified specialist workshop.
i Jump-starting is not considered to be a normal operating condition.
i Jumper cables and further information regarding jump-starting can be obtained at any
qualified specialist workshop. Towing and tow-starting
Important safety notes
G
WARNING
Functions relevant to safety are restricted or
no longer available if:
R the engine is not running.
R the brake system or the power steering is
malfunctioning.
R there is a
malfunction in the voltage supply
or the vehicle's electrical system.
If your vehicle is being towed, much more
force may be necessary to steer or brake.
There is a risk of an accident.
In such cases, use a tow bar. Before towing,
make sure that the steering moves freely. G
WARNING
If the weight of the vehicle to be towed or tow-
started is greater than the permissible gross
weight of your vehicle:
R the towing eye could detach itself
R the vehicle/trailer combination could
rollover.
There is a risk of an accident.
When towing or tow-starting another vehicle,
its weight should not be greater than the
permissible gross weight of your vehicle.
Information on your vehicle's gross vehicle
weight rating can be found on the vehicle
identification plate ( Y page 328). G
WARNING
The vehicle is braked if the HOLD function is
activated. Therefore, deactivate HOLD if the
vehicle is to be towed. Towing and tow-starting
291
Breakdown assistance Z
ProCarManuals.com
Page 295 of 340

Towing the vehicle with the front axle
raised
! The ignition must be switched off if the
vehicle is being towed with the front axle
raised. Otherwise, ESP®
may intervene and
damage the brake system.
X Turn the SmartKey to position 2 in the
ignition lock.
X When the vehicle is stationary, depress the
brake pedal and keep it depressed.
X Shift the automatic transmission to
position P.
X Release the brake pedal.
X Release the electric parking brake.
X Deactivate automatic locking
(Y page 198).
X Switch on the hazard warning lamps
(Y page 101).
X Turn the SmartKey to position 0 in the
ignition lock and
leave the SmartKey in the
ignition lock.
When towing your vehicle with the front axle
raised, it is important that you observe the
safety instructions ( Y page 291).Towing a vehicle with both axles on
the ground
G
WARNING
The power assistance for the steering and the
brake force booster do not work when the
engine is not running. You will then need
much more effort to brake and steer the
vehicle. Adapt your style of driving
accordingly.
i In order to signal a change of direction
when towing with
the hazard warning lamps
switched on, use the combination switch as
usual. In this case, only the turn signals for
the desired direction flash. When you reset
the combination switch, the hazard
warning lamps start flashing again. The automatic transmission automatically
shifts
to position P
when you open the driver's
or front-passenger door or when you remove
the SmartKey from the ignition lock. In order
to ensure that the automatic transmission
stays in position N when towing the vehicle,
you must observe the following points:
X Make sure that the vehicle is stationary.
X Turn the SmartKey to position 2 in the
ignition lock.
X Depress and hold the brake pedal.
X Shift the automatic transmission to
position N.
X Leave the SmartKey in position 2 in the
ignition lock.
X Release the brake pedal.
X Release the electric parking brake.
X Switch on the hazard warning lamps
(Y page 101).
It is important that you observe the safety
instructions when towing away your vehicle
(Y page 291). Transporting the vehicle
! Only lash the
vehicle down by the wheels
or wheel rims, not by parts of the vehicle
such as axle or steering components.
Otherwise, the vehicle could be damaged.
X Turn the SmartKey to position 2 in the
ignition lock.
X Shift the transmission to position N.
As soon as the vehicle is loaded:
X Prevent the vehicle from rolling away by
applying the electric parking brake.
X Shift the transmission to position P.
X Turn the SmartKey to position 0 in the
ignition lock and remove it.
X Secure the vehicle.
The towing eye can be used to pull the vehicle
onto a trailer or transporter for transporting
purposes. Towing and tow-starting
293
Breakdown assistance Z
ProCarManuals.com
Page 300 of 340

Useful information
i This Operator's Manual describes all
models and all standard and optional
equipment of your vehicle available at the
time of publication of the Operator's
Manual. Country-specific differences are
possible. Please note
that your vehicle may
not be equipped with all features
described. This also applies to safety-
related systems and functions.
i Read the information on qualified
specialist workshops: ( Y page 24).Important safety notes
G
WARNING
If wheels and tires of the wrong size are used,
the wheel brakes or suspension components
may be damaged. There is a risk of an
accident.
Always replace wheels and tires with those
that fulfill the specifications of the original
part.
When replacing wheels,
make sure to use the
correct:
R designation
R model
When replacing tires, make sure to use the
correct:
R designation
R manufacturer
R model G
WARNING
A flat tire severely impairs the driving,
steering and braking characteristics of the
vehicle. There is a risk of accident.
Tires without run-flat characteristics:
R do not drive with a flat tire.
R immediately replace the flat tire with your
emergency spare wheel or spare wheel, or
consult a qualified specialist workshop. Tires with run-flat characteristics:
R
pay attention to the information and
warning notices on
MOExtended tires (tires
with run-flat characteristics).
Accessories that are not approved for your
vehicle by Mercedes-Benz or are not being
used correctly can impair the operating
safety.
Before purchasing and using non-approved
accessories, visit a qualified specialist
workshop and inquire about:
R suitability
R legal stipulations
R factory recommendations
Information on dimensions and types of
wheels and tires for your vehicle can be found
(Y page 323).
Information on air pressure for the tires on
your vehicle can be found:
R on the vehicle's Tire and Loading
Information placard on the B-pillar
R on the tire pressure label on the fuel filler
flap
R under "Tire pressure"
i Further information on wheels and tires
can be obtained at any qualified specialist
workshop. Operation
Information on driving
R If the vehicle is heavily loaded, check the
tire pressures and correct them if
necessary.
R While driving, pay attention to vibrations,
noises and unusual handling
characteristics, e.g. pulling to one side.
This may indicate that the wheels or tires
are damaged. If you suspect that a tire is
defective, reduce your speed immediately.
Stop the vehicle as soon as possible to
check the wheels and tires for damage.
Hidden tire damage could also be causing298
Operation
Wheels and tires
ProCarManuals.com
Page 303 of 340

safety systems such as ABS and ESP
®
to
function optimally in
winter. These tires have
been developed specifically for driving in
snow.
Use M+S tires of the same make and tread on
all wheels to maintain safe handling
characteristics.
Always observe the maximum permissible
speed specified for the M+S tires you have
mounted.
Once the winter tires are mounted:
X Check the tire pressures (Y page 305).
X Restart the tire pressure loss warning
system (Y page 305).
For more information on driving with the
emergency spare wheel, see ( Y page 325).Snow chains
G
WARNING
If snow chains are mounted on the rear
wheels, the snow
chains could cause abrasion
to the vehicle body or to chassis components.
This could cause damage to the vehicle or the
tires. There is a risk of an accident.
To avoid hazardous situations:
R never mount snow chains on the rear
wheels
R only mount snow chains in pairs on the
front wheels.
! On some tire sizes there is not enough
space for snow chains. To avoid damage to
the vehicle or tires, observe the "Wheel and
tire combinations" section under "Tires and
wheels".
For safety reasons, Mercedes-Benz
recommends that you only use snow chains
that have been specially approved for your
vehicle by Mercedes-Benz, or are of a
corresponding standard of quality. If you intend to mount snow chains, please
bear the following points in mind:
R
Snow chains may not be mounted on all
wheel/tire combinations. Permissible
wheel-tire combinations (Y page 323).
R Only use snow chains when driving on
roads completely covered by snow.
Remove the snow chains as soon as
possible when you come to a road that is
not snow-covered.
R Local regulations may restrict the use of
snow chains. Observe the appropriate
regulations if you wish to mount snow
chains.
R Do not exceed the maximum permissible
speed of 30 mph (50 km/h).
R When snow chains
are installed, never use
Active Parking Assist (Y page 172).
i You may wish to deactivate
ESP ®
(Y page 62) when pulling away with
snow chains installed. You can thereby
allow the wheels to spin in a controlled
manner, achieving an increased driving
force (cutting action).
For more information on driving with the
emergency spare wheel, see ( Y page 325). Tire pressure
Tire pressure specifications
G
WARNING
Tires with tire pressures that are too low or
too high are associated with the following
hazards:
R they can burst,
in particular if the vehicle is
heavily laden or when driven at high
speeds.
R the tires can wear excessively and/or
unevenly, which can severely impair tire
traction.
R the driving, steering and braking
characteristics may be severely impaired.
There is a risk of accident. Tire pressure
301
Wheels and tires
ZProCarManuals.com
Page 307 of 340

Checking tire pressures manually
To determine and set the correct tire
pressure, proceed as follows:
X
Remove the valve cap of the tire that is to
be checked.
X Press the tire pressure gauge securely onto
the valve.
X Read the tire pressure and compare it with
the recommended value on the Tire and
Loading Information placard on the
B-pillar on the
driver's side of your vehicle.
X If necessary, increase the tire pressure to
the recommended value ( Y page 301).
X If the tire pressure is too high, release air
by pressing down
the metal pin in the valve
using the tip of a pen, for example. Then,
check the tire pressure again using the tire
pressure gauge.
X Screw the valve cap onto the valve.
X Repeat these steps for the other tires. Tire pressure loss warning system
Important safety notes While the vehicle is in motion, the tire
pressure loss warning system monitors the
set
tire
pressure
using the rotational speed of
the wheels. This enables the system to detect
significant pressure loss in a tire. If the speed
of rotation of a wheel changes as a result of
a loss of pressure, a corresponding warning
message will appear in the multifunction
display.
The tire pressure warning system does not
warn you of an incorrectly set tire pressure.
Observe the notes on the recommended tire
pressure ( Y page 301).
The tire pressure loss warning system does
not replace the need to regularly check your
vehicle's tire pressures, since an even loss of
pressure on several tires at the same time
cannot be detected by the tire pressure loss
warning system. The tire pressure loss warning system is not
able to
warn
you of a sudden loss of pressure,
e.g. if the tire is penetrated by a foreign
object. In the event of a sudden loss of
pressure, bring the vehicle to a halt by braking
carefully. Avoid abrupt steering maneuvers.
The function of the tire pressure loss warning
system is limited or delayed if:
R snow chains are mounted to your vehicle's
tires.
R road conditions are wintry.
R you are driving on sand or gravel.
R you adopt a very sporty driving style
(cornering at high speeds or driving with
high rates of acceleration).
R you are driving with a heavy load (in the
vehicle or on the roof).
Restarting the tire pressure loss
warning system Restart the tire pressure loss warning system
if you have:
R
changed the tire pressure
R changed the wheels or tires
R mounted new wheels or tires
X Before restarting, make sure that the tire
pressures are set properly on all four tires
for the respective operating conditions.
The recommended tire pressures can be
found in the table on the fuel filler flap.
The tire pressure loss warning system can
only give reliable warnings if you have set
the correct tire
pressure. If an incorrect tire
pressure is set, these incorrect values will
be monitored.
X Observe the notes on tire pressure
(Y page 301).
X Make sure that the SmartKey is in
position 2 (Y page 135)
in the ignition lock. Tire pressure
305
Wheels and tires Z
ProCarManuals.com
Page 308 of 340

X
Press = or ; on the steering wheel
to select the Service menu.
X Press the 9 or : button to select
Tire Pressure.
X Press the a button.
The Run Flat Indicator Active
Press 'OK' to Restart message
appears in the multifunction display.
If you wish to confirm the restart:
X Press the a button.
The Tire Pressure Now OK? message
appears in the multifunction display.
X Press the 9 or : button to select
Yes.
X Press the a button.
The Run Flat Indicator Restarted
message appears in the multifunction
display.
After a teach-in period, the tire pressure
loss warning system will monitor the set
tire pressures of all four tires.
or
If you wish to cancel the restart:
X Press the % button.
or
X If the Tire Pressure Now OK? message
appears, use the 9 or : button to
select Cancel.
X Press the a button.
The tire pressure values stored at the last
restart will continue to be monitored. Loading the vehicle
Instruction labels for tires and loads
G
WARNING
Overloaded tires can overheat, causing a
blowout. Overloaded tires
can also impair the
steering and driving characteristics and lead
to brake failure. There is a risk of accident.
Observe the load rating of the tires. The load
rating must be at least half of the GAWR of your vehicle. Never overload the tires by
exceeding the maximum load.
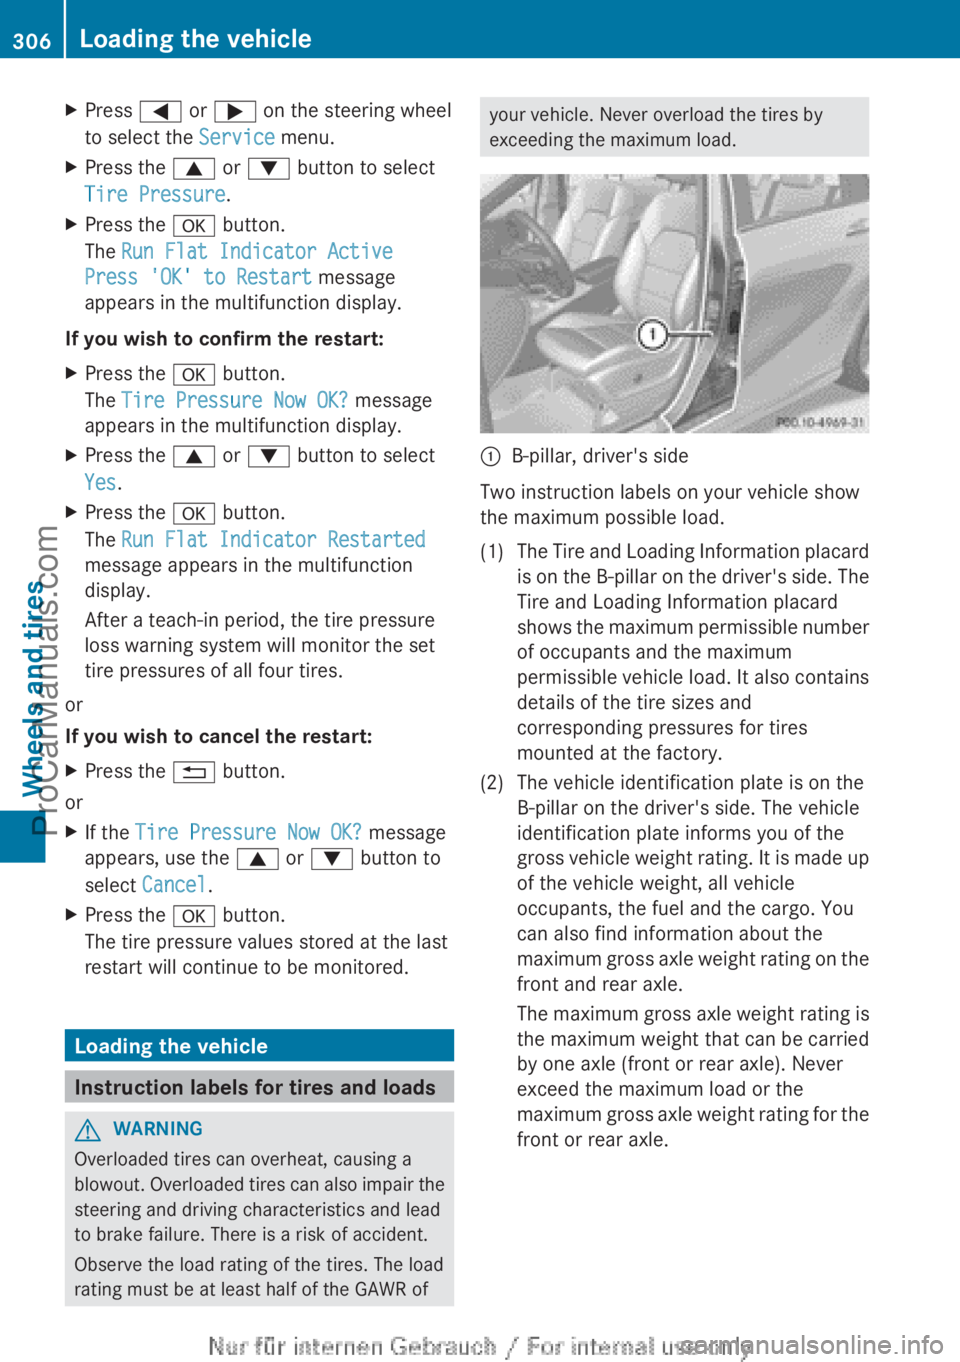
:
B-pillar, driver's side
Two instruction labels on your vehicle show
the maximum possible load.
(1) The Tire and Loading Information placard is on the
B-pillar on the driver's side. The
Tire and Loading Information placard
shows the maximum permissible number
of occupants and the maximum
permissible vehicle load. It also contains
details of the tire sizes and
corresponding pressures for tires
mounted at the factory.
(2) The vehicle identification plate is on the B-pillar on the driver's side. The vehicle
identification plate informs you of the
gross vehicle weight
rating. It is made up
of the vehicle weight, all vehicle
occupants, the fuel and the cargo. You
can also find information about the
maximum gross axle weight rating on the
front and rear axle.
The maximum gross axle weight rating is
the maximum weight that can be carried
by one axle (front or rear axle). Never
exceed the maximum load or the
maximum gross axle weight rating for the
front or rear axle. 306
Loading the vehicleWheels and tires
ProCarManuals.com