Page 187 of 413
AUDIO/VIDEO SYSTEM
186
Operations such as selecting a preset station and adjusting the sound balance are car-
ried out on the screen. To display the audio screen, push the“MENU”button on the Re-
mote Touch, then select “Audio”.
" DVD changer
U6016AASLY
1Function menu tab
To control the radio, DVD changer,
Bluetooth raudio player, AUX, USB
memory or iPod, select the screen
tabs. For details, see page 191.
2Function menu display screen
To control the radio, DVD changer,
Bluetooth raudio player, AUX, USB
memory or iPod, select the screen
buttons. For details, see page 191.
3Disc slot
Insert discs into the slot after pushing
“LOAD” button. For details, see
page 223.
4“LOAD” button
Push this button to insert the discs.
For details, see page 223.
5“TUNE/FILE” knob
Turn this knob to move the station
band and files up or down. For de-
tails, see pages 203, 218 and 259.
11 08.03HS250h_NAVI_U
75051U
Quick reference
Page 189 of 413

AUDIO/VIDEO SYSTEM
188
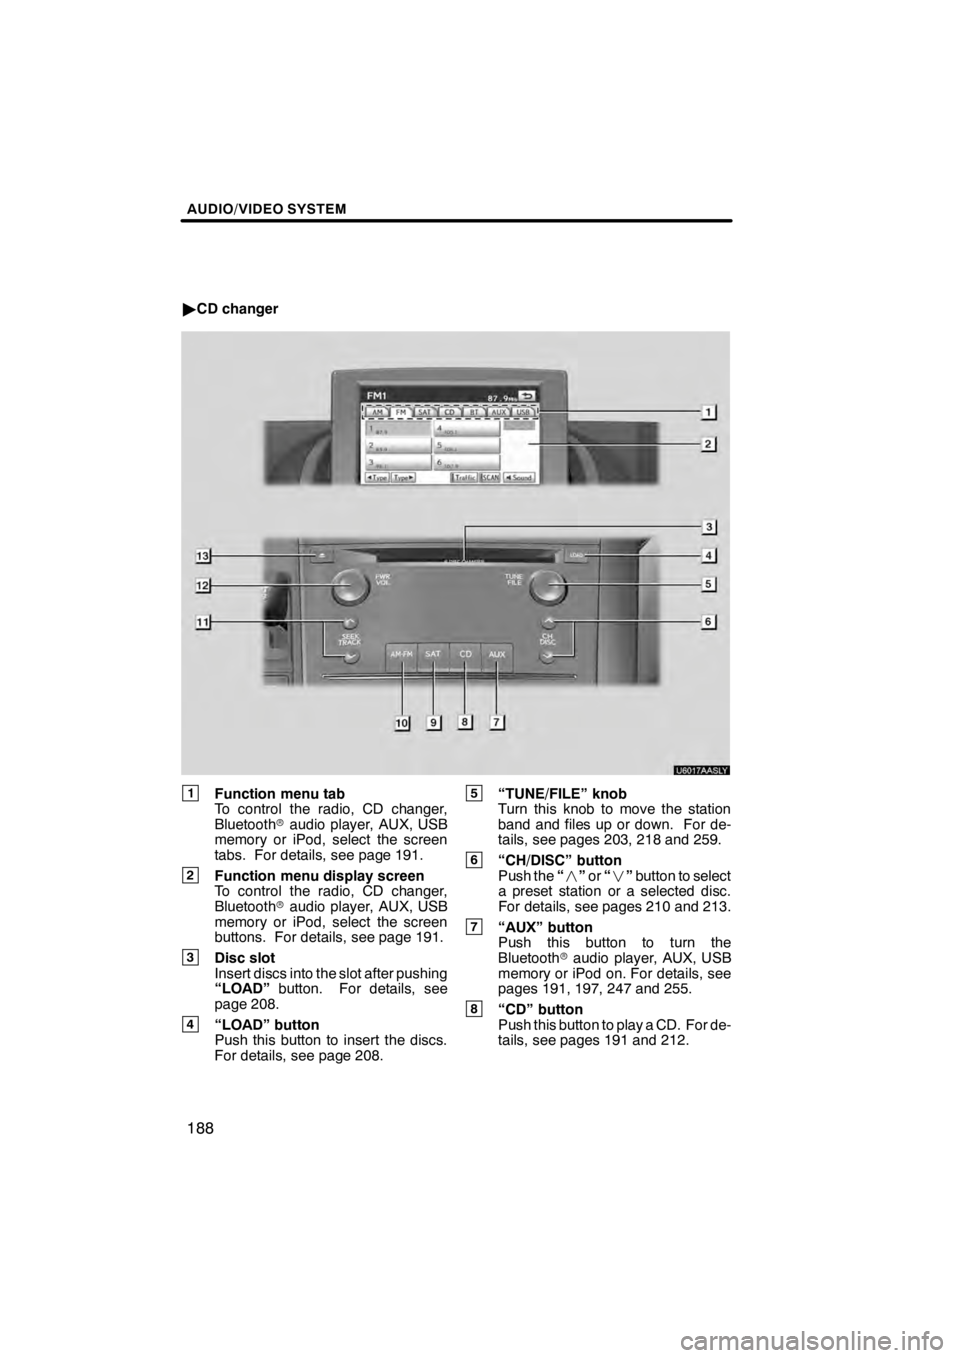
"CD changer
U6017AASLY
1Function menu tab
To control the radio, CD changer,
Bluetooth raudio player, AUX, USB
memory or iPod, select the screen
tabs. For details, see page 191.
2Function menu display screen
To control the radio, CD changer,
Bluetooth raudio player, AUX, USB
memory or iPod, select the screen
buttons. For details, see page 191.
3Disc slot
Insert discs into the slot after pushing
“LOAD” button. For details, see
page 208.
4“LOAD” button
Push this button to insert the discs.
For details, see page 208.
5“TUNE/FILE” knob
Turn this knob to move the station
band and files up or down. For de-
tails, see pages 203, 218 and 259.
6“CH/DISC” button
Push the “” or“” button to select
a preset station or a selected disc.
For details, see pages 210 and 213.
7“AUX” button
Push this button to turn the
Bluetooth raudio player, AUX, USB
memory or iPod on. For details, see
pages 191, 197, 247 and 255.
8“CD” button
Push this button to play a CD. For de-
tails, see pages 191 and 212.
11 08.03HS250h_NAVI_U
75051U
Page 193 of 413
AUDIO/VIDEO SYSTEM
192
U6003LC
3. Select “AM”, ”FM”, “SAT”, “CD”,
“CD/DVD”, “BT”, “AUX” or “USB” tab
to turn on the desired mode.
Push these buttons or tabs if you want to
switch from one mode to another.
If the disc is not set, the CD changer/DVD
changer does not turn on.
You can turn off the CD changer/DVD
changer by ejecting all the discs. If the au-
dio system was previously off, then the en-
tire audio system will be turned off when
you eject all the discs.
U6002LC
U6003LC
U6004LC
U6005LC
11 08.03HS250h_NAVI_U
75051U
Page 198 of 413

AUDIO/VIDEO SYSTEM
197
(h) AUX port
The sound of portable audio players
connected to the AUX port can be enjoyed.
Push the“AUX”button to display audio
screen and select “AUX”tab to switch to
AUX mode. When the portable audio
player is not connected to the AUX port,
the tab will tone down. For details, refer to
the “Owner’s Manual”.
(i) USB port
It is available to connect a USB memory/
iPod device with the USB port. When the
USB memory/iPod is not connected to the
USB port, the tab will tone down. For de-
tails, see “(a) Connecting a USB memory
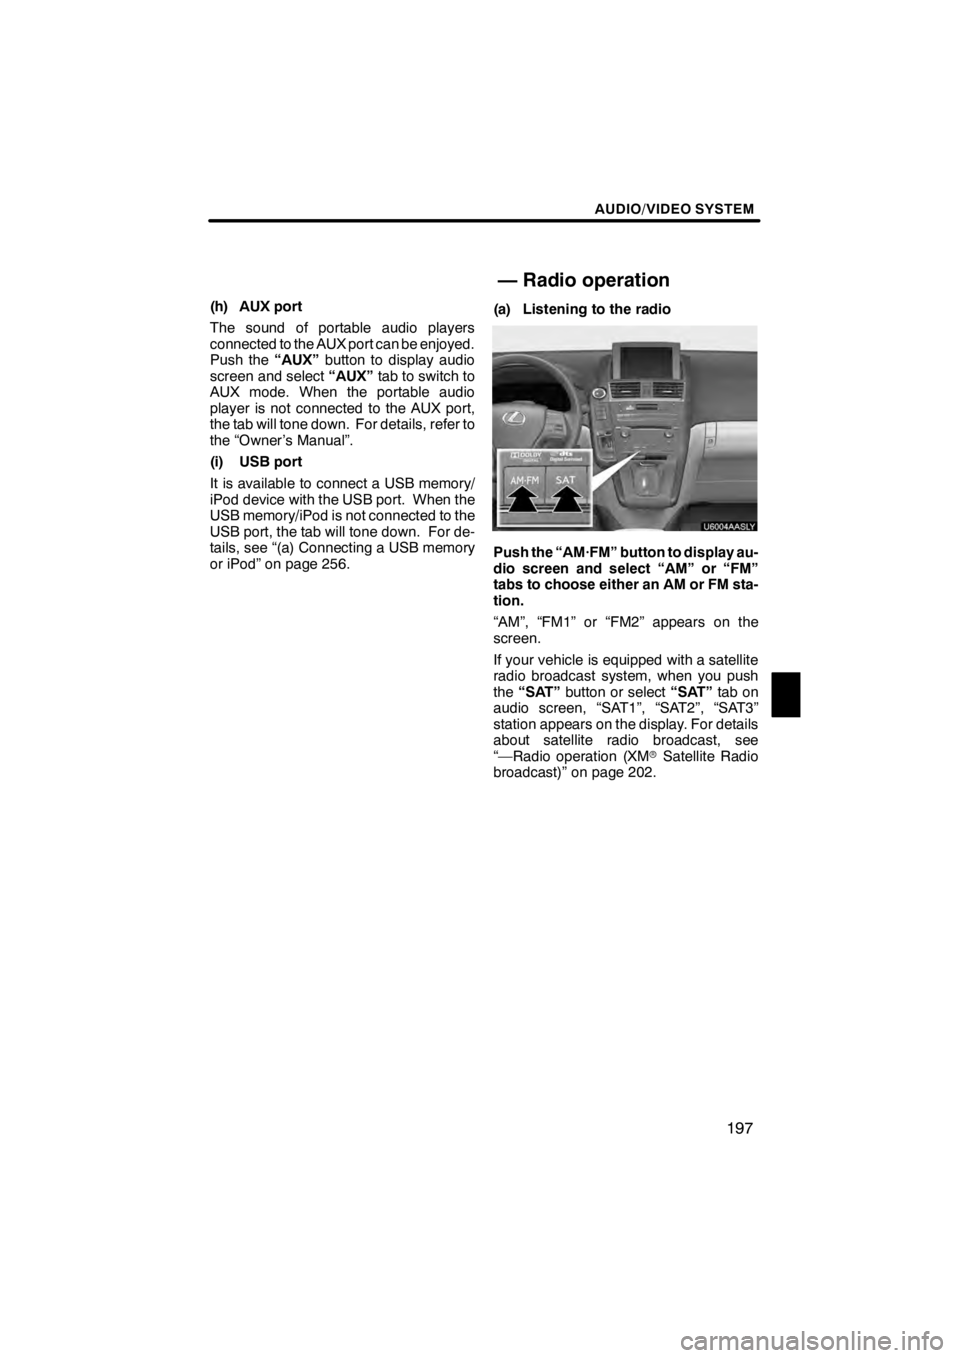
or iPod” on page 256. (a) Listening to the radio
U6004AASLY
Push the “AM·FM” button to display au-
dio screen and select “AM” or “FM”
tabs to choose either an AM or FM sta-
tion.
“AM”, “FM1” or “FM2” appears on the
screen.
If your vehicle is equipped with a satellite
radio broadcast system, when you push
the
“SAT” button or select “SAT”tab on
audio screen, “SAT1”, “SAT2”, “SAT3”
station appears on the display. For details
about satellite radio broadcast, see
“—Radio operation (XM rSatellite Radio
broadcast)” on page 202.
11 08.03HS250h_NAVI_U
75051U
— Radio operation
7
Page 309 of 413

INTUITIVE PARKING ASSIST
308
D
The shape of the obstacle may prevent
a sensor from detecting it. Pay particu-
lar attention to the following obstacles:
DWires, fences, ropes, etc.
DCotton, snow and other materials
that absorb radio waves
DSharply −angled objects
DLow obstacles
DTall obstacles with upper sections
projecting outwards in the direction
of your vehicle
CAUTION
DCaution when using the intuitive
parking assist− sensor
Observe the following precautions.
Failing to do so may result in the
vehicle being unable to be driven
safely and possibly cause an acci-
dent.
DDo not use the sensor at speeds in excess of 6 mph (10 km/h).
DDo not attach any accessorieswithin the sensor range.
NOTICE
Notes when washing the vehicle
Do not apply intensive bursts of wa-
ter or steam to the sensor area.
Doing so may result in the sensor
malfunctioning.
System malfunction
DAn accident will affect the sensors,
resulting in system failure.
DIf the indicators remain on without
a beeping sound, the system may
be malfunctioning. Contact your
Lexus dealer.
If an error is detected when the intuitive
parking assist− sensor is turned on, the
vehicle symbol comes on or flashes
with beeping sounds.
However, the sensors functioning properly
continue their obstacle detection.
The intuitive parking assist −sensor failure
warning display is not given in either of the
following operations:
DChanging to another screen
DTurning off the main switch for the intu-
itive parking assist −sensor
11 08.03HS250h_NAVI_U
75051U
— Intuitive parking
assist− sensor failure
warning