Page 45 of 257
45
1. BASIC INFORMATION BEFORE OPERATION
2
BASIC FUNCTION
GS450h/250 (EE) NAVI 30C48E
13.12.17 15:42
4. SCREEN ADJUST-
MENT
1Press the “MENU” button on the Re-
mote Touch.
2Select “Display”.Adjusting the screen display
“Camera”: Select to adjust the image the
camera displays.
Adjusting the image the camera dis-
plays
“Map·menu”: Select to return to the
screen display settings.
The contrast and brightness of the
screen display and the image the
camera displays can be adjusted. The
display can also be turned off, and/or
changed to either day or night mode.
SCREEN SETTING
ADJUSTMENT
ADJUSTING SCREEN
DISPLAY AND CAMERA
SETTINGS
Page 46 of 257

46
1. BASIC INFORMATION BEFORE OPERATION
GS450h/250 (EE) NAVI 30C48E
13.12.17 15:42
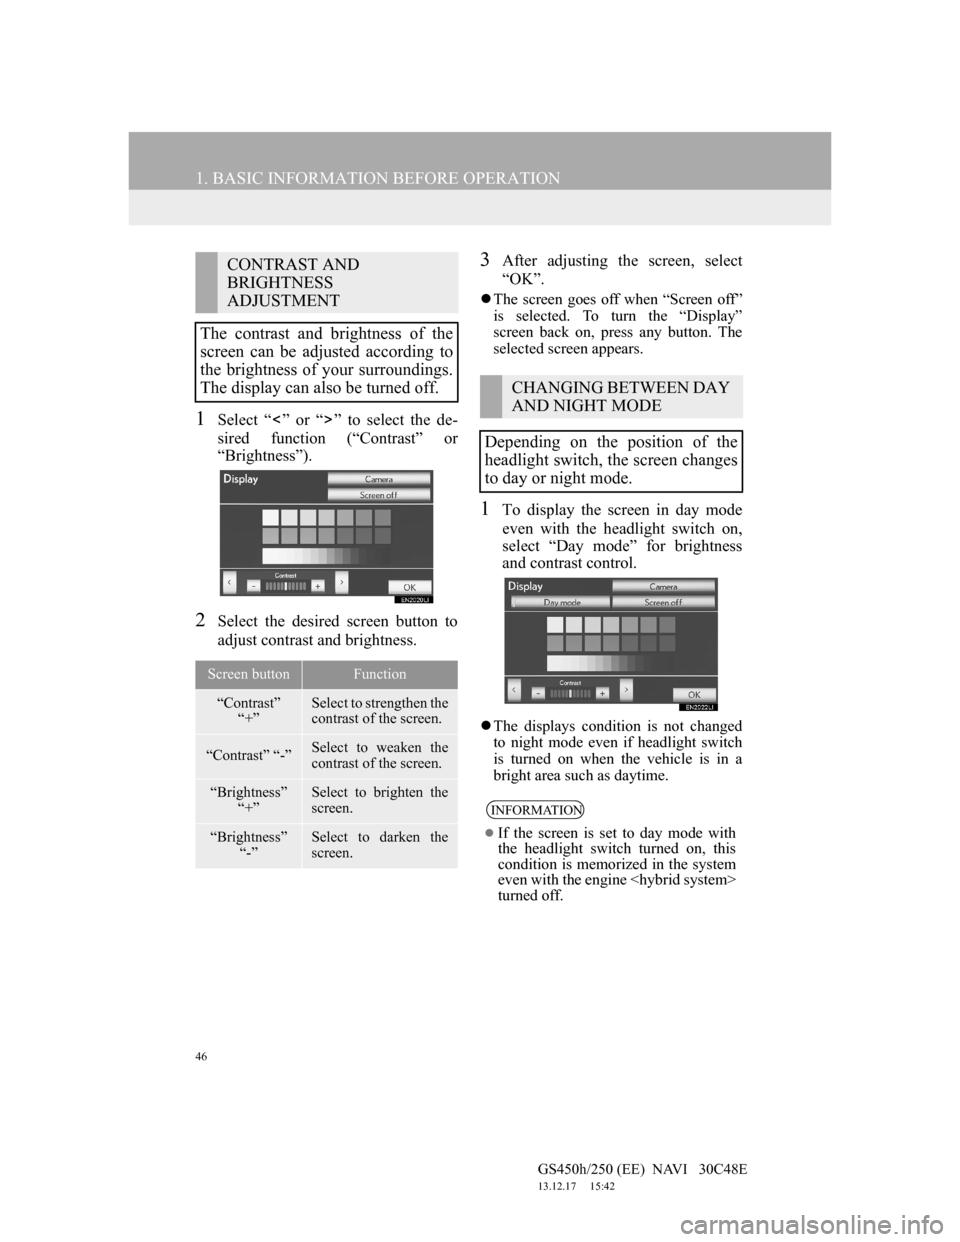
1Select “ ” or “ ” to select the de-
sired function (“Contrast” or
“Brightness”).
2Select the desired screen button to
adjust contrast and brightness.
3After adjusting the screen, select
“OK”.
The screen goes off when “Screen off”
is selected. To turn the “Display”
screen back on, press any button. The
selected screen appears.
1To display the screen in day mode
even with the headlight switch on,
select “Day mode” for brightness
and contrast control.
The displays condition is not changed
to night mode even if headlight switch
is turned on when the vehicle is in a
bright area such as daytime.
CONTRAST AND
BRIGHTNESS
ADJUSTMENT
The contrast and brightness of the
screen can be adjusted according to
the brightness of your surroundings.
The display can also be turned off.
Screen buttonFunction
“Contrast”
“+”Select to strengthen the
contrast of the screen.
“Contrast” “-”Select to weaken the
contrast of the screen.
“Brightness”
“+”Select to brighten the
screen.
“Brightness”
“-”Select to darken the
screen.
CHANGING BETWEEN DAY
AND NIGHT MODE
Depending on the position of the
headlight switch, the screen changes
to day or night mode.
INFORMATION
If the screen is set to day mode with
the headlight switch turned on, this
condition is memorized in the system
even with the engine
turned off.
Page 47 of 257
47
1. BASIC INFORMATION BEFORE OPERATION
2
BASIC FUNCTION
GS450h/250 (EE) NAVI 30C48E
13.12.17 15:42
5. MAP SCREEN OPERA-
TION
The current position mark ( ) appears
in the centre or bottom centre of the
map screen.
A street name will appear on the bot-
tom of the screen, depending on the
scale of the map ( ).
CURRENT POSITION
DISPLAY
Press the “MENU” button on the Re-
mote Touch, then select “Navi”, and
select if the navigation menu
screen is displayed, to display the
current position. This screen displays
the current position and a map of the
surrounding area.
Vehicles with a 12.3-inch display:
The current position can also be dis-
played by pressing the “MAP/
VOICE” button.
To correct the current position manu-
ally, see page 148.
Page 48 of 257

48
1. BASIC INFORMATION BEFORE OPERATION
GS450h/250 (EE) NAVI 30C48E
13.12.17 15:42
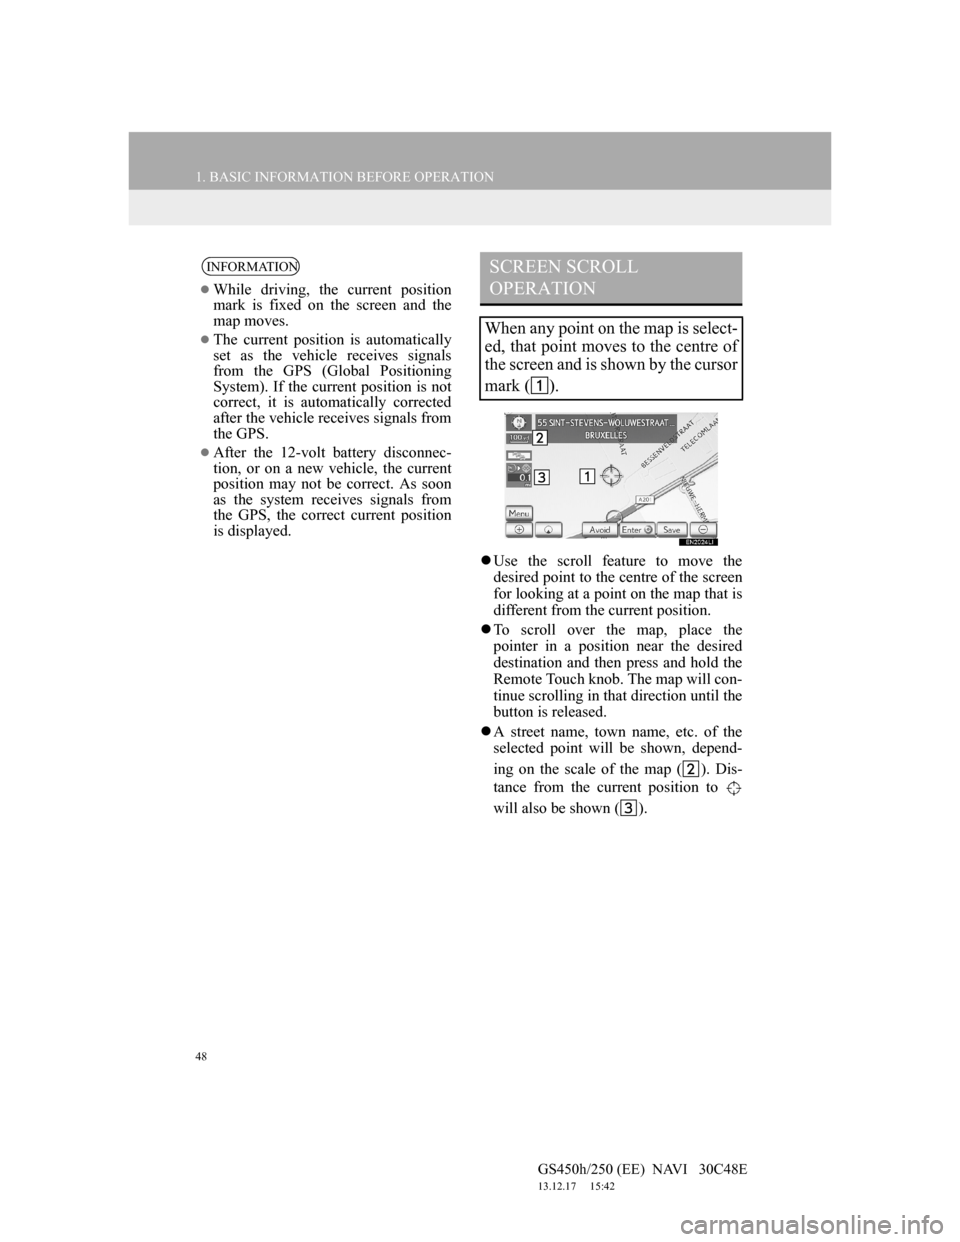
Use the scroll feature to move the
desired point to the centre of the screen
for looking at a point on the map that is
different from the current position.
To scroll over the map, place the
pointer in a position near the desired
destination and then press and hold the
Remote Touch knob. The map will con-
tinue scrolling in that direction until the
button is released.
A street name, town name, etc. of the
selected point will be shown, depend-
ing on the scale of the map ( ). Dis-
tance from the current position to
will also be shown ( ).
INFORMATION
While driving, the current position
mark is fixed on the screen and the
map moves.
The current position is automatically
set as the vehicle receives signals
from the GPS (Global Positioning
System). If the current position is not
correct, it is automatically corrected
after the vehicle receives signals from
the GPS.
After the 12-volt battery disconnec-
tion, or on a new vehicle, the current
position may not be correct. As soon
as the system receives signals from
the GPS, the correct current position
is displayed.
SCREEN SCROLL
OPERATION
When any point on the map is select-
ed, that point moves to the centre of
the screen and is shown by the cursor
mark ( ).
Page 49 of 257

49
1. BASIC INFORMATION BEFORE OPERATION
2
BASIC FUNCTION
GS450h/250 (EE) NAVI 30C48E
13.12.17 15:42
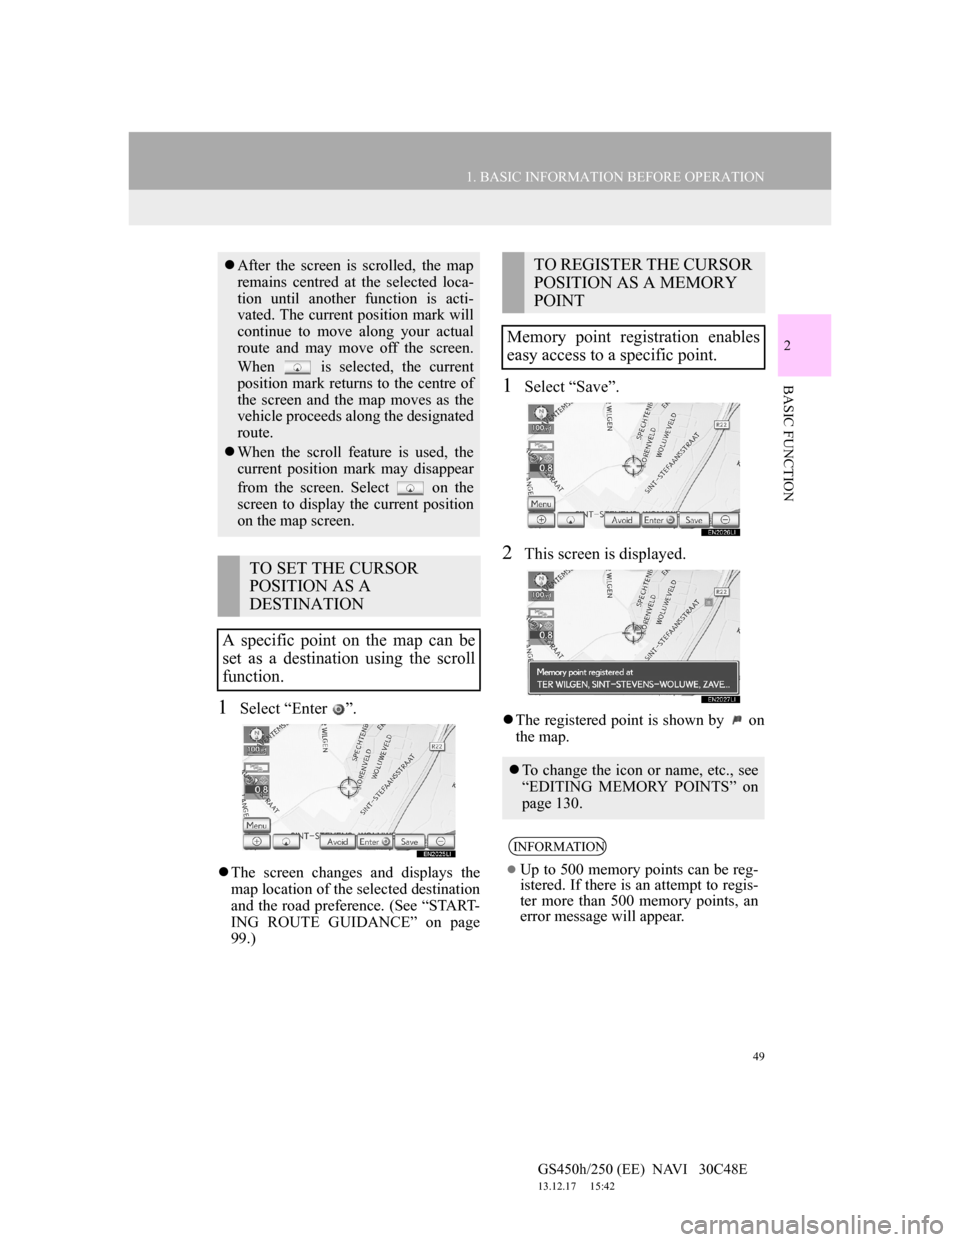
1Select “Enter ”.
The screen changes and displays the
map location of the selected destination
and the road preference. (See “START-
ING ROUTE GUIDANCE” on page
99.)
1Select “Save”.
2This screen is displayed.
The registered point is shown by on
the map.
After the screen is scrolled, the map
remains centred at the selected loca-
tion until another function is acti-
vated. The current position mark will
continue to move along your actual
route and may move off the screen.
When is selected, the current
position mark returns to the centre of
the screen and the map moves as the
vehicle proceeds along the designated
route.
When the scroll feature is used, the
current position mark may disappear
from the screen. Select on the
screen to display the current position
on the map screen.
TO SET THE CURSOR
POSITION AS A
DESTINATION
A specific point on the map can be
set as a destination using the scroll
function.
TO REGISTER THE CURSOR
POSITION AS A MEMORY
POINT
Memory point registration enables
easy access to a specific point.
To change the icon or name, etc., see
“EDITING MEMORY POINTS” on
page 130.
INFORMATION
Up to 500 memory points can be reg-
istered. If there is an attempt to regis-
ter more than 500 memory points, an
error message will appear.
Page 50 of 257
50
1. BASIC INFORMATION BEFORE OPERATION
GS450h/250 (EE) NAVI 30C48E
13.12.17 15:42
1Select “Avoid”.
2Select either or to change
the size of the area to be avoided.
3Select “OK”.
To display information about an icon,
set the cursor on it.
TO REGISTER THE CURSOR
LOCATION AS AN AREA TO
AVOID
A specific location on the map can be
set as an area to avoid using the scroll
function.INFORMATION
If a destination is input in the area to
avoid or the route calculation cannot
be made without running through the
area to avoid, a route passing through
the area to be avoided may be shown.
Up to 10 locations can be registered
as areas to avoid. If there are 10 loca-
tions already registered, the following
message will be displayed: “Unable
to register additional points. Perform
the operation again after deleting 1 or
more points.”.
TO SEE INFORMATION
ABOUT THE ICON WHERE
THE CURSOR IS SET
Page 51 of 257
51
1. BASIC INFORMATION BEFORE OPERATION
2
BASIC FUNCTION
GS450h/250 (EE) NAVI 30C48E
13.12.17 15:42
POI INFORMATION
1Select “Info”.
2Information such as the name, ad-
dress, position and telephone num-
ber are displayed.
When the cursor is set on a POI icon,
the name and “Info” are displayed at
the top of the screen.
If “Enter ” is selected, the position
of the cursor will be set as a destina-
tion.
If there is already a set destination,
“Add to ” and “Replace ” will be
displayed.
“Add to ”: Select to add a destina-
tion.
“Replace ”: Select to delete the ex-
isting destination(s) and set a new one.
To register this POI as a memory
point, select “Save”. (See “REGIS-
TERING MEMORY POINTS” on
page 130.)
If is selected, the registered
telephone number can be called.
The desired POI can be displayed on
the map screen. (See “DISPLAY POI
ICONS” on page 120.)
Page 52 of 257

52
1. BASIC INFORMATION BEFORE OPERATION
GS450h/250 (EE) NAVI 30C48E
13.12.17 15:42
MEMORY POINT INFORMA-
TION
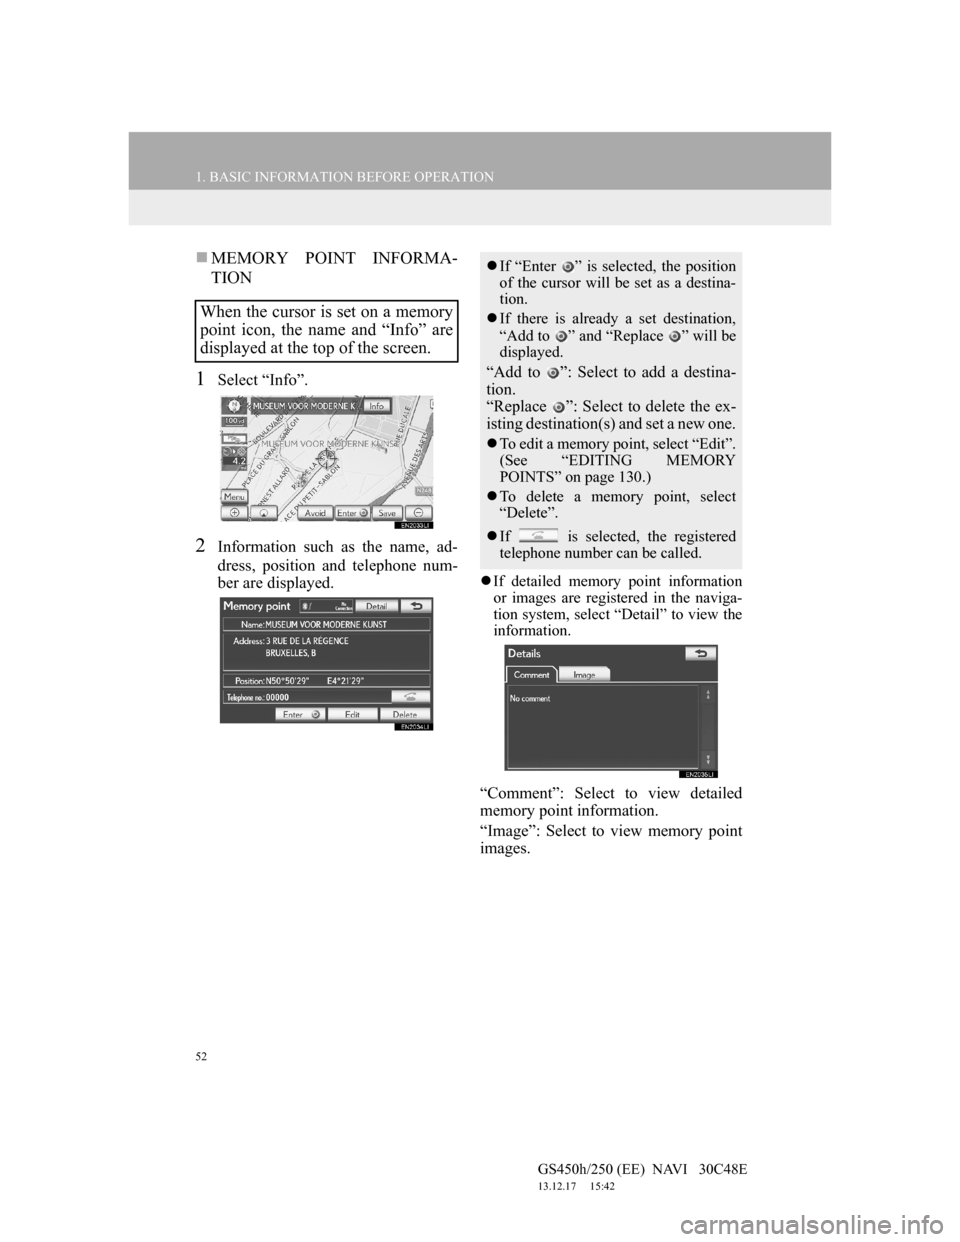
1Select “Info”.
2Information such as the name, ad-
dress, position and telephone num-
ber are displayed.
If detailed memory point information
or images are registered in the naviga-
tion system, select “Detail” to view the
information.
“Comment”: Select to view detailed
memory point information.
“Image”: Select to view memory point
images.
When the cursor is set on a memory
point icon, the name and “Info” are
displayed at the top of the screen.
If “Enter ” is selected, the position
of the cursor will be set as a destina-
tion.
If there is already a set destination,
“Add to ” and “Replace ” will be
displayed.
“Add to ”: Select to add a destina-
tion.
“Replace ”: Select to delete the ex-
isting destination(s) and set a new one.
To edit a memory point, select “Edit”.
(See “EDITING MEMORY
POINTS” on page 130.)
To delete a memory point, select
“Delete”.
If is selected, the registered
telephone number can be called.