Page 158 of 436

158
4. SETUP
CT200h_Navi_OM76078E_(EE)
14.02.06 12:30
1Press the “MENU” button on the
Remote Touch, then select “Setup”.
2Select “Vehicle” on the “Setup”
screen.
3Select “Maintenance” on the “Vehi-
cle settings” screen.
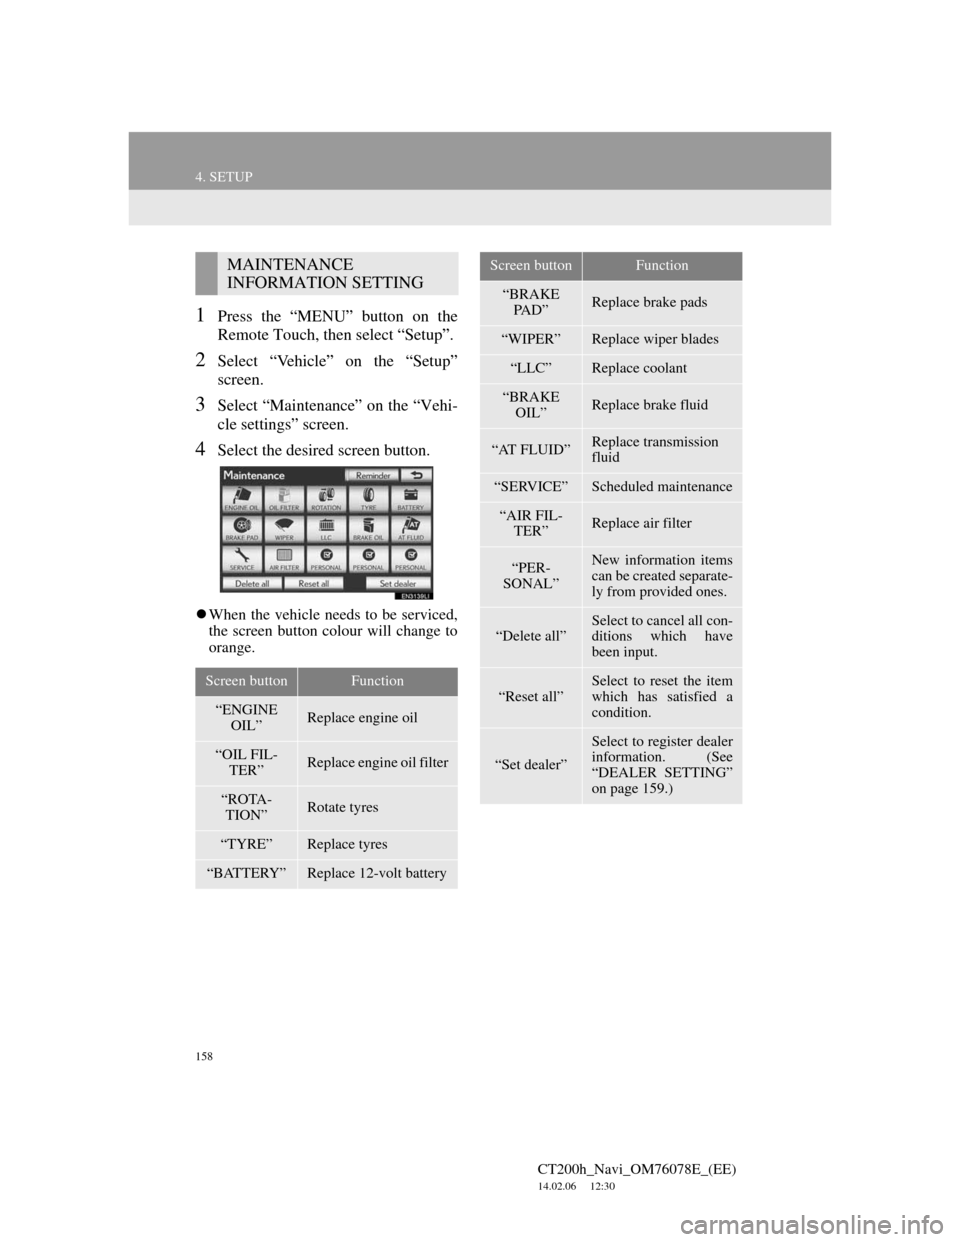
4Select the desired screen button.
When the vehicle needs to be serviced,
the screen button colour will change to
orange.
MAINTENANCE
INFORMATION SETTING
Screen buttonFunction
“ENGINE
OIL”Replace engine oil
“OIL FIL-
TER”Replace engine oil filter
“ROTA-
TION”Rotate tyres
“TYRE”Replace tyres
“BATTERY”Replace 12-volt battery
“BRAKE
PA D ”Replace brake pads
“WIPER”Replace wiper blades
“LLC”Replace coolant
“BRAKE
OIL”Replace brake fluid
“AT FLUID”Replace transmission
fluid
“SERVICE”Scheduled maintenance
“AIR FIL-
TER”Replace air filter
“PER-
SONAL”New information items
can be created separate-
ly from provided ones.
“Delete all”Select to cancel all con-
ditions which have
been input.
“Reset all”
Select to reset the item
which has satisfied a
condition.
“Set dealer”
Select to register dealer
information. (See
“DEALER SETTING”
on page 159.)
Screen buttonFunction
Page 159 of 436

159
4. SETUP
CT200h_Navi_OM76078E_(EE)
14.02.06 12:30
3
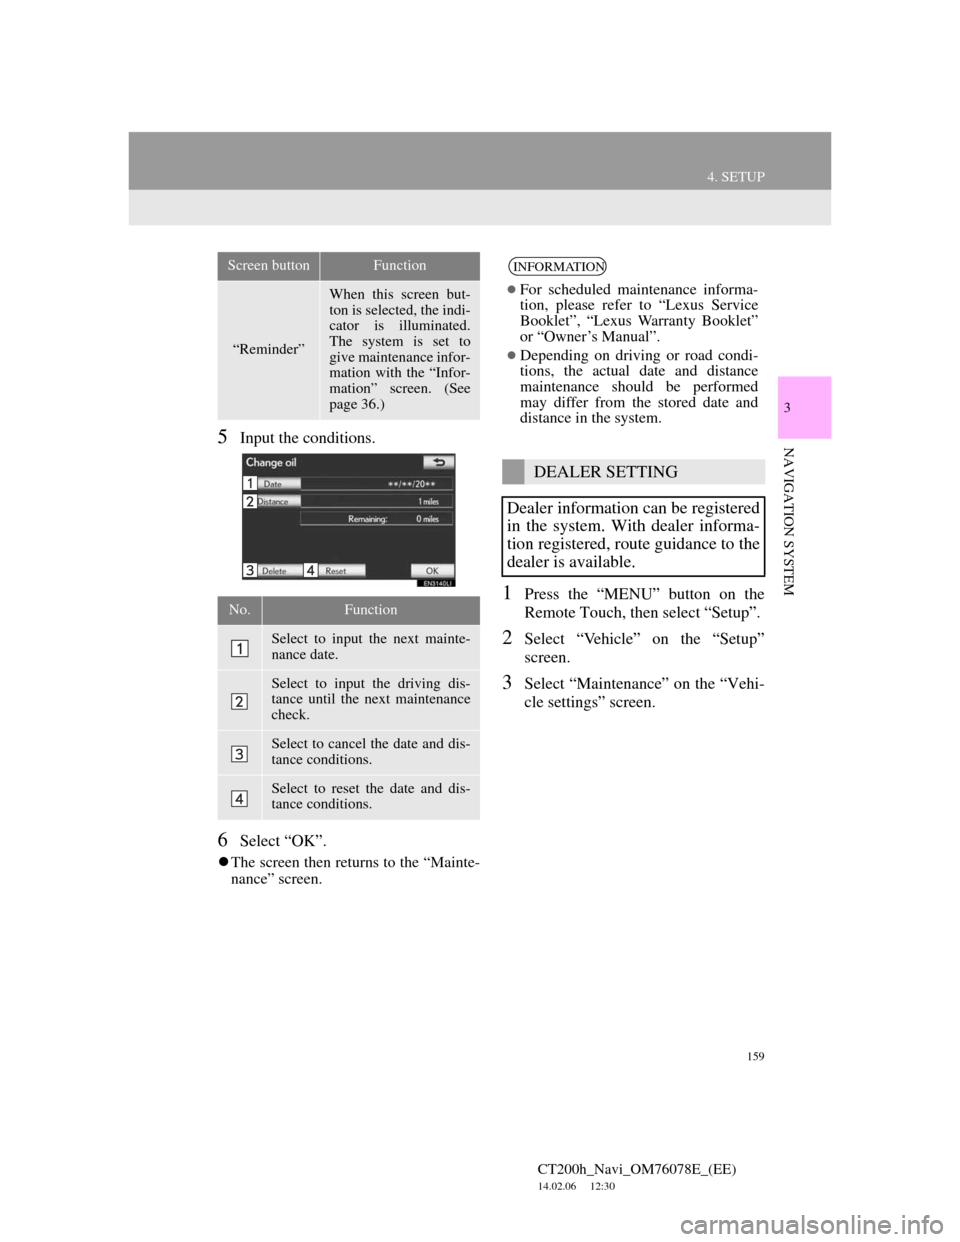
NAVIGATION SYSTEM5Input the conditions.
6Select “OK”.
The screen then returns to the “Mainte-
nance” screen.
1Press the “MENU” button on the
Remote Touch, then select “Setup”.
2Select “Vehicle” on the “Setup”
screen.
3Select “Maintenance” on the “Vehi-
cle settings” screen.
“Reminder”
When this screen but-
ton is selected, the indi-
cator is illuminated.
The system is set to
give maintenance infor-
mation with the “Infor-
mation” screen. (See
page 36.)
No.Function
Select to input the next mainte-
nance date.
Select to input the driving dis-
tance until the next maintenance
check.
Select to cancel the date and dis-
tance conditions.
Select to reset the date and dis-
tance conditions.
Screen buttonFunctionINFORMATION
For scheduled maintenance informa-
tion, please refer to “Lexus Service
Booklet”, “Lexus Warranty Booklet”
or “Owner’s Manual”.
Depending on driving or road condi-
tions, the actual date and distance
maintenance should be performed
may differ from the stored date and
distance in the system.
DEALER SETTING
Dealer information can be registered
in the system. With dealer informa-
tion registered, route guidance to the
dealer is available.
Page 244 of 436

244
1. AUDIO/VIDEO SYSTEM OPERATION
CT200h_Navi_OM76078E_(EE)
14.02.06 12:30
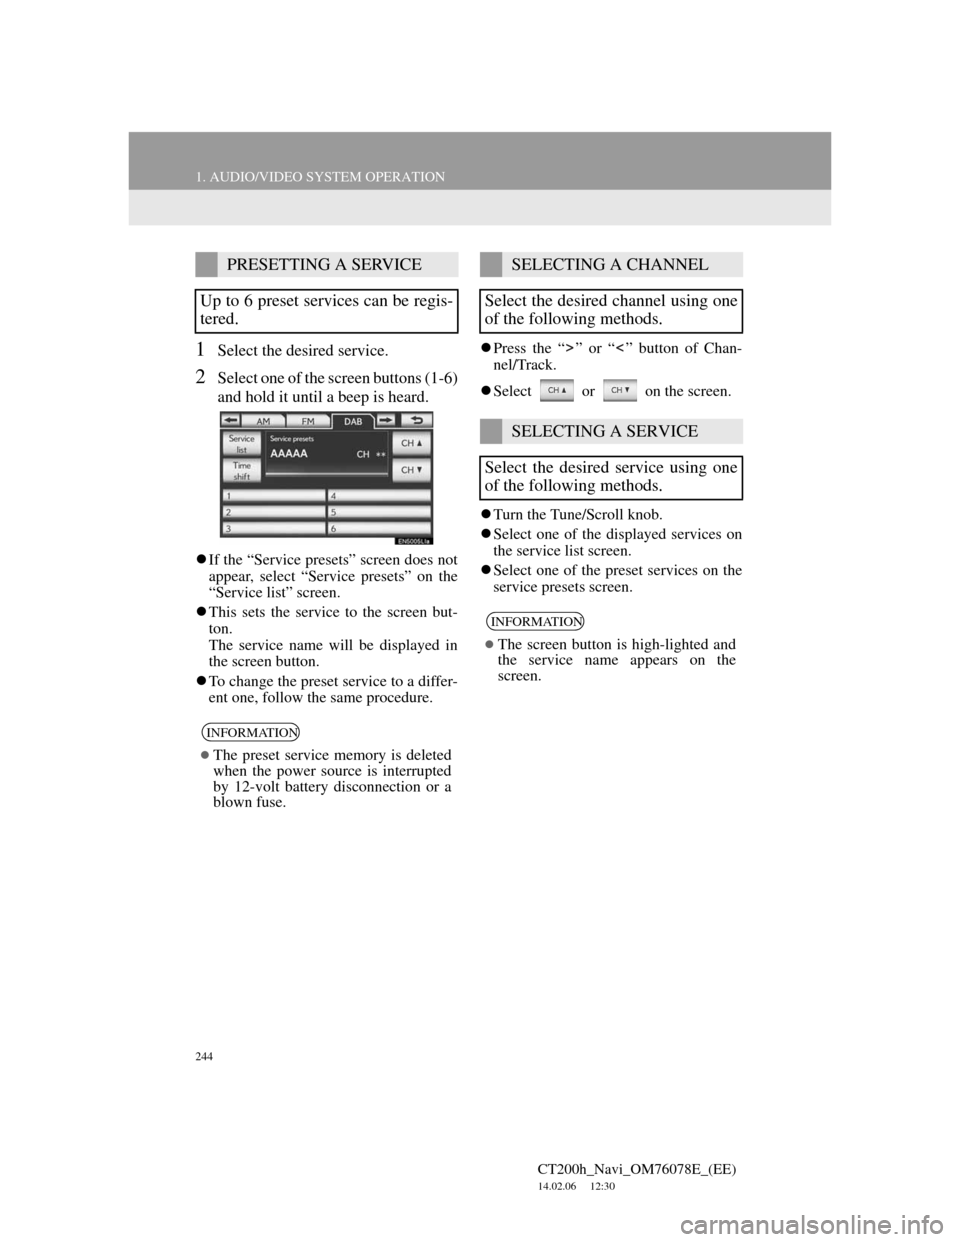
1Select the desired service.
2Select one of the screen buttons (1-6)
and hold it until a beep is heard.
If the “Service presets” screen does not
appear, select “Service presets” on the
“Service list” screen.
This sets the service to the screen but-
ton.
The service name will be displayed in
the screen button.
To change the preset service to a differ-
ent one, follow the same procedure.Press the “ ” or “ ” button of Chan-
nel/Track.
Select or on the screen.
Turn the Tune/Scroll knob.
Select one of the displayed services on
the service list screen.
Select one of the preset services on the
service presets screen.
PRESETTING A SERVICE
Up to 6 preset services can be regis-
tered.
INFORMATION
The preset service memory is deleted
when the power source is interrupted
by 12-volt battery disconnection or a
blown fuse.
SELECTING A CHANNEL
Select the desired channel using one
of the following methods.
SELECTING A SERVICE
Select the desired service using one
of the following methods.
INFORMATION
The screen button is high-lighted and
the service name appears on the
screen.
Page 288 of 436

288
1. AUDIO/VIDEO SYSTEM OPERATION
CT200h_Navi_OM76078E_(EE)
14.02.06 12:30
8. AUDIO/VIDEO REMOTE CONTROLS (STEERING SWITCHES)
“MODE” switch
Press the “MODE” switch to select an
audio mode. Each press changes the
mode sequentially if the desired mode
is ready to use.
To turn the audio/video system on,
press the “MODE” switch.
Press and hold the “MODE” switch to
mute/unmute or pause/resume the cur-
rent operation.“ ” switch
Radio
To select a preset station/channel:
Quickly press and release the “ ” or
“ ” switch. Repeat this to select the
next preset station/channel.
To seek a station/channel: Press and
hold the “ ” or “ ” switch until a beep
is heard. Repeat this to find the next sta-
tion/channel. If either switch is pressed
during seek mode, seeking will be can-
celed.
To seek up or down the frequency,
press and hold the switch until a beep is
heard. When you release the switch, the
radio will begin seeking up or down for
a station/channel. Repeat to find the
next station/channel.
DAB
To select a service: Quickly press and
release the “ ” or “ ” switch. Repeat
this to select the next service.
To select a channel: Press and hold the
“ ” or “ ” switch until a beep is heard.
Repeat this to find the next channel. If
either switch is pressed during seek
mode, seeking will be canceled.
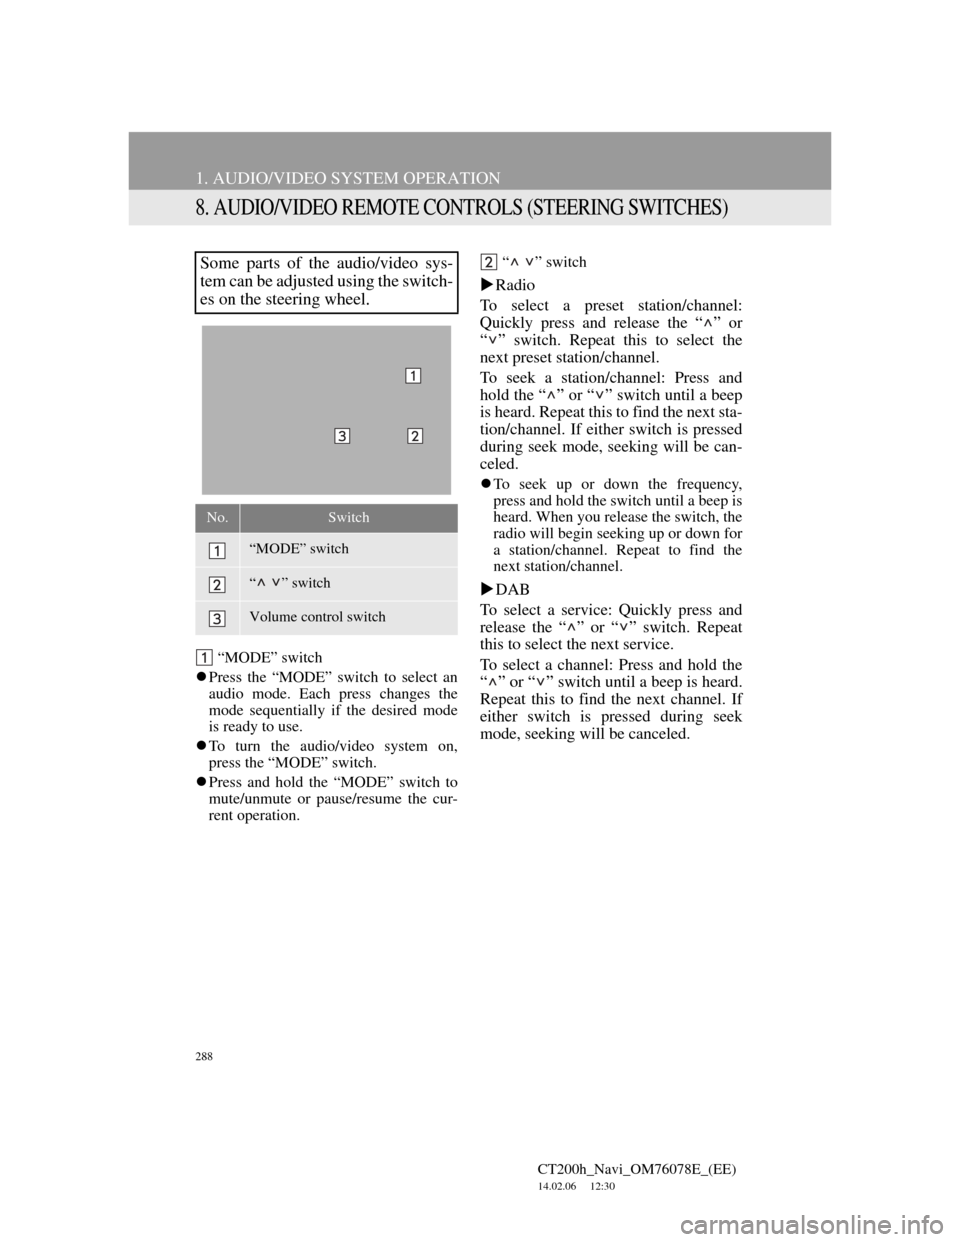
Some parts of the audio/video sys-
tem can be adjusted using the switch-
es on the steering wheel.
No.Switch
“MODE” switch
“ ” switch
Volume control switch