Page 148 of 436
148
3. MEMORY POINTS
CT200h_Navi_OM76078E_(EE)
14.02.06 12:29
8When backup starts, this screen is
displayed.
To cancel this function, select “Can-
cel”.
When backup is completed, the system
will return to the “Memory point”
screen.
SETTING A PASSWORD
1Press the “MENU” button on the
Remote Touch.
2Select “Navi”, and select “Menu” if
the map screen is displayed.
3Select “Memory point” on the navi-
gation menu screen.
4Select “Backup to USB” on the
“Memory point” screen.
5Select “Set password”.
INFORMATION
In the following situations, the mem-
ory point cannot be backed up to a
USB memory:
• When the memory point was regis-
tered using “UK Postal Code”
• When the memory point was regis-
tered using connected service
SET PASSWORD
Once a password has been set, it will
be requested not only to back up da-
ta, but also when copying memory
points from a USB memory to the
navigation system.
Page 149 of 436
149
3. MEMORY POINTS
CT200h_Navi_OM76078E_(EE)
14.02.06 12:29
3
NAVIGATION SYSTEM
6Enter a password and select “OK”.
7For confirmation, re-enter the pass-
word.
Once password setting is complete, the
system will return to the “Backup to
USB” screen.
1Press the lid, open the cover and con-
nect a USB memory.
Turn on the power of the USB memory
if it is not turned on.
2Press the “MENU” button on the
Remote Touch.
3Select “Navi”, and select “Menu” if
the map screen is displayed.
4Select “Memory point” on the navi-
gation menu screen.
INFORMATION
If you have forgotten the password:
• It is necessary to initialize personal
data using “Delete personal data”.
(See “DELETING PERSONAL
DATA” on page 72.)
• Contact any authorized Lexus dealer
or repairer, or another duly qualified
and equipped professional.
COPYING FROM A USB
MEMORY
Memory points that have been
backed up can be downloaded to the
navigation system using a USB
memory.
Page 150 of 436
150
3. MEMORY POINTS
CT200h_Navi_OM76078E_(EE)
14.02.06 12:29
5Select “Copy from USB”.
If a password has already been set,
enter the password. For instructions on
setting a password, see page 148.
If there are multiple memory points
stored on the USB memory, the follow-
ing options are displayed.
Select the memory points to be copied,
and then select “Start”.
6When copying from a USB memory
starts, this screen is displayed.
To cancel this function, select “Can-
cel”.
When registration is complete, the sys-
tem will return to the “Memory point”
screen.
INFORMATION
Memory points that are located out-
side of the map’s data range cannot be
registered.
A maximum of 500 memory points
can be registered.
When there are 21 or more memory
points stored on a USB memory, only
20 memory points will be displayed at
a time.
If memory points which have the
same name are already stored in the
navigation system, the system may
not update those memory points.
Page 151 of 436
151
CT200h_Navi_OM76078E_(EE)
14.02.06 12:30
3
NAVIGATION SYSTEM
4. SETUP
1. NAVIGATION SETTINGS
1Press the “MENU” button on the
Remote Touch.
2Select “Setup”.
3Select “Navigation”.
4Select the items to be set.
5Select “OK”.
On this screen, the following functions
can be performed:
Settings are available for average
speed, displayed screen contents,
POI icon categories, etc.
SCREENS FOR
NAVIGATION SETTINGS
Page 153 of 436

153
4. SETUP
CT200h_Navi_OM76078E_(EE)
14.02.06 12:30
3
NAVIGATION SYSTEM
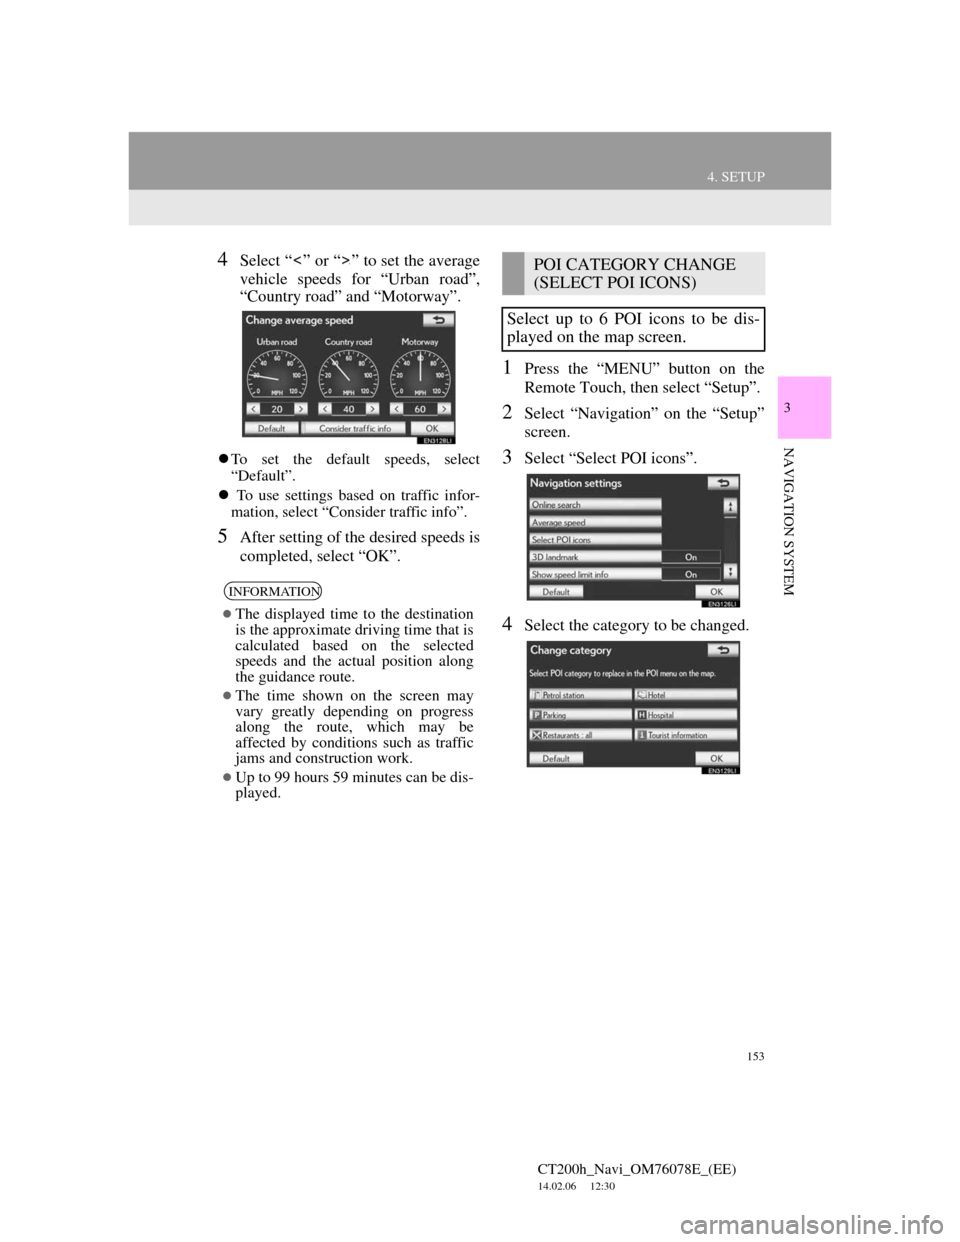
4Select “ ” or “ ” to set the average
vehicle speeds for “Urban road”,
“Country road” and “Motorway”.
To set the default speeds, select
“Default”.
To use settings based on traffic infor-
mation, select “Consider traffic info”.
5After setting of the desired speeds is
completed, select “OK”.
1Press the “MENU” button on the
Remote Touch, then select “Setup”.
2Select “Navigation” on the “Setup”
screen.
3Select “Select POI icons”.
4Select the category to be changed.
INFORMATION
The displayed time to the destination
is the approximate driving time that is
calculated based on the selected
speeds and the actual position along
the guidance route.
The time shown on the screen may
vary greatly depending on progress
along the route, which may be
affected by conditions such as traffic
jams and construction work.
Up to 99 hours 59 minutes can be dis-
played.
POI CATEGORY CHANGE
(SELECT POI ICONS)
Select up to 6 POI icons to be dis-
played on the map screen.
Page 155 of 436
155
4. SETUP
CT200h_Navi_OM76078E_(EE)
14.02.06 12:30
3
NAVIGATION SYSTEM
This message appears when the map
is switched to dual map screen mode.
1Press the “MENU” button on the
Remote Touch, then select “Setup”.
2Select “Navigation” on the “Setup”
screen.
3Select “Calibration”.
4Select the desired screen button.
POSITION/DIRECTION CALI-
BRATION
1Select “Position / Direction”.
CURRENT POSITION/TYRE
CHANGE CALIBRATION
The current position mark can be ad-
justed manually. Miscalculation of
the distance caused by tyre replace-
ment can also be adjusted.
For additional information on the
accuracy of a current position, see
“LIMITATIONS OF THE NAVIGA-
TION SYSTEM” on page 163.
When driving, the current position
mark will be automatically corrected
by GPS signals. If GPS reception is
poor due to location, the current po-
sition mark can be adjusted manual-
ly.
Page 157 of 436
157
4. SETUP
CT200h_Navi_OM76078E_(EE)
14.02.06 12:30
3
NAVIGATION SYSTEM
2. VEHICLE SETTINGS
1Press the “MENU” button on the
Remote Touch.
2Select “Setup”.
3Select “Vehicle”.
4Select “Maintenance”.
5Select the desired screen button.
Setting maintenance information (See
page 158.)
Setting dealer (See page 159.)
MAINTENANCE
When the navigation system is
turned on, the “Information” screen
displays when it is time to replace a
part or certain components. (See
page 36.)
Page 159 of 436

159
4. SETUP
CT200h_Navi_OM76078E_(EE)
14.02.06 12:30
3
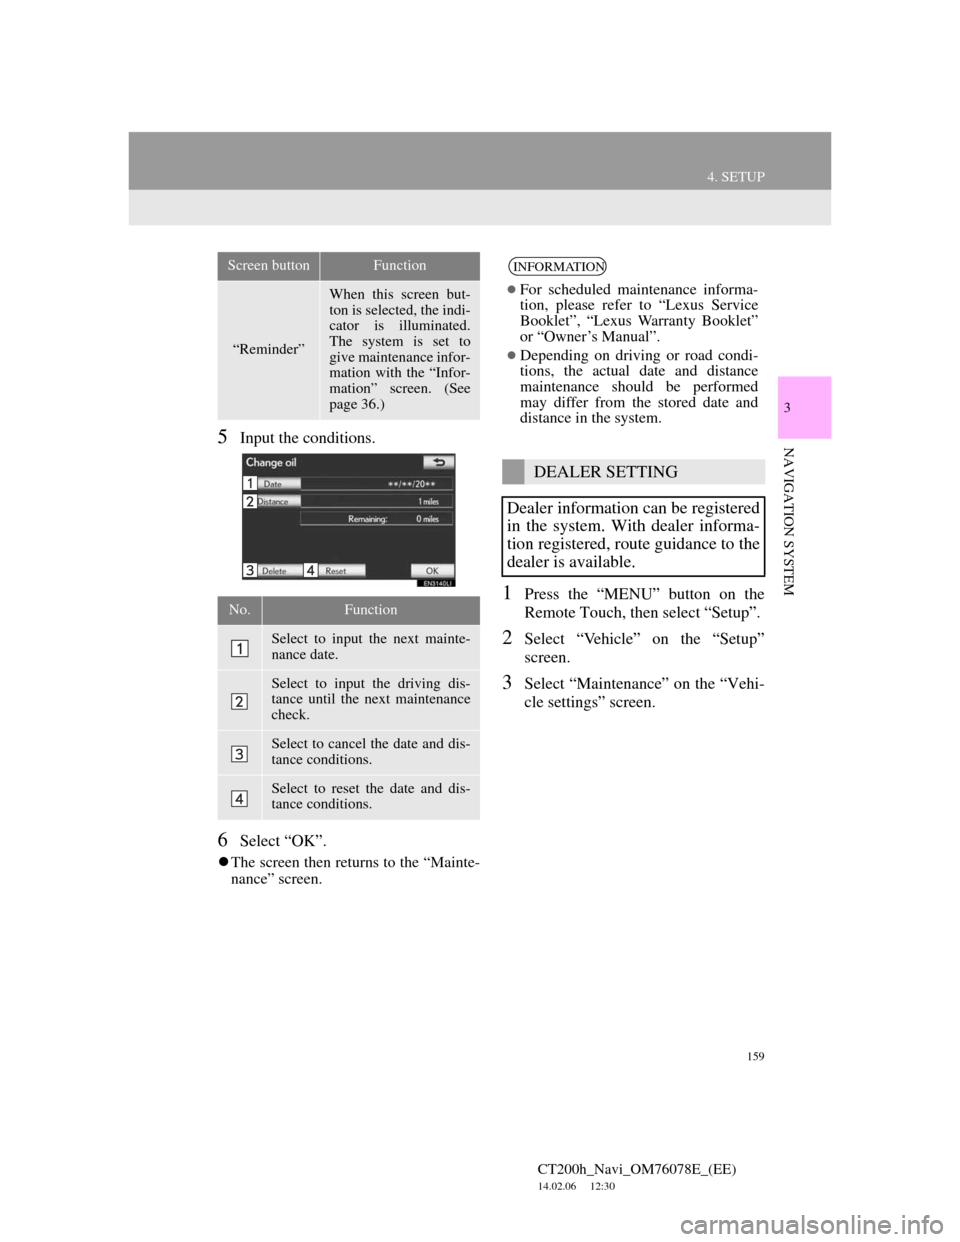
NAVIGATION SYSTEM5Input the conditions.
6Select “OK”.
The screen then returns to the “Mainte-
nance” screen.
1Press the “MENU” button on the
Remote Touch, then select “Setup”.
2Select “Vehicle” on the “Setup”
screen.
3Select “Maintenance” on the “Vehi-
cle settings” screen.
“Reminder”
When this screen but-
ton is selected, the indi-
cator is illuminated.
The system is set to
give maintenance infor-
mation with the “Infor-
mation” screen. (See
page 36.)
No.Function
Select to input the next mainte-
nance date.
Select to input the driving dis-
tance until the next maintenance
check.
Select to cancel the date and dis-
tance conditions.
Select to reset the date and dis-
tance conditions.
Screen buttonFunctionINFORMATION
For scheduled maintenance informa-
tion, please refer to “Lexus Service
Booklet”, “Lexus Warranty Booklet”
or “Owner’s Manual”.
Depending on driving or road condi-
tions, the actual date and distance
maintenance should be performed
may differ from the stored date and
distance in the system.
DEALER SETTING
Dealer information can be registered
in the system. With dealer informa-
tion registered, route guidance to the
dealer is available.