Page 181 of 436
181
1. TELEPHONE OPERATION
CT200h_Navi_OM76078E_(EE)
14.02.06 12:30
4
TELEPHONE
4. CALL ON THE Bluetooth® PHONE
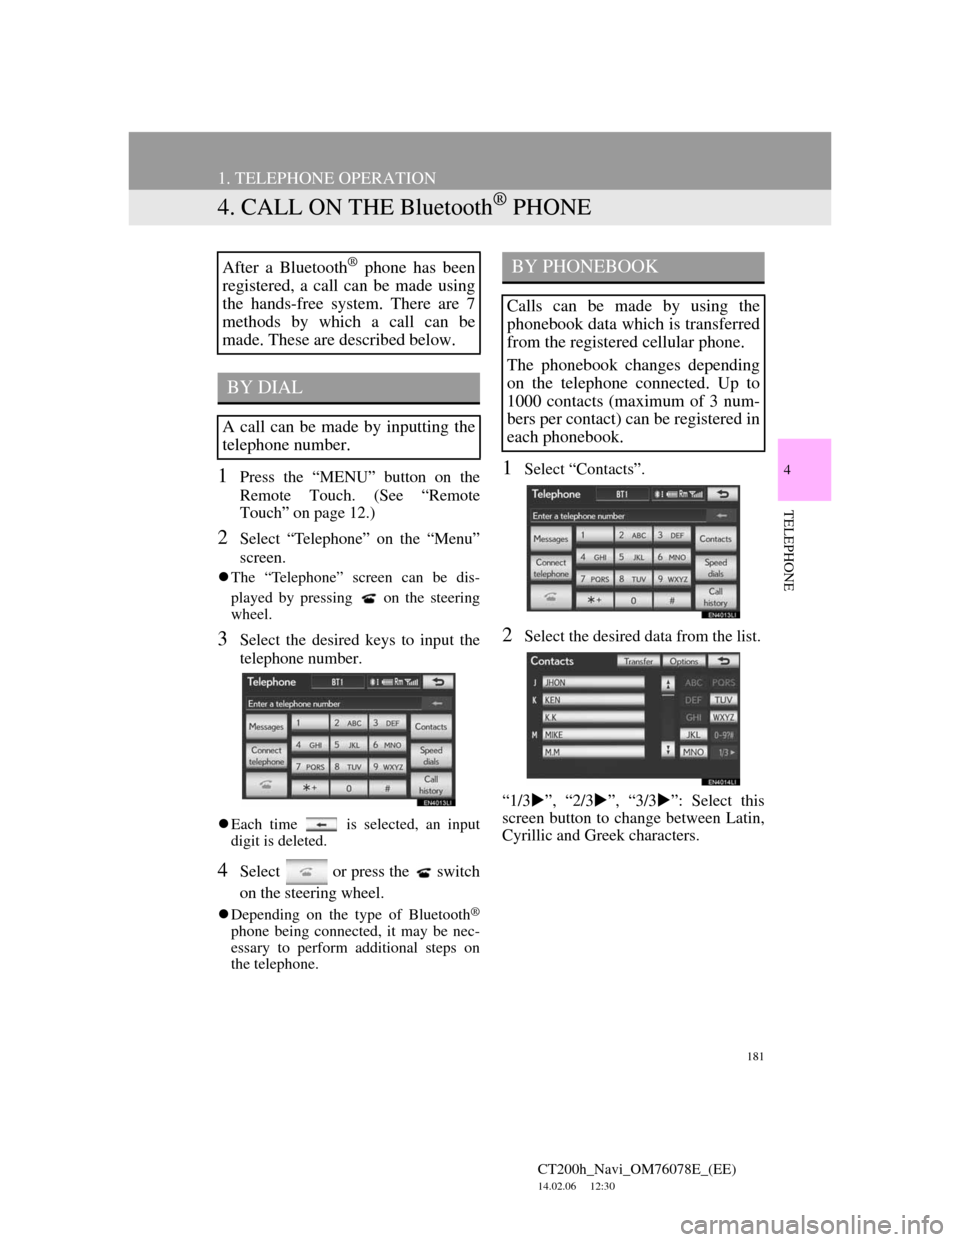
1Press the “MENU” button on the
Remote Touch. (See “Remote
Touch” on page 12.)
2Select “Telephone” on the “Menu”
screen.
The “Telephone” screen can be dis-
played by pressing
on the steering
wheel.
3Select the desired keys to input the
telephone number.
Each time is selected, an input
digit is deleted.
4Select or press the switch
on the steering wheel.
Depending on the type of Bluetooth®
phone being connected, it may be nec-
essary to perform additional steps on
the telephone.
1Select “Contacts”.
2Select the desired data from the list.
“1/3”, “2/3”, “3/3”: Select this
screen button to change between Latin,
Cyrillic and Greek characters.
After a Bluetooth® phone has been
registered, a call can be made using
the hands-free system. There are 7
methods by which a call can be
made. These are described below.
BY DIAL
A call can be made by inputting the
telephone number.
BY PHONEBOOK
Calls can be made by using the
phonebook data which is transferred
from the registered cellular phone.
The phonebook changes depending
on the telephone connected. Up to
1000 contacts (maximum of 3 num-
bers per contact) can be registered in
each phonebook.
Page 185 of 436
185
1. TELEPHONE OPERATION
4
TELEPHONE
CT200h_Navi_OM76078E_(EE)
14.02.06 12:30
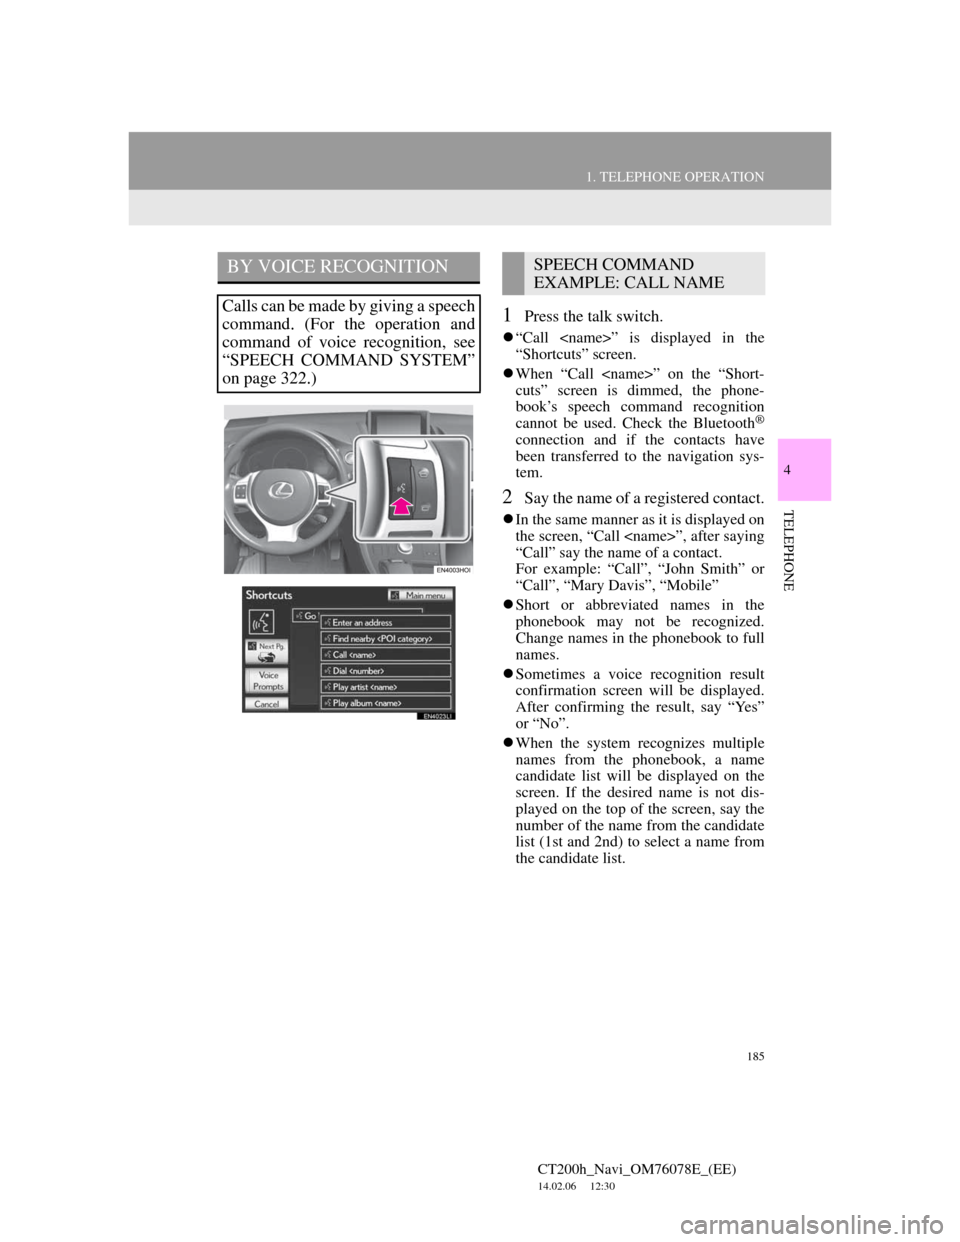
1Press the talk switch.
“Call ” is displayed in the
“Shortcuts” screen.
When “Call ” on the “Short-
cuts” screen is dimmed, the phone-
book’s speech command recognition
cannot be used. Check the Bluetooth
®
connection and if the contacts have
been transferred to the navigation sys-
tem.
2Say the name of a registered contact.
In the same manner as it is displayed on
the screen, “Call ”, after saying
“Call” say the name of a contact.
For example: “Call”, “John Smith” or
“Call”, “Mary Davis”, “Mobile”
Short or abbreviated names in the
phonebook may not be recognized.
Change names in the phonebook to full
names.
Sometimes a voice recognition result
confirmation screen will be displayed.
After confirming the result, say “Yes”
or “No”.
When the system recognizes multiple
names from the phonebook, a name
candidate list will be displayed on the
screen. If the desired name is not dis-
played on the top of the screen, say the
number of the name from the candidate
list (1st and 2nd) to select a name from
the candidate list.
BY VOICE RECOGNITION
Calls can be made by giving a speech
command. (For the operation and
command of voice recognition, see
“SPEECH COMMAND SYSTEM”
on page 322.)
SPEECH COMMAND
EXAMPLE: CALL NAME
Page 204 of 436
204
2. SETUP
CT200h_Navi_OM76078E_(EE)
14.02.06 12:30
From the “Call history” screen
1Press the “MENU” button on the
Remote Touch, then select
“Telephone”.
The “Telephone” screen can be dis-
played by pressing
on the steering
wheel.
2Select “Call history” on the “Tele-
phone” screen.
3Select the desired number from the
list on the “Call history” screen.
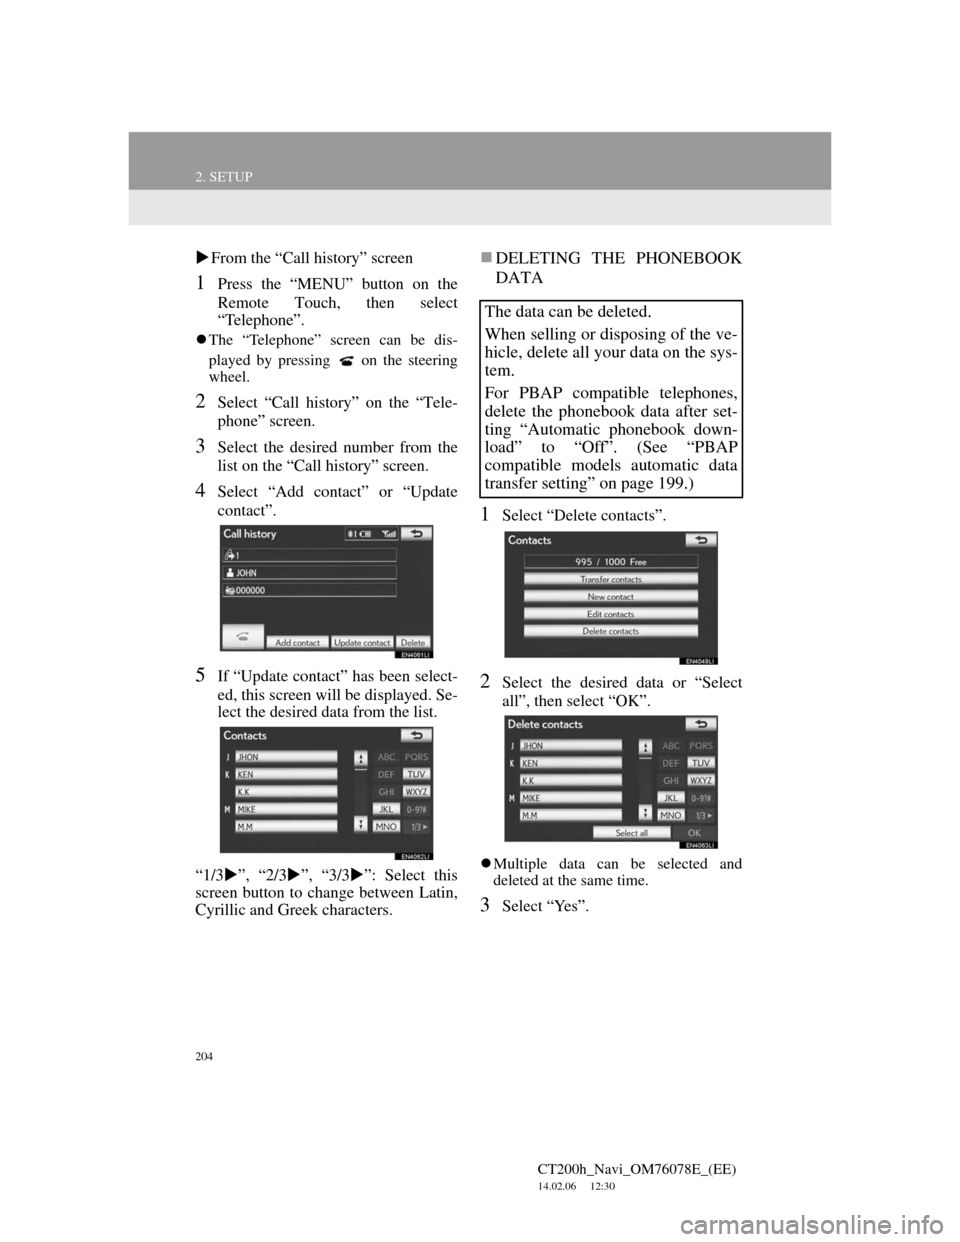
4Select “Add contact” or “Update
contact”.
5If “Update contact” has been select-
ed, this screen will be displayed. Se-
lect the desired data from the list.
“1/3”, “2/3”, “3/3”: Select this
screen button to change between Latin,
Cyrillic and Greek characters.
DELETING THE PHONEBOOK
DATA
1Select “Delete contacts”.
2Select the desired data or “Select
all”, then select “OK”.
Multiple data can be selected and
deleted at the same time.
3Select “Yes”.
The data can be deleted.
When selling or disposing of the ve-
hicle, delete all your data on the sys-
tem.
For PBAP compatible telephones,
delete the phonebook data after set-
ting “Automatic phonebook down-
load” to “Off”. (See “PBAP
compatible models automatic data
transfer setting” on page 199.)
Page 221 of 436
221
2. SETUP
4
TELEPHONE
CT200h_Navi_OM76078E_(EE)
14.02.06 12:30
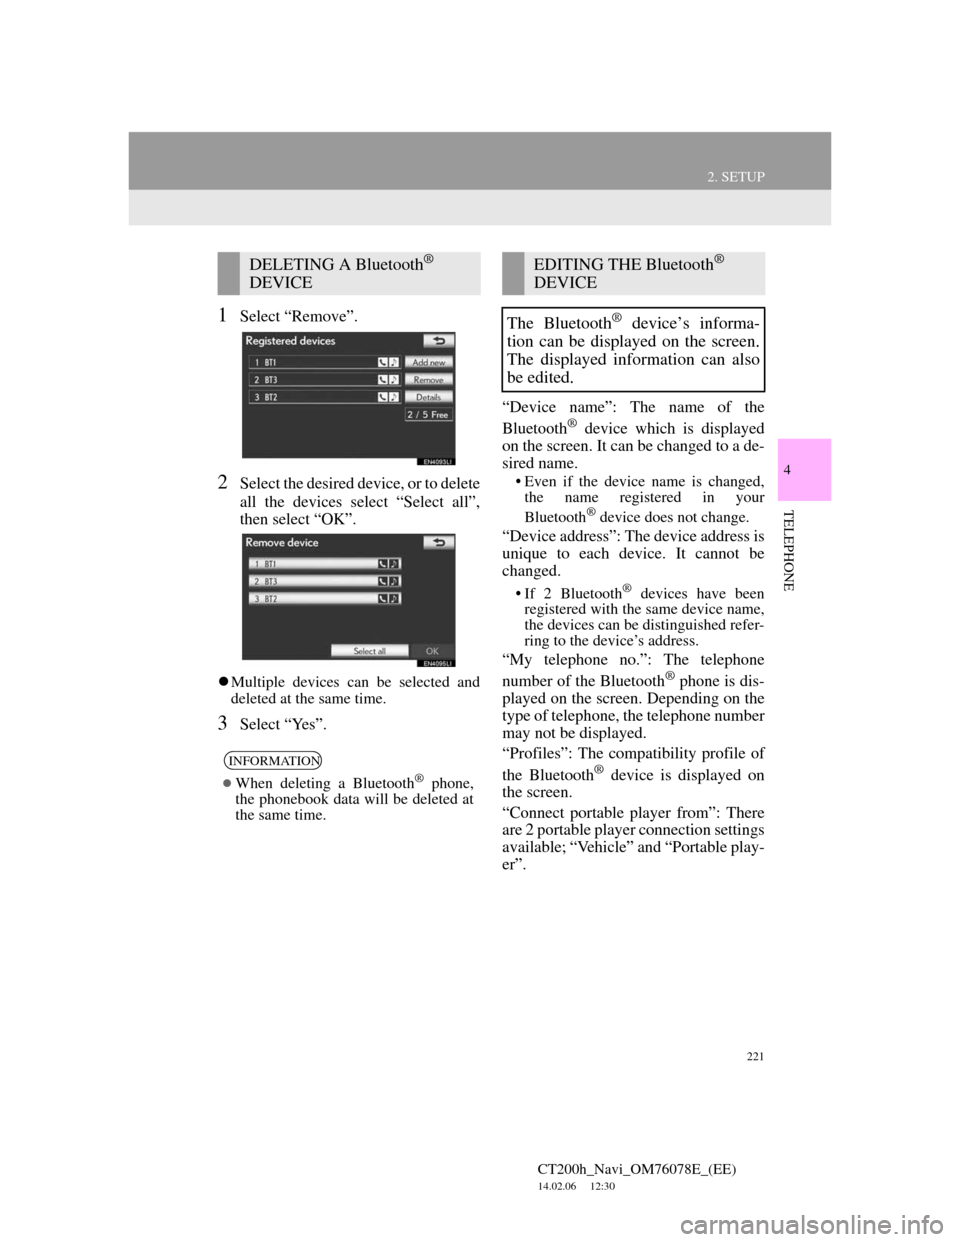
1Select “Remove”.
2Select the desired device, or to delete
all the devices select “Select all”,
then select “OK”.
Multiple devices can be selected and
deleted at the same time.
3Select “Yes”.“Device name”: The name of the
Bluetooth
® device which is displayed
on the screen. It can be changed to a de-
sired name.
• Even if the device name is changed,
the name registered in your
Bluetooth
® device does not change.
“Device address”: The device address is
unique to each device. It cannot be
changed.
• If 2 Bluetooth® devices have been
registered with the same device name,
the devices can be distinguished refer-
ring to the device’s address.
“My telephone no.”: The telephone
number of the Bluetooth® phone is dis-
played on the screen. Depending on the
type of telephone, the telephone number
may not be displayed.
“Profiles”: The compatibility profile of
the Bluetooth
® device is displayed on
the screen.
“Connect portable player from”: There
are 2 portable player connection settings
available; “Vehicle” and “Portable play-
er”.
DELETING A Bluetooth®
DEVICE
INFORMATION
When deleting a Bluetooth® phone,
the phonebook data will be deleted at
the same time.
EDITING THE Bluetooth®
DEVICE
The Bluetooth
® device’s informa-
tion can be displayed on the screen.
The displayed information can also
be edited.
Page 227 of 436
227
2. SETUP
4
TELEPHONE
CT200h_Navi_OM76078E_(EE)
14.02.06 12:30
CHANGING “Bluetooth* power”
When “Bluetooth* power” is “On”:
The Bluetooth® device is automatically
connected when the “POWER” switch
is in ACCESSORY or ON mode.
When “Bluetooth* power” is “Off”:
The Bluetooth
® device is disconnected,
and the system will not connect to it
next time.
The “Bluetooth* power” auto connec-
tion state can be set on or off.
• “On”: The auto connection is turned
on.
• “Off”: The auto connection is turned
off.
1Select “Bluetooth* power”.
2Select “On” or “Off”.
3Select “OK”.
In the event the state of “Bluetooth*
power” is changed from “Off” to “On”,
Bluetooth
® connection will begin.
*:Bluetooth is a registered trademark of
Bluetooth SIG, Inc.
CHANGING THE Bluetooth®
SETTINGS
The Bluetooth
® settings can be
changed according to the following
procedures.
The “Bluetooth* power” display
shows the following state.
Page 235 of 436
235
1. AUDIO/VIDEO SYSTEM OPERATION
5
AUDIO/VIDEO SYSTEM
CT200h_Navi_OM76078E_(EE)
14.02.06 12:30
Power/Volume knob: Press to turn the
audio/video system on and off. Turn this
knob to adjust the volume. The system
turns on in the last mode used.
“RADIO”, “MEDIA” button: Press to
display screen buttons for the audio/vid-
eo system. Using the instrument panel
1Every time the “RADIO” or “ME-
DIA” button is pressed, the audio
control mode changes.
The audio control mode changes in the
following order:
“RADIO” button: To display the
“AM”, “FM” and “DAB” tabs on the
screen. (Radio mode)
“MEDIA” button: To display the
“DISC”, “BT audio”, “AUX”, “USB”
and “iPod” tabs on the screen. (Media
mode)
Using the Remote Touch
1Press the “MENU” button on the
Remote Touch.
TURNING THE SYSTEM ON
AND OFF
A function that enables automatic
return to the previous screen from the
audio/video screen can be selected.
See page 60 for details.
SWITCHING BETWEEN
FUNCTIONS
Page 241 of 436
241
1. AUDIO/VIDEO SYSTEM OPERATION
5
AUDIO/VIDEO SYSTEM
CT200h_Navi_OM76078E_(EE)
14.02.06 12:30
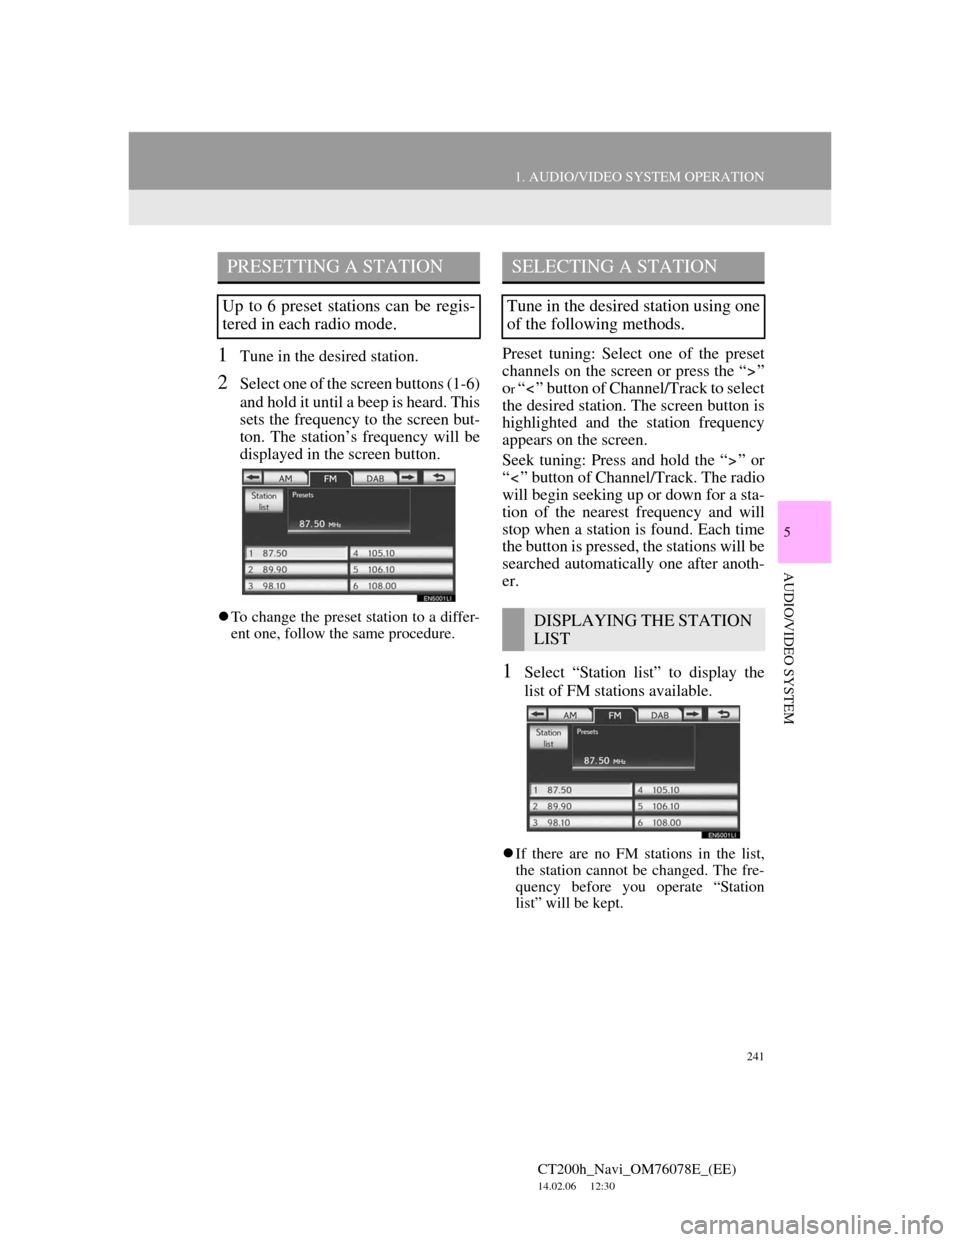
1Tune in the desired station.
2Select one of the screen buttons (1-6)
and hold it until a beep is heard. This
sets the frequency to the screen but-
ton. The station’s frequency will be
displayed in the screen button.
To change the preset station to a differ-
ent one, follow the same procedure.
Preset tuning: Select one of the preset
channels on the screen or press the “ ”
o
r “ ” button of Channel/Track to select
the desired station. The screen button is
highlighted and the station frequency
appears on the screen.
Seek tuning: Press and hold the “ ” or
“ ” button of Channel/Track. The radio
will begin seeking up or down for a sta-
tion of the nearest frequency and will
stop when a station is found. Each time
the button is pressed, the stations will be
searched automatically one after anoth-
er.
1Select “Station list” to display the
list of FM stations available.
If there are no FM stations in the list,
the station cannot be changed. The fre-
quency before you operate “Station
list” will be kept.
PRESETTING A STATION
Up to 6 preset stations can be regis-
tered in each radio mode.
SELECTING A STATION
Tune in the desired station using one
of the following methods.
DISPLAYING THE STATION
LIST
Page 253 of 436
253
1. AUDIO/VIDEO SYSTEM OPERATION
5
AUDIO/VIDEO SYSTEM
CT200h_Navi_OM76078E_(EE)
14.02.06 12:30
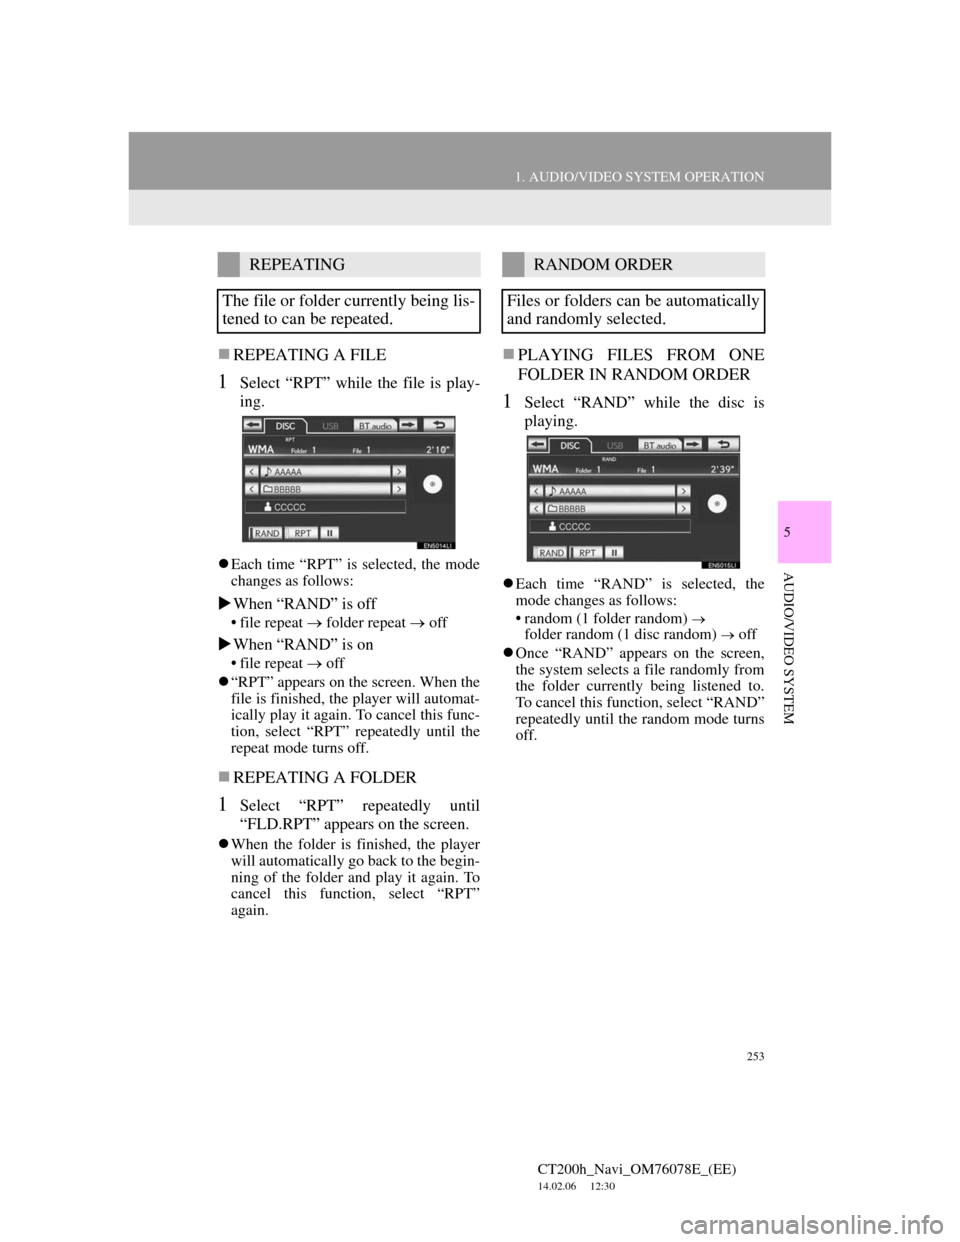
REPEATING A FILE
1Select “RPT” while the file is play-
ing.
Each time “RPT” is selected, the mode
changes as follows:
When “RAND” is off
• file repeat folder repeat off
When “RAND” is on
• file repeat off
“RPT” appears on the screen. When the
file is finished, the player will automat-
ically play it again. To cancel this func-
tion, select “RPT” repeatedly until the
repeat mode turns off.
REPEATING A FOLDER
1Select “RPT” repeatedly until
“FLD.RPT” appears on the screen.
When the folder is finished, the player
will automatically go back to the begin-
ning of the folder and play it again. To
cancel this function, select “RPT”
again.
PLAYING FILES FROM ONE
FOLDER IN RANDOM ORDER
1Select “RAND” while the disc is
playing.
Each time “RAND” is selected, the
mode changes as follows:
• random (1 folder random)
folder random (1 disc random) off
Once “RAND” appears on the screen,
the system selects a file randomly from
the folder currently being listened to.
To cancel this function, select “RAND”
repeatedly until the random mode turns
off.
REPEATING
The file or folder currently being lis-
tened to can be repeated.RANDOM ORDER
Files or folders can be automatically
and randomly selected.