Page 298 of 436

298
1. AUDIO/VIDEO SYSTEM OPERATION
CT200h_Navi_OM76078E_(EE)
14.02.06 12:30
This is the international standard for the
formatting of CD-ROM folders and
files. For the ISO 9660 format, there
are 2 levels of regulations.
Level 1: The file name is in 8.3 format
(8 character file names, with a 3 charac-
ter file extension. File names must be
composed of one-byte capital letters
and numbers. The “_” symbol may also
be included.)
Level 2: The file name can have up to
31 characters (including the separation
mark “.” and file extension). Each
folder must contain fewer than 8 hierar-
chies.
Playlists created using “WINAMP”
software have a playlist file extension
(.m3u).
MP3 is an audio compression standard
determined by a working group
(MPEG) of the ISO (International Stan-
dard Organization). MP3 compresses
audio data to about 1/10 the size of that
on conventional discs.
WMA (Windows Media Audio) is an
audio compression format developed
by Microsoft
®. It compresses files into
a size smaller than that of MP3 files.
The decoding formats for WMA files
are Ver. 7, 8 and 9.
ISO 9660 FORMAT
m3u
MP3
WMA
Page 299 of 436
299
CT200h_Navi_OM76078E_(EE)
14.02.06 12:30
5
AUDIO/VIDEO SYSTEM
2. SETUP
1. AUDIO SETTINGS
1Press the “MENU” button on the
Remote Touch.
2Select “Setup”.
3Select “Audio”.
4Select the audio setting to be edited.
AUDIO SETTINGS
Sound, radio and iPod details can be
set by following the procedure out-
lined below.
Page 300 of 436
300
2. SETUP
CT200h_Navi_OM76078E_(EE)
14.02.06 12:30
1Press the “MENU” button on the
Remote Touch.
2Select “Setup”.
3Select “Audio”.
4Select “Sound settings”.
5Select the “DSP” tab to display this
screen.
6Select the desired items to be set.
7Select “OK”.
AUTOMATIC SOUND LEVELIS-
ER (ASL)
1Select “Automatic sound leveliser”.
2Select “On” or “Off”.
SOUND SETTINGS
Sound balance can be adjusted.
DSP CONTROL
The system adjusts to the optimum
volume and tone quality according to
vehicle speed to compensate for in-
creased vehicle noise.
Page 301 of 436

301
2. SETUP
5
AUDIO/VIDEO SYSTEM
CT200h_Navi_OM76078E_(EE)
14.02.06 12:30
SURROUND FUNCTION
1Select “Surround”.
2Select “On” or “Off”.
TONE
BALANCE
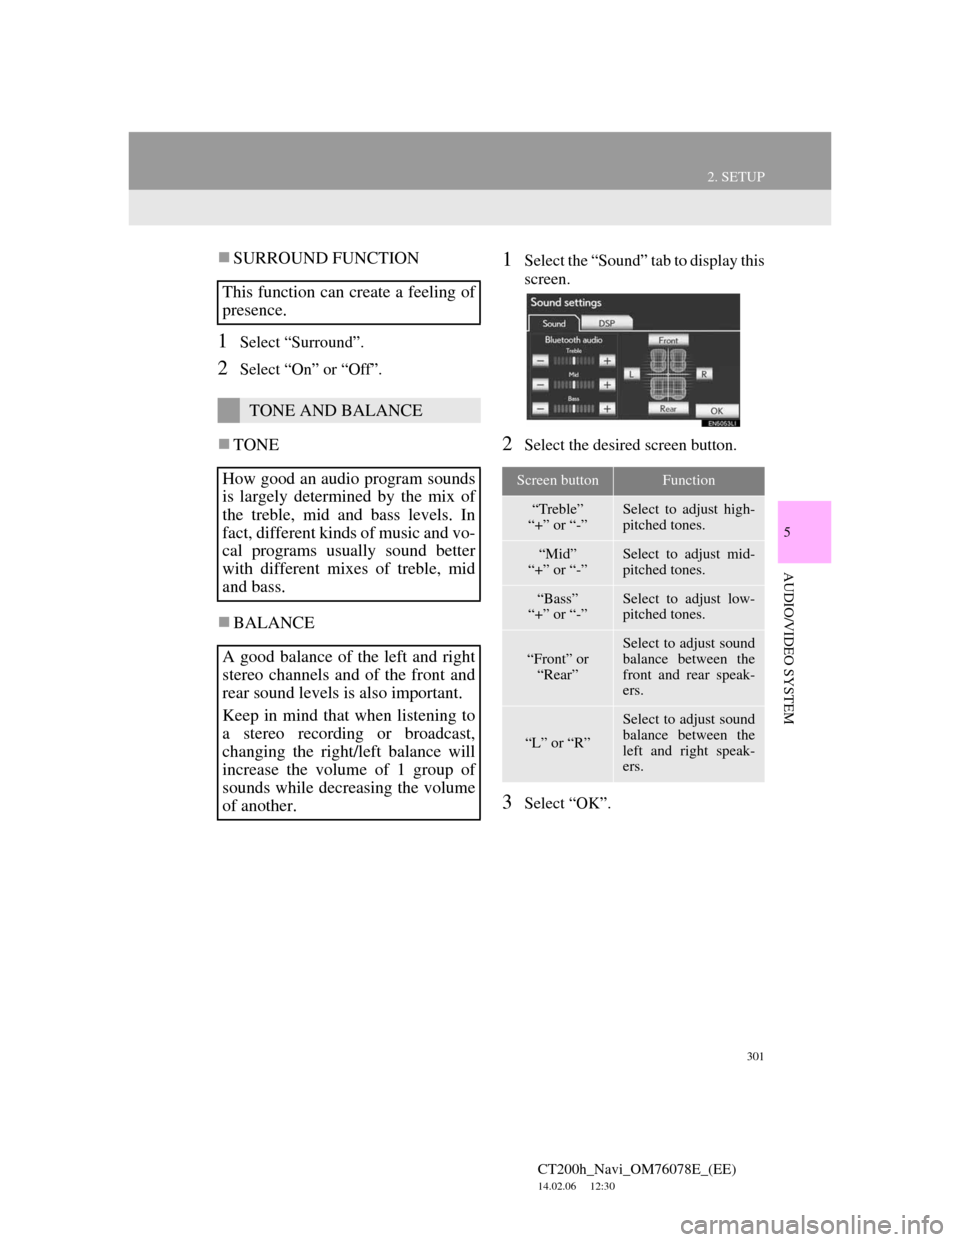
1Select the “Sound” tab to display this
screen.
2Select the desired screen button.
3Select “OK”.
This function can create a feeling of
presence.
TONE AND BALANCE
How good an audio program sounds
is largely determined by the mix of
the treble, mid and bass levels. In
fact, different kinds of music and vo-
cal programs usually sound better
with different mixes of treble, mid
and bass.
A good balance of the left and right
stereo channels and of the front and
rear sound levels is also important.
Keep in mind that when listening to
a stereo recording or broadcast,
changing the right/left balance will
increase the volume of 1 group of
sounds while decreasing the volume
of another.
Screen buttonFunction
“Treble”
“+” or “-”Select to adjust high-
pitched tones.
“Mid”
“+” or “-”Select to adjust mid-
pitched tones.
“Bass”
“+” or “-”Select to adjust low-
pitched tones.
“Front” or
“Rear”
Select to adjust sound
balance between the
front and rear speak-
ers.
“L” or “R”
Select to adjust sound
balance between the
left and right speak-
ers.
Page 302 of 436
302
2. SETUP
CT200h_Navi_OM76078E_(EE)
14.02.06 12:30
1Press the “MENU” button on the
Remote Touch.
2Select “Setup”.
3Select “Audio”.
4Select “Radio settings”.
5Select the item to be adjusted, and
then select the screen button next to
it to adjust its settings.
6Select “OK”.
INFORMATION
The tone of each mode (such as AM,
FM and DVD player) can be adjusted.
RADIO SETTINGS
Detailed radio settings can be pro-
grammed.
No
.Function
The tuner will automatically seek
a station that regularly broadcasts
traffic information and the station
broadcasts when the traffic infor-
mation program starts.
A station providing good recep-
tion is automatically selected if
current reception worsens.
For switching over to a broadcast-
ing station within the same local
program network.
A channel providing good recep-
tion is automatically selected if
current reception worsens.
*
*: If equipped
Page 303 of 436
303
2. SETUP
5
AUDIO/VIDEO SYSTEM
CT200h_Navi_OM76078E_(EE)
14.02.06 12:30
1Press the “MENU” button on the
Remote Touch.
2Select “Setup”.
3Select “Audio”.
4Select “iPod settings”.
5Select “Display cover art”.
6Select “On” or “Off”.
7After iPod setting has been changed,
select “OK”.
iPod SETTINGS
iPod can be set using the procedure
outlined below.
COVER ART DISPLAY
SETTINGS
When the track currently being
played has cover art data, it can be
displayed.
Page 322 of 436

322
CT200h_Navi_OM76078E_(EE)
14.02.06 12:30
1. SPEECH COMMAND SYSTEM OPERATION
1. SPEECH COMMAND SYSTEM
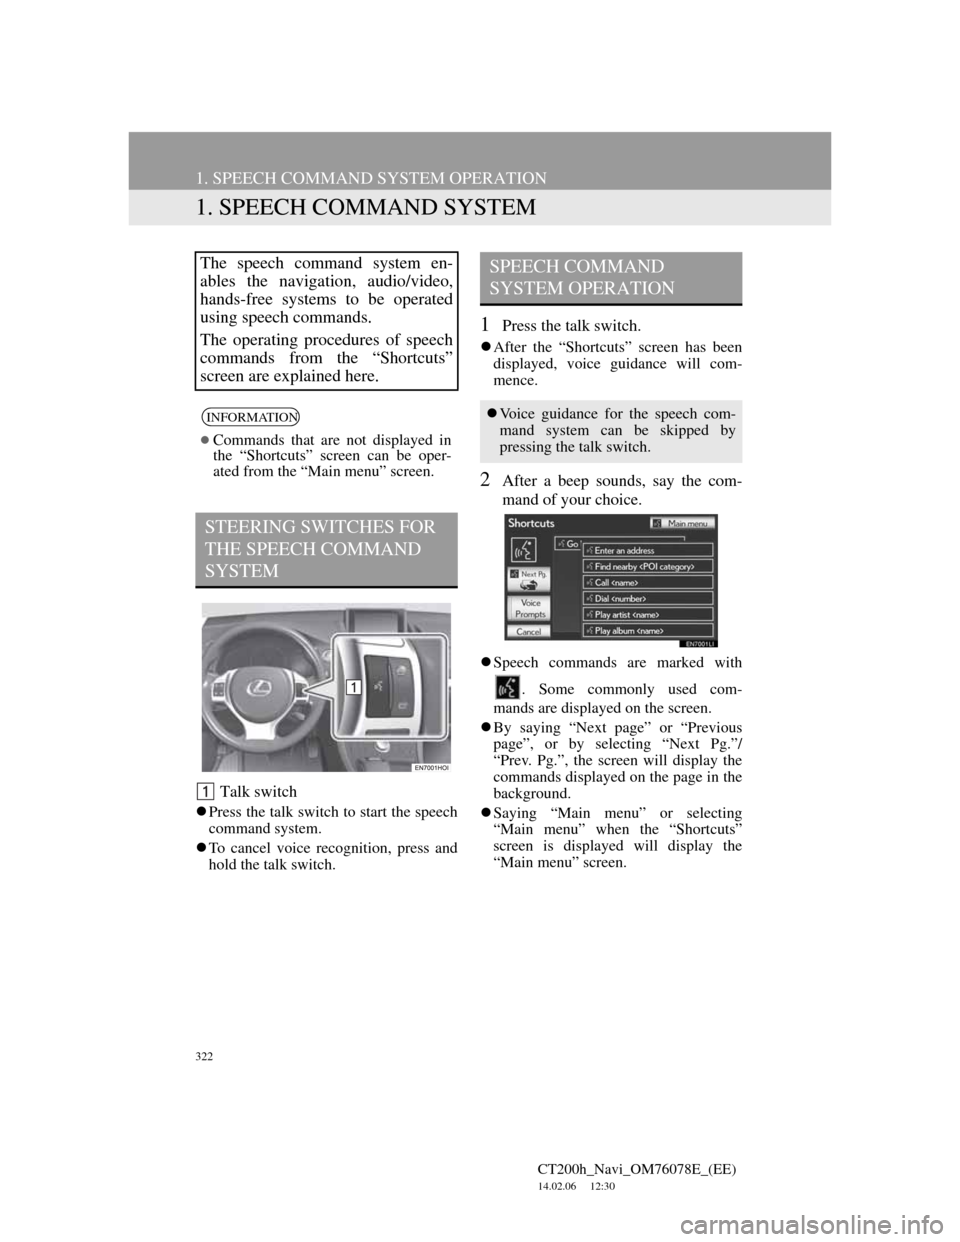
Talk switch
Press the talk switch to start the speech
command system.
To cancel voice recognition, press and
hold the talk switch.
1Press the talk switch.
After the “Shortcuts” screen has been
displayed, voice guidance will com-
mence.
2After a beep sounds, say the com-
mand of your choice.
Speech commands are marked with
. Some commonly used com-
mands are displayed on the screen.
By saying “Next page” or “Previous
page”, or by selecting “Next Pg.”/
“Prev. Pg.”, the screen will display the
commands displayed on the page in the
background.
Saying “Main menu” or selecting
“Main menu” when the “Shortcuts”
screen is displayed will display the
“Main menu” screen.
The speech command system en-
ables the navigation, audio/video,
hands-free systems to be operated
using speech commands.
The operating procedures of speech
commands from the “Shortcuts”
screen are explained here.
INFORMATION
Commands that are not displayed in
the “Shortcuts” screen can be oper-
ated from the “Main menu” screen.
STEERING SWITCHES FOR
THE SPEECH COMMAND
SYSTEM
SPEECH COMMAND
SYSTEM OPERATION
Voice guidance for the speech com-
mand system can be skipped by
pressing the talk switch.
Page 327 of 436

327
1. SPEECH COMMAND SYSTEM OPERATION
7
SPEECH COMMAND SYSTEM
CT200h_Navi_OM76078E_(EE)
14.02.06 12:30
1Press the talk switch.
“Play artist ” and “Play album
” are displayed in the “Short-
cuts” screen.
2Say “Play artist ” or “Play
album ”.
Say the desired artist name or album
name in the place of the “<>”.
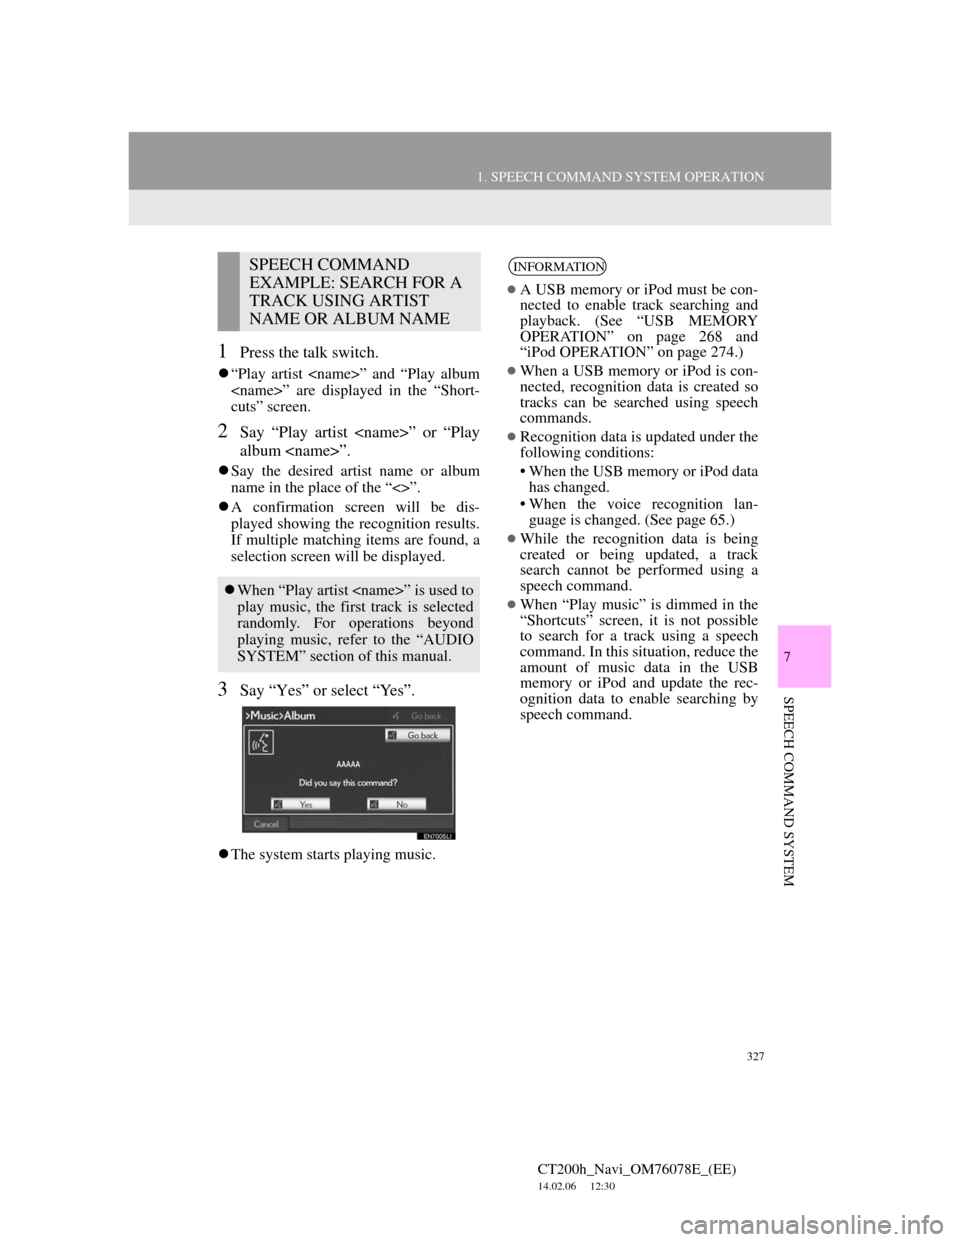
A confirmation screen will be dis-
played showing the recognition results.
If multiple matching items are found, a
selection screen will be displayed.
3Say “Yes” or select “Yes”.
The system starts playing music.
SPEECH COMMAND
EXAMPLE: SEARCH FOR A
TRACK USING ARTIST
NAME OR ALBUM NAME
When “Play artist ” is used to
play music, the first track is selected
randomly. For operations beyond
playing music, refer to the “AUDIO
SYSTEM” section of this manual.
INFORMATION
A USB memory or iPod must be con-
nected to enable track searching and
playback. (See “USB MEMORY
OPERATION” on page 268 and
“iPod OPERATION” on page 274.)
When a USB memory or iPod is con-
nected, recognition data is created so
tracks can be searched using speech
commands.
Recognition data is updated under the
following conditions:
• When the USB memory or iPod data
has changed.
• When the voice recognition lan-
guage is changed. (See page 65.)
While the recognition data is being
created or being updated, a track
search cannot be performed using a
speech command.
When “Play music” is dimmed in the
“Shortcuts” screen, it is not possible
to search for a track using a speech
command. In this situation, reduce the
amount of music data in the USB
memory or iPod and update the rec-
ognition data to enable searching by
speech command.