2012 Hyundai Sonata Hybrid Setting
[x] Cancel search: SettingPage 23 of 403

Safety features of your vehicle
43
Front seat
Manual adjustment
Forward and rearward
To move the seat forward or rearward:
1. Pull the seat slide adjustment lever upand hold it.
2. Slide the seat to the position you desire.
3. Release the lever and make sure the seat is locked in place.
Adjust the seat before driving, and make
sure the seat is locked securely by trying
to move forward and rearward without
using the lever. If the seat moves, it is not
locked properly.
OYF039002
(Continued)
To avoid the possibility of burns, do not remove the carpet in the
cargo area. Emission control
devices beneath this floor gener-
ate high temperatures.WARNING- Rear seat-backs
The rear seatback must be
securely latched. If not, passen-
gers and objects could be thrown
forward resulting in serious
injury or death in the event of a
sudden stop or collision.
Luggage and other cargo should be laid flat in the cargo area. If
objects are large, heavy, or must
be piled, they must be secured.
Under no circumstances should
cargo be piled higher than the
seatbacks. Failure to follow these
warnings could result in serious
injury or death in the event of a
sudden stop, collision or rollover.
No passenger should ride in the cargo area or sit or lie on folded
seatbacks while the vehicle is
moving. All passengers must be
properly seated in seats and
restrained properly while riding.
When resetting the seatback to the upright position, make sure it
is securely latched by pushing it
forward and rearwards.
(Continued)
WARNING
After adjusting the seat, always
check that it is securely locked into
place by attempting to move the
seat forward or reverse without
using the lock release lever.
Sudden or unexpected movement
of the driver's seat could cause you
to lose control of the vehicle result-
ing in an accident.
WARNING
Use extreme caution so thathands or other objects are not
caught in the seat mechanisms
while the seat is moving.
Do not put a cigarette lighter on the floor or seat. When you oper-
ate the seat, gas may gush out of
the lighter and cause fire.
Page 28 of 403
39
Safety features of your vehicle
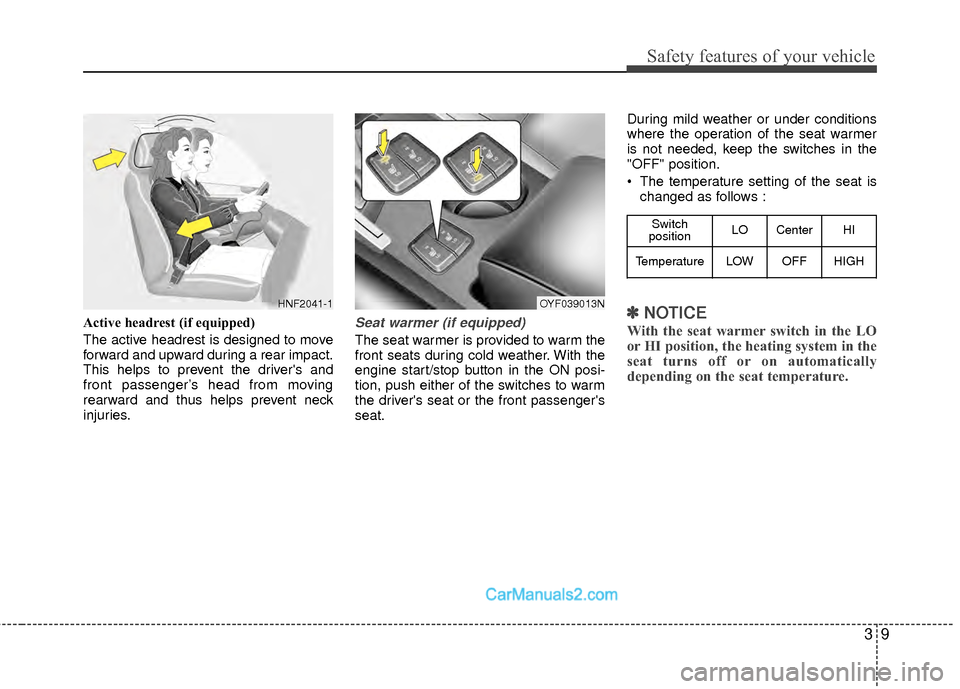
Active headrest (if equipped)
The active headrest is designed to move
forward and upward during a rear impact.
This helps to prevent the driver's and
front passenger’s head from moving
rearward and thus helps prevent neck
injuries.Seat warmer (if equipped)
The seat warmer is provided to warm the
front seats during cold weather. With the
engine start/stop button in the ON posi-
tion, push either of the switches to warm
the driver's seat or the front passenger's
seat.During mild weather or under conditions
where the operation of the seat warmer
is not needed, keep the switches in the
"OFF" position.
The temperature setting of the seat is
changed as follows :
✽ ✽ NOTICE
With the seat warmer switch in the LO
or HI position, the heating system in the
seat turns off or on automatically
depending on the seat temperature.
HNF2041-1
Switch
position LO Center HI
TemperatureLOWOFFHIGH
OYF039013N
Page 94 of 403
413
Features of your vehicle
If the smart key is in the vehicle andany door is open, the doors will not
lock even though the front portion(1) of
central door lock switch is pressed.Impact sensing door unlock system
(if equipped)
All doors will be automatically unlocked
when a significant impact is sensed by
the impact sensors while the engine start
/stop button is ON. However, the doors
may not automatically unlock if mechani-
cal damage is sustained by the door lock
system or battery.
✽ ✽ NOTICE
You can activate or deactivate some auto
door lock/unlock features as follows:
• Speed sensing auto door lock
• Auto door unlock by unlocking the
driver's door
• Auto door unlock when the smart key is removed from the smart key holder.
• Auto door lock/unlock by shifting the transmission shift lever out of P
(Park) or into P (Park)
If you want to activate or deactivate a
door lock/unlock feature, refer to the
"vehicle setting" in this chapter.
WARNING- Unlocked
vehicles
Leaving your vehicle unlocked can
invite theft or possible harm to you
or others from someone hiding in
your vehicle while you are gone.
Always remove the smart key,
engage the parking brake, close all
windows and lock all doors when
leaving your vehicle unattended.
WARNING- Unattended
children
An enclosed vehicle can become
extremely hot, causing death or
severe injury to unattended chil-
dren or animals who cannot escape
the vehicle. Furthermore, children
might operate features of the vehi-
cle that could injure them, or they
could encounter other harm, possi-
bly from someone gaining entry to
the vehicle. Never leave children or
animals unattended in your vehicle.
WARNING - Doors
The doors should always be fully
closed and locked while the vehi-
cle is in motion to prevent acci-
dental opening of the door.
Locked doors will also discour-
age potential intruders when the
vehicle stops or slows.
Be careful when opening doors and watch for vehicles, motorcy-
cles, bicycles or pedestrians
approaching the vehicle in the
path of the door. Opening a door
when something is approaching
can cause damage or injury.
Page 102 of 403
421
Features of your vehicle
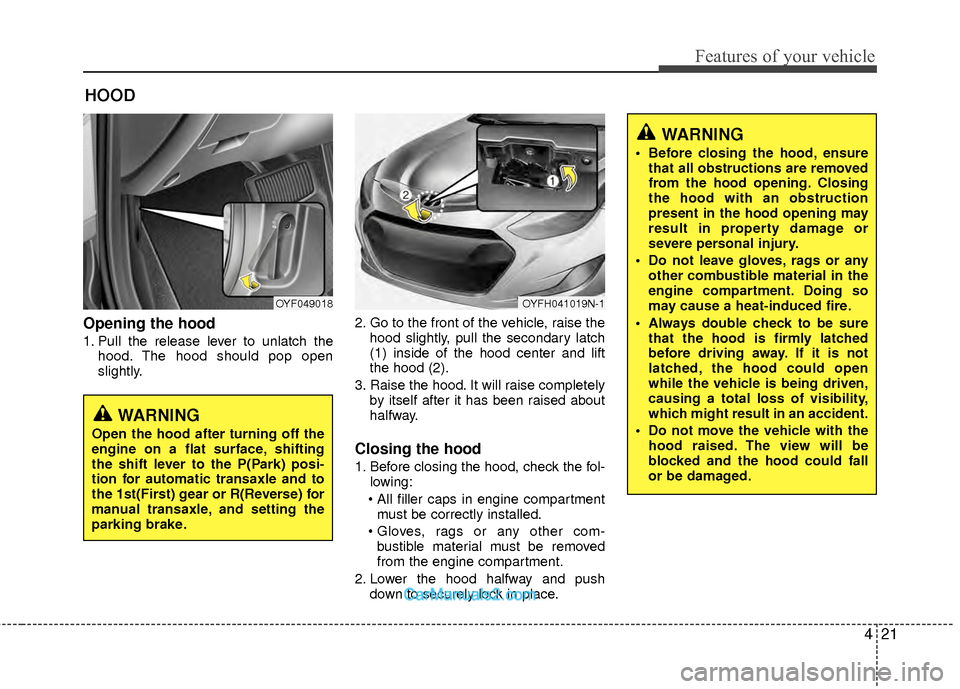
Opening the hood
1. Pull the release lever to unlatch thehood. The hood should pop open
slightly. 2. Go to the front of the vehicle, raise the
hood slightly, pull the secondary latch
(1) inside of the hood center and lift
the hood (2).
3. Raise the hood. It will raise completely by itself after it has been raised about
halfway.
Closing the hood
1. Before closing the hood, check the fol-lowing:
must be correctly installed.
bustible material must be removed
from the engine compartment.
2. Lower the hood halfway and push down to securely lock in place.
HOOD
OYF049018OYFH041019N-1
WARNING
Before closing the hood, ensurethat all obstructions are removed
from the hood opening. Closing
the hood with an obstruction
present in the hood opening may
result in property damage or
severe personal injury.
Do not leave gloves, rags or any other combustible material in the
engine compartment. Doing so
may cause a heat-induced fire.
Always double check to be sure that the hood is firmly latched
before driving away. If it is not
latched, the hood could open
while the vehicle is being driven,
causing a total loss of visibility,
which might result in an accident.
Do not move the vehicle with the hood raised. The view will be
blocked and the hood could fall
or be damaged.
WARNING
Open the hood after turning off the
engine on a flat surface, shifting
the shift lever to the P(Park) posi-
tion for automatic transaxle and to
the 1st(First) gear or R(Reverse) for
manual transaxle, and setting the
parking brake.
Page 109 of 403

Features of your vehicle
28
4
Resetting the sunroof
Whenever the vehicle battery is discon-
nected or discharged, or related fuse is
blown, you must reset your sunroof sys-
tem as follows:
1. Turn the engine start/stop button to the
ON position and close the sunroof
glass and sunshade completely.
2. Release the control lever.
3. Push the sunroof control lever forward in the direction of close (about 10 sec-
onds) until the sunroof is moved a little.
Then, release the lever.
4. Push the sunroof control lever forward in the direction of close until the sun-
roof operates as follows;
SUNSHADE OPEN → TILT OPEN →
SLIDE OPEN → SLIDE CLOSE →
SUNSHADE CLOSE
Then, release the control lever.
When this is complete, the sunroof
system is reset.
❈ For more detailed information, contact
an authorized HYUNDAI dealer.CAUTION
If the sunroof is not reset when the
vehicle battery is disconnected ordischarged, or related fuse isblown, the sunroof may operateimproperly.
Page 115 of 403
Features of your vehicle
34
4
To adjust the Zone setting:
1. Determine the desired Zone Number
based upon your current location on
the Zone Map.
2. Press and hold the button for more than 3 but less than 6 seconds, the
current Zone Number will appear on
the display.
3. Pressing and holding the button again will cause the numbers to incre-
ment (Note: they will repeat …13, 14,
15, 1, 2, …). Releasing the button
when the desired Zone Number
appears on the display will set the new
Zone.
4. Within about 5 seconds the compass will start displaying a compass head-
ing again.
There are some conditions that can
cause changes to the vehicle magnets,
such as installing a ski rack or a CB
antenna. Body repair work on the vehicle
can also cause changes to the vehicle's
magnetic field. In these situations, the
compass will need to be re-calibrated to
quickly correct for these changes. To re-
calibrate the compass: 1. Press and hold the button for more
than 6 seconds. When the compass
memory is cleared a "C" will appear in
the display.
2. To calibrate the compass, drive the vehicle in 2 complete circles at less
than 5 mph (8 km/h).
Integrated HomeLink
®Wireless Control
System
The HomeLink® Wireless Control
System provides a convenient way to
replace up to three hand-held radio-fre-
quency (RF) transmitters with a single
built-in device. This innovative feature will
learn the radio frequency codes of most
current transmitters to operate devices
such as gate operators, garage door
openers, entry door locks, security sys-
tems, even home lighting. Both standard
and rolling code-equipped transmitters
can be programmed by following the out-
lined procedures. Additional HomeLink
®
information can be found at: www.home-
link.com or by calling 1-800-355-3515. Retain the original transmitter of the RF
device you are programming for use in
other vehicles as well as for future
HomeLink
®programming. It is also sug-
gested that upon the sale of the vehicle,
the programmed HomeLink
®buttons be
erased for security purposes.
CAUTION
Before programming HomeLink®to
a garage door opener or gate oper- ator, make sure that people and objects are out of the way of thedevice to prevent potential harm ordamage. Do not use HomeLink
®
with any garage door opener thatlacks the safety stop and reverse features required by U.S. federalsafety standards (this includes any garage door opener model manu-factured before April 1, 1982). Agarage door that cannot detect anobject - signaling the door to stop and reverse - does not meet currentU.S. federal safety standards. Using a garage door opener without thesefeatures increases the risk of seri- ous injury or death.
Page 129 of 403
Features of your vehicle
48
4
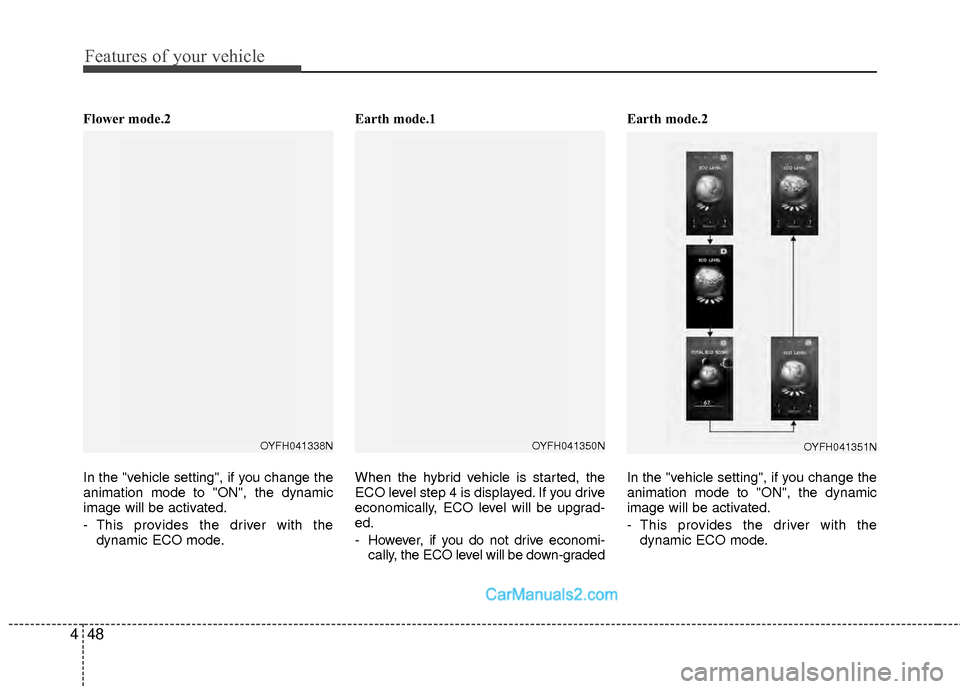
Flower mode.2
In the "vehicle setting", if you change the
animation mode to "ON", the dynamic
image will be activated.
- This provides the driver with the
dynamic ECO mode. Earth mode.1
When the hybrid vehicle is started, the
ECO level step 4 is displayed. If you drive
economically, ECO level will be upgrad-
ed.
- However, if you do not drive economi-
cally, the ECO level will be down-graded Earth mode.2
In the "vehicle setting", if you change the
animation mode to "ON", the dynamic
image will be activated.
- This provides the driver with the
dynamic ECO mode.
OYFH041350NOYFH041351NOYFH041338N
Page 130 of 403
449
Features of your vehicle
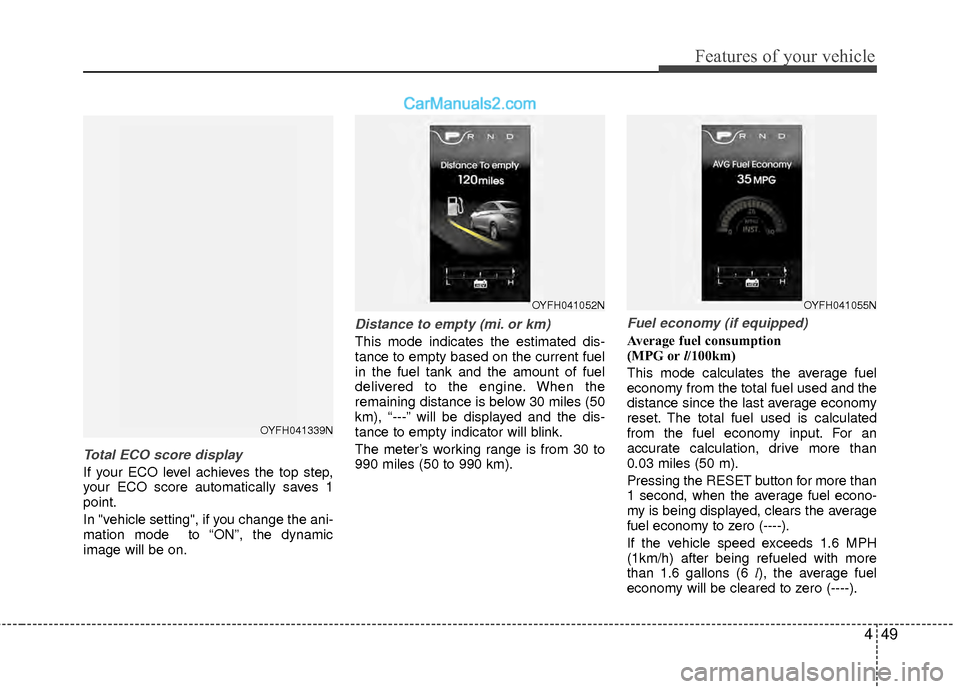
Total ECO score display
If your ECO level achieves the top step,
your ECO score automatically saves 1
point.
In "vehicle setting", if you change the ani-
mation mode to “ON”, the dynamic
image will be on.
Distance to empty (mi. or km)
This mode indicates the estimated dis-
tance to empty based on the current fuel
in the fuel tank and the amount of fuel
delivered to the engine. When the
remaining distance is below 30 miles (50
km), “---” will be displayed and the dis-
tance to empty indicator will blink.
The meter’s working range is from 30 to
990 miles (50 to 990 km).
Fuel economy (if equipped)
Average fuel consumption
(MPG orl/100km)
This mode calculates the average fuel
economy from the total fuel used and the
distance since the last average economy
reset. The total fuel used is calculated
from the fuel economy input. For an
accurate calculation, drive more than
0.03 miles (50 m).
Pressing the RESET button for more than
1 second, when the average fuel econo-
my is being displayed, clears the average
fuel economy to zero (----).
If the vehicle speed exceeds 1.6 MPH
(1km/h) after being refueled with more
than 1.6 gallons (6 l), the average fuel
economy will be cleared to zero (----).
OYFH041052NOYFH041055N
OYFH041339N