Page 22 of 217

1FEATURES OF YOUR HYUNDAI
10
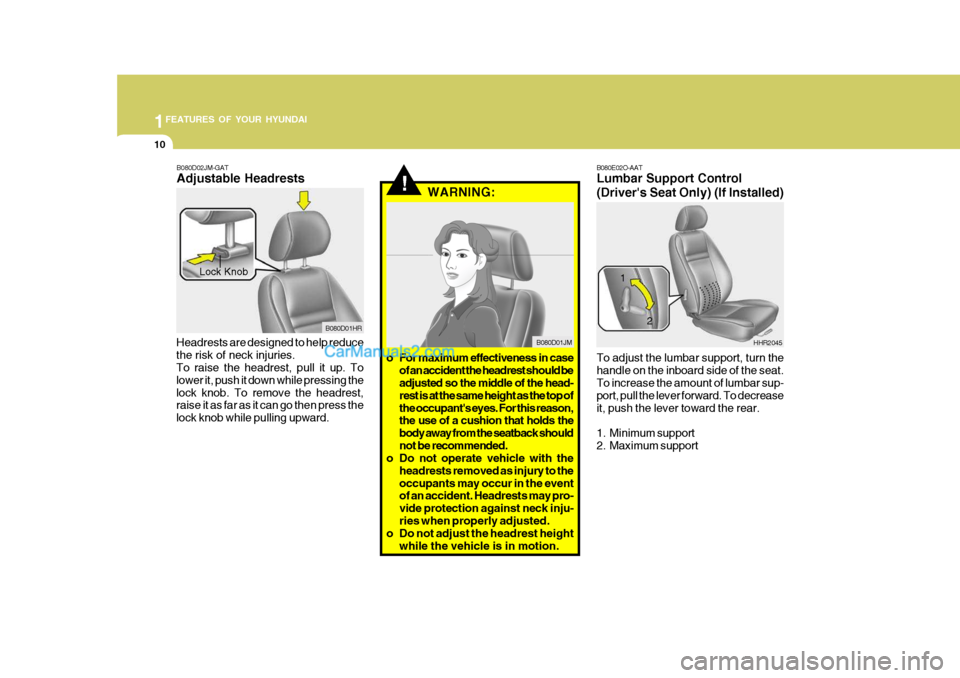
B080E02O-AAT Lumbar Support Control
(Driver's Seat Only) (If Installed) To adjust the lumbar support, turn the handle on the inboard side of the seat. To increase the amount of lumbar sup- port, pull the lever forward. To decreaseit, push the lever toward the rear.
1. Minimum support
2. Maximum support HHR2045
1
2
!
B080D02JM-GAT Adjustable Headrests
Headrests are designed to help reduce the risk of neck injuries. To raise the headrest, pull it up. To lower it, push it down while pressing thelock knob. To remove the headrest, raise it as far as it can go then press the lock knob while pulling upward. WARNING:
B080D01HR
Lock Knob
B080D01JM
o For maximum effectiveness in case of an accident the headrest should be adjusted so the middle of the head- rest is at the same height as the top ofthe occupant's eyes. For this reason, the use of a cushion that holds the body away from the seatback shouldnot be recommended.
o Do not operate vehicle with the
headrests removed as injury to theoccupants may occur in the event of an accident. Headrests may pro- vide protection against neck inju-ries when properly adjusted.
o Do not adjust the headrest height
while the vehicle is in motion.
Page 31 of 217

1
FEATURES OF YOUR HYUNDAI
19
WARNING:
o A child restraint system must be placed in the rear seat. Never install a child or infant seat on the front passenger's seat.Should an accident occur it could severely injure or kill an infant or child seated in an infant or childseat. Thus, only use a child re- straint in the rear seat of your vehicle.
o Since a safety belt or child re- straint system can become veryhot if it is left in a closed vehicle, be sure to check the seat cover and buckles before placing achild there.
o When the child restraint system is not in use, fasten it with a safety belt so that it will not be thrown forward in the case of a suddenstop or an accident.!o Children who are too large to be ina child restraint should sit in the rear seat and be restrained with the available lap/shoulder belts.Never allow children to ride in the front passenger seat.
o Always make sure that the shoul- der belt portion of the outboard lap/shoulder belt is positionedmidway over the shoulder, never across the neck or behind the back. Moving the child closer tothe center of the vehicle may help provide a good shoulder belt fit. The lap belt portion of the lap/shoulder belt or the center seat lap belt must always be posi- tioned as low as possible on thechild's hips and as snug as pos- sible.
o If the seat belt will not properly fit the child, Hyundai recommends the use of an approved boosterseat in the rear seat in order to raise the child's seating height so that the seat belt will properly fitthe child.o Never allow a child to stand up or
kneel on the seat.
o Never use an infant carrier or child safety seat that "hooks" over a seatback; it may not provide ad- equate security in an accident.
o Never allow a child to be held in a person's arms while they are in amoving vehicle, as this could re- sult in serious injury to the child in the event of an accident or asudden stop. Holding a child in a moving vehicle does not provide the child with any means of pro-tection during an accident, even if the person holding the child is wearing a seat belt.
o If the child restaint seat is not anchored properly, the risk of achild being seriously injured or killed in a collision greatly in- creases.
o After an accident, have an autho- rized HYUNDAI dealer check thechild restraint system, seat belt,tether anchor and lower anchor.
Page 96 of 217

1FEATURES OF YOUR HYUNDAI
84ANTENNA
o The playback head, capstan and pinch rollers will develop a coating of tape residue that can result in dete- rioration of sound quality, such as a wavering sound. They should becleaned monthly using a commer- cially available head cleaning tape or special solution available from audiospecialty shops. Follow the supplier's directions carefully and never oil any part of the tape player unit.
o Always be sure that the tape is tightly wound on its reel before inserting inthe player. Rotate a pencil in thedrive sprockets to wind up any slack. NOTE: Look at a tape before you insert it. If the tape is loose, tighten it by turning one of the hubs with a pencil or your finger.If the label is peeling off, do not put it in the drive mechanism. Do not leave tapes sitting wherethey are exposed to hot, warm, or high humidity, such as on top of the dashboard or in the player.If a tape is exposed to excessively hot or cold, let it reach a moderate temperature before putting it in theplayer.
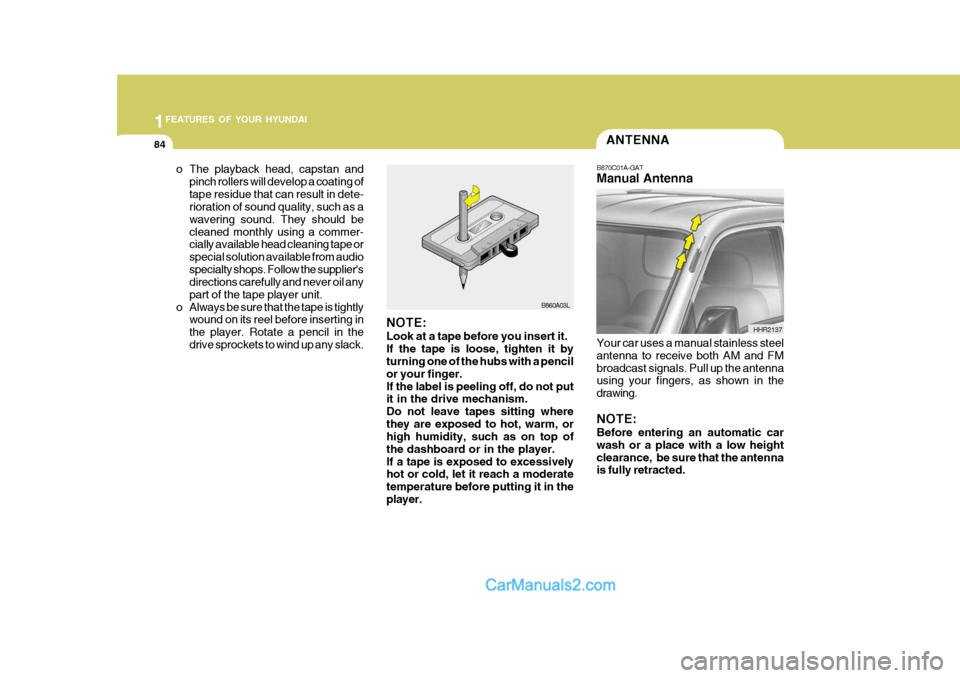
B860A03LB870C01A-GAT Manual Antenna Your car uses a manual stainless steel antenna to receive both AM and FMbroadcast signals. Pull up the antenna using your fingers, as shown in the drawing. NOTE: Before entering an automatic car wash or a place with a low heightclearance, be sure that the antenna is fully retracted. HHR2137
Page 203 of 217

8CONSUMER INFORMATION
6
o Tires degrade over time, even when
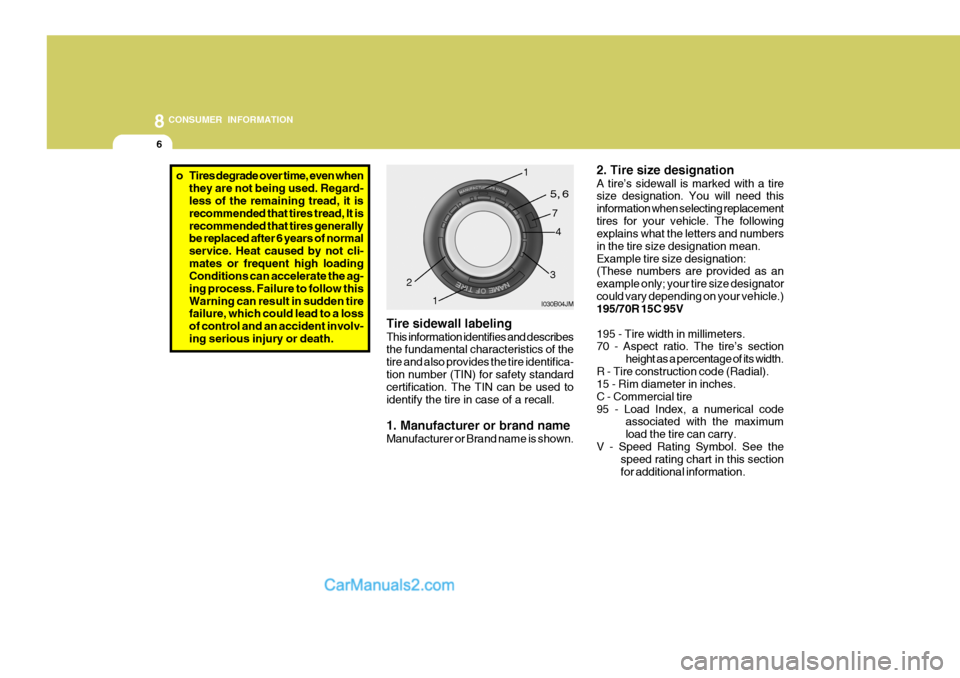
they are not being used. Regard- less of the remaining tread, it is recommended that tires tread, It isrecommended that tires generally be replaced after 6 years of normal service. Heat caused by not cli-mates or frequent high loading Conditions can accelerate the ag- ing process. Failure to follow thisWarning can result in sudden tire failure, which could lead to a loss of control and an accident involv-ing serious injury or death. Tire sidewall labeling This information identifies and describes the fundamental characteristics of the tire and also provides the tire identifica-tion number (TIN) for safety standard certification. The TIN can be used to identify the tire in case of a recall. 1. Manufacturer or brand name Manufacturer or Brand name is shown.
I030B04JM
2
1
1
5, 6
7
3
4 2. Tire size designation A tire’s sidewall is marked with a tire size designation. You will need this information when selecting replacementtires for your vehicle. The following explains what the letters and numbers in the tire size designation mean.Example tire size designation: (These numbers are provided as an example only; your tire size designatorcould vary depending on your vehicle.) 195/70R 15C 95V 195 - Tire width in millimeters. 70 - Aspect ratio. The tire’s section
height as a percentage of its width.
R - Tire construction code (Radial).15 - Rim diameter in inches. C - Commercial tire
95 - Load Index, a numerical code associated with the maximumload the tire can carry.
V - Speed Rating Symbol. See the speed rating chart in this sectionfor additional information.
Page 208 of 217
9 VEHICLE SPECIFICATIONS
2
1st 2nd3rd 4th 5thReverse
Double Cab
��� � ��
Standard Cab
4,795 1,740 1,9652,430 1,485 1,320 High Deck
Standard Cab ��� � �
1,420
TypeWheel Free PlayRack Stroke Oil Pump Type
Rack and pinion 0 ~ 30 mm (0 ~ 1.18 in.)146 mm (5.75 in.) Vane type
J020HR01HR-GAT POWER STEERING
Long Wheel Base
Front Rear mm
ITEMS
Overall Length Overall WidthOverall Height Wheel Base Wheel Tread
Extra Long Wheel Base Low Deck
Standard Cab
5,120 1,740 1,965 2,6401,485 1,320
J010A01HR-GAT MEASUREMENT
Low Deck
J090A01HR-GATTRANSMISSION Manual Transmission
2.6 N/A 3.986 2.1551.414 1.000 0.8133.814
ITEMS
Gear Ratio2.5 TCI 4.270 2.282
� � ��