Page 11 of 429

�Î�Î�Î
�Î
�Î
�Î
�Î �Î
�Î
�Î �Î
�Î �Û
�Ý
�Π����ΠOnly on vehicles equipped with navigation system. Ref er to the navigati
on system manual.
To use the horn, press the center pad of the steering wheel.
If equipped
On models with navigation system.
On models without navigation system.
1:2:3:4:5:
Your Vehicle at a Glance
4
Vehicle with navigation system is shown. (P.31)
REMOTE AUDIO CONTROLS
HEADLIGHT CONTROL DIAL
STEERING WHEEL
ADJUSTMENTSEAT HEATERSPASSENGER AIRBAG OFF
INDICATOR
SEL/RESET BUTTON
INFO ( ) BUTTON
SELECT BUTTON
INTERIOR LIGHT CONTROL
SWITCH
CRUISE CONTROLS
HAZARD WARNING BUTTON
MULTI-CONTROL LEVER
(WINDSHIELD WIPERS/
WASHERS/TURN SIGNALS/
HEADLIGHT HIGH BEAMS)
(P.94)
(P.95) MOONROOF SWITCH
(P.131)
FOG LIGHTS
BED LIGHT SWITCH (P.99)
(P.126)
(P.99)
(P.76)
(P.76)
(P.76)
(P.76)
TRIP/RESET BUTTON
(P.76)
(P.97) INFO ( ) BUTTON
(P.203) (P.210)
INSTRUMENT PANEL
BRIGHTNESS
(P.98)
VTM-4 LOCK
SHIFT LEVER
VOICE CONTROL BUTTONS HORN
(P.144)
(P.221) (P.142)
(P.273)
(P.278)
BLUETOOTH
HANDSFREELINK
SYSTEM VOICE
CONTROL BUTTONS
VEHICLE STABILITY ASSIST (VSA)
OFF SWITCH
(P.294) 2
24
4
5
2
2 5
4
3 1
4
Main Menu
Page 66 of 429

This section gives inf ormation about
the controls and displays that
contribute to the daily operation of
your vehicle. All the essential
controls are within easy reach............................
Control Locations . 60
............................
Instrument Panel . 61
..........
Instrument Panel Indicators . 62
.............................................
Gauges . 76
..............
Multi-Inf ormation Display .82
Controls Near the Steering
...........................................
Wheel . 93
........................
Multi-Control Lever . 94
........................................
Headlights . 95
...............
Headlight Control Dial . 95
........................................
Fog Lights . 97
........
Instrument Panel Brightness . 98
.................
Hazard Warning Button . 99
..........
Steering Wheel Adjustment . 99
................................................
Keys . 100
......................
Immobilizer System . 101
..............................
Ignition Switch . 102
....................................
Door Locks . 103
............
Childproof Door Locks . 104
Auto Door Locking/
..............................
Unlocking . 104
.....................
Remote Transmitter . 110
.....................
Dual-Action Tailgate . 113
...............................
In-Bed Trunk
. 116
...............................................
Seats . 119
..................................
Seat Heaters . 126 ............................
Power Windows . 128
.......................................
Moonroof . 131
...............................
Parking Brake . 132
...........................................
Mirrors . 133
.........
Interior Convenience Items . 135
.........................
Center Console . 136
.......
Console Compartments . 136
.........................
Cargo Hooks . 137
.....................
Beverage Holders . 137
..................................
Glove Box . 138
................................
Coat Hooks . 138
....................
Sunglasses Holder . 138
........
Accessory Power Sockets . 139
...................................
Sun Visor . 140
............................
Vanity Mirror . 140
........................
AC Power Outlet .141
...............................
Interior Lights . 142
.....................................
Bed Lights . 144
Instruments and Controls
Inst rument s and Cont rols
59
Main MenuINDEX
Page 100 of 429

�Î�Î �Î
�Î
�Î
�Î
�Î �Î
�Î
�Î �Î
�Î �Û �Ý
�Î �Î�Î�Î�Î
Only on vehicles equipped with navigation system. Ref er to the navigati
on system manual.
To use the horn, press the center pad of the steering wheel.
If equipped
On models with navigation system.
On models without navigation system.
1:2:3:4:5:
Controls Near the Steering Wheel
Inst rument s and Cont rols
93
MOONROOF SWITCH
REMOTE AUDIO CONTROLS HEADLIGHT CONTROL DIAL
STEERING WHEEL
ADJUSTMENTSEL/RESET BUTTON
INFO ( ) BUTTON
SELECT BUTTON
TRIP/RESET BUTTON
Vehicle with navigation system is shown. CRUISE CONTROLS
HAZARD WARNING BUTTON
MULTI-CONTROL LEVER
(WINDSHIELD WIPERS/
WASHERS/TURN SIGNALS/
HEADLIGHT HIGH BEAMS)
(P.131)
(P.94)(P.95)
FOG LIGHTS (P.99)
(P.76)
(P.76)
(P.76)
(P.76)
(P.76)
(P.203)
(P.221)
INSTRUMENT PANEL
BRIGHTNESS (P.98)
SHIFT LEVER
VTM-4 LOCK
BED LIGHT SWITCH (P.144)
(P.97)
(P.210)
(P.142)
SEAT HEATERS
INTERIOR LIGHT CONTROL
SWITCH
(P.126)
HORN
(P.99)
VOICE CONTROL BUTTONS INFO ( ) BUTTON
(P.273)
(P.278)
BLUETOOTH
HANDSFREELINK
SYSTEM VOICE CONTROL
BUTTONS
VEHICLE STABILITY ASSIST (VSA)
OFF SWITCH
(P.294)2
2 4
4
5
5
2 2
1
3 4
4
Main MenuTable of Contents
Page 102 of 429

�µ�µ
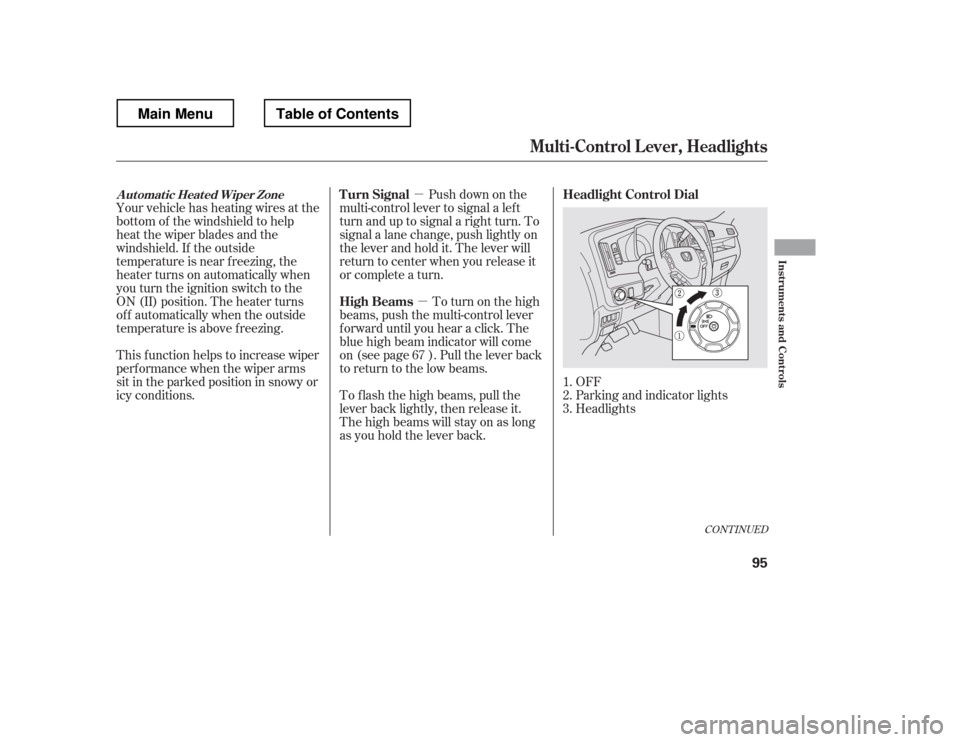
OFF
Parking and indicator lights
Headlights
Push down on the
multi-control lever to signal a lef t
turn and up to signal a right turn. To
signal a lane change, push lightly on
the lever and hold it. The lever will
return to center when you release it
or complete a turn.
To turn on the high
beams, push the multi-control lever
f orward until you hear a click. The
blue high beam indicator will come
on (see page ). Pull the lever back
to return to the low beams.
To f lash the high beams, pull the
lever back lightly, then release it.
The high beams will stay on as long
as you hold the lever back.
Your vehicle has heating wires at the
bottom of the windshield to help
heat the wiper blades and the
windshield. If the outside
temperature is near f reezing, the
heater turns on automatically when
you turn the ignition switch to the
ON (II) position. The heater turns
of f automatically when the outside
temperature is above f reezing.
This f unction helps to increase wiper
perf ormance when the wiper arms
sit in the parked position in snowy or
icy conditions.
1.2.3.
67
CONT INUED
Headlight Control Dial
Turn Signal
High BeamsAutomatic Heated Wiper Zone
Multi-Control L ever, Headlights
Inst rument s and Cont rols
95
Main MenuTable of Contents
Page 133 of 429
If equipped
Make sure all items in the cargo area
are secured. Loose items can f ly
f orward and cause injury if you have
to brake hard (See
on page ).
You can also store small items under
the rear seats. Make sure to secure
the items so they will not shift while
you are driving.
To return the seat cushion to its
original position, pull the lever
outward, then push down the seat
cushion slowly.
Make sure the seat cushion is locked
securely and the seat legs are
positioned properly in the f loor guide. Both f ront seats are equipped with
seat heaters. Because of the sensors
f or the side airbag cutof f system,
there is no heater in the passenger
Page 134 of 429
Follow these precautions when using
the seat heaters:Donotusetheseatheaterinthe
HI setting f or an extended period,
because it draws large amounts of
current from the battery.
If the engine is lef t idling f or an
extended period, do not use the
seat heaters, even on the LO
setting. It can weaken the battery,
causing hard starting.
Push the top of the switch, HI, to
rapidly heat up the seat. Af ter the
seat reaches a comfortable
temperature, select LO by pushing
the bottom of the switch. This will
keep the seat warm. In the HI setting, the heater turns off
when the seat gets warm, and turns
back on after the seat
Page 141 of 429
Turn the ignition switch to the ON
(II) position.When you f inish, move the
selector switch to the center (off)
position. This turns the
adjustment switch of f to keep your
settings.
The outside mirrors are heated to
remove fog and frost. With the
ignition switch in the ON (II)
position, turn on the heaters by
pressing the button. The indicator in
the button comes on as a reminder.
Press the button again to turn the
heaters off.
Push the appropriate edge of the
adjustment switch to move the
mirrorright,left,up,ordown.
Move the selector switch to L
(driver
Page 156 of 429

Air conditioning places an extra load
on the engine. Watch the engine
coolant temperature gauge (see page). If it moves near the red mark,
turn of f the A/C until the gauge
reads normally.
The heater uses engine coolant to
warm the air. If the engine is cold, it
will be several minutes bef ore you
f eel warm air coming f rom the
system.
Select .
When you select , the system
automatically switches to the fresh
air mode.
Set the f an to the desired speed.
Adjust the warmth of the air with
the temperature control dial.
Set the temperature to the lower
limit.
Make sure the A/C is of f .
Select and fresh air mode.
Set the f an to the desired speed.
If the outside air is humid, select
recirculation mode. If the outside
air is dry, select f resh air mode.
Select .
Make sure the temperature is set
to the lower limit.
Turn on the A/C by pressing the
button. You will see A/C ON in
the display.
Set the f an to the desired speed.
The ventilation system draws in
outside air, circulates it through the
interior, then exhausts it through
vents near the back window.
1.2. 3. 4. 5.
1. 2. 3.
1. 2. 3.4. 76
CONT INUED
Vents, Heating, and A/C
Using the A /C
Ventilation Using the Heater
Features
149
Main MenuTable of Contents