Page 106 of 429

Push the lever up to lock the
steering wheel in position.
Make sure you have securely
locked the steering wheel in place
by trying to move it up and down.
Make any steering wheel adjustment
bef ore you start driving.
Move the steering wheel so it
points toward your chest, not
toward your f ace. Make sure you
can see the instrument panel
gauges and indicators.
Push the lever on the lef t side of
the steering column all the way
down.
Pushthebuttontoturnonthe
hazard warning lights (f our-way
flashers). This causes all four
outside turn signals and both turn
indicators in the instrument panel to
f lash. Use the hazard warning lights
if you need to park in a dangerous
area near heavy traffic, or if your
vehicle is disabled. 3. 4.
1. 2.
Steering Wheel A djustment
Hazard Warning Button
Hazard Warning Button, Steering Wheel A djustment
Inst rument s and Cont rols
99
Adjusting the steering wheel
position while driving may
cause you to lose control of the
vehicle and be seriously injured
inacrash.
Adjust the steering wheel only
when the vehicle is stopped.
Main MenuTable of Contents
Page 109 of 429
�µ�µ
�µ �µ
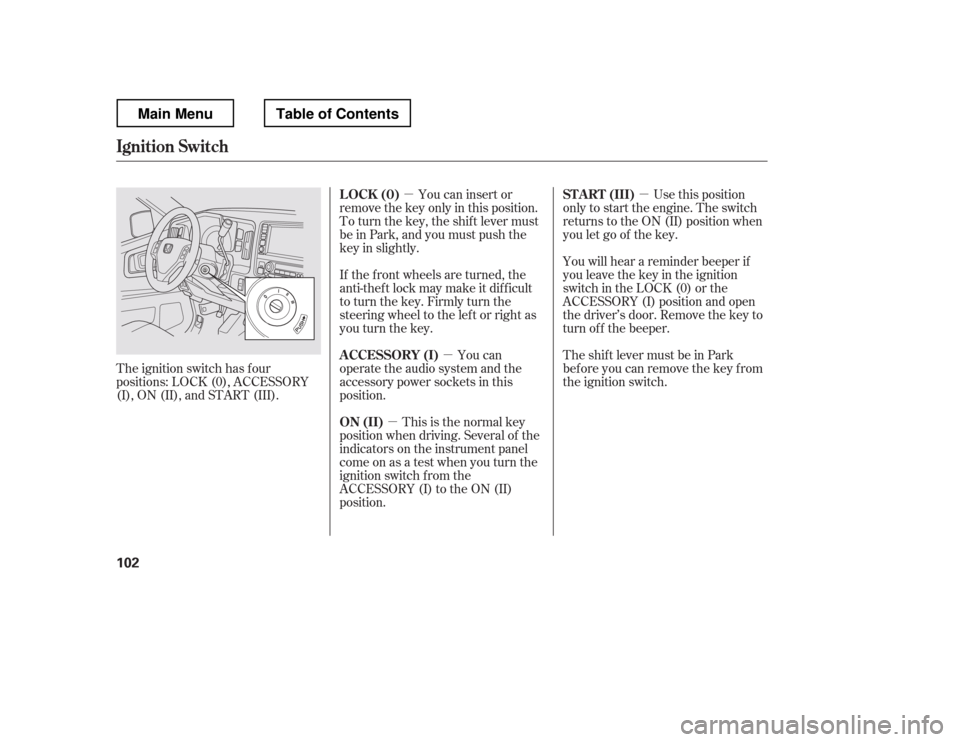
The ignition switch has f our
positions: LOCK (0), ACCESSORY
(I), ON (II), and START (III). You can insert or
remove the key only in this position.
To turn the key, the shift lever must
be in Park, and you must push the
key in slightly.
If the f ront wheels are turned, the
anti-theft lock may make it difficult
to turn the key. Firmly turn the
steering wheel to the lef t or right as
you turn the key.
You can
operate the audio system and the
accessory power sockets in this
position.
This is the normal key
position when driving. Several of the
indicators on the instrument panel
come on as a test when you turn the
ignition switch f rom the
ACCESSORY (I) to the ON (II)
position. Use this position
only to start the engine. The switch
returns to the ON (II) position when
you let go of the key.
You will hear a reminder beeper if
you leave the key in the ignition
switch in the LOCK (0) or the
ACCESSORY (I) position and open
the driver
Page 165 of 429
Theclimatecontrolsystemhastwo
sensors. A sunlight sensor is in the
top of the dashboard, and a
temperature sensor is under the
steering column. Do not cover the
sensors or spill any liquid on them.
Sunlight and T emperature
Sensors
Climate Control System
158
SUNLIGHT SENSOR TEMPERATURE SENSOR
Main MenuTable of Contents
Page 210 of 429

�´
�µ �´�µ
�Û�Ý
Three controls f or the audio system
are mounted in the steering wheel
hub. These let you control basic
f unctions without removing your
hand f rom the wheel. If you are listening to the radio, use
the CH button to change stations.
Each time you press the top ( ) of
the button, the system goes to the
next preset station on the band you
are listening to. Press the bottom
( ) to go back to the previous
station.
To search up and down f rom the
current f requency and f ind a station
with a strong signal, press the top
( ) or bottom ( ) of the button for
1 second.
The VOL button adjusts the volume
up ( ) or down ( ). Press the top
or bottom of the button, hold it until
the desired volume is reached, then
release it.
The MODE button changes the
mode. Pressing the button
repeatedly selects FM1, FM2, AM,
XM1, XM2 (if equipped), CD (if a
disc is loaded), or AUX-Audio.
CONT INUED
On RTS, RTL, Touring, and Sport
models
Remote Audio Controls
Features
203
MODE BUTTON
CH BUTTON
VOL BUTTON
Main MenuTable of Contents
Page 217 of 429
Cruise control allows you to maintain
asetspeedabove25mph(40km/h)
without keeping your f oot on the
accelerator pedal. It should be used
f or cruising on straight, open
highways. It is not recommended f or
city driving, winding roads, slippery
roads, heavy rain, or bad weather.Push in the CRUISE button on the
steering wheel. The CRUISE
MAIN indicator on the instrument
panel comes on.Press and release the SET/
DECELbuttononthesteering
wheel. The CRUISE CONTROL
indicator on the instrument panel
comes on to show the system is
now activated.
Accelerate to the desired cruising
speedabove25mph(40km/h).
Thecruisecontrolsystemcanbe
lefton,evenwhenitisnotinuse.
1. 2. 3.
Using Cruise Control
Cruise Control
210
CRUISE BUTTON
CANCEL
BUTTON
SET/DECEL BUTTON RES/ACCEL
BUTTON
Improper use of the cruise
control can lead to a crash.
Use the cruise control only
when traveling on open
highways in good weather.
Main MenuTable of Contents
Page 219 of 429
Tap the brake pedal.
Push the CANCEL button on the
steering wheel.
Resting your f oot on the brake pedal
causes cruise control to cancel.
You can cancel cruise control in any
of these ways:
Push the CRUISE button on the
steering wheel. When you push the CANCEL button
or tap the brake pedal, the system
remembers the previously set speed.
To return to that speed, accelerate to
above25mph(40km/h),thenpress
and release the RES/ACCEL button.
The CRUISE CONTROL indicator
comes on. The vehicle accelerates to
thesamespeedasbefore.
Pressing the CRUISE button turns
the system completely of f and erases
the previous cruising speed.
Even with cruise control turned on,
you can still use the accelerator
pedal to speed up f or passing. Af ter
completing the pass, take your foot
of f the accelerator pedal. The vehicle
will return to the set cruising speed.
Resuming the Set Speed
Canceling Cruise Control
Cruise Control
212
CRUISE BUTTON
CANCEL BUTTON
Main MenuTable of Contents
Page 278 of 429

Youshoulddothefollowingchecks
and adjustments bef ore you drive
your vehicle.Make sure all windows, mirrors,
and outside lights are clean and
unobstructed. Remove f rost, snow,
or ice.
Check that the hood is f ully closed.
Check that the tailgate is f ully
closed when it is not used as an
extended pickup bed.
Visually check the tires. If a tire
looks low, use a gauge to check its
pressure.
Check that any items you may be
carrying are stored properly or
f astened down securely. Check the adjustment of the
inside and outside mirrors (see
page ).
Check the steering wheel
adjustment (see page ).
Make sure the doors and In-Bed
Trunk are securely closed and
locked.
Fasten your seat belt. Check that
your passengers have f astened
their seat belts (see page ).
Check the seat adjustment (see
pages and ). When you start the engine, check
the gauges and indicators in the
instrument panel, and the
messages on the inf ormation
display or multi-inf ormation
display (depending on the model)(
s e e pag es,,, an d
).
1. 2. 3. 4.5. 6. 8.
7. 9.
10. 11.
121 133
99
16
61 76 77
119 89
Preparing to Drive
Driving
271
Main MenuTable of Contents
Page 297 of 429

Your vehicle is equipped with disc
brakes at all f our wheels. A power
assist helps reduce the ef f ort needed
on the brake pedal. The emergency
brake assist system increases the
stopping f orce when you depress the
brake pedal hard in an emergency
situation. The anti-lock brake system
(ABS) helps you retain steering
control when braking very hard.
Resting your f oot on the pedal keeps
the brakes applied lightly, builds up
heat, reduces their ef f ectiveness and
reduces brake pad lif e. In addition,
f uel economy can be reduced. It also
keeps your brake lights on all the
time, conf using drivers behind you.Constant application of the brakes
when going down a long hill builds
up heat and reduces their ef f ective-
ness. Use the engine to assist the
brakes by taking your f oot of f the
accelerator and downshif ting to a
lower gear.
Check the brakes after driving
through deep water. Apply the
brakes moderately to see if they f eel
normal. If not, apply them gently and
f requently until they do. Be extra
cautious and alert in your driving.
The hydraulic system that operates
the brakes has two separate circuits.
Each circuit works diagonally across
the vehicle (the lef t-f ront brake is
connected with the right-rear brake,
etc.). If one circuit should develop a
problem, you will still have braking
at two wheels.
If the brake pads need replacing, you
will hear a distinctive, metallic
screeching sound when you apply
the brake pedal. If you do not have
the brake pads replaced, they will
screech all the time. It is normal f or
the brakes to occasionally squeal or
squeak when you apply them.
Braking System Design
Brake Pad Wear Indicators
Braking System
290
Main MenuTable of Contents


without keeping your f oot on the
accelerator pedal. It should be used
f or cruising on straight, open
highways. It is not recommende")
