Page 9 of 441

8Quick Reference Guide
Instrument Panel
(P71)
U. S.Canada
U. S.
Canada
U. S.
Canada
Canada
U. S.
U. S.
Canada
System Indicators
Malfunction
Indicator Lamp
Low Oil Pressure
Indicator
Charging System
Indicator
Anti-lock Brake
System (ABS) Indicator Vehicle Stability
Assist (VSA
®) System
Indicator
VSA
® OFF Indicator
Low Tire Pressure
Indicator
*/
Low Tire Pressure/
TPMS Indicator
*
Security System Alarm
Indicator
*
Lights Reminders
Lights On Indicator
High Beam Indicator
Fog Light Indicator
*
Immobilizer System
IndicatorSeat Belt Reminder
Indicator
System Indicators
Starter System
Indicator
*
System Message
Indicator
*
Parking Brake
and Brake System
IndicatorSupplemental
Restraint System
Indicator
Side Airbag Off
Indicator
Door and Tailgate Open Indicator/
Parking Sensor IndicatorCruise Main Indicator TachometerInformation Display
*/
Multi-Information Display
*
Speedometer
Fuel Gauge
Shift Lever
Position Indicator
Power Sliding Door
Indicator
*
Gauges
(P86)
/Information Display
* (P87)
/
Multi-Information Display
* (P98)
/System Indicators
(P72)
Power Tailgate
Indicator
*
Fuel Economy
Indicator
TPMS Indicator
*
Turn Signal and
Hazard Warning
Indicators
Maintenance Minder
Indicator
*
Daytime Running
Lights Indicator
Washer Level
Indicator
*
Blind Spot Information
System Indicator
*
Cruise Control
Indicator
Temperature
Gauge
Low Fuel
Indicator
Page 35 of 441

uuSeat BeltsuFastening a Seat Belt
34Safe Driving
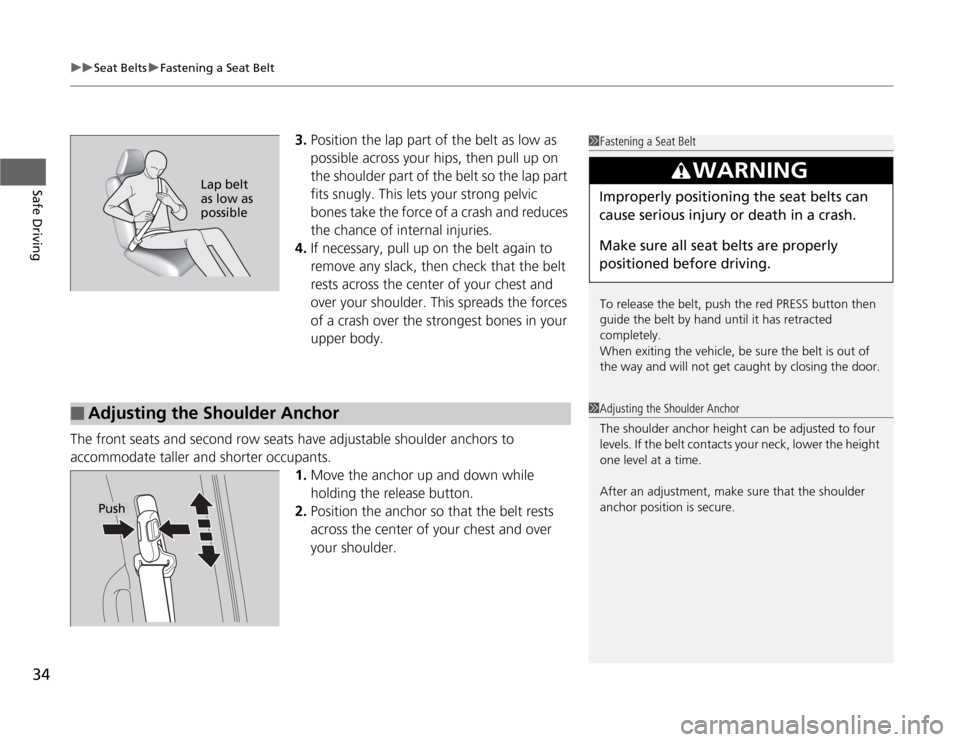
3.Position the lap part of the belt as low as
possible across your hips, then pull up on
the shoulder part of the belt so the lap part
fits snugly. This lets your strong pelvic
bones take the force of a crash and reduces
the chance of internal injuries.
4.If necessary, pull up on the belt again to
remove any slack, then check that the belt
rests across the center of your chest and
over your shoulder. This spreads the forces
of a crash over the strongest bones in your
upper body.
The front seats and second row seats have adjustable shoulder anchors to
accommodate taller and shorter occupants.
1.Move the anchor up and down while
holding the release button.
2.Position the anchor so that the belt rests
across the center of your chest and over
your shoulder.
1Fastening a Seat Belt
To release the belt, push the red PRESS button then
guide the belt by hand until it has retracted
completely.
When exiting the vehicle, be sure the belt is out of
the way and will not get caught by closing the door.
3
WARNING
Improperly positioning the seat belts can
cause serious injury or death in a crash.
Make sure all seat belts are properly
positioned before driving.
Lap belt
as low as
possible
■
Adjusting the Shoulder Anchor
1Adjusting the Shoulder Anchor
The shoulder anchor height can be adjusted to four
levels. If the belt contacts your neck, lower the height
one level at a time.
After an adjustment, make sure that the shoulder
anchor position is secure.
Push
Page 39 of 441

38
uuSeat BeltsuSeat Belt Inspection
Safe Driving
Seat Belt InspectionRegularly check the condition of your seat belts as follows:
•Pull each belt out fully, and look for frays, cuts, burns, and wear.
•Check that the latches work smoothly and the belts retract easily.
uIf a belt does not retract easily, cleaning the belt may correct the problem. Only
use a mild soap and warm water. Do not use bleach or cleaning solvents. Make
sure the belt is completely dry before allowing it to retract.
Any belt that is not in good condition or working properly will not provide proper
protection and should be replaced as soon as possible.
A belt that has been worn during a crash may not provide the same level of
protection in a subsequent crash. Have your seat belts inspected by a dealer after
any collision.
1Seat Belt Inspection
3
WARNING
Not checking or maintaining seat belts can
result in serious injury or death if the seat
belts do not work properly when needed.
Check your seat belts regularly and have
any problem corrected as soon as possible.
Page 73 of 441

72Instrument Panel
IndicatorsIndicator
Name
On/Blinking
Explanation
Message
*
Parking Brake
and Brake
System Indicator
●
Comes on for a few seconds when
you turn the ignition switch to ON (w
, then goes off.
●
Comes on when the parking brake
is applied, and goes off when it is
released.
●
Comes on when the brake fluid
level is low.
●
Comes on if there is a problem
with the brake system.
●
The beeper sounds and the
indicator comes on if you drive
with the parking brake not fully
released.
●
Comes on while driving - Make sure
the parking brake is released. Check the
brake fluid level.
2What to do when the indicator
comes on while driving P. 408
●
Comes on along with the ABS
indicator - Have the vehicle checked by
a dealer.
2If the Brake System Indicator Comes
On P. 408
Low Oil Pressure
Indicator
●
Comes on when you turn the
ignition switch to ON
(w
, and goes
off when the engine starts.
●
Comes on when the engine oil
pressure is low.
●
Comes on while driving - Immediately
stop in a safe place.
2If the Low Oil Pressure Indicator
Comes On P. 406
U.S.
Canada
U.S. Canada
* Not available on all models
Page 83 of 441
82
uuIndicatorsu
Instrument Panel
Washer Level
Indicator
*
●
Comes on when washer fluid gets
low.
●
Refill washer fluid.
2Refilling Window Washer Fluid
P. 354
Maintenance
Minder Indicator
*
●
Comes on when the scheduled
maintenance is due soon.
2Maintenance Minder™ P. 335
—
Power Tailgate
Indicator
*
●
Comes on for a few seconds when
you turn the ignition switch to ON (w
.
●
Comes on if there is a problem with
the power tailgate system.
●
Stays on constantly or does not
come on at all - You can still open or
close the tailgate manually. Have the
vehicle checked by a dealer.
Indicator
Name
On/Blinking
Explanation
Message
*
U.S.
Canada
U.S.
Canada
* Not available on all models
Page 143 of 441

142
uuOperating the Switches Around the Steering WheeluTurn Signals
Controls
Turn Signals
The turn signals can be used when the ignition
switch is in ON
(w
.
Light Switches
Rotating the light switch turns the lights on
and off, regardless of the position of the
ignition switch.■
High beams
Push the lever forward until you hear a click.
■
Low beams
When in high beams, pull the lever back to
return to low beams.
■
Flashing the high beams
Pull the lever back, and release it.
Right Turn
Left Turn
■
Manual Operation
1Light Switches
If you remove the key from the ignition switch while
the lights are on, a chime sounds when the driver’s
door is opened.
When the lights are on, the lights on indicator in the
instrument panel will be on.
2Lights On Indicator P. 79
Repeatedly turning the headlights on and off reduces
the life of the HID headlight bulbs. If you sense that
the level of the headlights is abnormal, have the
vehicle inspected by a dealer.
Do not leave the lights on when the engine is off
because it will cause the battery to discharge.
Models with high voltage discharge tube bulb
High Beams
Flashing the high beamsLow Beams
Turns on side marker, tail, and
rear license plate lights
Turns on headlights, parking, side
marker, tail, and rear license plate
lights
Page 148 of 441

147
uuOperating the Switches Around the Steering WheeluBrightness Control
Controls
Brightness Control
When the ignition switch is in ON
(w
, you can
use the brightness control knob to adjust
instrument panel brightness.
Brighten: Turn the knob to the right.
Dim: Turn the knob to the left.
You will hear a beeper when the brightness
reaches minimum or maximum. The
information display
*/multi-information
display
* will return to its original state several
seconds after you adjust the brightness.
■
Brightness level indicator
The brightness level is shown on the
information display
*/multi-information
display
* while you are adjusting it.
1Brightness Control
Instrument panel brightness varies, depending on
whether the exterior lights are on or off. The
instrument panel dims to reduce glare when they are
on.
Pressing the (SEL/RESET) knob or the /
(information) button
* switches the display.
If you turn the knob to the right until the brightness
display is up to max, the beeper sounds. This cancels
the reduced instrument panel brightness when the
exterior lights are on.
Control Knob
On multi-information display
On information display* Not available on all models
Page 158 of 441
Continued
157
uuAdjusting the SeatsuAdjusting the Seat Positions
Controls
Your vehicle is equipped with head restraints
in all seating positions.
Head restraints are most effective for
protection against whiplash and other rear-
impact crash injuries when the center of the
back of the occupant's head rests against the
center of the restraint. The tops of the
occupant's ears should be level with the
center height of the restraint.
■
Adjusting the Head Restraints
1Adjusting the Head Restraints
3
WARNING
Improperly positioning head restraints
reduces their effectiveness and increases
the likelihood of serious injury in a crash.
Make sure head restraints are in place and
positioned properly before driving.
Position head in the center
of the head restraint.