Page 239 of 441
238
uuGeneral Information on the Audio SystemuRecommended CDs
Features
Recommended CDs•Use only high-quality CD-R or CD-RW discs labeled for audio use.
•Use only CD-R or CD-RW discs on which the recordings are closed.
•Play only standard round-shaped CDs.
•Some software files may not allow for audio play or text data display.
•Some versions of MP3, WMA or AAC formats may be unsupported.
1Recommended CDs
A Dual-disc cannot play on this audio unit. If recorded
under certain conditions, a CD-R or CD-RW may not
play either.
■
CDs with MP3, WMA or AAC filesThe CD packages or jackets should have one of these marks.
Page 240 of 441
239
uuGeneral Information on the Audio SystemuRecommended CDs
Features
■
Protecting CDs
Follow these precautions when handling or storing CDs:
•Store a CD in its case when it is not being played.
•When wiping a CD, use a soft clean cloth from the center to the outside edge.
•Handle a CD by its edge. Never touch either surface.
•Never insert foreign objects into the CD player.
•Keep CDs out of direct sunlight and extreme heat.
•Do not place stabilizer rings or labels on the CD.
•Avoid fingerprints, liquids, and felt-tip pens on the CD.
1Protecting CDs
NOTICEDo not insert a damaged CD. It may be stuck inside
and damage the audio unit.Examples:●Damaged CDsBubbled/
WrinkledWith Label/
StickerUsing
Printer Label
Kit
Sealed With Plastic Ring
●Poor quality
CDs
Chipped/
CrackedWarped Burrs
●Small CDs
3-inch
(8-cm)
CD●Bubbled, wrinkled, labeled, and
excessively thick CDs
Page 241 of 441
240
uuGeneral Information on the Audio SystemuCompatible iPod
®* and USB Flash Drives
*
Features
Compatible iPod
®* and USB Flash Drives
*
•Use a recommended USB flash drive of 256 MB or higher.
•Some digital audio players may not be compatible.
•Some USB flash drives (e.g., a device with security lockout) may not work.
•Some software files may not allow for audio play or text data display.
•Some versions of MP3, WMA, or AAC formats may be unsupported.■
iPod
® Model Compatibility
Model
iPod classic
® 80/160G
iPod classic
® 120G
iPod classic
® 160G (launch in 2009)
iPod
® (5th generation)iPod nano
®
iPod touch
®
■
USB Flash Drives
1iPod
® Model Compatibility
This system may not work with all software versions
of these devices.
1USB Flash Drives
Files on the USB flash drive are played in their stored
order. This order may be different from the order
displayed on your PC or device.
* Not available on all models
Page 242 of 441

241
Continued
Features
Rear Entertainment System
*
For models with the navigation system, see the Navigation System Manual for how
to operate the rear entertainment system.
Allows the rear passengers to enjoy a different entertainment source, such as DVD,
CD, CD Library, and radio, than the front passengers.
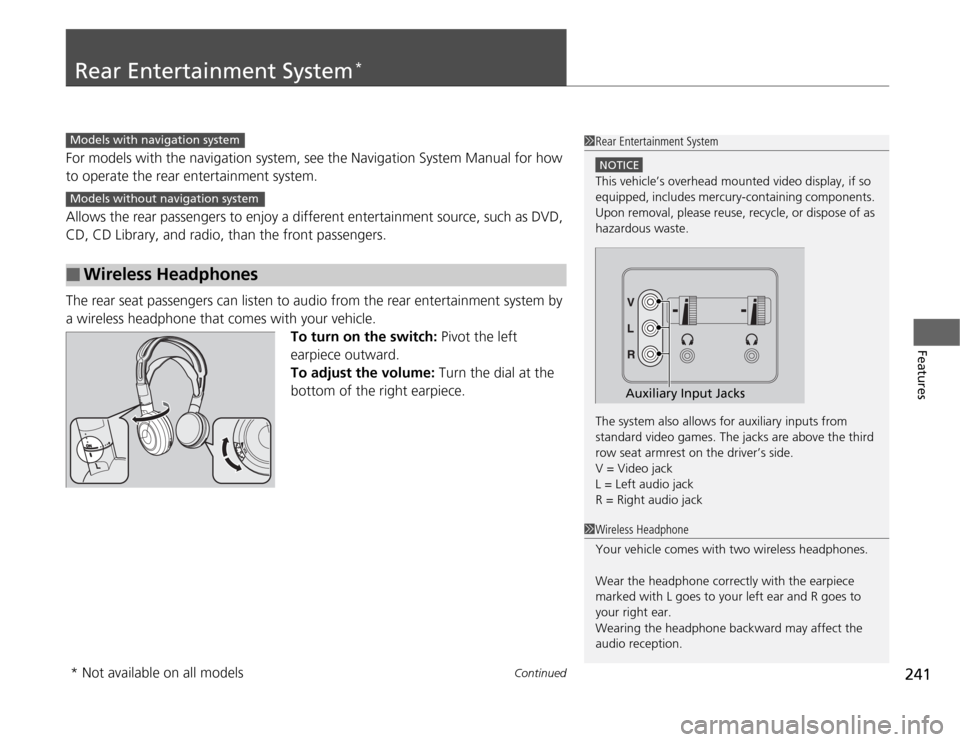
The rear seat passengers can listen to audio from the rear entertainment system by
a wireless headphone that comes with your vehicle.
To turn on the switch: Pivot the left
earpiece outward.
To adjust the volume: Turn the dial at the
bottom of the right earpiece.■
Wireless Headphones
1Rear Entertainment System
NOTICEThis vehicle’s overhead mounted video display, if so
equipped, includes mercury-containing components.
Upon removal, please reuse, recycle, or dispose of as
hazardous waste.
The system also allows for auxiliary inputs from
standard video games. The jacks are above the third
row seat armrest on the driver’s side.
V = Video jack
L = Left audio jack
R = Right audio jack
Auxiliary Input Jacks
Models with navigation systemModels without navigation system
1Wireless Headphone
Your vehicle comes with two wireless headphones.
Wear the headphone correctly with the earpiece
marked with L goes to your left ear and R goes to
your right ear.
Wearing the headphone backward may affect the
audio reception.
* Not available on all models
Page 243 of 441

uuRear Entertainment System
*uOperating the System
242Features
Pull down the screen to the first or second
detent until it latches.
Operating the SystemTo operate the system, turn the ignition switch to ON
(w
or ACCESSORY
(q
. Press
the button to turn on the system (indicator on).
■
button on the front panel
When you press the button (indicator
on), the beeper sounds three times, and the
front display changes to what is displayed on
the rear overhead screen.
The audio from the front speakers switches to
the audio played in the rear.
■
Overhead Screen
1 Overhead Screen
NOTICEThis vehicle’s overhead mounted video display, if so
equipped, includes mercury-containing components.
Upon removal, please reuse, recycle, or dispose of as
hazardous waste.
You can use the rear control panel as a remote. Press
the lock tab to detach it.
Overhead
Screen
1 Operation the System
If you do not operate the system from the front panel
for more than 20 seconds, the indicator in the
button goes off, and the front display returns to what
has previously been displayed.
REAR POWER
ButtonREAR SOURCE
Button
Page 244 of 441

243
uuRear Entertainment System
*uOperating the System
Continued
Features
■
System Controls and Menus for DVD (Power) Button
Press to turn on the system.DVD Button
Press to watch a DVD.
(Light) Button
Press to illuminate
the buttons and
bars for a few
seconds.
SKIP Bar
Press or to
change chapters.
(Play/Pause) Button
Press to pause or play a DVD.
TITLE/SCROLL Button
Press to display the status of the
DVD that is currently playing.MENU Button
The following options appear when you
play a DVD and press the MENU button:
Top Menu
Menu
Play Mode Audio
Subtitle
Angle
Search/NumInput Title
Chapter
NumInput Repeat
Pause/Play
Stop
Return
SETUP Button
The following options appear when you
play a DVD and press the SETUP button:
Disp Adjust
( P.249)Brightness
Contrast
Black Level
Color CANCEL Button
Press to go back to
the previous display
or operation.3, 4, , and ENTER Buttons
Use 3, 4, , or to highlight
a menu item, and press the
ENTER Button to make a
selection.
Tint
Normal
Wide
Zoom
Full Aspect Ratio
( P.249)
PERSONAL SURROUND ( P.249)
Language ( P.250)
Page 245 of 441

uuRear Entertainment System
*uOperating the System
244Features
■
Playing a DVD
•Insert a DVD into the lower slot of the front audio unit.
uThe system automatically starts the DVD.
•To fast forward, press and hold the (SEEK/SKIP) bar, and to reverse, press and
hold the bar on the front panel or the remote.
•To go to the next chapter, press the bar, and to go to the beginning of the
current chapter, press the bar on the front panel or the remote. Quickly press
the bar twice to go to the previous chapter.
■
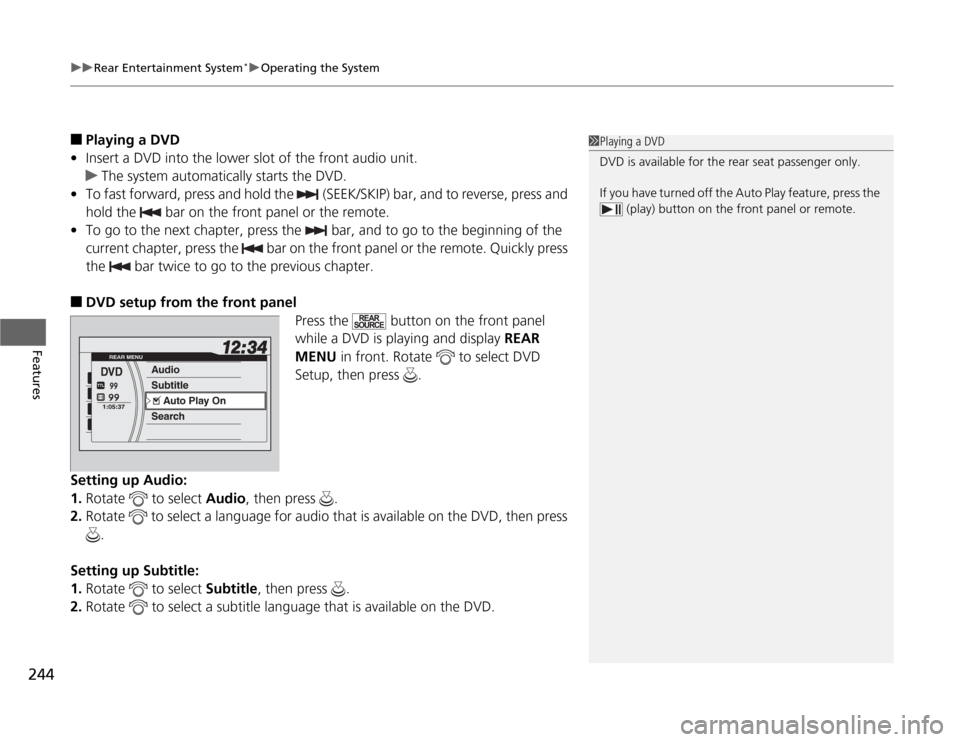
DVD setup from the front panel
Press the button on the front panel
while a DVD is playing and display REAR
MENU in front. Rotate to select DVD
Setup, then press .
Setting up Audio:
1.Rotate to select Audio, then press .
2.Rotate to select a language for audio that is available on the DVD, then press
.
Setting up Subtitle:
1.Rotate to select Subtitle, then press .
2.Rotate to select a subtitle language that is available on the DVD.
1Playing a DVD
DVD is available for the rear seat passenger only.
If you have turned off the Auto Play feature, press the
(play) button on the front panel or remote.
Page 246 of 441
Continued
245
uuRear Entertainment System
*uOperating the System
Features
Auto Play On:
1.Rotate to select Auto Play On, then press .
2.The check mark disappears, and the auto play feature turns off.
uWith this feature off, the DVD does not automatically start playing when the
disc is inserted. Press button to play.
Title/Chapter Search:
1.Rotate to select Title Search or Chapter Search, then press .
2.Rotate to select a title or chapter number, then press .■
TITLE/SCROLL button on the remote
Press the TITLE/SCROLL button while the DVD is playing to see the current status of
title, chapter, elapsed time, angle, subtitle, audio, and sound characteristics.
■
MENU button on the remote
Press the MENU button while the DVD is
playing to see the available options.
Use the 3, 4, , and buttons to highlight
the option and then press the ENTER button.
1TITLE/SCROLL button on the remote
Press the TITLE/SCROLL button again to return.