Page 87 of 345
uuGauges and DisplaysuMulti-Information Display*
86
Instrument Panel
Use the multi-information display to customize certain features. ■ How to customize
Select the Vehicle Menu screen by pressing the MENU button while the ignition
switch is in ON
(w , and the vehicle is at a complete stop. Select Customize
Settings , then press the SOURCE button.
■Customized Features1Customized Features
To customize other features, press the /
button.
2 List of customizable options P. 89
2 Example for customizing wallpapers P. 93
+–
MENU
SOURCE
Button
Press to go to the next
display.
SOURCE Button
MENU Button
Press to go to Vehicle
Button
Press to scroll upwards.+
Button
Press to go back to the
previous display.
Button
Press to scroll downwards.–
Page 89 of 345
88
uuGauges and DisplaysuMulti-Information Display*
Instrument Panel
Customize Settings
Display Setup
Trip Computer Setup
Lighting Setup
Door Setup
Default All
Select Wallpaper
Language Selection
Adjust Outside Temp. Display
Fuel Efficiency Backlight*
Interior Light Dimming Time
Auto Light Sensitivity
*
Auto Door Lock
Security Relock Timer
Import Wallpaper
Delete Wallpaper
Trip Meter Item to Display
Welcome Screen
Color Theme
Turn by Turn Display*
Trip A Reset with Refuel
Display km/miles
Headlight Auto Off Timer
Door Lock Mode
Auto Door Unock
Keyless Lock Acknowledgment
* Not available on all models
Page 92 of 345

91
uuGauges and DisplaysuMulti-Information Display*
Continued
Instrument Panel
*1: Not available on all models
*2: Default SettingSetup Group Customizable Features Description Selectable settings
Customize
Settings Trip Computer SetupAdjust
Outside Temp.
Display
*1 Adjusts the temperature reading by a few degrees.
-5°F ~ ±0°F
*2
~ +5°F (U.S.)
-3°C ~ ±0°C *2
~ +3°C (Canada)
Trip A Reset
with Refuel Set Trip A and the average fuel economy to reset
when you refuel.
On/Off
*2
Display km/miles Changes the displayed measurement on the multi-information display.
Auto
*2
/km/miles
Fuel Efficiency
Backlight Turns the ambient meter feature on and off. On
*2
/Off
Lighting Setup Interior Light
Dimming Time
Changes the length of time the interior lights stay on
after you close the doors.
60sec/30sec
*2
/15sec
Headlight Auto Off
Timer Changes the length of time the exterior lights stay
on after you close the driver’s door.
60sec/30sec/15sec
*2
/0sec
Auto Light Sensitivity *1Changes the timing for the headlights to come on. Max/High/Mid
*2
/Low/Min
Page 117 of 345

116
Controls
Opening and Closing the Moonroof*
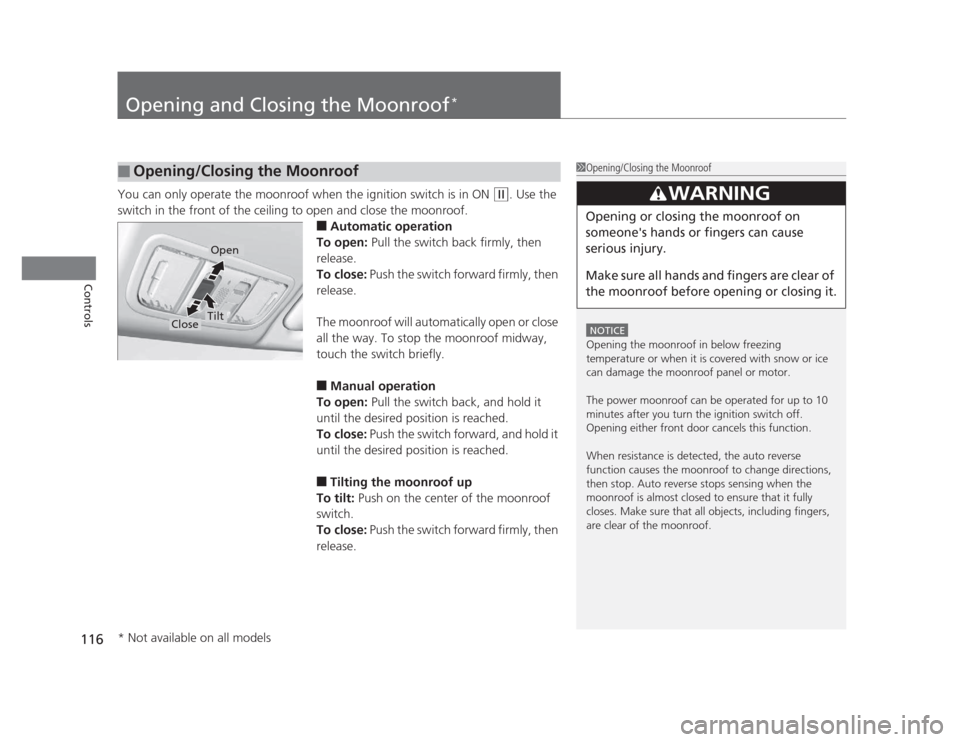
You can only operate the moonroof when the ignition switch is in ON (w
. Use the
switch in the front of the ceiling to open and close the moonroof. ■Automatic operation
To open: Pull the switch back firmly, then
release.
To close: Push the switch forward firmly, then
release.
The moonroof will automatically open or close
all the way. To stop the moonroof midway,
touch the switch briefly. ■ Manual operation
To open: Pull the switch back, and hold it
until the desired position is reached.
To close: Push the switch forward, and hold it
until the desired position is reached. ■ Tilting the moonroof up
To tilt: Push on the center of the moonroof
switch.
To close: Push the switch forward firmly, then
release.
■Opening/Closing the Moonroof1Opening/Closing the Moonroof
NOTICE
Opening the moonroof in below freezing
temperature or when it is covered with snow or ice
can damage the moonroof panel or motor.
The power moonroof can be operated for up to 10
minutes after you turn the ignition switch off.
Opening either front door cancels this function.
When resistance is detected, the auto reverse
function causes the moonroof to change directions,
then stop. Auto reverse stops sensing when the
moonroof is almost closed to ensure that it fully
closes. Make sure that all objects, including fingers,
are clear of the moonroof.
3WARNING
Opening or closing the moonroof on
someone's hands or fingers can cause
serious injury.
Make sure all hands and fingers are clear of
the moonroof before opening or closing it.
Open
CloseTilt
* Not available on all models
Page 119 of 345

118
uuOperating the Switches Around the Steering WheeluTurn Signals
Controls
Turn SignalsThe turn signals can be used when the ignition
switch is in ON
(w.
Light Switches
Rotating the light switch turns the lights on
and off, regardless of the position of the
ignition switch. ■High beams
Push the lever forward until you hear a click. ■ Low beams
When in high beams, pull the lever back to
return to low beams.■ Flashing the high beams
Pull the lever back, and release it.
Right Turn
Left Turn
■Manual Operation
1Light Switches
If you remove the key from the ignition switch while
the lights are on, a chime sounds when the driver’s
door is opened.
When the lights are on, the lights on indicator in the
instrument panel will be on. 2 Lights On Indicator P. 73
Do not leave the lights on when the engine is off
because it will cause the battery to discharge.
High Beams
Flashing the high beams
Low Beams
Turns on side marker, tail, and
rear license plate lights
Turns on headlights, parking, side
marker, tail, and rear license plate lights
Page 127 of 345

126
Controls
Adjusting the Seats
Adjusting the Seat PositionsAdjust the driver's seat as far back as possible
while allowing you to maintain full control of
the vehicle. You should be able to sit upright,
well back in the seat and be able to
adequately press the pedals without leaning
forward, and grip the steering wheel
comfortably. The passenger's seat should be
adjusted in a similar manner, so that it is as far
back from the front airbag in the dashboard as possible.
■ Adjusting the front power seat *
1Adjusting the Seats
The National Highway Traffic Safety Administration
and Transport Canada recommend that drivers allow
at least 10 inches (25 cm) between the center of the
steering wheel and the chest.
Always make seat adjustments before driving.
3WARNING
Sitting too close to a front airbag can result
in serious injury or death if the front
airbags inflate.
Always sit as far back from the front
airbags as possible while maintaining
control of the vehicle.
Move back.
Allow sufficient space.
Horizontal Position
Adjustment
Height Adjustment
Seat-back Angle
Adjustment
Driver side only
* Not available on all models
Page 128 of 345
Continued127
uuAdjusting the SeatsuAdjusting the Seat Positions
Controls
■Adjusting the front manual seat(s)1Adjusting the front manual seat(s)
Once a seat is adjusted correctly, rock it back and
forth to make sure it is locked in position.
Horizontal Position
Adjustment
Pull up on the bar to move the
seat, then release the bar.
Height Adjustment
(Driver side only)
Pull up or push down the lever
to raise or lower the seat.
Seat-back Angle
Adjustment
Pull up the lever to
change the angle.
Driver’s seat is shown.
Page 129 of 345

uuAdjusting the SeatsuAdjusting the Seat Positions
128
Controls
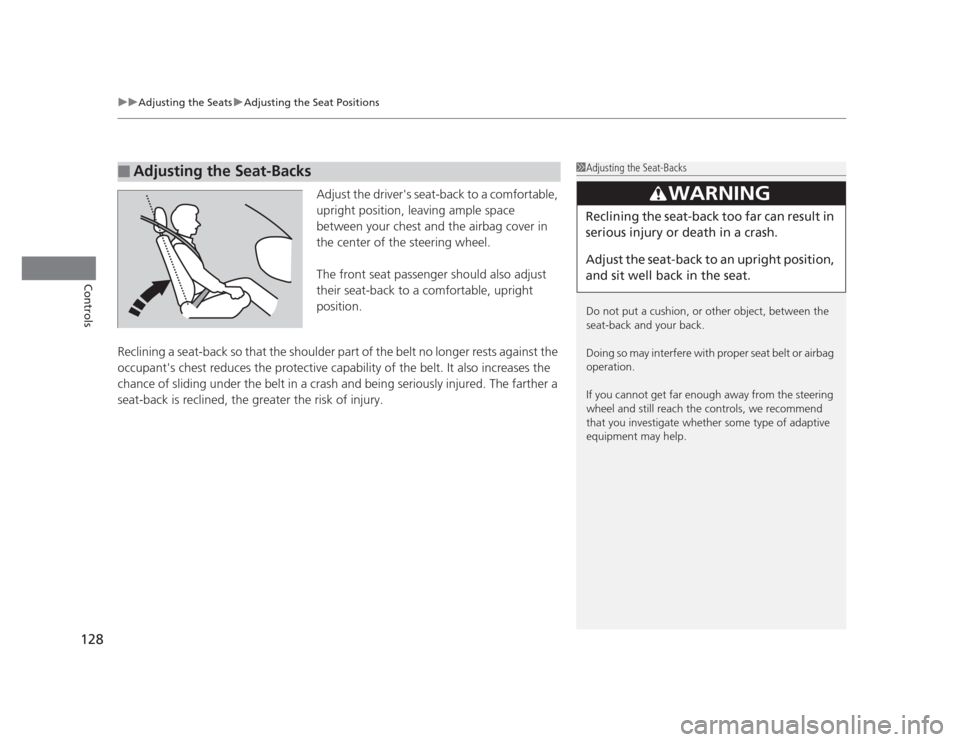
Adjust the driver's seat-back to a comfortable,
upright position, leaving ample space
between your chest and the airbag cover in
the center of the steering wheel.
The front seat passenger should also adjust
their seat-back to a comfortable, upright
position.
Reclining a seat-back so that the shoulder part of the belt no longer rests against the
occupant's chest reduces the protective capabil ity of the belt. It also increases the
chance of sliding under the belt in a crash and being seriously injured. The farther a
seat-back is reclined, the greater the risk of injury.
■Adjusting the Seat-Backs1Adjusting the Seat-Backs
Do not put a cushion, or other object, between the
seat-back and your back.
Doing so may interfere with proper seat belt or airbag
operation.
If you cannot get far enough away from the steering
wheel and still reach the controls, we recommend
that you investigate whether some type of adaptive
equipment may help.
3WARNING
Reclining the seat-back too far can result in
serious injury or death in a crash.
Adjust the seat-back to an upright position,
and sit well back in the seat.