2012 GMC SIERRA 1500 buttons
[x] Cancel search: buttonsPage 272 of 556
Black plate (6,1)GMC Sierra Owner Manual - 2012 - CRC - 11/15/11
8-6 Climate Controls
O(On/Off):Press to turn the
climate control system on or off.
Outside air still enters the vehicle,
and is directed to the floor. This
direction can be changed by
pressing the mode button.
Recirculation can be selected once
you have selected vent or bi-level
mode. The temperature can also be
adjusted using either temperature
button. If the air delivery mode or
temperature settings are adjusted
with the system off, the display
illuminates briefly to show the
settings and then returns to off. The
system can be turned back on by
pressing either
O,D,C,#, the
defrost or the AUTO button.
Driver and Passenger Side
Temperature Controls
The driver and passenger side
temperature buttons are used to
adjust the temperature of the air
coming through the system on the
driver or passenger side of the
vehicle. The temperature can be
adjusted even if the system is turned off. This is possible since
outside air always flows through
the system as the vehicle is
moving forward unless it is
set to recirculation mode. See
“Recirculation”
later in this section.
Press the + or −buttons to increase
or decrease the cabin temperature.
The driver side or passenger side
temperature display shows the
temperature setting increasing or
decreasing.
The passenger temperature setting
can be set to match the driver
temperature setting by pressing
the PASS button and turning
off the PASS indicator. When the
passenger temperature setting is
set different than the driver setting,
the indicator on the PASS button
illuminates and both the driver side
and passenger side temperature
displays are shown.
When in defrost mode the
passenger temperature setting
cannot be changed.
Automatic Operation
AUTO (Automatic): When
automatic operation is active,
the system controls the inside
temperature, the air delivery, and
the fan speed.
Use the steps below to place the
entire system in automatic mode:
1. Press the AUTO button.
When AUTO is selected, the
display changes to show the
current temperature(s) and
AUTO is lit on the display. The
current air delivery mode and
fan speed are also displayed for
about five seconds.
When AUTO is selected, the air
conditioning operation and air
inlet are automatically controlled.
The air conditioning compressor
may run when the outside
temperature is above freezing.
The air inlet will normally be set
to outside air. If it is hot outside,
the air inlet may automatically
switch to the recirculate mode to
Page 273 of 556
Black plate (7,1)GMC Sierra Owner Manual - 2012 - CRC - 11/15/11
Climate Controls 8-7
help quickly cool down the air
inside the vehicle. The light
on the button comes on in
recirculation.
2. Set the driver and passenger temperature.
To find your comfort setting, start
with a 23°C (74°F) temperature
setting and allow about
20 minutes for the system to
regulate. Use the driver or
passenger temperature buttons
to adjust the temperature setting
as necessary. If a temperature
setting of 15°C (60°F) is chosen,
the system remains at the
maximum cooling setting. If a
temperature setting of 32°C
(90°F) is chosen, the system
remains at the maximum heat
setting. Choosing either
maximum setting will not cause
the vehicle to heat or cool any
faster.
Do not cover the solar sensor
located on the top of the instrument
panel near the windshield. This sensor regulates air temperature
based on sun load. For more
information on the solar sensor, see
“Sensors”
later in this section.
To avoid blowing cold air in cold
weather, the system delays turning
the fan on until warm air is
available. The length of delay
depends on the engine coolant
temperature. Pressing the fan
switch overrides this delay and
changes the fan to a selected
speed.
Manual Operation
D C(Fan Control): Press these
buttons to increase or decrease the
fan speed.
Pressing either fan button while in
automatic control places the fan
under manual control. The fan
setting remains displayed and the
AUTO light turns off. The air
delivery mode remains under
automatic control.
H G(Air Delivery Mode Control):
Press these buttons to change the
direction of the airflow in the vehicle.
Repeatedly press either button until
the desired mode appears on the
display.
Pressing either mode button while
the system is off changes the air
delivery mode without turning the
system on.
Pressing either mode button while
in automatic control places the
mode under manual control. The air
delivery mode setting displays and
the AUTO light turns off. The fan
remains under automatic control.
H(Vent): Air is directed to the
instrument panel outlets.
)(Bi-Level): Air is divided
between the instrument panel and
floor outlets. Some air is directed
toward the windshield and side
window outlets.
Page 274 of 556
Black plate (8,1)GMC Sierra Owner Manual - 2012 - CRC - 11/15/11
8-8 Climate Controls
6(Floor):Air is directed to the
floor outlets, with some to the
windshield, side window outlets, and
second row floor outlets. In this
mode, the system automatically
selects outside air.
-(Defog): This mode clears the
windows of fog or moisture. Air is
directed to the windshield, floor
outlets, and side window vents. In
this mode, the system turns off
recirculation and runs the air
conditioning compressor unless the
outside temperature is close to
freezing. The recirculation mode
cannot be selected while in the
defrost mode.
0(Defrost): This mode removes
fog or frost from the windshield
more quickly. Air is directed to the
windshield and side window vents,
with some directed to the floor
vents. In this mode, the system
automatically forces outside air
into the vehicle and runs the air
conditioning compressor unless the
outside temperature is close to freezing. The recirculation mode
cannot be selected while in the
defrost mode.
The passenger temperature control
cannot be activated while in defrost
mode. If the PASS button is
pressed, the button indicator flashes
three times and will not work. If the
passenger temperature buttons are
adjusted, the driver temperature
indicator changes. The passenger
temperature will not be displayed.
If vent, bi-level, or floor mode is
selected again, the climate control
system displays the previous
temperature settings.
Do not drive the vehicle until all
windows are clear.
#(Air Conditioning):
Press to
turn the air conditioning (A/C)
compressor on and off. An indicator
light comes on to show that the air
conditioning is on.
If this button is pressed when the
air conditioning compressor is
unavailable due to outside conditions, the indicator flashes
three times and then turns off.
If the air conditioning is on and the
outside temperature drops below a
temperature which is too cool for air
conditioning to be effective, the air
conditioning light turns off to show
that the air conditioning mode has
been canceled.
On hot days, open the windows long
enough to let hot inside air escape.
This helps to reduce the time it
takes for the vehicle to cool down.
It also helps the system to operate
more efficiently.
The air conditioning system
removes moisture from the air, so a
small amount of water might drip
under the vehicle while idling or
after turning off the engine. This is
normal.
@(Recirculation):
Press to
turn the recirculation mode on. An
indicator light comes on to show
that recirculation is on.
Page 305 of 556
Black plate (29,1)GMC Sierra Owner Manual - 2012 - CRC - 11/15/11
Driving and Operating 9-29
Fast Idle System
If the vehicle has this feature it is
available only with cruise control.
The manual fast idle switch is
operated using the cruise control
buttons located on the left hand side
of the steering wheel.
This system can be used to
increase engine idle speed
whenever the following conditions
are met:
.The park brake is set.
.The brake pedal is not pressed.
.The vehicle must not be moving
and the accelerator must not be
pressed.
To control the fast idle:
.To enable the Fast Idle System,
press and release the Cruise
Control On/Off button and
ensure that the switch LED is lit.
.Press and release the Cruise
Control Set switch. Engine
speed will be held at
approximately 1200 RPM. When the fast idle is active the
Driver Information Center (DIC) will
display
“FAST IDLE ON.”
One of the following actions will turn
off the fast idle:
.Pressing the brake.
.Selecting the Cruise Control
Cancel button.
.Releasing the Parking Brake.
.The transmission shift lever is
moved out of P (Park) or
N (Neutral).
.Selecting the Cruise Control
On/Off button when it was
previously on.
.Pressing the Cruise Control Set
switch a second time.
.Pressing the accelerator greater
than a quarter of the way down.
.Turning the ignition switch to the
LOCK/OFF position.
Retained Accessory
Power (RAP)
The following vehicle accessories
can be used for up to 10 minutes
after the engine is turned off:
.Audio System
.Power Windows
.OnStar System (if equipped)
.Sunroof (if equipped)
These features work when
the key is in ON/RUN or ACC/
ACCESSORY. Once the key is
turned from ON/RUN to LOCK/OFF,
the windows and sunroof continue
to work up to 10 minutes until any
door is opened. The radio continues
to work for up to 10 minutes or until
the driver door is opened.
Page 314 of 556
Black plate (38,1)GMC Sierra Owner Manual - 2012 - CRC - 11/15/11
9-38 Driving and Operating
1 (First):For the Hydra-Matic
4-Speed transmission this position
reduces vehicle speed even more
than 2 (Second) without using the
brakes. You can use it on very steep
hills, or in deep snow or mud. If the
shift lever is put in 1 (First) while the
vehicle is moving forward, the
transmission does not shift into first
gear until the vehicle is going slowly
enough.
For an Allison Transmission or
Hydra-Matic 6-Speed transmission,
this position reduces vehicle speed
without using the brakes. You can
use it for major/severe downgrades
and off-road driving where the
vehicle would otherwise accelerate
due to steepness of grade. When
you shift to 1 (First) it provides the
lowest gear appropriate to current
road speed and continues to
downshift as the vehicle slows,
eventually downshifting to
1 (First) gear. Notice:
Spinning the tires
or holding the vehicle in one
place on a hill using only the
accelerator pedal may damage
the transmission. The repair will
not be covered by the vehicle
warranty. If you are stuck, do not
spin the tires. When stopping on
a hill, use the brakes to hold the
vehicle in place.
Manual Mode
Range Selection Mode
(Allison®Transmission or
Hydra-Matic®6-Speed
Transmission)
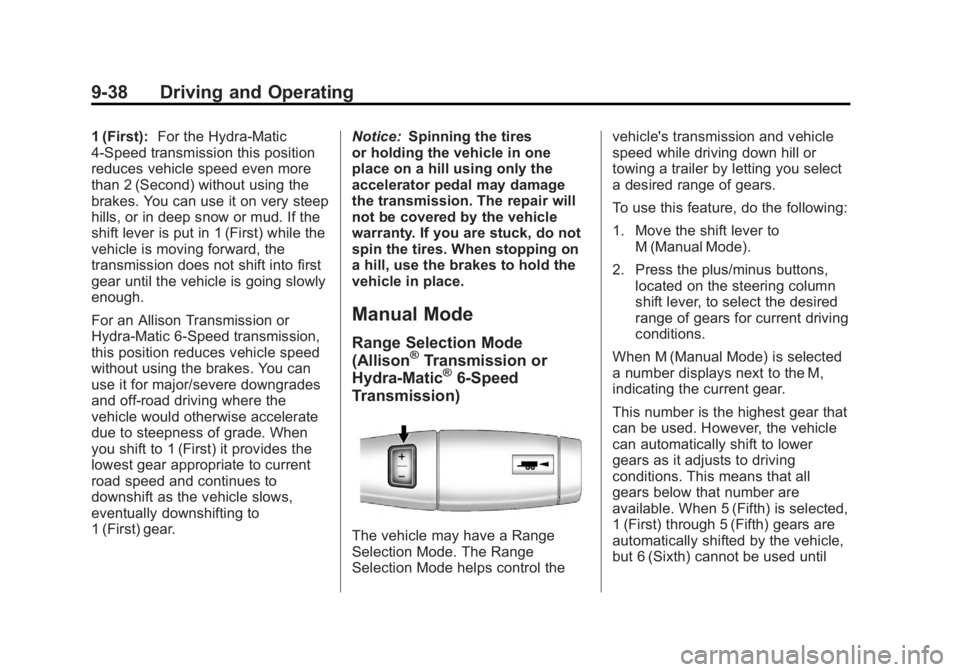
The vehicle may have a Range
Selection Mode. The Range
Selection Mode helps control the vehicle's transmission and vehicle
speed while driving down hill or
towing a trailer by letting you select
a desired range of gears.
To use this feature, do the following:
1. Move the shift lever to
M (Manual Mode).
2. Press the plus/minus buttons, located on the steering column
shift lever, to select the desired
range of gears for current driving
conditions.
When M (Manual Mode) is selected
a number displays next to the M,
indicating the current gear.
This number is the highest gear that
can be used. However, the vehicle
can automatically shift to lower
gears as it adjusts to driving
conditions. This means that all
gears below that number are
available. When 5 (Fifth) is selected,
1 (First) through 5 (Fifth) gears are
automatically shifted by the vehicle,
but 6 (Sixth) cannot be used until
Page 340 of 556
Black plate (64,1)GMC Sierra Owner Manual - 2012 - CRC - 11/15/11
9-64 Driving and Operating
The delay after shifting out of
R (Reverse) is approximately
10 seconds. The delay can be
canceled by performing one of the
following:
.Pressing a hard key on the
navigation system.
.Shifting into P (Park).
.Reaching a vehicle speed of
8 km/h (5 mph).
Adjusting the Brightness and
Contrast of the Screen
To adjust the brightness and
contrast of the screen, press the
MENU button while the RVC image
is on the display. Any adjustments
made will only affect the RVC
screen.
](Brightness): Touch the + (plus)
or –(minus) screen buttons to
increase or decrease the brightness
of the screen.
_(Contrast): Touch the + (plus)
or –(minus) screen buttons to
increase or decrease the contrast of
the screen.
Symbols
The navigation system may have a
feature that allows for viewing
parking assist symbols on the
navigation screen while using the
RVC. The Ultrasonic Rear Park
Assist (URPA) system must not be
disabled to use the caution symbols.
If URPA has been disabled and the
symbols have been turned on,
the Rear Parking Assist Symbols
Unavailable error message may
display. See Ultrasonic Parking
Assist on page 9‑61.
The symbols appear near objects
detected by the URPA system. The
symbol may cover the object when
viewing the navigation screen.
To turn the symbols on or off:
1. Make sure that URPA has not been disabled.
2. Shift into P (Park). 3. Press MENU to enter the
configure menu options. Turn
the Multifunction knob until the
Display feature is highlighted
and press the Multifunction
knob. Or press the Display
screen button
4. Select the Rear Camera Options screen button. The Rear Camera
Options screen displays.
5. Touch the Symbols screen button. The screen button will
be highlighted when on.
Guidelines
The RVC system has a guideline
overlay that can help the driver align
the vehicle when backing into a
parking spot.
If the vehicle has dual rear wheels,
this feature will not be available.
To turn the guidelines on or off:
1. Make sure that URPA has not been disabled.
2. Shift into P (Park).
Page 377 of 556
Black plate (101,1)GMC Sierra Owner Manual - 2012 - CRC - 11/15/11
Driving and Operating 9-101
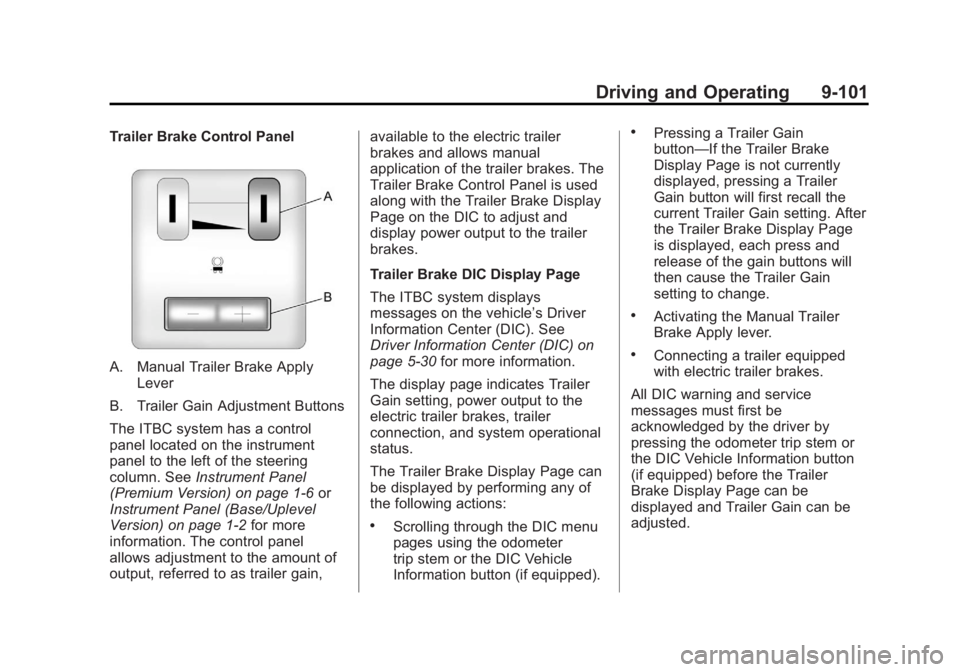
Trailer Brake Control Panel
A. Manual Trailer Brake ApplyLever
B. Trailer Gain Adjustment Buttons
The ITBC system has a control
panel located on the instrument
panel to the left of the steering
column. See Instrument Panel
(Premium Version) on page 1‑6 or
Instrument Panel (Base/Uplevel
Version) on page 1‑2 for more
information. The control panel
allows adjustment to the amount of
output, referred to as trailer gain, available to the electric trailer
brakes and allows manual
application of the trailer brakes. The
Trailer Brake Control Panel is used
along with the Trailer Brake Display
Page on the DIC to adjust and
display power output to the trailer
brakes.
Trailer Brake DIC Display Page
The ITBC system displays
messages on the vehicle’s Driver
Information Center (DIC). See
Driver Information Center (DIC) on
page 5‑30
for more information.
The display page indicates Trailer
Gain setting, power output to the
electric trailer brakes, trailer
connection, and system operational
status.
The Trailer Brake Display Page can
be displayed by performing any of
the following actions:
.Scrolling through the DIC menu
pages using the odometer
trip stem or the DIC Vehicle
Information button (if equipped).
.Pressing a Trailer Gain
button—If the Trailer Brake
Display Page is not currently
displayed, pressing a Trailer
Gain button will first recall the
current Trailer Gain setting. After
the Trailer Brake Display Page
is displayed, each press and
release of the gain buttons will
then cause the Trailer Gain
setting to change.
.Activating the Manual Trailer
Brake Apply lever.
.Connecting a trailer equipped
with electric trailer brakes.
All DIC warning and service
messages must first be
acknowledged by the driver by
pressing the odometer trip stem or
the DIC Vehicle Information button
(if equipped) before the Trailer
Brake Display Page can be
displayed and Trailer Gain can be
adjusted.
Page 378 of 556
Black plate (102,1)GMC Sierra Owner Manual - 2012 - CRC - 11/15/11
9-102 Driving and Operating
TRAILER GAIN: This setting is
displayed any time the Trailer Brake
Display Page is active. This setting
can be adjusted from 0.0 to 10.0
with either a trailer connected or
disconnected. To adjust the Trailer
Gain, press one of the Trailer Gain
adjustment buttons located on the
Trailer Brake Control Panel. Press
and hold a gain button to cause the
Trailer Gain to continuously adjust.
To turn the output to the trailer
off, adjust the Trailer Gain setting
to 0.0 (zero).
0.0 (zero) gain is the factory default
setting. To properly adjust trailer
gain, see“Trailer Gain Adjustment
Procedure” later in this section.
TRAILER OUTPUT: This is
displayed any time a trailer with
electric brakes is connected. Output
to the electric brakes is based on
the amount of vehicle braking
present and relative to the Trailer
Gain setting. Output is displayed
from 0 to 10 bars for each gain
setting. Non-hybrid vehicles with Trailer
Sway Control (TSC) or Hill Start
Assist (HSA), output to the electric
trailer brakes may be displayed
when the systems are active. See
Trailer Sway Control (TSC) on
page 9‑105
andHill Start Assist
(HSA) on page 9‑54.
The Trailer Output will indicate
“- - - - - -” on the Trailer Brake
Display Page whenever the
following occur:
.No trailer is connected
.A trailer without electric brakes
is connected (no DIC message
is displayed)
.A trailer with electric brakes
has become disconnected
(a CHECK TRAILER WIRING
message will also be displayed
on the DIC)
.There is a fault present in the
wiring to the electric trailer
brakes (a CHECK TRAILER
WIRING message will also be
displayed on the DIC)
.There is a fault in the ITBC
system (a SERVICE TRAILER
BRAKE SYSTEM message will
also be displayed in the DIC)
Manual Trailer Brake Apply
The Manual Trailer Brake Apply
Lever is located on the Trailer
Brake Control Panel and is used to
apply the trailer ’s electric brakes
independent of the vehicle’s brakes.
This lever is used in the Trailer Gain
Adjustment Procedure to properly
adjust the power output to the trailer
brakes. Sliding the lever to the left
will apply only the trailer brakes.
The power output to the trailer is
indicated in the Trailer Brake
Display Page on the DIC. If the
vehicle’s service brakes are applied
while using the Manual Trailer Brake
Apply Lever, the trailer output power
will be the greater of the two.
The trailer's and the vehicle's brake
lamps will come on when either
vehicle braking or manual trailer
brakes are applied.