2012 GMC SIERRA 1500 buttons
[x] Cancel search: buttonsPage 379 of 556
Black plate (103,1)GMC Sierra Owner Manual - 2012 - CRC - 11/15/11
Driving and Operating 9-103
Trailer Gain Adjustment Procedure
Trailer Gain should be set for a
specific trailering condition and
must be adjusted any time vehicle
loading, trailer loading, or road
surface conditions change.
Setting the Trailer Gain properly is
needed for the best trailer stopping
performance. A trailer that is
over-gained may result in locked
trailer brakes. A trailer that is
under-gained may result in not
enough trailer braking. Both of these
conditions may result in poorer
stopping and stability of the vehicle
and trailer.
Use the following procedure to
correctly adjust Trailer Gain for each
towing condition:
1. Make sure the trailer brakes arein proper working condition.
2. Connect a properly loaded trailer to the vehicle and make all
necessary mechanical and electrical connections. See
Vehicle Load Limits on
page 9‑16
for more information.
3. After the electrical connection is made to a trailer equipped with
electric brakes:
.A TRAILER CONNECTED
message will be briefly
displayed on the DIC.
.The Trailer Brake Display
Page will appear on the
DIC showing TRAILER
GAIN and TRAILER
OUTPUT.
.In the Trailer Output display
on the DIC, “- - - - - -”will
disappear if there is no
error present. Connecting
a trailer without electric
brakes will not clear the
six dashed lines.
4. Adjust the Trailer Gain by using the gain adjustment (+ / -)
buttons on the Trailer Brake
Control Panel. 5. Drive the vehicle with the trailer
attached on a level road surface
representative of the towing
condition and free of traffic at
about 32 to 40 km/h (20 to
25 mph) and fully apply the
Manual Trailer Brake Apply
Lever.
Adjusting trailer gain at speeds
lower than 32 to 40 km/h
(20 to 25 mph) may result in
an incorrect gain setting.
6. Adjust the Trailer Gain to just below the point of trailer wheel
lock-up, indicated by trailer
wheel squeal or tire smoke when
a trailer wheel locks.
Trailer wheel lock-up may not
occur if towing a heavily loaded
trailer. In this case, adjust the
Trailer Gain to the highest
allowable setting for the towing
condition.
Page 396 of 556
Black plate (10,1)GMC Sierra Owner Manual - 2012 - CRC - 11/15/11
10-10 Vehicle Care
Engine Oil Life System
When to Change Engine Oil
This vehicle has a computer system
that indicates when to change the
engine oil and filter. This is based
on a combination of factors which
include engine revolutions, engine
temperature, and miles driven.
Based on driving conditions, the
mileage at which an oil change is
indicated can vary considerably. For
the oil life system to work properly,
the system must be reset every time
the oil is changed.
On some vehicles, when the system
has calculated that oil life has been
diminished, a CHANGE ENGINE
OIL SOON message comes on
to indicate that an oil change is
necessary. SeeEngine Oil
Messages on page 5‑42. Change
the oil as soon as possible within
the next 1 000 km (600 mi). It is
possible that, if driving under the best conditions, the oil life system
might indicate that an oil change is
not necessary for up to a year.
The engine oil and filter must be
changed at least once a year and,
at this time, the system must be
reset. For vehicles without the
CHANGE ENGINE OIL SOON
message, an oil change is
needed when the OIL LIFE
REMAINING percentage is near
0%. Your dealer has trained service
people who will perform this work
and reset the system. It is also
important to check the oil regularly
over the course of an oil drain
interval and keep it at the proper
level.
If the system is ever reset
accidentally, the oil must be
changed at 5 000 km (3,000 mi)
since the last oil change.
Remember to reset the oil life
system whenever the oil is changed.
How to Reset the Engine Oil
Life System
Reset the system whenever the
engine oil is changed so that the
system can calculate the next
engine oil change. Always reset the
engine oil life to 100% after every oil
change. It will not reset itself. To
reset the system on most vehicles:
1. Display the OIL LIFE
REMAINING on the DIC.
If the vehicle does not have
DIC buttons, the vehicle must
be in P (Park) to access this
display. See Driver Information
Center (DIC) on page 5‑30.
2. Press and hold the SET/RESET button on the DIC, or the trip
odometer reset stem if the
vehicle does not have DIC
buttons, for more than
five seconds. The oil life will
change to 100%.
Page 448 of 556
Black plate (62,1)GMC Sierra Owner Manual - 2012 - CRC - 11/15/11
10-62 Vehicle Care
Tire Pressure Monitor
Operation
This vehicle may have a Tire
Pressure Monitor System (TPMS).
The TPMS is designed to warn the
driver when a low tire pressure
condition exists. TPMS sensors are
mounted onto each tire and wheel
assembly, excluding the spare tire
and wheel assembly. The TPMS
sensors monitor the air pressure in
the tires and transmit the tire
pressure readings to a receiver
located in the vehicle.
When a low tire pressure condition
is detected, the TPMS illuminates
the low tire pressure warning light
located on the instrument cluster.If the warning light comes on, stop
as soon as possible and inflate the
tires to the recommended pressure
shown on the Tire and Loading
Information label. See
Vehicle Load
Limits on page 9‑16.
A message to check the pressure in
a specific tire displays in the Driver
Information Center (DIC). The low
tire pressure warning light and the
DIC warning message come on at
each ignition cycle until the tires
are inflated to the correct inflation
pressure. If the vehicle has DIC
buttons, tire pressure levels can be
viewed. For additional information
and details about the DIC operation
and displays, see Driver Information
Center (DIC) on page 5‑30 andTire
Messages on page 5‑45.
The low tire pressure warning light
may come on in cool weather when
the vehicle is first started, and then
turn off as the vehicle is driven.
This could be an early indicator that
the air pressure is getting low and
needs to be inflated to the proper
pressure. A Tire and Loading Information
label shows the size of the original
equipment tires and the correct
inflation pressure for the tires when
they are cold. See
Vehicle Load
Limits on page 9‑16, for an example
of the Tire and Loading Information
label and its location. Also see Tire
Pressure on page 10‑58.
The TPMS can warn about a
low tire pressure condition but it
does not replace normal tire
maintenance. See Tire Inspection
on page 10‑65, Tire Rotation on
page 10‑65 andTires on
page 10‑50.
Notice: Tire sealant materials are
not all the same. A non-approved
tire sealant could damage the
TPMS sensors. TPMS sensor
damage caused by using an
incorrect tire sealant is not
covered by the vehicle
warranty. Always use only the
GM-approved tire sealant
available through your dealer or
included in the vehicle.
Page 450 of 556
Black plate (64,1)GMC Sierra Owner Manual - 2012 - CRC - 11/15/11
10-64 Vehicle Care
The malfunction light and the DIC
message should go off at the next
ignition cycle. The sensors are
matched to the tire/wheel positions,
using a TPMS relearn tool, in the
following order: driver side front tire,
passenger side front tire, passenger
side rear tire, and driver side rear.
See your dealer for service or to
purchase a relearn tool.
There are two minutes to match
the first tire/wheel position, and
five minutes overall to match all
four tire/wheel positions. If it takes
longer, the matching process stops
and must be restarted.
The TPMS sensor matching
process is:
1. Set the parking brake.
2. Turn the ignition to ON/RUN withthe engine off.
3. Press the Remote Keyless Entry (RKE) transmitter's LOCK
and UNLOCK buttons at the
same time for approximately
five seconds. The horn sounds twice to signal the receiver
is in relearn mode and TIRE
LEARNING ACTIVE message
displays on the DIC screen.
If the vehicle does not have
RKE, press the Driver
Information Center (DIC) vehicle
information button until the
PRESS
VTO RELEARN TIRE
POSITIONS message displays.
The horn sounds twice to signal
the receiver is in relearn mode
and TIRE LEARNING ACTIVE
message displays on the DIC
screen.
If the vehicle does not have RKE
or DIC buttons, press the trip
odometer reset stem located on
the instrument panel cluster until
the PRESS
VTO RELEARN
TIRE POSITIONS message
displays. The horn sounds twice
to signal the receiver is in
relearn mode and TIRE
LEARNING ACTIVE message
displays on the DIC screen. 4. Start with the driver side
front tire.
5. Place the relearn tool against the tire sidewall, near the valve
stem. Then press the button to
activate the TPMS sensor.
A horn chirp confirms that the
sensor identification code has
been matched to this tire and
wheel position.
6. Proceed to the passenger side front tire, and repeat the
procedure in Step 5.
7. Proceed to the passenger side rear tire, and repeat the
procedure in Step 5.
8. Proceed to the driver side rear tire, and repeat the procedure in
Step 5. The horn sounds two
times to indicate the sensor
identification code has been
matched to the driver side rear
tire, and the TPMS sensor
matching process is no longer
active. The TIRE LEARNING
ACTIVE message on the DIC
display screen goes off.
Page 535 of 556
Black plate (1,1)GMC Sierra Owner Manual - 2012 - CRC - 11/15/11
OnStar 14-1
OnStar
OnStar Overview
OnStar Overview . . . . . . . . . . . . 14-1
OnStar Services
Emergency . . . . . . . . . . . . . . . . . . 14-2
Security . . . . . . . . . . . . . . . . . . . . . . 14-2
Navigation . . . . . . . . . . . . . . . . . . . 14-2
Connections . . . . . . . . . . . . . . . . . 14-4
Diagnostics . . . . . . . . . . . . . . . . . . 14-5
OnStar Additional Information
OnStar AdditionalInformation . . . . . . . . . . . . . . . . . 14-5
OnStar Overview
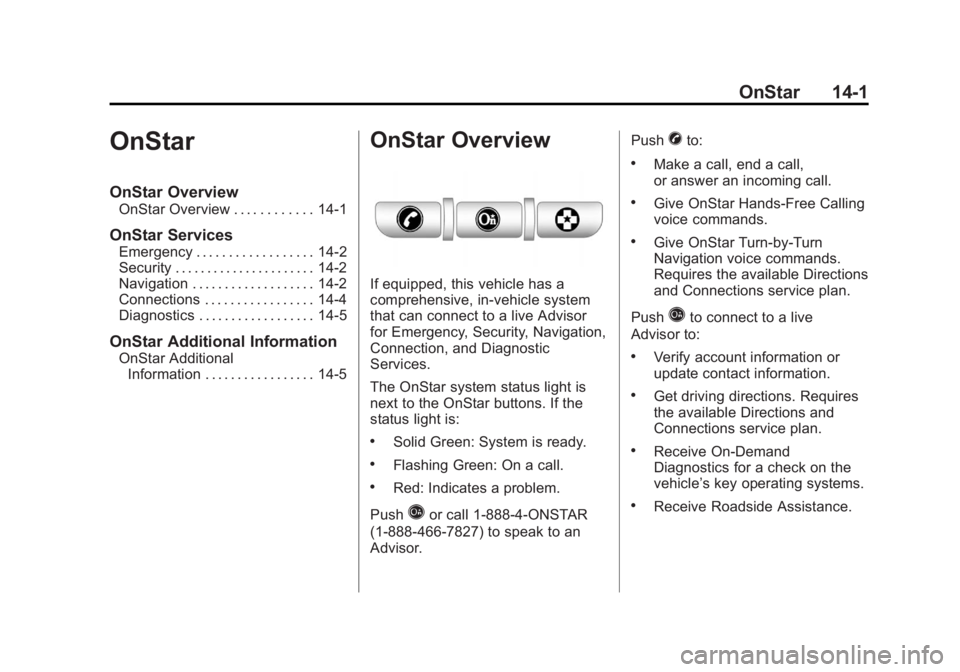
If equipped, this vehicle has a
comprehensive, in-vehicle system
that can connect to a live Advisor
for Emergency, Security, Navigation,
Connection, and Diagnostic
Services.
The OnStar system status light is
next to the OnStar buttons. If the
status light is:
.Solid Green: System is ready.
.Flashing Green: On a call.
.Red: Indicates a problem.
Push
Qor call 1‐888‐4‐ONSTAR
(1‐888‐466‐7827) to speak to an
Advisor. Push
Xto:
.Make a call, end a call,
or answer an incoming call.
.Give OnStar Hands-Free Calling
voice commands.
.Give OnStar Turn-by-Turn
Navigation voice commands.
Requires the available Directions
and Connections service plan.
Push
Qto connect to a live
Advisor to:
.Verify account information or
update contact information.
.Get driving directions. Requires
the available Directions and
Connections service plan.
.Receive On-Demand
Diagnostics for a check on the
vehicle’s key operating systems.
.Receive Roadside Assistance.