2012 FORD F SERIES MOTORHOME AND COMMERCIAL CHASSIS engine
[x] Cancel search: enginePage 14 of 160
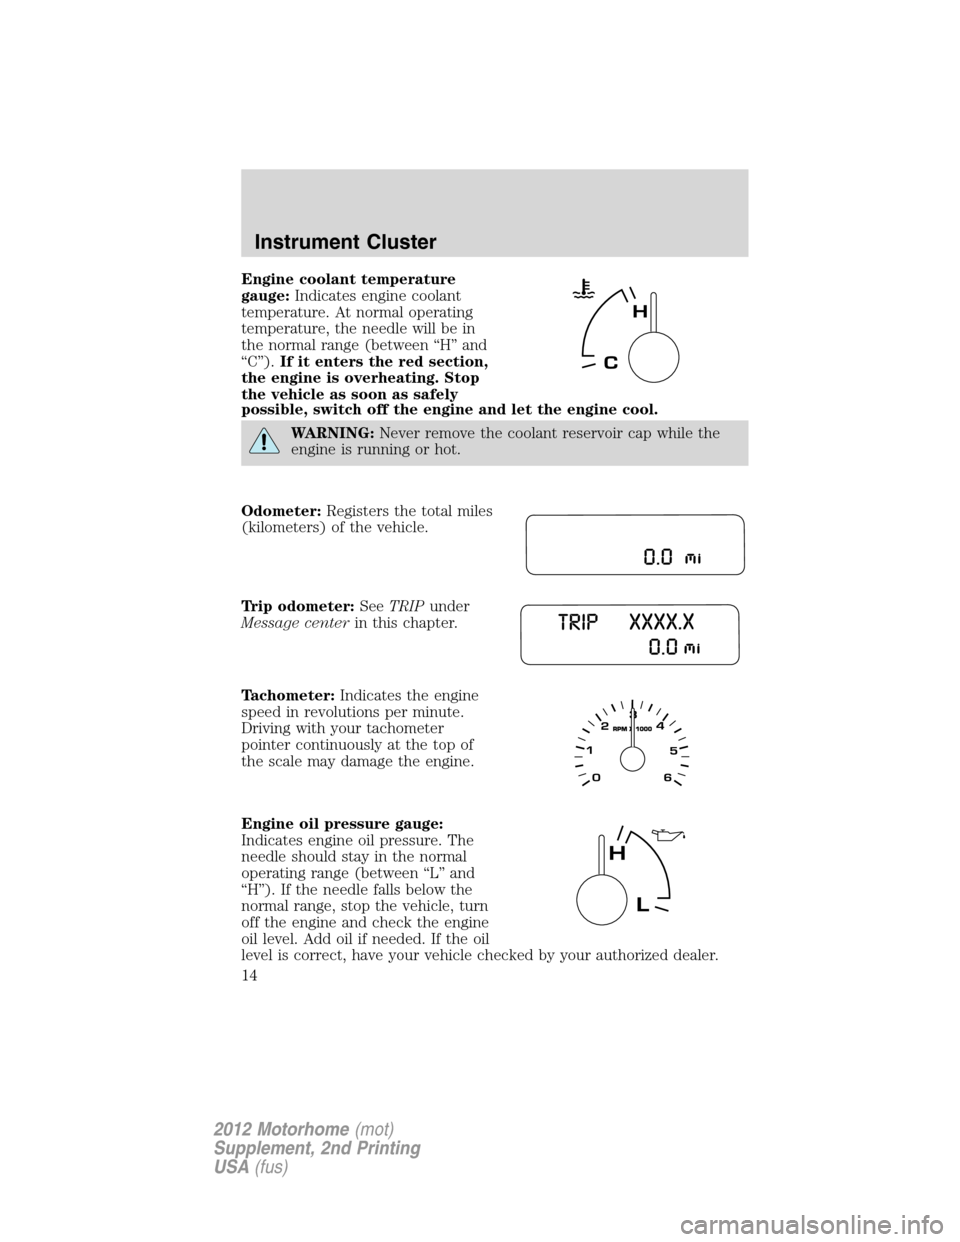
Engine coolant temperature
gauge:Indicates engine coolant
temperature. At normal operating
temperature, the needle will be in
the normal range (between “H” and
“C”).If it enters the red section,
the engine is overheating. Stop
the vehicle as soon as safely
possible, switch off the engine and let the engine cool.
WARNING:Never remove the coolant reservoir cap while the
engine is running or hot.
Odometer:Registers the total miles
(kilometers) of the vehicle.
Trip odometer:SeeTRIPunder
Message centerin this chapter.
Tachometer:Indicates the engine
speed in revolutions per minute.
Driving with your tachometer
pointer continuously at the top of
the scale may damage the engine.
Engine oil pressure gauge:
Indicates engine oil pressure. The
needle should stay in the normal
operating range (between “L” and
“H”). If the needle falls below the
normal range, stop the vehicle, turn
off the engine and check the engine
oil level. Add oil if needed. If the oil
level is correct, have your vehicle checked by your authorized dealer.
Instrument Cluster
14
2012 Motorhome(mot)
Supplement, 2nd Printing
USA(fus)
Page 17 of 160
XXX° (outside air temperature)
This displays the outside temperature.
Refer toUNITSlater in this section to switch the display from Metric to
English.
MILES (km) TO E
This displays an estimate of approximately how far you can drive with
the fuel remaining in your tank under normal driving conditions.
Remember to turn the ignition off when refueling to allow this feature to
correctly detect the added fuel.
The DTE function will display FUEL LEVEL LOW when you have
approximately 50 miles (80 km), to empty. Press RESET to clear this
warning message. It will return at approximately 25 miles (40 km),
10 miles (16 km) and 0 miles (0 km) miles to empty.
DTE is calculated using a running average fuel economy, which is based
on your recent driving history of 500 miles (800 km).
ENG HRS
Registers the accumulated time the engine has been running.
System check and vehicle feature customization
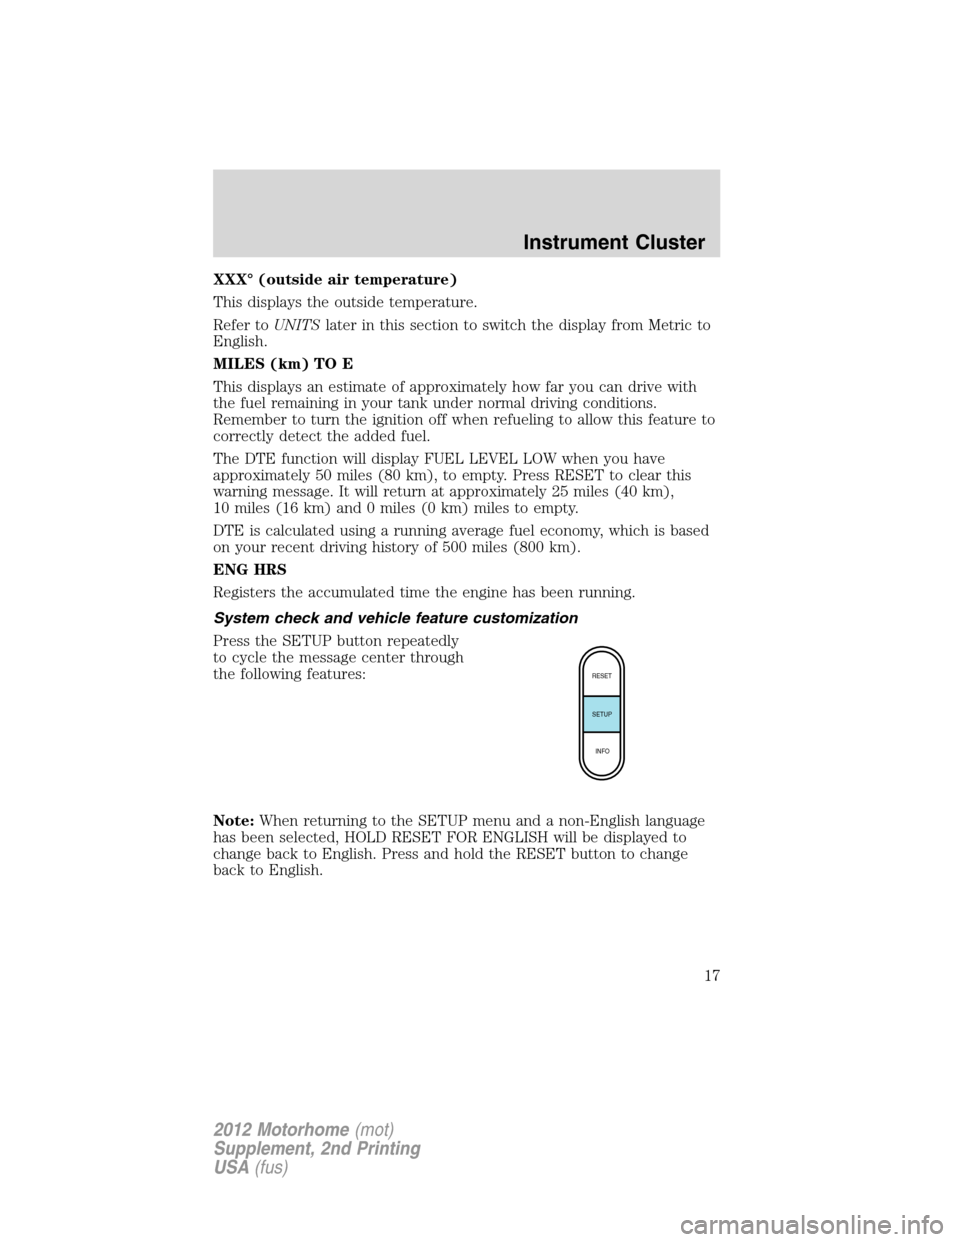
Press the SETUP button repeatedly
to cycle the message center through
the following features:
Note:When returning to the SETUP menu and a non-English language
has been selected, HOLD RESET FOR ENGLISH will be displayed to
change back to English. Press and hold the RESET button to change
back to English.
RESET
SETUP
INFO
Instrument Cluster
17
2012 Motorhome(mot)
Supplement, 2nd Printing
USA(fus)
Page 18 of 160
PRESS RESET FOR SYS CHECK
When this message appears, press the RESET button and the message
center will begin to cycle through the following systems and provide a
status of the item if needed.
Note:Some systems show a message only if a condition is present.
1. ENGINE TEMP
2. TRANS TEMP
3. OIL PRESSURE
4. BRAKE FLUID LEVEL
5. FUEL LEVEL (if equipped)
UNITS
Displays the current units English or Metric.
Press the RESET button to change from English to Metric.
ENGLISH RESET FOR NEW
Allows you to choose which language the message center will display in.
Selectable languages are English, Spanish, or French.
Press the RESET button to cycle the message center through English,
Spanish and French language choices. Press and hold the RESET button
for two seconds to set the language choice.
System warnings
System warnings alert you to possible problems or malfunctions in your
vehicle’s operating systems.
In the event of a multiple warning situation, the message center will cycle
the display to show all warnings by displaying each one for four seconds.
The message center will display the last selected feature if there are no
more warning messages.
Types of messages and warnings:
•Some messages will appear briefly to inform you of something you
may need to take action on or be informed of.
•Some messages will appear once and then again when the vehicle is
restarted.
•Some messages will reappear after clearing or being reset if a problem
or condition is still present and needs your attention.
•Some messages can be acknowledged and reset by pressing RESET.
This allows you to use the full message center functionality by clearing
the message.
Instrument Cluster
18
2012 Motorhome(mot)
Supplement, 2nd Printing
USA(fus)
Page 19 of 160
REDUCED ENGINE POWER— Displayed when the engine is
overheating. Stop the vehicle as soon as safely possible, turn off the
engine. If the warning stays on followed by an indicator chime or
continues to come on, contact your authorized dealer as soon as
possible.
WARNING:Never remove the coolant reservoir cap while the
engine is running or hot.
STOP ENGINE SAFELY— Displayed when the engine is overheating.
Stop the vehicle as soon as safely possible, turn off the engine. If the
warning stays on followed by an indicator chime or continues to come
on, contact your authorized dealer as soon as possible.
FUEL LEVEL LOW— Displayed as an early reminder of a low fuel
condition.
BRAKE FLUID LEVEL LOW— Indicates the brake fluid level is low
and the brake system should be inspected immediately. Refer toBrake
fluidin theMaintenance and Specificationschapter.
LOW OIL PRESSURE— Displayed when the engine oil pressure is low.
If this warning message is displayed, check the level of the engine oil.
Refer toEngine oilin theMaintenance and Specificationschapter for
information about adding engine oil. If the oil level is OK and this
warning persists, shut down the engine immediately and contact your
authorized dealer as soon as possible.
CHECK ENGINE TEMPERATURE— Displayed when the engine
coolant is overheating. Stop the vehicle as soon as safely possible, turn
off the engine and let it cool. Check the coolant and coolant level. Refer
toEngine coolantin theMaintenance and Specificationschapter. If
the warning stays on or continues to come on, contact your authorized
dealer as soon as possible.
CHECK TRANS TEMPERATURE— Displayed when the transmission
fluid is overheating. This warning may appear when towing heavy loads
or when driving in a low gear at a high speed for an extended period of
time. Stop the vehicle as soon as safely possible, turn off the engine and
let the transmission cool. Refer toTransmission fluidin the
Maintenance and Specificationschapter.
Instrument Cluster
19
2012 Motorhome(mot)
Supplement, 2nd Printing
USA(fus)
Page 44 of 160
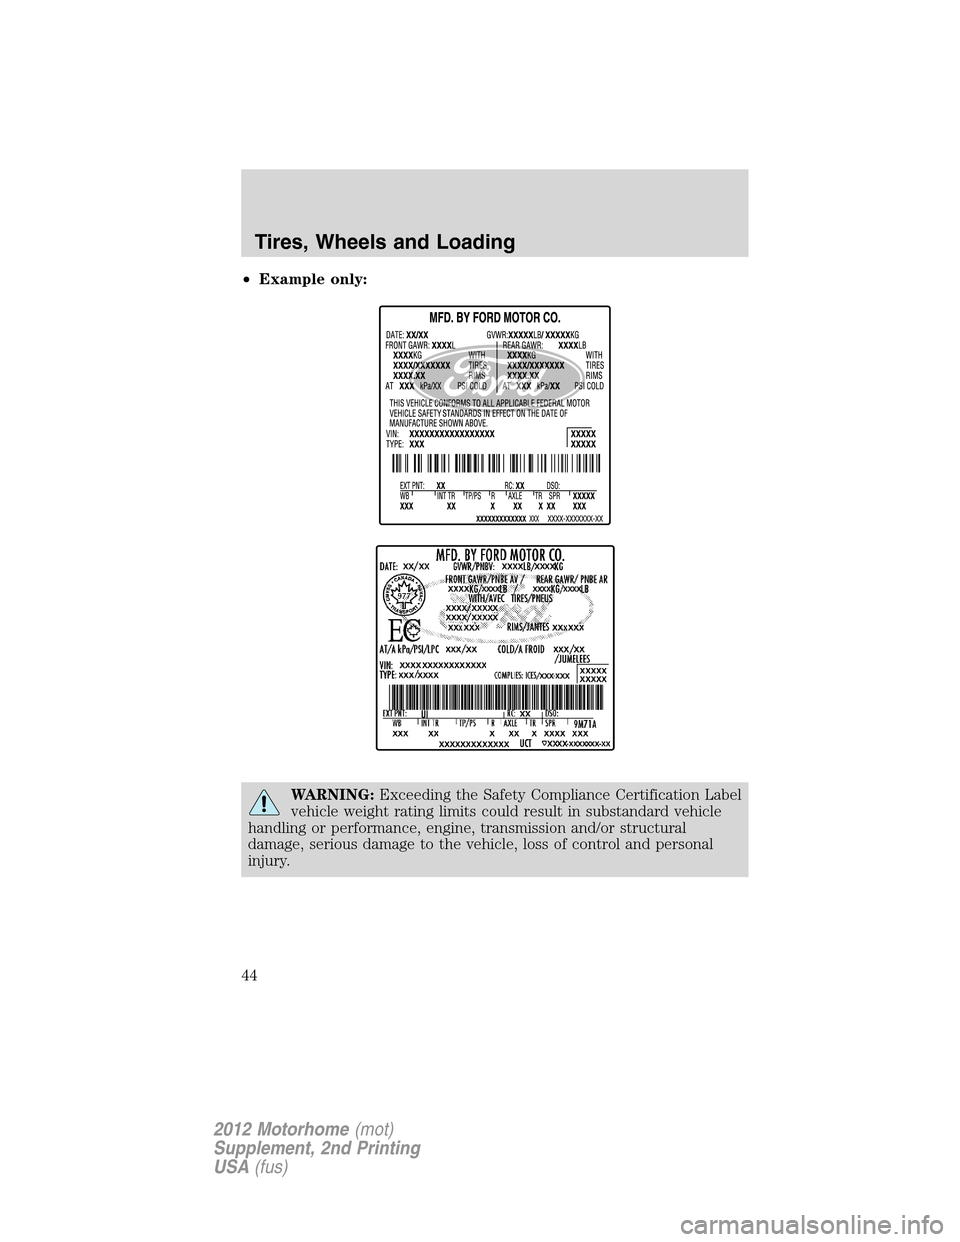
•Example only:
WARNING:Exceeding the Safety Compliance Certification Label
vehicle weight rating limits could result in substandard vehicle
handling or performance, engine, transmission and/or structural
damage, serious damage to the vehicle, loss of control and personal
injury.
Tires, Wheels and Loading
44
2012 Motorhome(mot)
Supplement, 2nd Printing
USA(fus)
Page 48 of 160
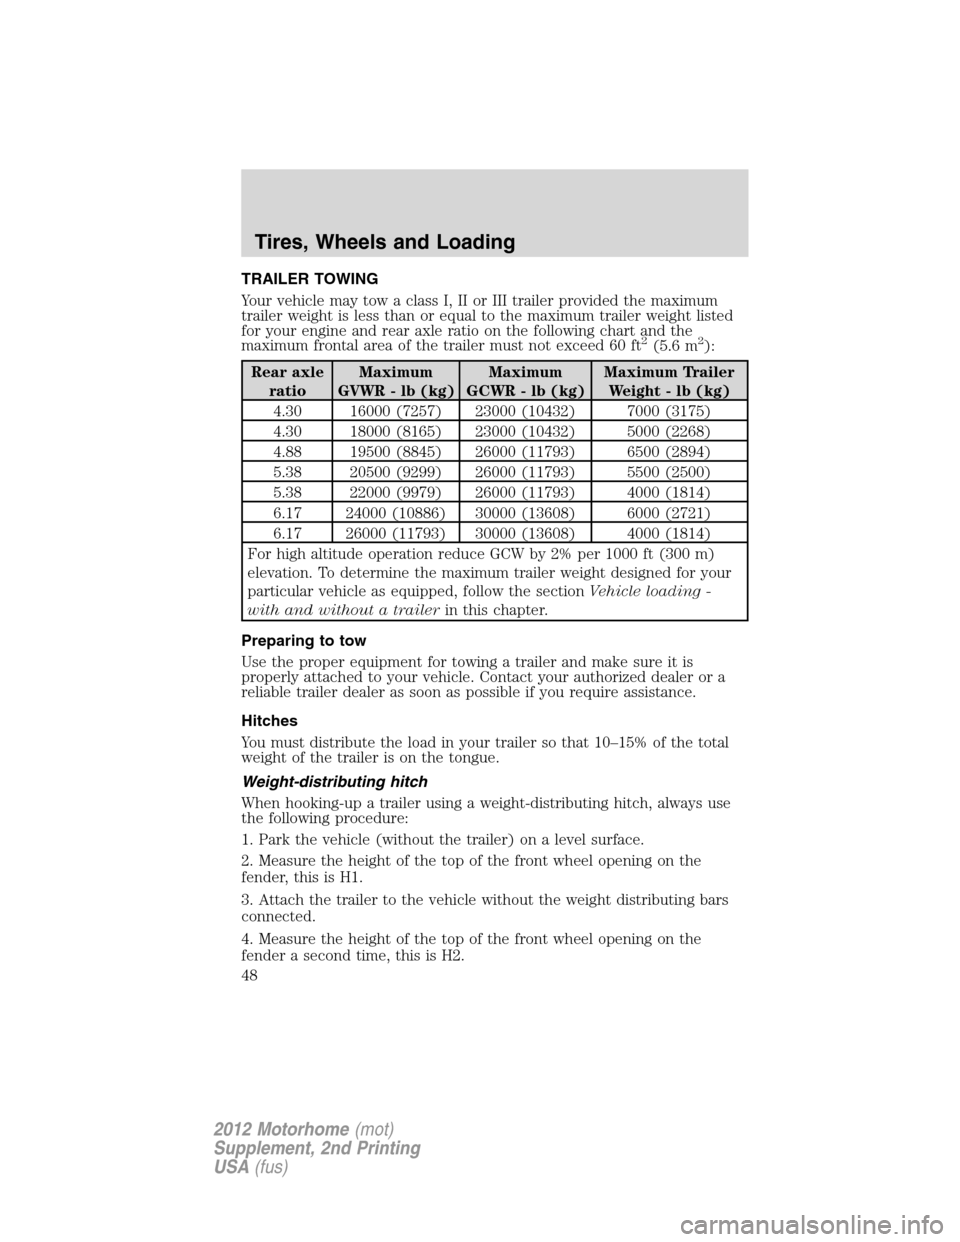
TRAILER TOWING
Your vehicle may tow a class I, II or III trailer provided the maximum
trailer weight is less than or equal to the maximum trailer weight listed
for your engine and rear axle ratio on the following chart and the
maximum frontal area of the trailer must not exceed 60 ft
2(5.6 m2):
Rear axle
ratioMaximum
GVWR - lb (kg)Maximum
GCWR - lb (kg)Maximum Trailer
Weight - lb (kg)
4.30 16000 (7257) 23000 (10432) 7000 (3175)
4.30 18000 (8165) 23000 (10432) 5000 (2268)
4.88 19500 (8845) 26000 (11793) 6500 (2894)
5.38 20500 (9299) 26000 (11793) 5500 (2500)
5.38 22000 (9979) 26000 (11793) 4000 (1814)
6.17 24000 (10886) 30000 (13608) 6000 (2721)
6.17 26000 (11793) 30000 (13608) 4000 (1814)
For high altitude operation reduce GCW by 2% per 1000 ft (300 m)
elevation. To determine the maximum trailer weight designed for your
particular vehicle as equipped, follow the sectionVehicle loading -
with and without a trailerin this chapter.
Preparing to tow
Use the proper equipment for towing a trailer and make sure it is
properly attached to your vehicle. Contact your authorized dealer or a
reliable trailer dealer as soon as possible if you require assistance.
Hitches
You must distribute the load in your trailer so that 10–15% of the total
weight of the trailer is on the tongue.
Weight-distributing hitch
When hooking-up a trailer using a weight-distributing hitch, always use
the following procedure:
1. Park the vehicle (without the trailer) on a level surface.
2. Measure the height of the top of the front wheel opening on the
fender, this is H1.
3. Attach the trailer to the vehicle without the weight distributing bars
connected.
4. Measure the height of the top of the front wheel opening on the
fender a second time, this is H2.
Tires, Wheels and Loading
48
2012 Motorhome(mot)
Supplement, 2nd Printing
USA(fus)
Page 50 of 160
Driving while you tow
When towing a trailer:
•Keep your speed no faster than 70 mph (113 km/h) during the first
500 miles (800 km) of towing a trailer, and don’t make full throttle
starts.
•Turn off the speed control. The speed control may shut off
automatically when you are towing on long, steep grades.
•Use a lower gear to eliminate excessive shifting and assist in
transmission cooling. For additional information, refer toAutomatic
transmission operationin theDrivingchapter.
•Allow more distance for stopping with a trailer attached; anticipate
stops and brake gradually.
Trailer towing tips
•Practice turning, stopping and backing-up before starting on a trip to
get the feel of the vehicle-trailer combination. When turning, make
wider turns so the trailer wheels will clear curbs and other obstacles.
•To aid in engine/transmission cooling and A/C efficiency during hot
weather while stopped in traffic, place the gearshift lever in P (Park).
•After you have traveled 50 miles (80 km), thoroughly check your
hitch, electrical connections and trailer wheel lug nuts.
•If you are driving down a long or steep hill, shift to a lower gear. Do
not apply the brakes continuously, as they may overheat and become
less effective.
•If you will be towing a trailer frequently in hot weather, hilly
conditions, at GCWR, or any combination of these factors, consider
refilling your rear axle with synthetic gear lube if not already so
equipped. Refer to theMaintenance and Specificationschapter for
the lubricant specification. Remember that regardless of the rear axle
lube used, do not tow a trailer for the first 1,000 miles (1,600 km) of a
new vehicle, and that the first 500 miles (800 km) of towing be done
at no faster than 70 mph (113 km/h) with no full throttle starts.
•Vehicles with trailers should not be parked on a grade. If you must
park on a grade, place wheel chocks under the trailer’s wheels.
Tires, Wheels and Loading
50
2012 Motorhome(mot)
Supplement, 2nd Printing
USA(fus)
Page 51 of 160
STARTING
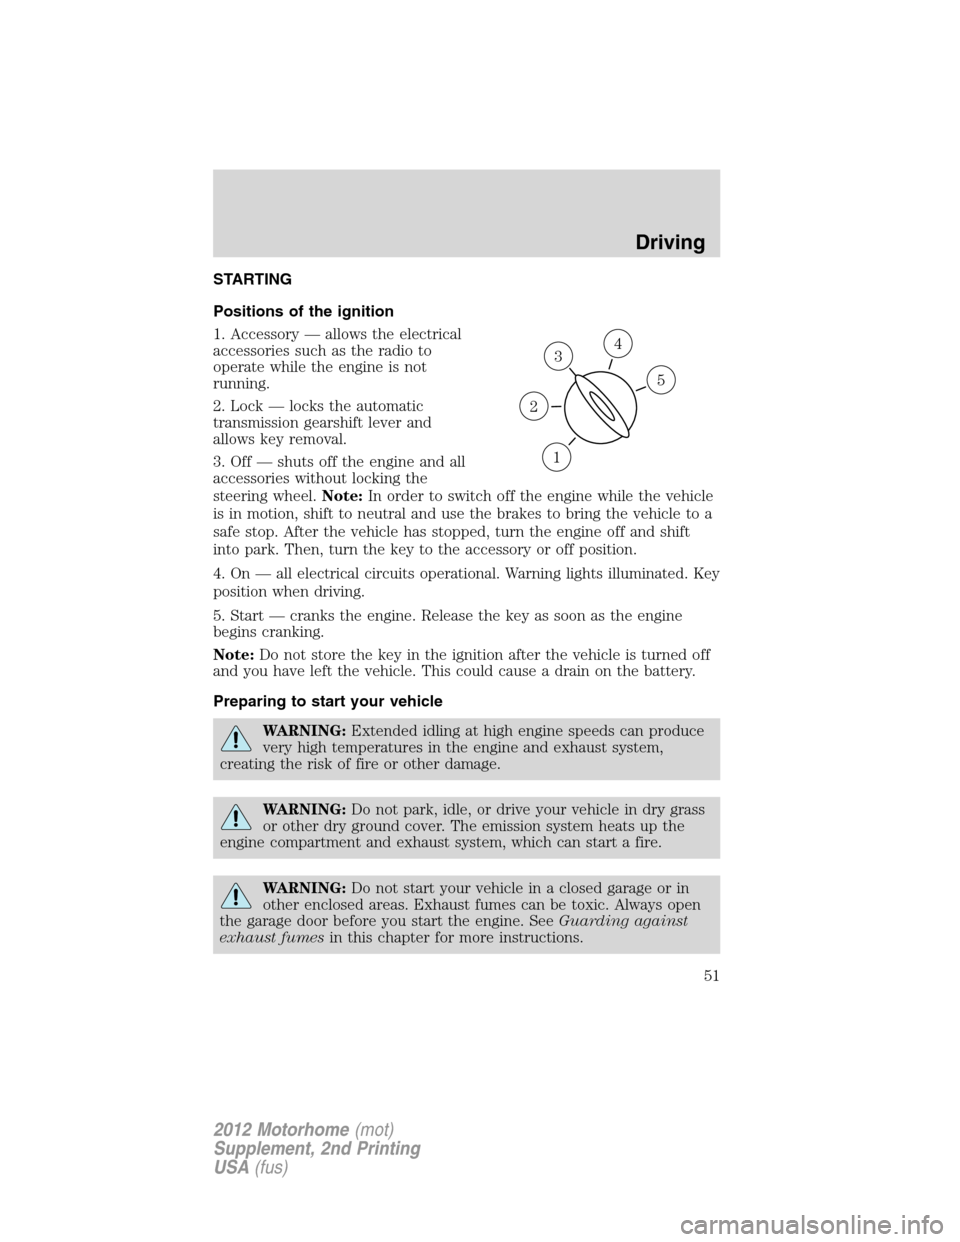
Positions of the ignition
1. Accessory — allows the electrical
accessories such as the radio to
operate while the engine is not
running.
2. Lock — locks the automatic
transmission gearshift lever and
allows key removal.
3. Off — shuts off the engine and all
accessories without locking the
steering wheel.Note:In order to switch off the engine while the vehicle
is in motion, shift to neutral and use the brakes to bring the vehicle to a
safe stop. After the vehicle has stopped, turn the engine off and shift
into park. Then, turn the key to the accessory or off position.
4. On — all electrical circuits operational. Warning lights illuminated. Key
position when driving.
5. Start — cranks the engine. Release the key as soon as the engine
begins cranking.
Note:Do not store the key in the ignition after the vehicle is turned off
and you have left the vehicle. This could cause a drain on the battery.
Preparing to start your vehicle
WARNING:Extended idling at high engine speeds can produce
very high temperatures in the engine and exhaust system,
creating the risk of fire or other damage.
WARNING:Do not park, idle, or drive your vehicle in dry grass
or other dry ground cover. The emission system heats up the
engine compartment and exhaust system, which can start a fire.
WARNING:Do not start your vehicle in a closed garage or in
other enclosed areas. Exhaust fumes can be toxic. Always open
the garage door before you start the engine. SeeGuarding against
exhaust fumesin this chapter for more instructions.
3
1
2
5
4
Driving
51
2012 Motorhome(mot)
Supplement, 2nd Printing
USA(fus)