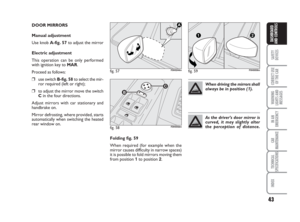
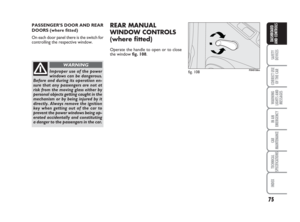
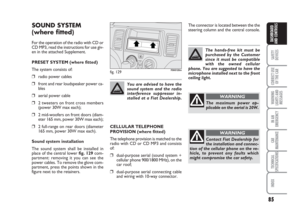
Page 153 of 210

152
CAR
MAINTENANCE
TECHNICAL
SPECIFICATIONS
INDEX
DASHBOARD
AND CONTROLS
SAFETY
DEVICES
CORRECT USE
OF THE CAR
WARNING
LIGHTS AND
MESSAGES
IN AN
EMERGENCY
IF AN INTERIOR LIGHT
BURNS OUT
For the type of bulb and power rating, see
“When needing to change a bulb”.
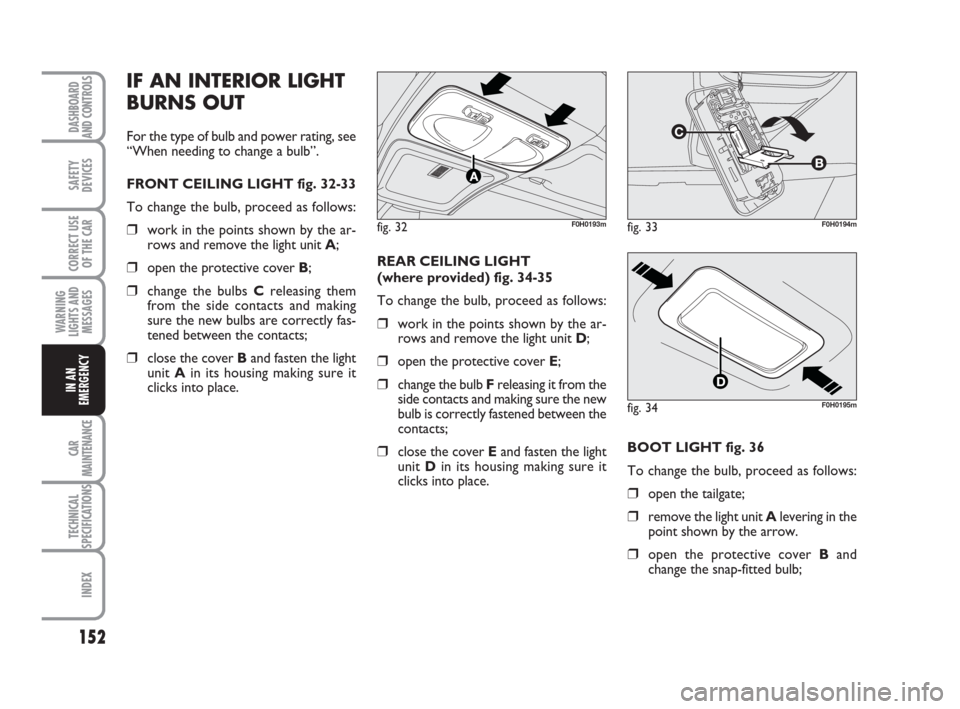
FRONT CEILING LIGHT fig. 32-33
To change the bulb, proceed as follows:
❒work in the points shown by the ar-
rows and remove the light unit A;
❒open the protective cover B;
❒change the bulbs Creleasing them
from the side contacts and making
sure the new bulbs are correctly fas-
tened between the contacts;
❒close the cover Band fasten the light
unit Ain its housing making sure it
clicks into place. REAR CEILING LIGHT
(where provided) fig. 34-35
To change the bulb, proceed as follows:
❒work in the points shown by the ar-
rows and remove the light unit D;
❒open the protective cover E;
❒change the bulb Freleasing it from the
side contacts and making sure the new
bulb is correctly fastened between the
contacts;
❒close the cover Eand fasten the light
unit Din its housing making sure it
clicks into place.
fig. 32F0H0193mfig. 33F0H0194m
fig. 34F0H0195m
BOOT LIGHT fig. 36
To change the bulb, proceed as follows:
❒open the tailgate;
❒remove the light unit Alevering in the
point shown by the arrow.
❒open the protective cover Band
change the snap-fitted bulb;
133-160 idea GB 1 ed 10-07-2008 8:30 Pagina 152
Page 154 of 210

153
CAR
MAINTENANCE
TECHNICAL
SPECIFICATIONS
INDEX
DASHBOARD
AND CONTROLS
SAFETY
DEVICES
CORRECT USE
OF THE CAR
WARNING
LIGHTS AND
MESSAGES
IN AN
EMERGENCY
❒refit the protective cover Bon the
transparent;
❒refit the light unit Ainserting it in its
correct position firstly on one end and
then on the other until it clicks into
place.
fig. 35F0H0196m
fig. 36F0H0197m
IF A FUSE BLOWS
GENERAL fig. 37
The fuse is a protective device for the
electric system: it comes into action (i.e.
it cuts off) mainly due to a fault or im-
proper action on the system.
If an electric device is not working, check
the efficiency of its fuse. The conductor el-
ement Amust be intact; if not, replace the
fuse with one of the same amp rating
(same colour).
B: Undamaged fuse
C: Fuse with broken filament.
Remove the blown fuse using the pincer
Dprovided in the control box on the
dashboard.
fig. 37F0H0198m
Never replace a broken fuse
with anything other than a
new fuse.
Never change a fuse with
another with a higher amp
rating, DANGER OF FIRE.
WARNING
If a general fuse (MEGA-
FUSE, MIDI-FUSE, MAXI-
FUSE) cuts in, do not attempt any re-
pair and contact Fiat Dealership. Be-
fore changing a fuse, check the igni-
tion key has been removed and that
all the other electric devices have
been turned off/disabled.
WARNING
If the fuse blows again, have
the car inspected at Fiat
Dealership.
WARNING
133-160 idea GB 1 ed 10-07-2008 8:30 Pagina 153
Page 155 of 210
154
CAR
MAINTENANCE
TECHNICAL
SPECIFICATIONS
INDEX
DASHBOARD
AND CONTROLS
SAFETY
DEVICES
CORRECT USE
OF THE CAR
WARNING
LIGHTS AND
MESSAGES
IN AN
EMERGENCY
F0H0720m
FUSE LOCATION
Fuses are grouped into two fuse boxes to
be found respectively on the left side of
the dashboard and in the engine com-
partment near the battery.Fuse box on the dashboard
To gain access to the fuses in the control
box on the dashboard fig. 38, remove the
protective trim A-fig. 39-40.
fig. 39 - Left-hand drive versionsF0H0719m
fig. 40 - Right-hand drive versionsF0H0198m
fig. 38
133-160 idea GB 1 ed 10-07-2008 8:30 Pagina 154
Page 156 of 210
155
CAR
MAINTENANCE
TECHNICAL
SPECIFICATIONS
INDEX
DASHBOARD
AND CONTROLS
SAFETY
DEVICES
CORRECT USE
OF THE CAR
WARNING
LIGHTS AND
MESSAGES
IN AN
EMERGENCY
F0H0720mfig. 42 fig. 41
F0H0201m
Fuse box near the battery
To gain access to the fuses fig. 42in the
fusebox on the battery post, remove the
protective cover B - fig. 41.
133-160 idea GB 1 ed 10-07-2008 8:30 Pagina 155
Page 157 of 210

156
CAR
MAINTENANCE
TECHNICAL
SPECIFICATIONS
INDEX
DASHBOARD
AND CONTROLS
SAFETY
DEVICES
CORRECT USE
OF THE CAR
WARNING
LIGHTS AND
MESSAGES
IN AN
EMERGENCY
FUSE SUMMARY TABLE
Control box on dashboard
USERFUSE AMPERE
Right-hand dipped beam headlightF12 7.5
Left-hand dipped beam headlight / headlight aiming device F13 7.5
Reversing lights / engine compartment control box relay coils / body computer F31 7.5
AvailableF32 –
Left rear power windowF33 20
Right rear power windowF34 20
+15 Cruise control, signal from switch on brake pedal for control units (*) F35 7.5
+30 Presetting for trailer control unit, rear locks front locks with single door control unit (*) F36 10
+15 Third brake light, instrument panel, brake lights (*) F37 7.5
Boot unlockingF38 20
+30 EOBD diagnostic socket, sound system, navigator, tyre pressure control unit (*)F39 10
Rear heated screenF40 30
Heated door electric mirrorsF41 7.5
+15 ABS / ESP control unit (*)F42 7.5
Windscreen wiper/washerF43 30
Cigar lighter / current socket on tunnelF44 15
Heated seatsF45 15
Boot current socketF46 15
Driver’s door control unit power supply (power window, lock) F47 20
Passenger’s door control unit power supply (power window, lock) F48 20
+15 utilities (left and central dashboard control lights, electric mirrors, heated seat control
lighting,presetting for radiotelephone, navigator, rain / daylight sensors, parking sensor control unit,
sunroof control lighting) (*)F49 7.5
Airbag control unitF50 7.5
+15 Tyre pressure control unit, ECO / Sport control (*) F51 7.5
Rear screen wiper/washerF52 15
+30 Direction indicators, hazard lights, instrument panel (*) F53 7.5
(*) +30 = battery directive positive terminal (not under key)
+15 = positive terminal under key
133-160 idea GB 1 ed 10-07-2008 8:30 Pagina 156
Page 158 of 210

157
CAR
MAINTENANCE
TECHNICAL
SPECIFICATIONS
INDEX
DASHBOARD
AND CONTROLS
SAFETY
DEVICES
CORRECT USE
OF THE CAR
WARNING
LIGHTS AND
MESSAGES
IN AN
EMERGENCY
Fuse box in engine compartment
USERFUSE AMPERE
Headlight washer fluidF9 20
HornF10 15
Electronic injection secondary servicesF11 15
Right main beam headlightF14 7.5
Left main beam headlightF15 7.5
Electronic injection primary servicesF17 10
+30 Engine control unit / Radiator electric fan remote control switch (1.9 Multijet) (*) F18 10
CompressorF19 7.5
FreeF20 –
Fuel pumpF21 15
Electronic injection primary services (1.2 16V, 1.4 16V)F22 15
Electronic injection primary services (Multijet engine)F22 20
Electronic injection primary services (petrol engine)F22 15
+30 Dualogic gearbox (*)F23 30
+15 Electric power steering (*)F24 7,5
Front fog lightsF30 15
(*) +30 = battery directive positive terminal (not under key)
+15 = positive terminal under key
Optional fusebox (on auxiliary bracket)
USERFUSE AMPERE
+30 Outside radio amplifier (*)F54 15
+30 Sunroof (*)F58 20
(*) +30 = battery directive positive terminal (not under key)
+15 = positive terminal under key
133-160 idea GB 1 ed 10-07-2008 8:30 Pagina 157
Page 159 of 210

158
CAR
MAINTENANCE
TECHNICAL
SPECIFICATIONS
INDEX
DASHBOARD
AND CONTROLS
SAFETY
DEVICES
CORRECT USE
OF THE CAR
WARNING
LIGHTS AND
MESSAGES
IN AN
EMERGENCY
IF THE BATTERY IS FLAT
WARNING The battery charging proce-
dure is described only for information pur-
poses. This operation should be carried
out by Fiat Dealership.
Charging should be slow at low amp rat-
ing for 24 hours. Charging for a longer
time may damage the battery.
Charge the battery as follows:
❒disconnect battery negative terminal;
❒connect the charger cables to the bat-
tery terminals, observing the poles;
❒turn on the charger;
❒when you have finished, turn the
charger off before disconnecting the
battery;
❒reconnect battery negative terminal.
WARNING If the vehicle is fitted with
alarm system, turn it off with the remote
control (see “Alarm” in the “Dashboard
and controls” chapter).
JACKING THE CAR
If the car is to be lifted, go to a Fiat Deal-
ership which is equipped with the arm
hoist or workshop lift.
Jack up the car only by positioning the jack
arms or the shop jack in the points shown
in the figures fig. 43.
The liquid in the battery is
poisonous and corrosive. Do
not let it touch the skin or eyes.
Recharging the battery should be
done in a well ventilated area away
from naked flames or possible sources
of sparks: explosion and fire risk.
WARNING
Do not attempt to recharge
a frozen battery. Thaw it
first, otherwise it could explode. If the
battery froze, make sure the internal
elements are not broken (short-circuit
risk) and that the casing is not
cracked (risk of spilling the poisonous
and corrosive fluid).
WARNING
fig. 43F0H0752m
133-160 idea GB 1 ed 10-07-2008 8:30 Pagina 158
Page 160 of 210
159
CAR
MAINTENANCE
TECHNICAL
SPECIFICATIONS
INDEX
DASHBOARD
AND CONTROLS
SAFETY
DEVICES
CORRECT USE
OF THE CAR
WARNING
LIGHTS AND
MESSAGES
IN AN
EMERGENCY
TOWING THE CAR
The car is delivered with two tow rings:
the short tow ring shall be fitted at the
front and the long one at the back.
Side figures show how rear (long) ring was
arranged, within spare wheel fig. 44 and
in the container of kit Fix & Go automat-
ic, respectively fig. 45.
HOW TO REMOVE TOW HITCH
CAPS
To avoid damaging the cap A-fig. 46, pro-
ceed as follows:
❒take the screwdriver provided in the
tool kit;
fig. 46F0H0250m
fig. 47F0H0251m
❒insert the screwdriver in the cap slot
B;
❒put the hand thumb on the cap to pre-
vent damaging it fig. 47;
fig. 44F0H0342m
fig. 45F0H0361m
❒remove the cap (without turning it)
making a movement perpendicular to
the supporting surface fig. 47.
133-160 idea GB 1 ed 10-07-2008 8:30 Pagina 159