Page 195 of 652
NOTE:
•Disconnect the center shoulder belt from the small
buckle and lower the head restraints before attempting
to fold/stow the power third row seats.
•To abort seat operation while seat is in motion, press a
different seat position selector switch to stop the seat.
Once the seat stops moving, then the desired position
can be selected.
•The third row power seat system includes obstacle
detection for safe operation. When the system detects
an obstacle, the motors will stop and reverse the
motion a short distance to move the seat away from
the obstacle. Should this occur, remove the obstacle
and press the button again, for the desired position.
Manually Folding Third Row Seats — If Equipped
1. Lower the center head restraint down to the seatback
by pushing the button on the guide and pushing the head
restraint down.2. Lower the outboard head restraints by pulling on the
release strap marked “1” located on the outboard side of
the head restraint.
Head Restraint Release Strap “1”
3
UNDERSTANDING THE FEATURES OF YOUR VEHICLE 193
Page 197 of 652
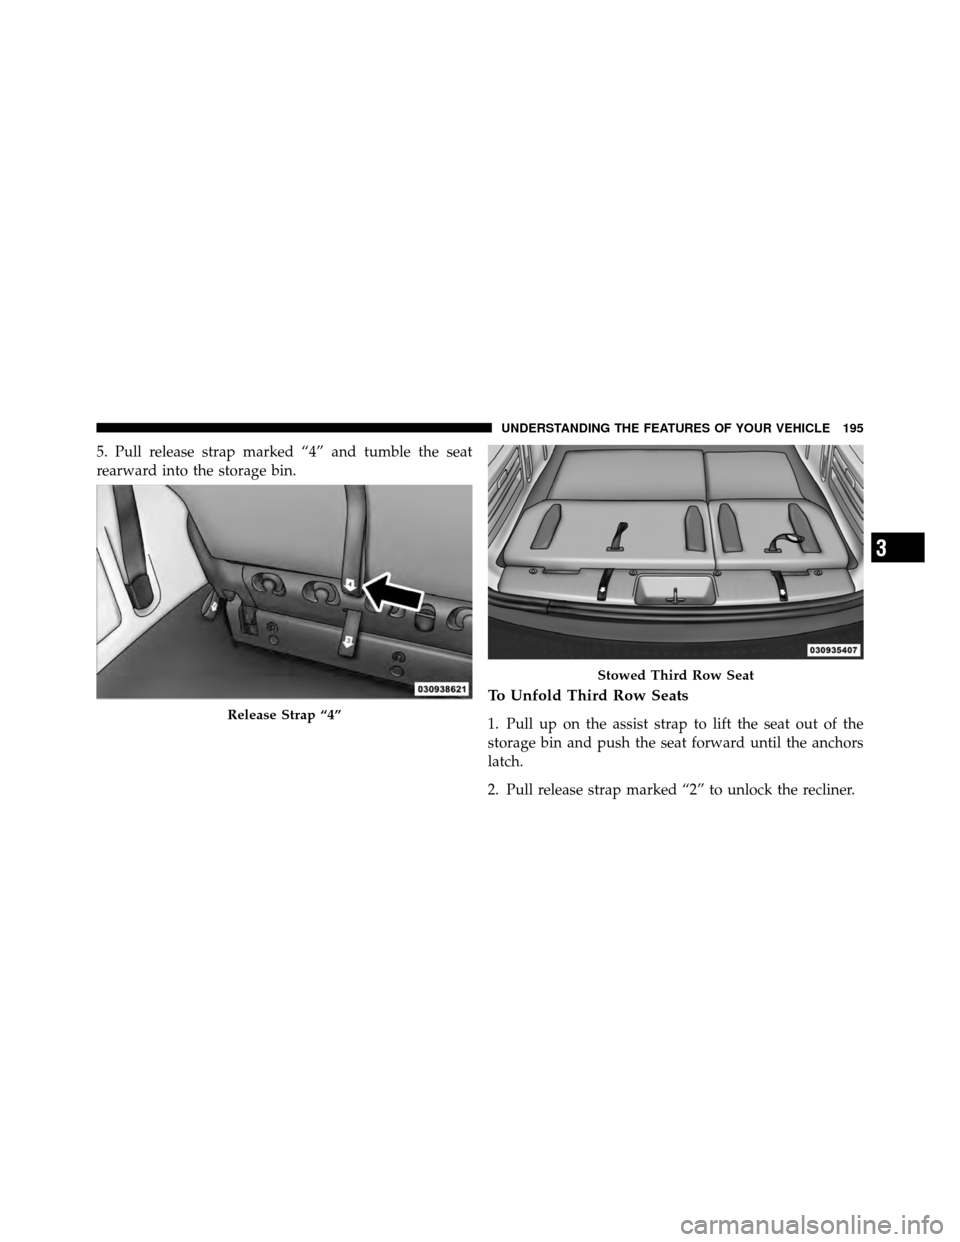
5. Pull release strap marked “4” and tumble the seat
rearward into the storage bin.
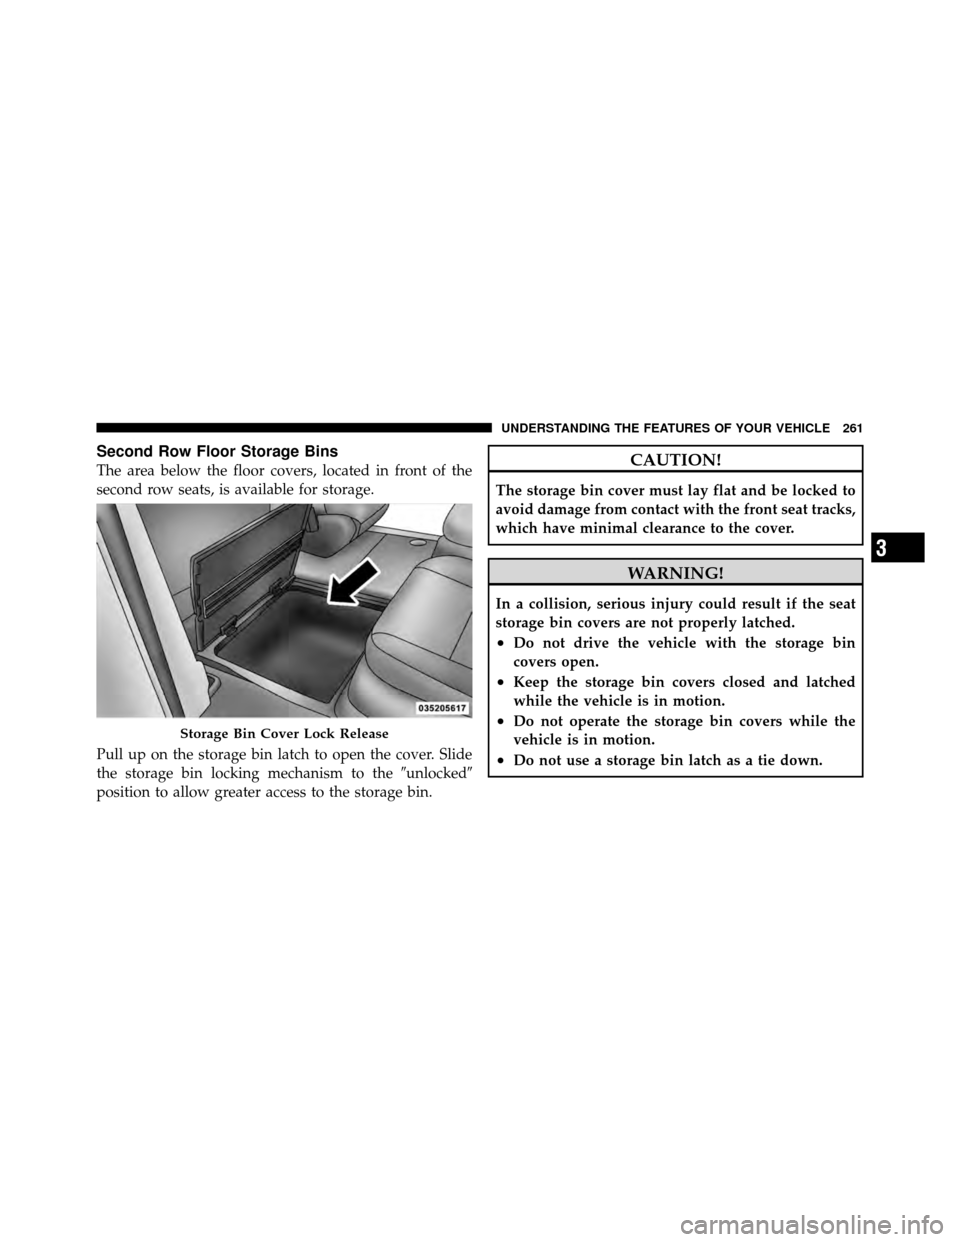
To Unfold Third Row Seats
1. Pull up on the assist strap to lift the seat out of the
storage bin and push the seat forward until the anchors
latch.
2. Pull release strap marked “2” to unlock the recliner.Release Strap “4”
Stowed Third Row Seat
3
UNDERSTANDING THE FEATURES OF YOUR VEHICLE 195
Page 198 of 652
3. Pulling strap “4” releases the seatback to return to its
full upright position.
4. Raise the head restraint to its upright position.
WARNING!
In a collision, you or others in your vehicle could be
injured if seats are not properly latched to their floor
attachments. Always be sure the seats are fully
latched.
Tailgate Mode
1. Pull release strap “3”, then pull release strap “4” to
rotate the entire seat rearward.
2. To restore the seat to its upright position, lift up on the
seatback and push forward until the anchors latch.
WARNING!
To avoid serious injury or death, never operate the
vehicle with occupants in the third row seat while in
the tailgate mode.
Plastic Grocery Bag Retainer Hooks
Retainer hooks which will hold plastic grocery bag
handles are built into the seatbacks of all rear seats and
some front seats. The floor supports the partial weight of
the bagged goods.
DRIVER MEMORY SEAT — IF EQUIPPED
The Memory Buttons 1 and 2 on the driver’s door panel
can be programmed to recall the driver’s seat, driver’s
outside mirror, adjustable brake and accelerator pedals,
and radio station preset settings. Your Remote Keyless
Entry (RKE) transmitters can also be programmed to
recall the same positions when the UNLOCK button is
pressed.
196 UNDERSTANDING THE FEATURES OF YOUR VEHICLE
Page 263 of 652
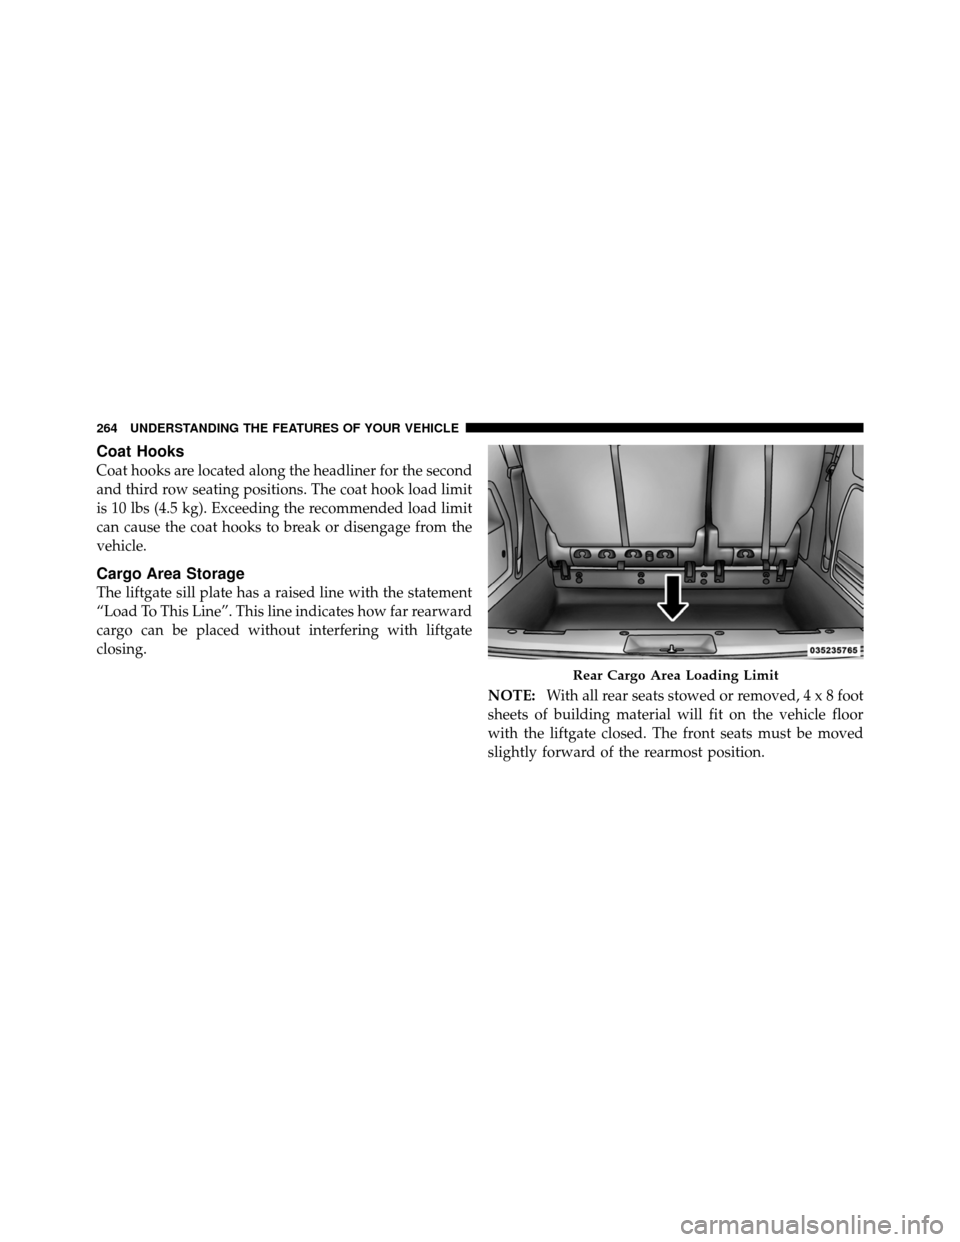
Second Row Floor Storage Bins
The area below the floor covers, located in front of the
second row seats, is available for storage.
Pull up on the storage bin latch to open the cover. Slide
the storage bin locking mechanism to the�unlocked�
position to allow greater access to the storage bin.CAUTION!
The storage bin cover must lay flat and be locked to
avoid damage from contact with the front seat tracks,
which have minimal clearance to the cover.
WARNING!
In a collision, serious injury could result if the seat
storage bin covers are not properly latched.
•Do not drive the vehicle with the storage bin
covers open.
•Keep the storage bin covers closed and latched
while the vehicle is in motion.
•Do not operate the storage bin covers while the
vehicle is in motion.
•Do not use a storage bin latch as a tie down.
Storage Bin Cover Lock Release
3
UNDERSTANDING THE FEATURES OF YOUR VEHICLE 261
Page 266 of 652
Coat Hooks
Coat hooks are located along the headliner for the second
and third row seating positions. The coat hook load limit
is 10 lbs (4.5 kg). Exceeding the recommended load limit
can cause the coat hooks to break or disengage from the
vehicle.
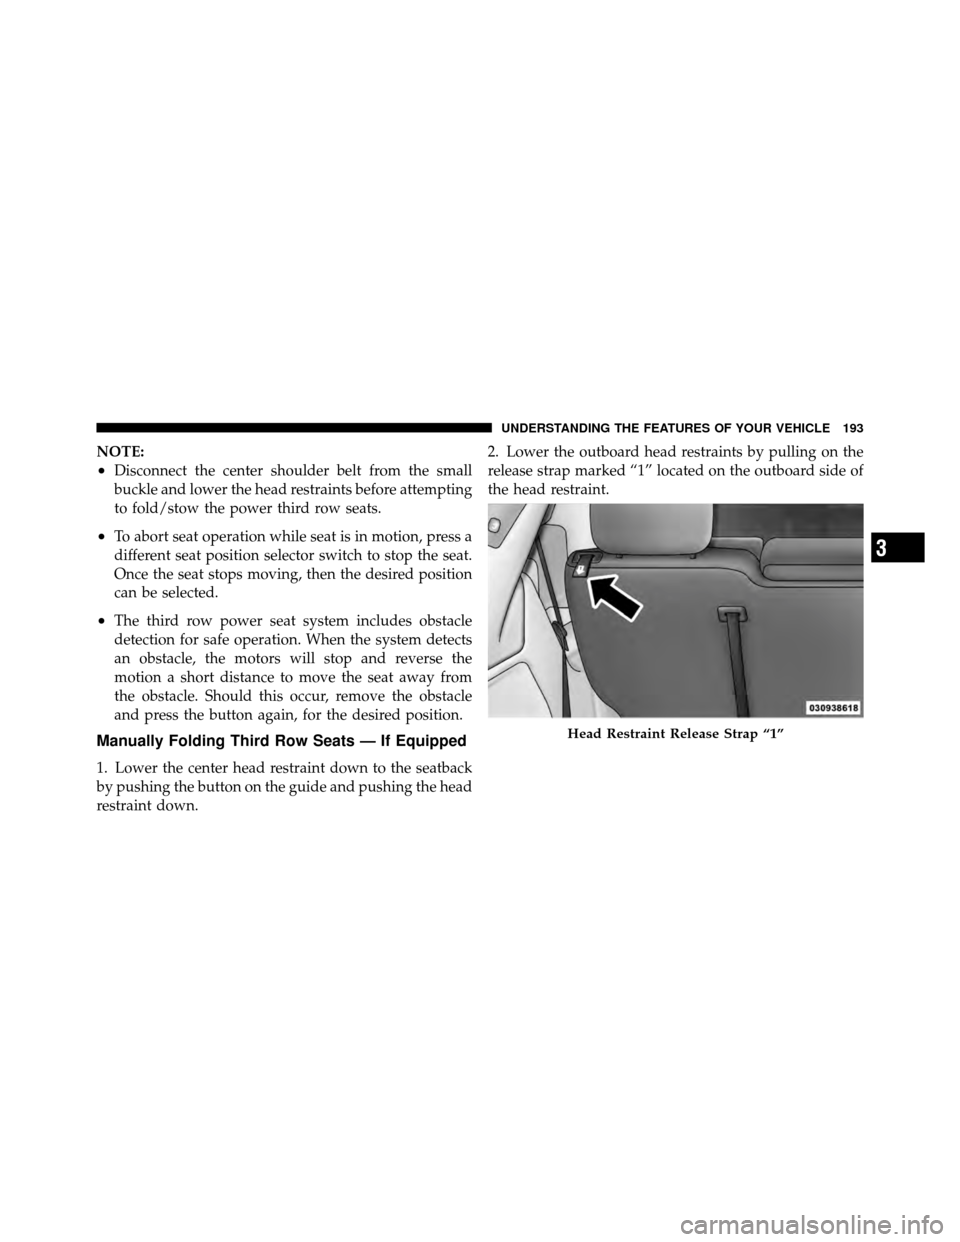
Cargo Area Storage
The liftgate sill plate has a raised line with the statement
“Load To This Line”. This line indicates how far rearward
cargo can be placed without interfering with liftgate
closing.NOTE:With all rear seats stowed or removed,4x8foot
sheets of building material will fit on the vehicle floor
with the liftgate closed. The front seats must be moved
slightly forward of the rearmost position.
Rear Cargo Area Loading Limit
264 UNDERSTANDING THE FEATURES OF YOUR VEHICLE
Page 407 of 652
CAUTION!
Interior air enters the Rear Manual Climate Control
system through an intake grille, located in the right
side trim panel behind the third row seats. The
heater outlets are located in the right side trim panel,
just behind the sliding door. Do not block or place
objects directly in front of the inlet grille or heater
outlets. The electrical system could overload, causing
damage to the blower motor.
Rear Temperature Control
The rear mode selectionREAR,allows the settings to be
controlled by the rear mode control knob.
To change the temperature in the rear of the vehicle,
rotate the temperature control knob counterclockwise for
cold air, and clockwise for heated air. When rear controls are locked by the front system, the
lock symbol on the temperature knob is illuminated, and
the rear overhead adjustments are inoperable.
Rear Mode Control
Headliner Mode
Air comes from the outlets in the headliner. Each of
these outlets can be individually adjusted to direct
the flow of air. Moving the air vanes of the outlets to one
side will shut off the airflow.
Bi-Level Mode Air comes from both the headliner outlets and the
floor outlets.
NOTE: In many temperature positions, the Bi-Level
mode is designed to provide cooler air out of the head-
liner outlets and warmer air from the floor outlets.
4
UNDERSTANDING YOUR INSTRUMENT PANEL 405
Page 418 of 652
CAUTION!
Interior air enters the Rear Automatic Temperature
Control System through an intake grille, located in
the right side trim panel behind the third row seats.
The heater outlets are located in the right side trim
panel, just behind the sliding door. Do not block or
place objects directly in front of the inlet grille or
heater outlets. The electrical system could overload
causing damage to the blower motor.
Rear Temperature Control
To change the temperature in the rear of the vehicle,
rotate the temperature knob counterclockwise to lower
the temperature, and clockwise to increase the tempera-
ture. The rear temperature settings are displayed in the
front ATC panel.When rear controls are locked by the front system, the
Rear Temperature Lock symbol on the temperature knob
is illuminated and any rear overhead adjustments are
ignored.
Rear Mode Control
Auto Mode
The rear system automatically maintains the correct
mode and comfort level desired by the rear seat occu-
pants.
416 UNDERSTANDING YOUR INSTRUMENT PANEL
Page 503 of 652
VEHICLE LOADING
As required by National Highway Traffic Safety Admin-
istration regulations, your vehicle has a certification label
affixed to the driver’s side door or B-Pillar.
If seats are removed for carrying cargo, do not exceed the
specified GVWR and GAWR.
Vehicle Certification Label
Your vehicle has a Vehicle Certification Label attached to
the driver’s door B-Pillar.
The label contains the following information:
•Name of manufacturer
•Month and year of manufacture
•Gross Vehicle Weight Rating (GVWR)
•Gross Axle Weight Rating (GAWR) — Front
•Gross Axle Weight Rating (GAWR) — Rear
•Vehicle Identification Number (VIN)
•Type of Vehicle
•Month, Day and Hour of Manufacture (MDH)
The bar code allows a computer scanner to read the
Vehicle Identification Number (VIN).
Gross Vehicle Weight Rating (GVWR)
The GVWR is the total allowable weight of your vehicle.
This includes driver, passengers, and cargo. The total
load must be limited so that you do not exceed the
GVWR.
Gross Axle Weight Rating (GAWR)
The GAWR is the maximum capacity of the front and rear
axles. Distribute the load over the front and rear axles
evenly. Make sure that you do not exceed either front or
rear GAWR.
5
STARTING AND OPERATING 501