Page 171 of 652
When the HIGH-level setting is selected, the heater will
provide a boosted heat level during the initial stages of
operation. Then, the heat output will drop to the normal
HIGH-level. If the HIGH-level setting is selected, the
system will automatically switch to LOW-level after a
maximum of 60 minutes of continuous operation. At that
time, the display will change from HIGH to LOW,
indicating the change. The LOW-level setting will turn
OFF automatically after a maximum of 45 minutes.
Rear Heated Seats
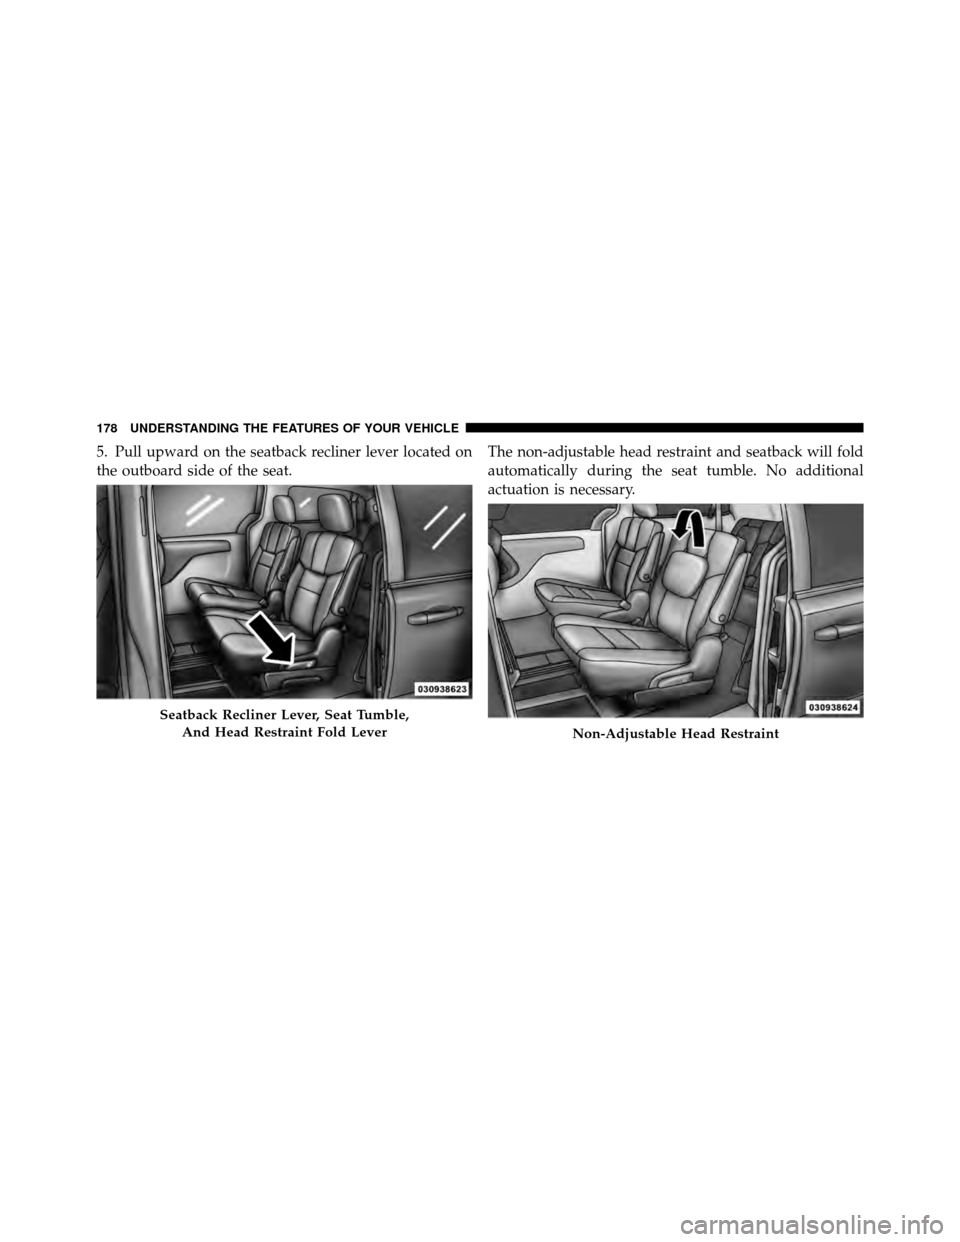
On some models, the second row seats are equipped with
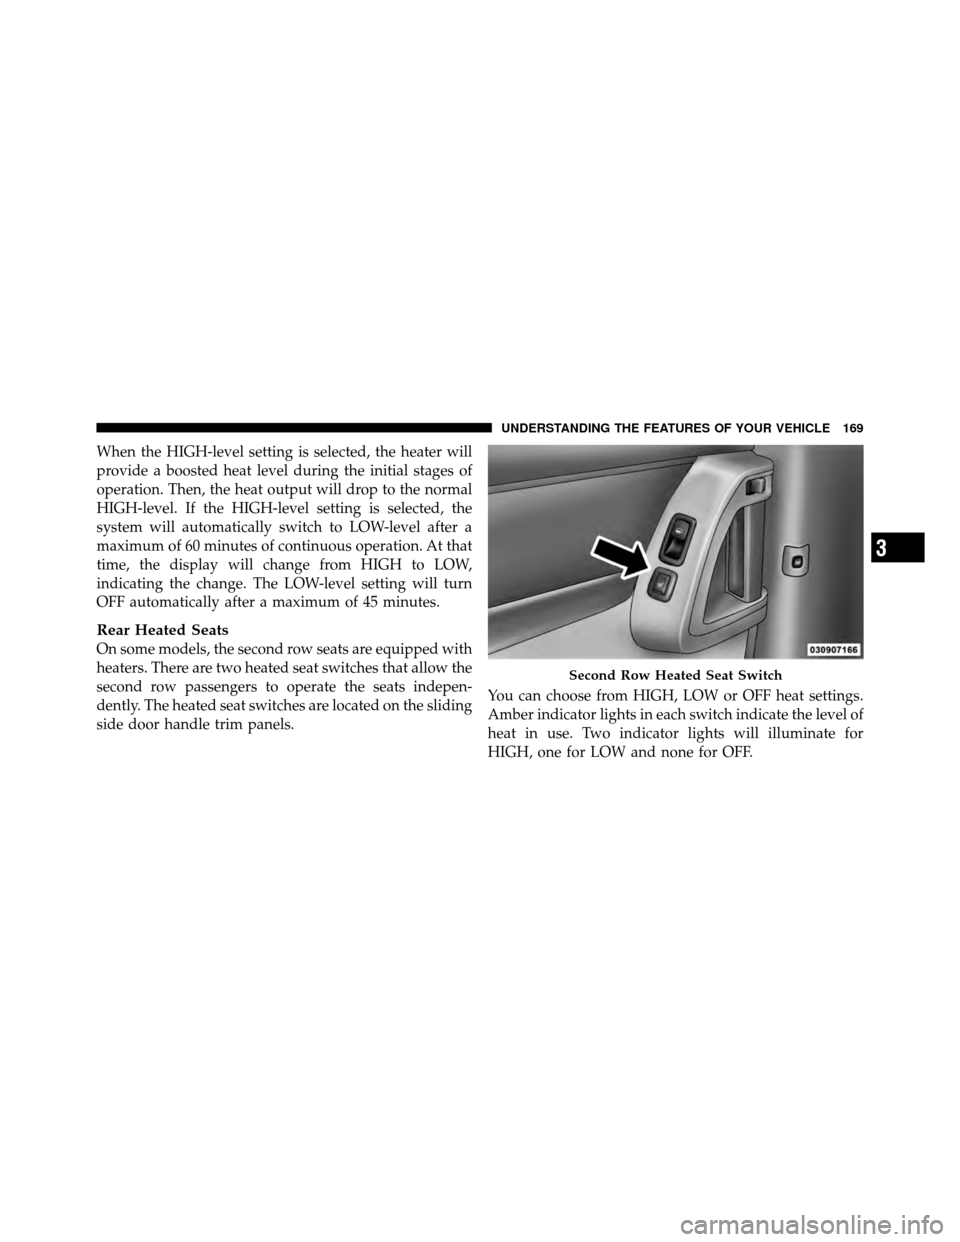
heaters. There are two heated seat switches that allow the
second row passengers to operate the seats indepen-
dently. The heated seat switches are located on the sliding
side door handle trim panels.You can choose from HIGH, LOW or OFF heat settings.
Amber indicator lights in each switch indicate the level of
heat in use. Two indicator lights will illuminate for
HIGH, one for LOW and none for OFF.
Second Row Heated Seat Switch
3
UNDERSTANDING THE FEATURES OF YOUR VEHICLE 169
Page 172 of 652
Press the switch once to select HIGH-level
heating. Press the switch a second time to select
LOW-level heating. Press the switch a third
time to shut the heating elements OFF.
NOTE: Once a heat setting is selected, heat will be felt
within two to five minutes.
When the HIGH-level setting is selected, the heater will
provide a boosted heat level during the initial stages of
operation. Then, the heat output will drop to the normal
HIGH-level. If the HIGH-level setting is selected, the
system will automatically switch to LOW-level after
approximately 30 minutes of continuous operation. At
that time, the display will change from HIGH to LOW,
indicating the change. The LOW-level setting will turn
OFF automatically after approximately 45 minutes.Manual Front/Second Row Seat Adjuster
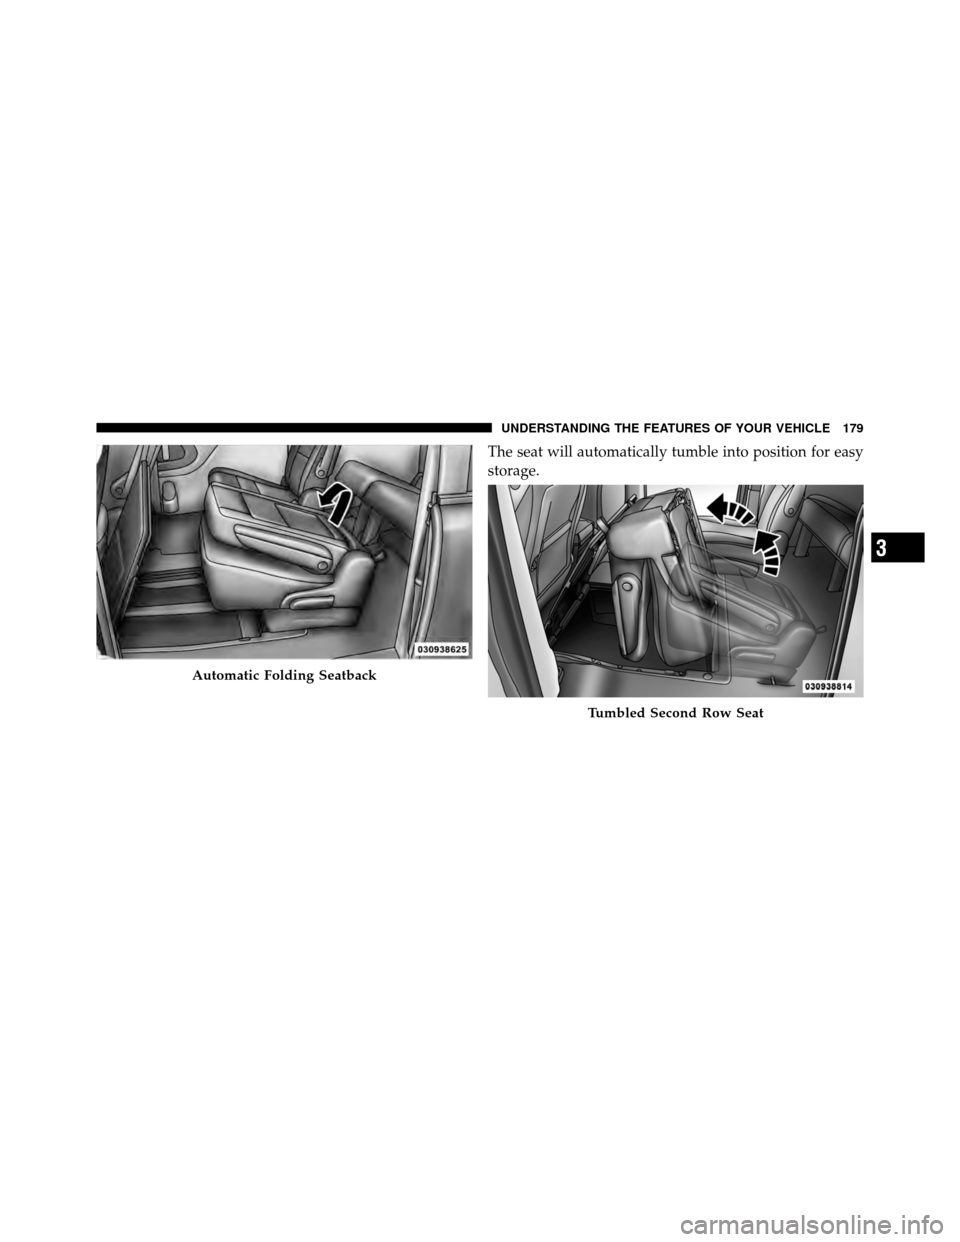
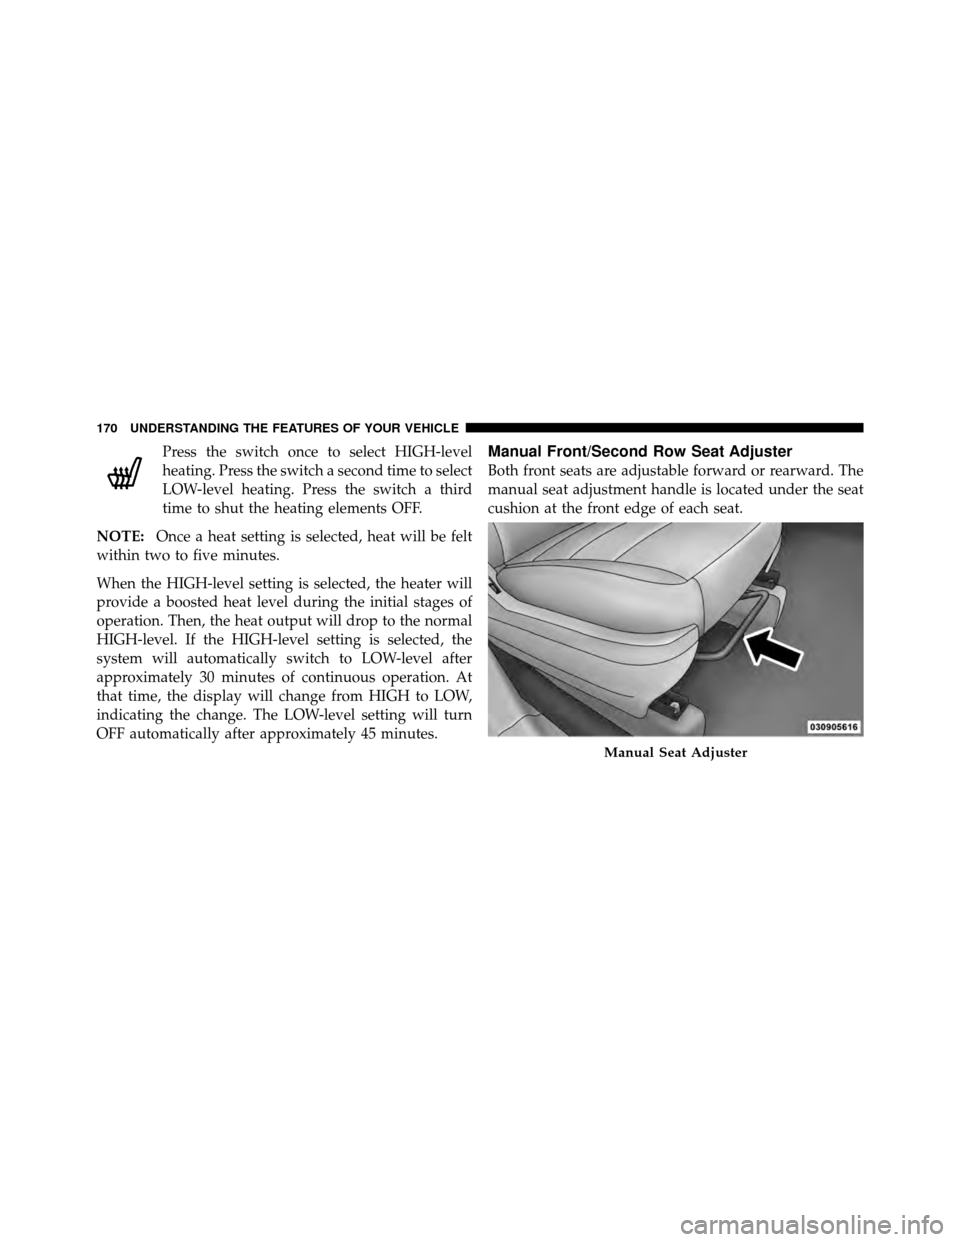
Both front seats are adjustable forward or rearward. The
manual seat adjustment handle is located under the seat
cushion at the front edge of each seat.
Manual Seat Adjuster
170 UNDERSTANDING THE FEATURES OF YOUR VEHICLE
Page 180 of 652
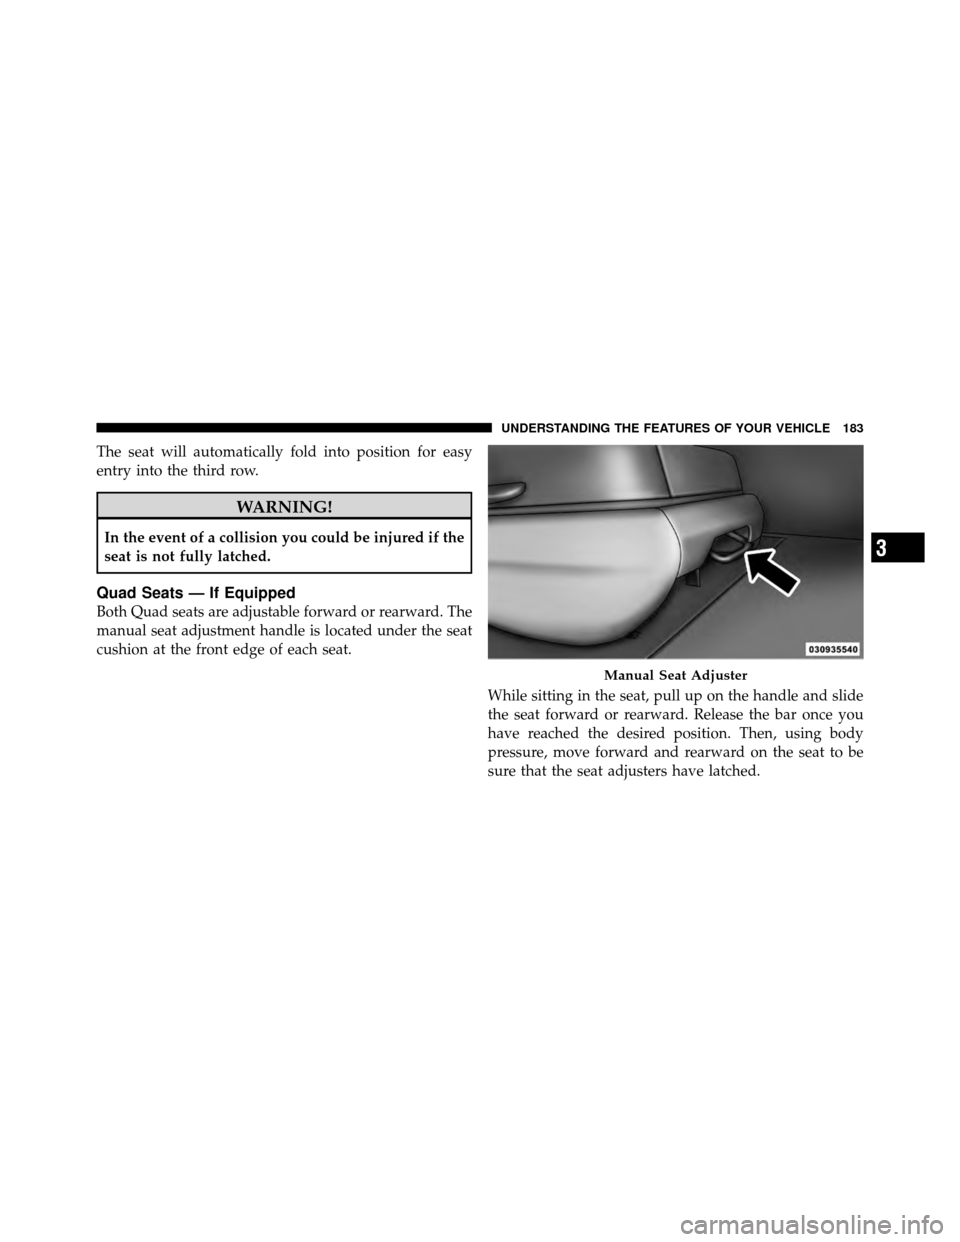
5. Pull upward on the seatback recliner lever located on
the outboard side of the seat.The non-adjustable head restraint and seatback will fold
automatically during the seat tumble. No additional
actuation is necessary.
Seatback Recliner Lever, Seat Tumble,
And Head Restraint Fold Lever
Non-Adjustable Head Restraint
178 UNDERSTANDING THE FEATURES OF YOUR VEHICLE
Page 181 of 652
The seat will automatically tumble into position for easy
storage.
Automatic Folding Seatback
Tumbled Second Row Seat
3
UNDERSTANDING THE FEATURES OF YOUR VEHICLE 179
Page 185 of 652
The seat will automatically fold into position for easy
entry into the third row.
WARNING!
In the event of a collision you could be injured if the
seat is not fully latched.
Quad Seats — If Equipped
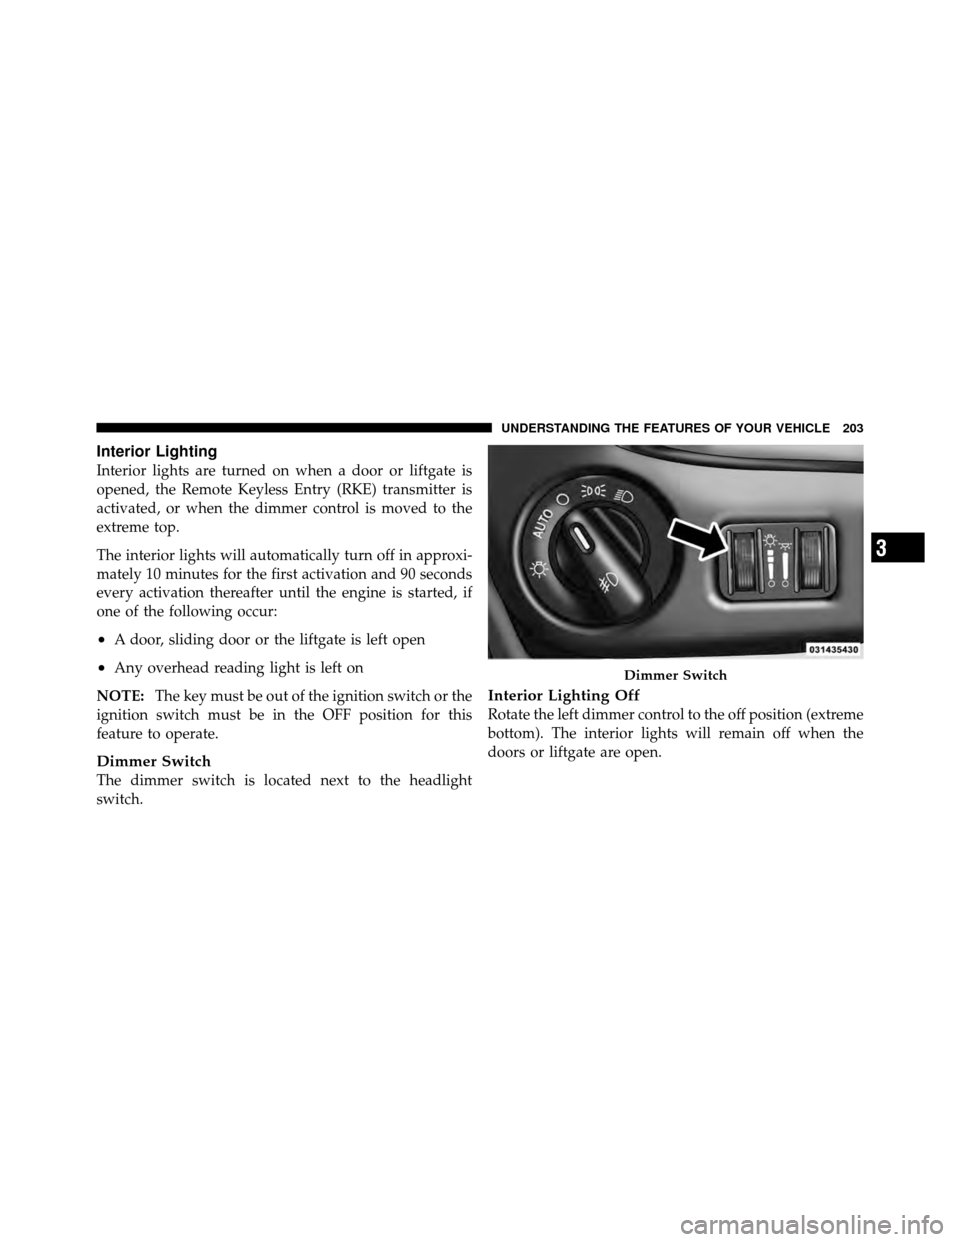
Both Quad seats are adjustable forward or rearward. The
manual seat adjustment handle is located under the seat
cushion at the front edge of each seat.While sitting in the seat, pull up on the handle and slide
the seat forward or rearward. Release the bar once you
have reached the desired position. Then, using body
pressure, move forward and rearward on the seat to be
sure that the seat adjusters have latched.
Manual Seat Adjuster
3
UNDERSTANDING THE FEATURES OF YOUR VEHICLE 183
Page 202 of 652
Easy Entry/Exit Seat
(Available With Memory Seat ONLY)
This feature provides automatic driver seat positioning to
enhance driver mobility when entering and exiting the
vehicle.
The distance the driver seat moves depends on where
you have the driver seat positioned when you remove the
key from the ignition switch.
•When you remove the key from the ignition switch,
the driver seat will move about 2.4 in (60 mm)
rearward if the driver seat position is greater than or
equal to 2.7 in (67.7 mm) forward of the rear stop. The
seat will return to its previously set position when you
insert the key into the ignition switch and turn it out of
the LOCK position.
•When you remove the key from the ignition switch the
driver seat will move to a position 0.3 in (7.7 mm)
forward of the rear stop if the driver seat position isbetween 0.9 – 2.7 in (22.7 – 67.7 mm) forward of the
rear stop. The seat will return to its previously set
position when you insert the key into the ignition
switch and turn it out of the LOCK position.
•The Easy Entry/Easy Exit feature is disabled when the
driver seat position is less than 0.9 in (22.7 mm)
forward of the rear stop. At this position, there is no
benefit to the driver by moving the seat for Easy Exit
or Easy Entry.
Each stored memory setting will have an associated Easy
Entry and Easy Exit Position.
NOTE: The Easy Entry/Easy Exit feature can be en-
abled or disabled through the programmable features in
the Electronic Vehicle Information Center (EVIC). If your
vehicle is not equipped with an EVIC, your dealership
can activate/deactivate this feature for you. For details,
refer to “Electronic Vehicle Information Center (EVIC)/
200 UNDERSTANDING THE FEATURES OF YOUR VEHICLE
Page 205 of 652
Interior Lighting
Interior lights are turned on when a door or liftgate is
opened, the Remote Keyless Entry (RKE) transmitter is
activated, or when the dimmer control is moved to the
extreme top.
The interior lights will automatically turn off in approxi-
mately 10 minutes for the first activation and 90 seconds
every activation thereafter until the engine is started, if
one of the following occur:
•A door, sliding door or the liftgate is left open
•Any overhead reading light is left on
NOTE: The key must be out of the ignition switch or the
ignition switch must be in the OFF position for this
feature to operate.
Dimmer Switch
The dimmer switch is located next to the headlight
switch.
Interior Lighting Off
Rotate the left dimmer control to the off position (extreme
bottom). The interior lights will remain off when the
doors or liftgate are open.
Dimmer Switch
3
UNDERSTANDING THE FEATURES OF YOUR VEHICLE 203
Page 207 of 652
To activate the Halo lights, rotate the Halo
switch control upward or downward to in-
crease or decrease the lighting.
Parking Lights
Turn the headlight switch knob to the first detent
to turn the parking lights on. This also turns on all
instrument panel lighting.
Headlights
Turn the headlight switch knob to the second
detent to turn the headlights and parking lights
on. This also turns on all instrument panel
lighting.
To change the brightness of the instrument panel lights,
rotate the dimmer control up or down.
Automatic Headlights — If Equipped
This system automatically turns your headlights on or off
based on ambient light levels. To turn the system on, turn the headlight switch to the extreme counterclockwise
position aligning the indicator with AUTO on the head-
light switch. When the system is on, the Headlight Time
Delay feature is also on. This means your headlights will
stay on for up to 90 seconds after you turn the ignition
switch OFF. To turn the Automatic System off, turn the
headlight switch clockwise to the O (Off) position.
NOTE:
The engine must be running before the head-
lights will come on in the Automatic mode.
Headlights On With Wipers — If Equipped
When your headlights are in the Automatic mode and the
engine is running, the headlights will automatically turn
on when the wiper system is also turned on. Headlights
on when windshield wipers are on may be found on
vehicles equipped with an automatic headlight system.
Refer to “Electronic Vehicle Information Center (EVIC)/
Customer-Programmable Features” in “Understanding
Your Instrument Panel” for further information.
3
UNDERSTANDING THE FEATURES OF YOUR VEHICLE 205