Page 115 of 652

▫Courtesy/Interior Lighting ............. 233
▫ Sunglass Storage (Non-Sunroof Only) ...... 233
▫ Rear Courtesy/Reading Lights — If
Equipped .......................... 235
▫ Rear Overhead Consoles — If Equipped .... 235
� Garage Door Opener — If Equipped ........ 236
▫ Before You Begin Programming
HomeLink� ........................ 238
▫ Programming A Rolling Code ........... 238
▫ Programming A Non-Rolling Code ........ 240
▫ Canadian/Gate Operator Programming .... 241
▫ Using HomeLink� ................... 243
▫ Security ........................... 243
▫ Troubleshooting Tips .................. 244 ▫
General Information .................. 245
� Power Sunroof — If Equipped ............ 245
▫ Opening Sunroof — Express ............ 246
▫ Opening The Sunroof — Manual Mode ..... 246
▫ Closing Sunroof — Express ............. 246
▫ Closing Sunroof — Manual Mode ........ 247
▫ Pinch Protect Feature ................. 247
▫ Pinch Protect Override ................ 247
▫ Venting Sunroof — Express ............. 247
▫ Sunshade Operation .................. 247
▫ Wind Buffeting ...................... 248
▫ Sunroof Maintenance ................. 248
▫ Ignition Off Operation ................. 248
3
UNDERSTANDING THE FEATURES OF YOUR VEHICLE 113
Page 122 of 652

Tilt Mirrors In Reverse (Available With Memory
Seat Only) — If Equipped
Tilt Mirrors in Reverse provides automatic outside mirror
positioning which will aid the drivers view of the ground
rearward of the front doors. The driver’s outside mirror
will move slightly downward from the present position
when the vehicle is shifted into REVERSE. The driver’s
outside mirror will then return to the original position
when the vehicle is shifted out of REVERSE position.
Each stored memory setting will have an associated Tilt
Mirrors in Reverse position.
NOTE:The Tilt Mirrors in Reverse feature is not en-
abled when delivered from the factory. The Tilt Mirrors in
Reverse feature can be enabled or disabled in the Elec-
tronic Vehicle Information Center (EVIC). Refer to “Elec-
tronic Vehicle Information Center (EVIC)/Customer-
Programmable Features” in “Understanding Your
Instrument Panel” for further information.
Power Folding Mirrors — If Equipped
The switch for the power folding mirrors is located
between the power mirror switches L (left) and R (right).
Press the switch once and the mirrors will fold in,
pressing the switch a second time will return the mirrors
to the normal driving position.
NOTE: Pressing the power folding mirror switch for
more than four seconds, or if the vehicle speed is greater
than 5 mph (8 km/h) will disable the folding feature.
If the mirrors are in the folded position, and vehicle
speed is equal or greater than 5 mph (8 km/h), they will
automatically unfold.
Illuminated Vanity Mirrors — If Equipped
An illuminated vanity mirror is located on the sun visor.
To use the mirror, rotate the sun visor down and swing
the mirror cover upward. The lights turn on automati-
cally. Closing the mirror cover turns off the lights.
120 UNDERSTANDING THE FEATURES OF YOUR VEHICLE
Page 130 of 652

NOTE:In a parking lot situation, oncoming vehicles can
be obscured by vehicles parked on either side. If the
sensors are blocked by other structures or vehicles, the
system will not be able to alert the driver.
When RCP is on and the vehicle is in REVERSE, the
driver is alerted using both the visual and audible
alarms, including radio muting.
WARNING!
RCP is not a Back Up Aid system. It is intended to be
used to help a driver detect an oncoming vehicle in a
parking lot situation. Drivers must be careful when
backing up, even when using RCP. Always check
carefully behind your vehicle, look behind you, and
be sure to check for pedestrians, animals, other
vehicles, obstructions, and blind spots before back-
ing up. Failure to do so can result in serious injury or
death.
Modes Of Operation
Three selectable modes of operation are available in the
Electronic Vehicle Information Center (EVIC). Refer to
�Electronic Vehicle Information Center (EVIC)/Personal
Settings (Customer-Programmable Features)” in “Under-
standing Your Instrument Panel” for further information.
Blind Spot Alert
When operating in Blind Spot Alert mode, the BSM
system will provide a visual alert in the appropriate side
view mirror based on a detected object. However, when
the system is operating in RCP, the system will respond
with both visual and audible alerts when a detected
object is present. Whenever an audible alert is requested,
the radio is muted.
Blind Spot Alert Lights/Chime
When operating in Blind Spot Alert Lights/Chime mode,
the BSM system will provide a visual alert in the appro-
priate side view mirror based on a detected object. If the
128 UNDERSTANDING THE FEATURES OF YOUR VEHICLE
Page 170 of 652

WARNING! (Continued)
•Do not place anything on the seat that insulates
against heat, such as a blanket or cushion. This
may cause the seat heater to overheat. Sitting in a
seat that has been overheated could cause serious
burns due to the increased surface temperature of
the seat.
Vehicles Equipped With Remote Start
On models that are equipped with remote start, the
driver ’s heated seat can be programmed to come on
during a remote start. Refer to “Remote Starting System
— If Equipped” in “Things To Know Before Starting Your
Vehicle” for further information.
Front Heated Seats
There are two heated seat switches that allow the driver
and passenger to operate the seats independently. The
controls for each heater are located on the switch bank
below the climate controls.
You can choose from HIGH, LOW or OFF heat settings.
Amber indicator lights in each switch indicate the level of
heat in use. Two indicator lights will illuminate for
HIGH, one for LOW and none for OFF.Press the switch once to select HIGH-level
heating. Press the switch a second time to select
LOW-level heating. Press the switch a third
time to shut the heating elements OFF.
NOTE: Once a heat setting is selected, heat will be felt
within two to five minutes.
168 UNDERSTANDING THE FEATURES OF YOUR VEHICLE
Page 171 of 652

When the HIGH-level setting is selected, the heater will
provide a boosted heat level during the initial stages of
operation. Then, the heat output will drop to the normal
HIGH-level. If the HIGH-level setting is selected, the
system will automatically switch to LOW-level after a
maximum of 60 minutes of continuous operation. At that
time, the display will change from HIGH to LOW,
indicating the change. The LOW-level setting will turn
OFF automatically after a maximum of 45 minutes.
Rear Heated Seats
On some models, the second row seats are equipped with
heaters. There are two heated seat switches that allow the
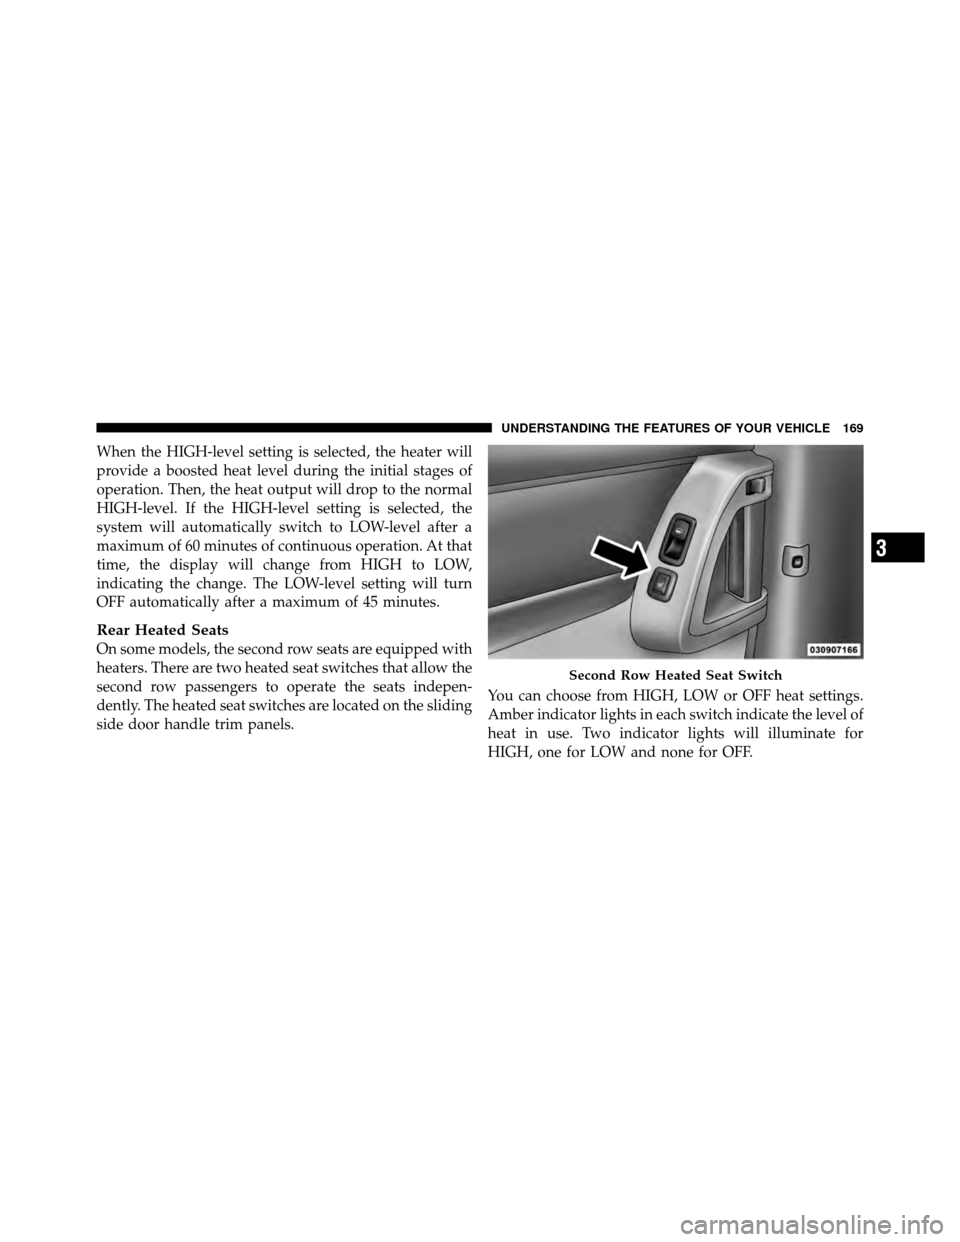
second row passengers to operate the seats indepen-
dently. The heated seat switches are located on the sliding
side door handle trim panels.You can choose from HIGH, LOW or OFF heat settings.
Amber indicator lights in each switch indicate the level of
heat in use. Two indicator lights will illuminate for
HIGH, one for LOW and none for OFF.
Second Row Heated Seat Switch
3
UNDERSTANDING THE FEATURES OF YOUR VEHICLE 169
Page 204 of 652
Use the hood prop rod to secure the hood in the open
position.
CAUTION!
To prevent possible damage, do not slam the hood to
close it. Lower the hood until it is open approxi-
mately 12 in (30 cm) and then drop it. This should
secure both latches. Never drive your vehicle unless
the hood is fully closed, with both latches engaged.
WARNING!
Be sure the hood is fully latched before driving your
vehicle. If the hood is not fully latched, it could open
when the vehicle is in motion and block your vision.
Failure to follow this warning could result in serious
injury or death.
LIGHTS
All of the lights, except the Hazard Warning lights,
headlight high beams and flash-to-pass, are controlled by
switches to the left of the steering column on the instru-
ment panel.
Headlight Switch With Halo Control Assembly
202 UNDERSTANDING THE FEATURES OF YOUR VEHICLE
Page 205 of 652
Interior Lighting
Interior lights are turned on when a door or liftgate is
opened, the Remote Keyless Entry (RKE) transmitter is
activated, or when the dimmer control is moved to the
extreme top.
The interior lights will automatically turn off in approxi-
mately 10 minutes for the first activation and 90 seconds
every activation thereafter until the engine is started, if
one of the following occur:
•A door, sliding door or the liftgate is left open
•Any overhead reading light is left on
NOTE: The key must be out of the ignition switch or the
ignition switch must be in the OFF position for this
feature to operate.
Dimmer Switch
The dimmer switch is located next to the headlight
switch.
Interior Lighting Off
Rotate the left dimmer control to the off position (extreme
bottom). The interior lights will remain off when the
doors or liftgate are open.
Dimmer Switch
3
UNDERSTANDING THE FEATURES OF YOUR VEHICLE 203
Page 206 of 652
Dimmer Control
With the parking lights or headlights on, rotating the left
dimmer control for the interior lights on the instrument
panel upward will increase the brightness of the instru-
ment panel lights.
Parade Mode (Daytime Brightness Feature)
Rotate the left dimmer control to the first detent. This
feature brightens the odometer, radio and overhead
displays when the parking lights or headlights are on.
Interior Lights On
Rotate the left dimmer control completely upward to the
second detent (extreme top position) to turn on the
interior lights. The interior lights will remain on when the
dimmer control is in this position.
Halo Lights — If Equipped
Halo lights are strategically placed soft lighting that help
to illuminate specific areas to aid the occupants in
locating specific features while driving at night.
The Halo control switch is located to the right of the
dimmer switch.
Halo Switch
204 UNDERSTANDING THE FEATURES OF YOUR VEHICLE