Page 280 of 557

▫Messages # ......................... 309
▫ Turn Menu Off ...................... 309
� Uconnect Touch™ Settings ............... 309
▫ Hard-Keys ......................... 309
▫ Soft-Keys .......................... 309
▫ Customer Programmable Features —
Uconnect Touch™ System 8.4 Settings ...... 310
▫ SRT Performance Features .............. 324
� Setting The Analog Clock ................ 328
� iPod�/USB/MP3 Control — If Equipped ..... 328
� Harman Kardon� Logic7�High Performance
Multichannel Surround Sound System With
Driver-Selectable Surround (DSS) — If
Equipped ............................ 328 �
Steering Wheel Audio Controls ............ 330
▫ Radio Operation ..................... 330
▫ CD Player ......................... 331
� CD/DVD Disc Maintenance .............. 331
� Radio Operation And Mobile Phones ....... 332
� Climate Controls ...................... 332
▫ General Overview .................... 333
▫ Climate Control Functions .............. 340
▫ Automatic Temperature Control (ATC) ..... 341
▫ Operating Tips ...................... 342
278 UNDERSTANDING YOUR INSTRUMENT PANEL
Page 294 of 557
ELECTRONIC VEHICLE INFORMATION CENTER
(EVIC)
The Electronic Vehicle Information Center (EVIC) fea-
tures a driver-interactive display that is located in the
instrument cluster.This system allows the driver to select a variety of useful
information by pressing the switches mounted on the
steering wheel. The EVIC consists of the following:
•Radio Info
•Fuel Economy Info
•Cruise Control Info
•Digital Vehicle Speed
•Trip Info
•Tire Pressure
•Vehicle Info Messages
•Stored Warning Messages
•Turn Menu OFF
Electronic Vehicle Information Center (EVIC)
292 UNDERSTANDING YOUR INSTRUMENT PANEL
Page 315 of 557

Clock
After pressing the Clock soft-key the following settings
will be available.
•Sync Time With GPS
When in this display, you may automatically have the
radio set the time. To change the Sync Time setting touch
the Sync with GPS Time soft-key until a check-mark
appears next to the setting, showing that setting has been
selected. Touch the back arrow soft-key to return to the
previous menu.
•Set Time Hours
When in this display, you may adjust the hours. The Sync
with GPS Time soft-key must be unchecked. To make
your selection touch the + or - soft-keys to adjust the
hours up or down. Touch the back arrow soft-key to
return to the previous menu or touch the X soft-key to
close out of the settings screen.
•Set Time Minutes
When in this display, you may adjust the minutes. The
Sync with GPS Time soft-key must be unchecked. To
make your selection touch the + or - soft-keys to adjust
the minutes up or down. Touch the back arrow soft-key
to return to the previous menu or touch the X soft-key to
close out of the settings screen.
•Time Format
When in this display, you may select the time format
display setting. Touch the Time Format soft-key until a
check-mark appears next to the 12hrs or 24hrs setting,
showing that setting has been selected. Touch the back
arrow soft-key to return to the previous menu.
•Show Time In Status Bar
When in this display, you may turn on or shut off the
digital clock in the status bar. To change the Show Time
Status setting touch the Show Time in Status Bar soft-key
4
UNDERSTANDING YOUR INSTRUMENT PANEL 313
Page 317 of 557

previous position when the transmission is shifted out of
REVERSE. To make your selection, touch the Tilt Mirrors
In Reverse soft-key, until a check-mark appears next to
setting, showing that setting has been selected. Touch the
back arrow soft-key to return to the previous menu.
•Blind Spot Alert
When this feature is selected, the Blind Spot Alert feature
can be set to Off, Lights or Lights and Chime. The Blind
Spot Alert feature can be activated in “Lights” mode.
When this mode is selected, the Blind Spot Monitor
(BSM) system is activated and will only show a visual
alert in the outside mirrors. When “Lights & Chime”
mode is activated, the Blind Spot Monitor (BSM) will
show a visual alert in the outside mirrors as well as an
audible alert when the turn signal is on. When “Off” is
selected, the Blind Spot Monitor (BSM) system is deacti-
vated. To change the Blind Spot Alert status, touch the
Off, Lights or Lights & Chime soft-key. Then touch the
arrow back soft-key. NOTE:
If your vehicle has experienced any damage in
the area where the sensor is located, even if the fascia is
not damaged, the sensor may have become misaligned.
Take your vehicle to an authorized dealer to verify sensor
alignment. Having a sensor that is misaligned will result
in the BSM not operating to specification.•ParkView� Backup Camera
Your vehicle may be equipped with the ParkView� Rear
Back Up Camera that allows you to see an on-screen
image of the rear surroundings of your vehicle whenever
the shift lever is put into REVERSE. The image will be
displayed on the radio touchscreen display along with a
caution note to “check entire surroundings” across the
top of the screen. After five seconds, this note will
disappear. The ParkView� camera is located on the rear
of the vehicle above the rear License plate. To make your
selection, touch the ParkView� Backup Camera soft-key,
until a check-mark appears next to setting, showing that
setting has been selected. Touch the back arrow soft-key
to return to the previous menu.
4
UNDERSTANDING YOUR INSTRUMENT PANEL 315
Page 323 of 557

showing that setting has been selected. Touch the back
arrow soft-key to return to the previous menu.
•Engine Off Power Delay
When this feature is selected, the power window
switches, radio, Uconnect™ phone system (if equipped),
DVD video system (if equipped), power sunroof (if
equipped), and power outlets will remain active for up to
10 minutes after the ignition is cycled to OFF. Opening
either front door will cancel this feature. To change the
Engine Off Power Delay status touch the 0 seconds,
45 seconds, 5 minutes or 10 minutes soft-key. Then touch
the arrow back soft-key.
•Headlight Off Delay
When this feature is selected, the driver can choose to
have the headlights remain on for 0, 30, 60, or 90 seconds
when exiting the vehicle. To change the Headlight Off Delay status touch the + or - soft-key to select your
desired time interval. Touch the back arrow soft-key to
return to the previous menu.
Compass Settings
After pressing the Compass Settings soft-key the follow-
ing settings will be available.
•Variance
Compass Variance is the difference between Magnetic
North and Geographic North. To compensate for the
differences the variance should be set for the zone where
the vehicle is driven, per the zone map. Once properly
set, the compass will automatically compensate for the
differences, and provide the most accurate compass
heading.4
UNDERSTANDING YOUR INSTRUMENT PANEL 321
Page 326 of 557

SIRIUS Setup
After pressing the SIRIUS Setup soft-key the following
settings will be available.
•Channel Skip
SIRIUS can be programmed to designate a group of
channels that are the most desirable to listen to or to
exclude undesirable channels while scanning. To make
your selection, touch the Channel Skip soft-key, select the
channels you would like to skip followed by pressing the
arrow back soft-key.
•Subscription Information
New vehicle purchasers or lessees will receive a free
limited time subscription to SIRIUS Satellite Radio with
your radio. Following the expiration of the free services,
it will be necessary to access the information on the
Subscription Information screen in order to re-subscribe. Touch the Subscription Info soft-key to access the Sub-
scription Information screen.
Write down the SIRIUS ID numbers for your receiver. To
reactivate your service, either call the number listed on
the screen or visit the provider online.
NOTE:
SIRIUS Travel Link is a separate subscription.
SRT Performance Features
To access the SRT Performance Features, touch the
“More” soft-key then touch the “SRT” soft-key. Press the
UP or DOWN soft-key to cycle through the features.
Press the feature soft-key to select that feature.
324 UNDERSTANDING YOUR INSTRUMENT PANEL
Page 331 of 557

proprietary amplifier and speaker technologies deliver-
ing substantial increases in component and system effi-
ciency levels.
The 12 Channel Class D GreenEdge high efficiency
amplifier is governed by a high voltage tracking power
supply and drives a 7.5-channel playback architecture.
The Harman Kardon�audio system offers the ability to
choose Logic 7 surround sound for any audio source. The
GreenEdge high-efficiency speaker designs ensure the
system has higher SPL and a dramatic increase in dy-
namic sound quality. The speakers are tuned for maxi-
mum efficiency and perfectly matched to the amplifier
output stage ensuring state of the art multi-seat surround
sound processing.
Logic7� multichannel surround-sound technology deliv-
ers an immersive, accurate sound-stage to every seating
position. This surround effect is available for audio from
any source - AM/FM/CD/ Satellite Radio or dashboard AUX input; and is activated through the Uconnect
Touch™ System. Refer to “Surround Sound” under
“Uconnect Touch™ Settings” in “Understanding Your
Instrument Panel”.
Selecting “Audio Surround” through the DSS modes
activates the Harman Kardon�
Logic7�multichannel
surround-sound technology in your vehicle. The “Video
Surround” mode is described under Driver-Selectable
Surround (DSS). The Video Surround Mode will only be
available for video media sources (DVDs, Video CDs, or
other video media supported by the radio). Some audio
will sound better in DSS modes, others in Stereo mode.
When in “Audio Surround” mode, balance is set auto-
matically. Fader control is available in surround mode
but should be set to the center position for optimal
surround performance.
4
UNDERSTANDING YOUR INSTRUMENT PANEL 329
Page 332 of 557

STEERING WHEEL AUDIO CONTROLS
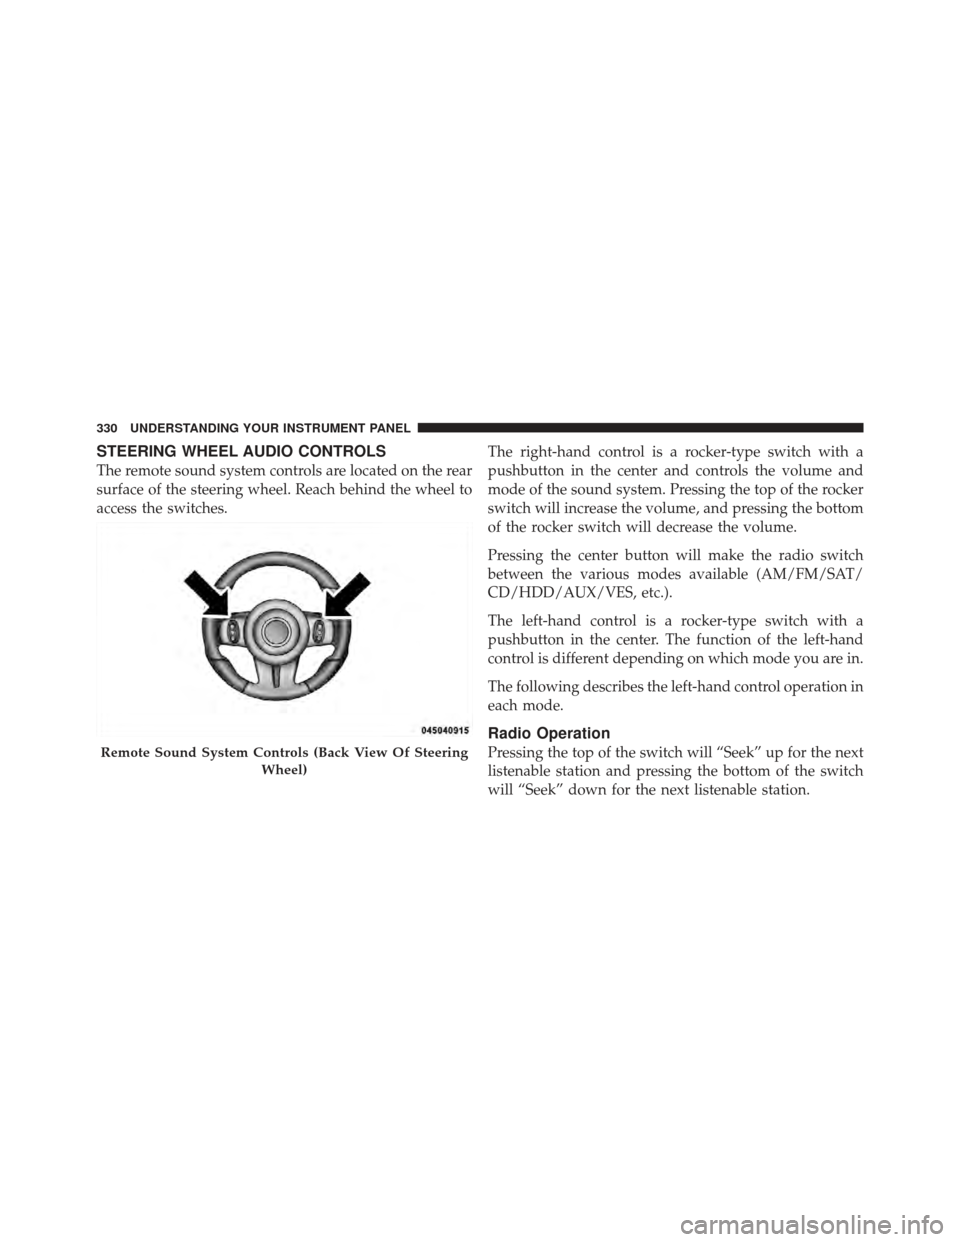
The remote sound system controls are located on the rear
surface of the steering wheel. Reach behind the wheel to
access the switches.The right-hand control is a rocker-type switch with a
pushbutton in the center and controls the volume and
mode of the sound system. Pressing the top of the rocker
switch will increase the volume, and pressing the bottom
of the rocker switch will decrease the volume.
Pressing the center button will make the radio switch
between the various modes available (AM/FM/SAT/
CD/HDD/AUX/VES, etc.).
The left-hand control is a rocker-type switch with a
pushbutton in the center. The function of the left-hand
control is different depending on which mode you are in.
The following describes the left-hand control operation in
each mode.
Radio Operation
Pressing the top of the switch will “Seek” up for the next
listenable station and pressing the bottom of the switch
will “Seek” down for the next listenable station.Remote Sound System Controls (Back View Of Steering
Wheel)
330 UNDERSTANDING YOUR INSTRUMENT PANEL