Page 191 of 557
Interior Lights
The interior lights come on when a door is opened.
To protect the battery, the interior lights will turn off
automatically 10 minutes after the ignition switch is
moved to the LOCK position. This will occur if the
interior lights were switched on manually or are on
because a door is open. This includes the glove box light,
but not the trunk light. To restore interior light operation,
either turn the ignition switch ON or cycle the light
switch.
Dimmer Control
The dimmer control is part of the headlight switch and is
located on the left side of the instrument panel.
Dimmer Controls
3
UNDERSTANDING THE FEATURES OF YOUR VEHICLE 189
Page 192 of 557
With the parking lights or headlights on, rotate the left
dimmer control upward or downward to increase or
decrease the brightness of the instrument panel lights
and cupholder rings (if equipped).Ambient Light Control
Rotate the right dimmer control upward or downward to
increase or decrease the brightness of the door handle
lights and ambient light located in the overhead console.
Instrument Panel DimmerDoor Handle/Ambient Light Dimmer
190 UNDERSTANDING THE FEATURES OF YOUR VEHICLE
Page 193 of 557
Dome Light Position
Rotate the dimmer control completely upward to the
second detent to turn on the interior lights. The interior
lights will remain on when the dimmer control is in this
position.
Interior Light Defeat (OFF)
Rotate the dimmer control to the extreme bottom OFF
position. The interior lights will remain off when the
doors are open.
Parade Mode (Daytime Brightness Feature)
Rotate the dimmer control upward to the first detent.
This feature brightens all text displays such as the
odometer, EVIC (if equipped), and radio when the park-
ing lights or headlights are on.
WINDSHIELD WIPERS AND WASHERS
The multifunction lever operates the windshield wipers
and washer when the ignition is placed in the RUN
position. The multifunction lever is located on the left
side of the steering column.
Windshield Wiper/Washer Control
3
UNDERSTANDING THE FEATURES OF YOUR VEHICLE 191
Page 195 of 557

Mist Feature
Rotate the end of the lever downward to the Mist
position to activate a single wipe cycle to clear off road
mist or spray from a passing vehicle. The wipers will
continue to operate until you release the multifunction
lever.
NOTE:The mist feature does not activate the washer
pump; therefore, no washer fluid will be sprayed on the
windshield. The wash function must be used in order to
spray the windshield with washer fluid.
Windshield Washers
To use the washer, push the multifunction lever inward
(toward the steering column) and hold it for as long as
washer spray is desired.
If you activate the washer while the windshield wiper
control is in the delay range, the wipers will operate for
two wipe cycles after releasing the lever and then resume
the intermittent interval previously selected. If you activate the washer while the windshield wiper is
turned off, the wipers will operate for three wipe cycles
and then turn off.
WARNING!
Sudden loss of visibility through the windshield
could lead to a collision. You might not see other
vehicles or other obstacles. To avoid sudden icing of
the windshield during freezing weather, warm the
windshield with the defroster before and during
windshield washer use.
Headlights On With Wipers (Available with
Automatic Headlights Only)
When this feature is active, the headlights will turn on
approximately 10 seconds after the wipers are turned on
if the headlight switch is placed in the AUTO position. In
addition, the headlights will turn off when the wipers are
turned off if they were turned on by this feature.
3
UNDERSTANDING THE FEATURES OF YOUR VEHICLE 193
Page 196 of 557

The Headlights On with Wipers feature can be turned on
and off using the Uconnect Touch™ System, refer to
“Uconnect Touch™ Settings” in “Understanding Your
Instrument Panel” for further information.
Rain Sensing Wipers
This feature senses moisture on the windshield and
automatically activates the wipers for the driver. The
feature is especially useful for road splash or over spray
from the windshield washers of the vehicle ahead. Rotate
the end of the multifunction lever to one of four settings
to activate this feature.
The sensitivity of the system can be adjusted with the
multifunction lever. Wiper delay position 1 is the least
sensitive, and wiper delay position 4 is the most sensi-
tive. Setting 3 should be used for normal rain conditions.
Settings 1 and 2 can be used if the driver desires less
wiper sensitivity. Settings 4 can be used if the driver
desires more sensitivity. The rain sense wipers willautomatically change between an intermittent wipe, slow
wipe and a fast wipe depending on the amount of
moisture that is sensed on the windshield. Place the
wiper switch in the OFF position when not using the
system.
The Rain Sensing feature can be turned on and off using
the Uconnect Touch™ System, refer to “Uconnect
Touch™ Settings” in “Understanding Your Instrument
Panel” for further information.
NOTE:
•The Rain Sensing feature will not operate when the
wiper speed is in the low or high position.
•The Rain Sensing feature may not function properly
when ice or dried salt water is present on the wind-
shield.
•Use of Rain-X�
or products containing wax or silicone
may reduce rain sensor performance.
194 UNDERSTANDING THE FEATURES OF YOUR VEHICLE
Page 218 of 557

If there is no vehicle ahead, the vehicle will maintain the set
speed. If a slower moving vehicle is detected in the same
lane, the EVIC displays the “Sensed Vehicle Indicator”
icon, and the system adjusts vehicle speed automatically to
maintain the distance setting, regardless of the set speed.
The vehicle will then maintain the set distance until:
•The vehicle ahead accelerates to a speed above the set
speed.
•The vehicle ahead moves out of your lane or view of
the sensor.
•The vehicle ahead slows to a speed below 15 mph
(24 km/h) and the system automatically disengages
itself.
•The distance setting is changed.
•The system disengages. (Refer to the information on
ACC Activation).The maximum braking applied by ACC is limited; how-
ever, the driver can always apply the brakes manually, if
necessary.
NOTE:
The brake lights will illuminate whenever the
ACC system applies the brakes.
A Proximity Warning will alert the driver if ACC predicts
that its maximum braking level is not sufficient to
maintain the set distance. If this occurs, a visual alert
“BRAKE” will flash in the EVIC and a chime will sound
while ACC continues to apply its maximum braking
capacity. When this occurs, you should immediately
apply the brakes as needed to maintain a safe distance
from the vehicle ahead.
216 UNDERSTANDING THE FEATURES OF YOUR VEHICLE
Page 245 of 557
Turning ParkView�On Or Off — With Touch
Screen Radio
1. Turn the Radio on.
2. Press the “More” soft-key.
3. Press the “Settings” soft-key.
4. Press the “Safety & Driving Assistance” soft-key.
5. Press the check box soft key next to “Parkview �
Backup Camera” to enable/disable.
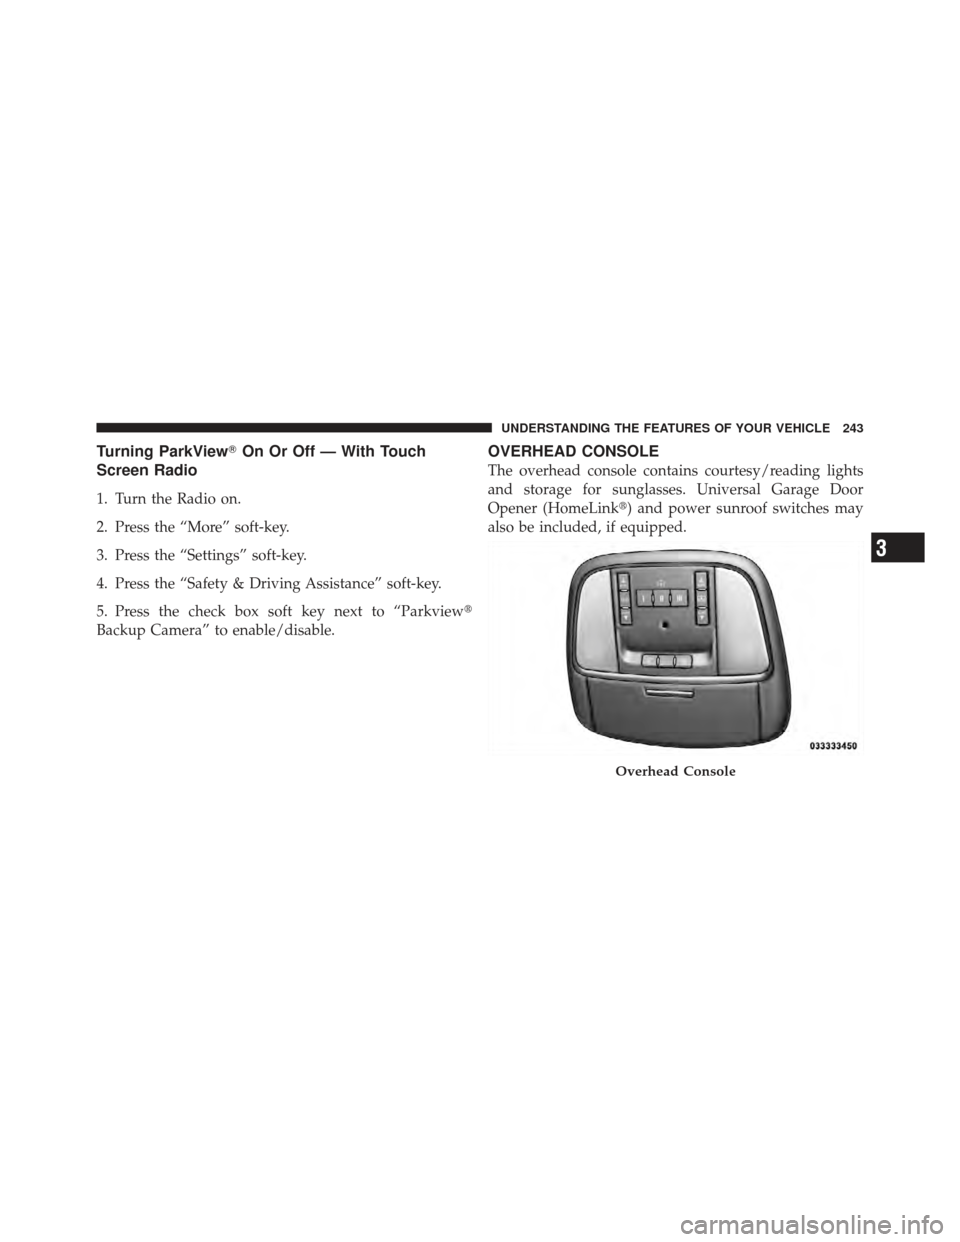
OVERHEAD CONSOLE
The overhead console contains courtesy/reading lights
and storage for sunglasses. Universal Garage Door
Opener (HomeLink�) and power sunroof switches may
also be included, if equipped.
Overhead Console
3
UNDERSTANDING THE FEATURES OF YOUR VEHICLE 243
Page 246 of 557
Front Map/Reading Lights
Lights are mounted in the overhead console. Each light
can be turned on by pressing the switch on either side of
the console. These buttons are backlit for night time
visibility.To turn the lights off, press the switch a second time. The
lights also turn on when a door is opened. The lights will
also turn on when the UNLOCK button on the RKE is
pressed.
Front Map/Reading Lights
244 UNDERSTANDING THE FEATURES OF YOUR VEHICLE

.Ambi")