2012 CHEVROLET SILVERADO engine
[x] Cancel search: enginePage 434 of 584
Black plate (28,1)Chevrolet Silverado Owner Manual - 2012
10-28 Vehicle Care
Washer Fluid
What to Use
When windshield washer fluid needs
to be added, be sure to read the
manufacturer's instructions before
use. Use a fluid that has sufficient
protection against freezing in an
area where the temperature may fall
below freezing.
Adding Washer Fluid
The vehicle has a low washer
fluid message on the DIC that
comes on when the washer fluid is
low. The message is displayed for
15 seconds at the start of each
ignition cycle. When the WASHER
FLUID LOW ADD FLUID message
displays, washer fluid will need to
be added to the windshield washer
fluid reservoir.
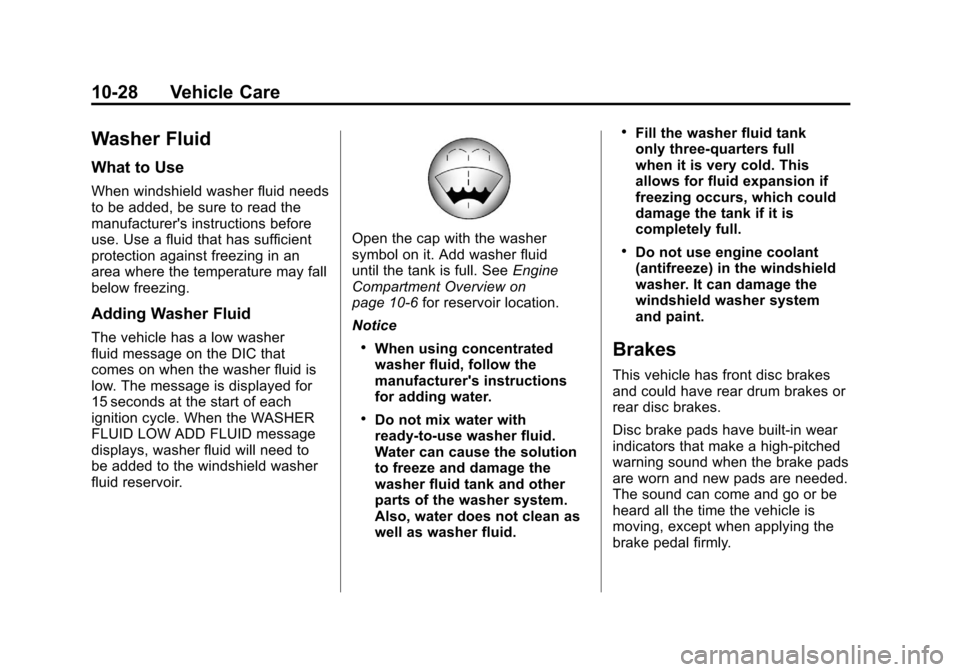
Open the cap with the washer
symbol on it. Add washer fluid
until the tank is full. SeeEngine
Compartment Overview on
page 10‑6 for reservoir location.
Notice
.When using concentrated
washer fluid, follow the
manufacturer's instructions
for adding water.
.Do not mix water with
ready-to-use washer fluid.
Water can cause the solution
to freeze and damage the
washer fluid tank and other
parts of the washer system.
Also, water does not clean as
well as washer fluid.
.Fill the washer fluid tank
only three-quarters full
when it is very cold. This
allows for fluid expansion if
freezing occurs, which could
damage the tank if it is
completely full.
.Do not use engine coolant
(antifreeze) in the windshield
washer. It can damage the
windshield washer system
and paint.
Brakes
This vehicle has front disc brakes
and could have rear drum brakes or
rear disc brakes.
Disc brake pads have built-in wear
indicators that make a high-pitched
warning sound when the brake pads
are worn and new pads are needed.
The sound can come and go or be
heard all the time the vehicle is
moving, except when applying the
brake pedal firmly.
Page 436 of 584
Black plate (30,1)Chevrolet Silverado Owner Manual - 2012
10-30 Vehicle Care
Brake Fluid
The brake master cylinder reservoir
is filled with DOT 3 brake fluid. See
Engine Compartment Overview on
page 10‑6for the location of the
reservoir.
There are only two reasons why the
brake fluid level in the reservoir
might go down:
.The brake fluid level goes down
because of normal brake lining
wear. When new linings are
installed, the fluid level goes
back up.
.A fluid leak in the brake
hydraulic system can also cause
a low fluid level. Have the brake
hydraulic system fixed, since a
leak means that sooner or later
the brakes will not work well. Do not top off the brake fluid.
Adding fluid does not correct a leak.
If fluid is added when the linings are
worn, there will be too much fluid
when new brake linings are
installed. Add or remove brake fluid,
as necessary, only when work is
done on the brake hydraulic system.
{WARNING
If too much brake fluid is added, it
can spill on the engine and burn,
if the engine is hot enough. You
or others could be burned, and
the vehicle could be damaged.
Add brake fluid only when work is
done on the brake hydraulic
system. See
“Checking Brake
Fluid” in this section.
When the brake fluid falls to a low
level, the brake warning light comes
on. See Brake System Warning
Light on page 5‑26. Refer to the Maintenance Schedule
to determine when to check the
brake fluid. See
Maintenance
Schedule on page 11‑3.
Checking Brake Fluid
Check brake fluid by looking at the
brake fluid reservoir. See Engine
Compartment Overview on
page 10‑6.
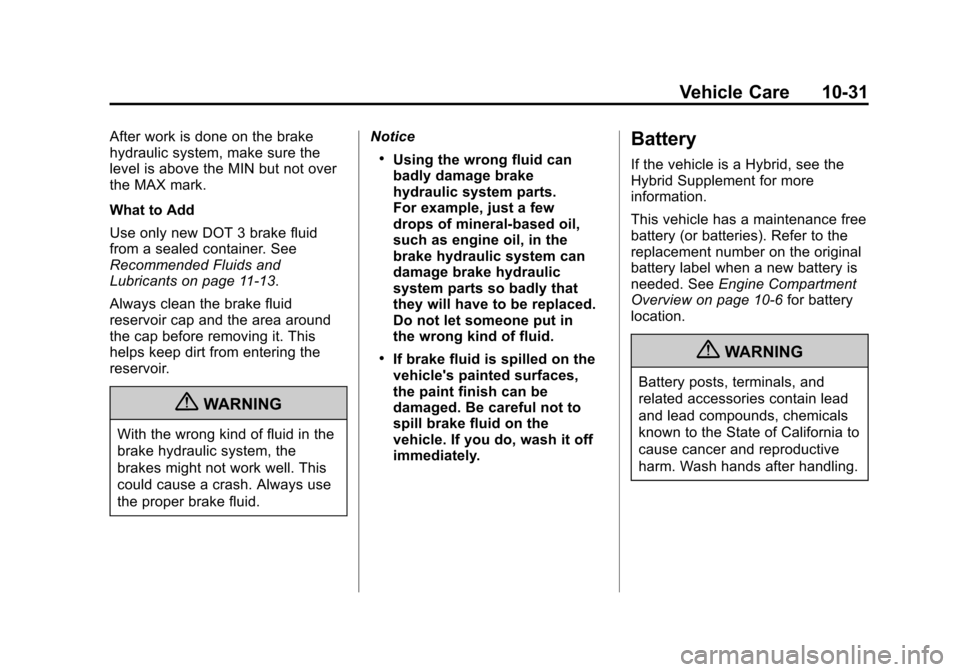
The fluid level should be above
MIN. If it is not, have the brake
hydraulic system checked to see if
there is a leak.
Page 437 of 584
Black plate (31,1)Chevrolet Silverado Owner Manual - 2012
Vehicle Care 10-31
After work is done on the brake
hydraulic system, make sure the
level is above the MIN but not over
the MAX mark.
What to Add
Use only new DOT 3 brake fluid
from a sealed container. See
Recommended Fluids and
Lubricants on page 11‑13.
Always clean the brake fluid
reservoir cap and the area around
the cap before removing it. This
helps keep dirt from entering the
reservoir.
{WARNING
With the wrong kind of fluid in the
brake hydraulic system, the
brakes might not work well. This
could cause a crash. Always use
the proper brake fluid.Notice
.Using the wrong fluid can
badly damage brake
hydraulic system parts.
For example, just a few
drops of mineral-based oil,
such as engine oil, in the
brake hydraulic system can
damage brake hydraulic
system parts so badly that
they will have to be replaced.
Do not let someone put in
the wrong kind of fluid.
.If brake fluid is spilled on the
vehicle's painted surfaces,
the paint finish can be
damaged. Be careful not to
spill brake fluid on the
vehicle. If you do, wash it off
immediately.
Battery
If the vehicle is a Hybrid, see the
Hybrid Supplement for more
information.
This vehicle has a maintenance free
battery (or batteries). Refer to the
replacement number on the original
battery label when a new battery is
needed. See
Engine Compartment
Overview on page 10‑6 for battery
location.
{WARNING
Battery posts, terminals, and
related accessories contain lead
and lead compounds, chemicals
known to the State of California to
cause cancer and reproductive
harm. Wash hands after handling.
Page 441 of 584
Black plate (35,1)Chevrolet Silverado Owner Manual - 2012
Vehicle Care 10-35
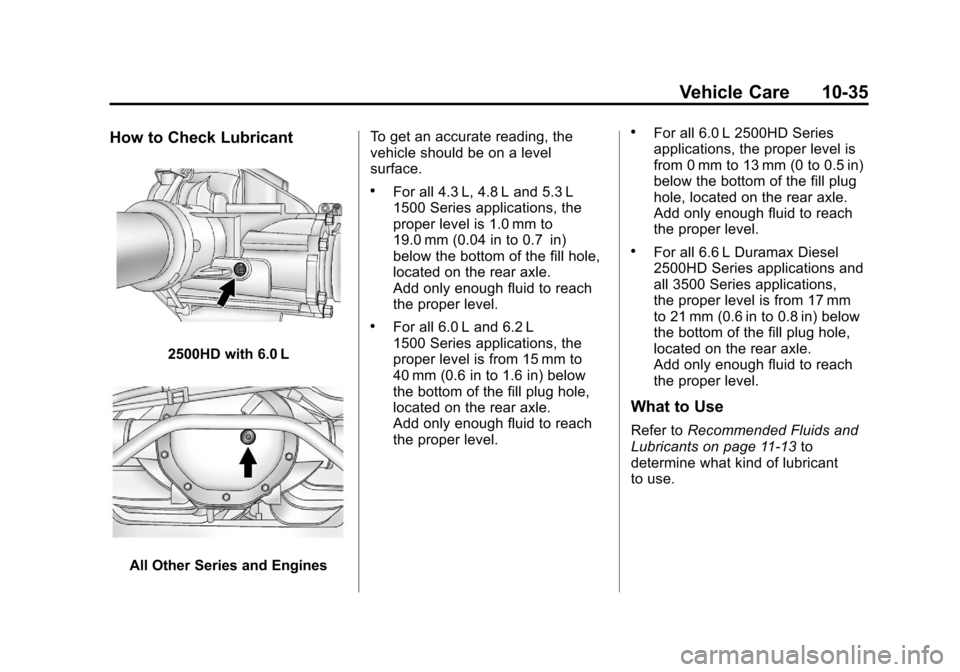
How to Check Lubricant
2500HD with 6.0 L
All Other Series and EnginesTo get an accurate reading, the
vehicle should be on a level
surface.
.For all 4.3 L, 4.8 L and 5.3 L
1500 Series applications, the
proper level is 1.0 mm to
19.0 mm (0.04 in to 0.7 in)
below the bottom of the fill hole,
located on the rear axle.
Add only enough fluid to reach
the proper level.
.For all 6.0 L and 6.2 L
1500 Series applications, the
proper level is from 15 mm to
40 mm (0.6 in to 1.6 in) below
the bottom of the fill plug hole,
located on the rear axle.
Add only enough fluid to reach
the proper level.
.For all 6.0 L 2500HD Series
applications, the proper level is
from 0 mm to 13 mm (0 to 0.5 in)
below the bottom of the fill plug
hole, located on the rear axle.
Add only enough fluid to reach
the proper level.
.For all 6.6 L Duramax Diesel
2500HD Series applications and
all 3500 Series applications,
the proper level is from 17 mm
to 21 mm (0.6 in to 0.8 in) below
the bottom of the fill plug hole,
located on the rear axle.
Add only enough fluid to reach
the proper level.
What to Use
Refer to
Recommended Fluids and
Lubricants on page 11‑13 to
determine what kind of lubricant
to use.
Page 442 of 584
Black plate (36,1)Chevrolet Silverado Owner Manual - 2012
10-36 Vehicle Care
Noise Control System
The following information relates to
compliance with federal noise
emission standards for vehicles
with a Gross Vehicle Weight Rating
(GVWR) of more than 4 536 kg
(10,000 lbs). The noise control
system warranty is given in your
warranty booklet.
These standards apply only to
vehicles sold in the United States.
Federal law prohibits the following
acts or the causing thereof:
1. The removal or renderinginoperative by any person,
other than for purposes of
maintenance, repair or
replacement, of any device or
element of design incorporated
into any new vehicle for the
purpose of noise control, prior to
its sale or delivery to the ultimate
purchaser or while it is in use; or
2. The use of the vehicle after such device or element of design has
been removed or rendered
inoperative by any person. Among those acts presumed to
constitute tampering are the acts
listed below.
Insulation:
Removal of the noise shields or any
underhood insulation.
Engine:
Removal or rendering engine speed
governor, if the vehicle has one,
inoperative so as to allow engine
speed to exceed manufacturer
specifications.
Fan and Drive:
.Removal of fan clutch, if the
vehicle has one, or rendering
clutch inoperative.
.Removal of the fan shroud, if the
vehicle has one.
Air Intake:
.Removal of the air cleaner
silencer.
.Modification of the air cleaner. Exhaust:
.Removal of the muffler and/or
resonator.
.Removal of the exhaust pipes
and exhaust pipe clamps.
Starter Switch Check
{WARNING
When you are doing this
inspection, the vehicle could
move suddenly. If the vehicle
moves, you or others could be
injured.
1. Before starting this check, be sure there is enough room
around the vehicle.
2. Firmly apply both the parking brake and the regular brake.
See Parking Brake on
page 9‑60.
Page 443 of 584
Black plate (37,1)Chevrolet Silverado Owner Manual - 2012
Vehicle Care 10-37
Do not use the accelerator
pedal, and be ready to turn off
the engine immediately if it
starts.
3. For automatic transmission vehicles, try to start the engine
in each gear. The vehicle should
start only in P (Park) or
N (Neutral). If the vehicle starts
in any other position, contact
your dealer for service.
For manual transmission
vehicles, put the shift lever in
Neutral, push the clutch pedal
down halfway, and try to start
the engine. The vehicle should
start only when the clutch pedal
is pushed down all the way to
the floor. If the vehicle starts
when the clutch pedal is not
pushed all the way down,
contact your dealer for service.Automatic Transmission
Shift Lock Control
Function Check
{WARNING
When you are doing this
inspection, the vehicle could
move suddenly. If the vehicle
moves, you or others could be
injured.
1. Before starting this check, be sure there is enough room
around the vehicle. It should be
parked on a level surface. 2. Firmly apply the parking brake.
See Parking Brake on
page 9‑60.
Be ready to apply the regular
brake immediately if the vehicle
begins to move.
3. With the engine off, turn the ignition on, but do not start the
engine. Without applying the
regular brake, try to move the
shift lever out of P (Park) with
normal effort. If the shift lever
moves out of P (Park), contact
your dealer for service.
Page 444 of 584
Black plate (38,1)Chevrolet Silverado Owner Manual - 2012
10-38 Vehicle Care
Ignition Transmission
Lock Check
While parked, and with the parking
brake set, try to turn the ignition to
LOCK/OFF in each shift lever
position.
.For automatic transmission
vehicles, the ignition should turn
to LOCK/OFF only when the
shift lever is in P (Park).
.For manual transmission
vehicles, the ignition should turn
to LOCK/OFF only when you
press the key release button.
On all vehicles, the ignition key
should come out only in LOCK/OFF.
Contact your dealer if service is
required.
Park Brake and P (Park)
Mechanism Check
{WARNING
When you are doing this check,
the vehicle could begin to move.
You or others could be injured
and property could be damaged.
Make sure there is room in front
of the vehicle in case it begins to
roll. Be ready to apply the regular
brake at once should the vehicle
begin to move. Park on a fairly steep hill, with the
vehicle facing downhill. Keeping
your foot on the regular brake, set
the parking brake.
.To check the parking brake's
holding ability: With the engine
running and the transmission in
N (Neutral), slowly remove foot
pressure from the regular brake
pedal. Do this until the vehicle is
held by the parking brake only.
.To check the P (Park)
mechanism's holding ability:
With the engine running, shift to
P (Park). Then release the
parking brake followed by the
regular brake.
Contact your dealer if service is
required.
Page 448 of 584
Black plate (42,1)Chevrolet Silverado Owner Manual - 2012
10-42 Vehicle Care
Bulb Replacement
For the proper type of replacement
bulbs, seeReplacement Bulbs on
page 10‑45.
For any bulb‐changing procedure
not listed in this section, contact
your dealer.
Halogen Bulbs
{WARNING
Halogen bulbs have pressurized
gas inside and can burst if you
drop or scratch the bulb. You or
others could be injured. Be sure
to read and follow the instructions
on the bulb package.
Headlamps, Front Turn
Signal, Sidemarker, and
Parking Lamps
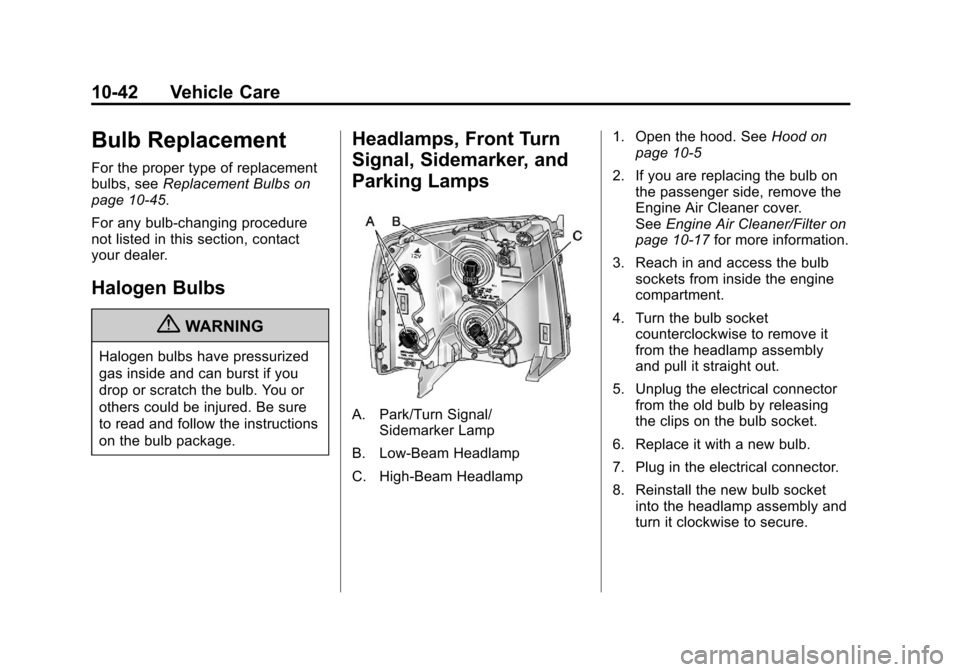
A. Park/Turn Signal/
Sidemarker Lamp
B. Low‐Beam Headlamp
C. High‐Beam Headlamp 1. Open the hood. See
Hood on
page 10‑5
2. If you are replacing the bulb on the passenger side, remove the
Engine Air Cleaner cover.
See Engine Air Cleaner/Filter on
page 10‑17 for more information.
3. Reach in and access the bulb sockets from inside the engine
compartment.
4. Turn the bulb socket counterclockwise to remove it
from the headlamp assembly
and pull it straight out.
5. Unplug the electrical connector from the old bulb by releasing
the clips on the bulb socket.
6. Replace it with a new bulb.
7. Plug in the electrical connector.
8. Reinstall the new bulb socket into the headlamp assembly and
turn it clockwise to secure.