2012 CHEVROLET ORLANDO warning
[x] Cancel search: warningPage 1 of 378

Black plate (1,1)Chevrolet Orlando Owner Manual - 2012
2012 Chevrolet Orlando Owner ManualM
In Brief. . . . . . . . . . . . . . . . . . . . . . . . 1-1
Instrument Panel . . . . . . . . . . . . . . 1-2
Initial Drive Information . . . . . . . . 1-4
Vehicle Features . . . . . . . . . . . . . 1-15
Performance and Maintenance . . . . . . . . . . . . . . . . 1-19
Keys, Doors, and Windows . . . . . . . . . . . . . . . . . . . . 2-1
Keys and Locks . . . . . . . . . . . . . . . 2-2
Doors . . . . . . . . . . . . . . . . . . . . . . . . . . 2-8
Vehicle Security . . . . . . . . . . . . . . . . 2-9
Exterior Mirrors . . . . . . . . . . . . . . . 2-11
Interior Mirrors . . . . . . . . . . . . . . . . 2-12
Windows . . . . . . . . . . . . . . . . . . . . . 2-14
Roof . . . . . . . . . . . . . . . . . . . . . . . . . . 2-17
Seats and Restraints . . . . . . . . . 3-1
Head Restraints . . . . . . . . . . . . . . . 3-2
Front Seats . . . . . . . . . . . . . . . . . . . . 3-4
Rear Seats . . . . . . . . . . . . . . . . . . . . 3-8
Safety Belts . . . . . . . . . . . . . . . . . . 3-16
Airbag System . . . . . . . . . . . . . . . . 3-25
Child Restraints . . . . . . . . . . . . . . 3-33 Storage
. . . . . . . . . . . . . . . . . . . . . . . 4-1
Storage Compartments . . . . . . . . 4-1
Additional Storage Features . . . 4-2
Roof Rack System . . . . . . . . . . . . . 4-5
Instruments and Controls . . . . 5-1
Controls . . . . . . . . . . . . . . . . . . . . . . . 5-2
Warning Lights, Gauges, and
Indicators . . . . . . . . . . . . . . . . . . . . 5-7
Information Displays . . . . . . . . . . 5-22
Vehicle Messages . . . . . . . . . . . . 5-26
Vehicle Personalization . . . . . . . 5-32
Lighting . . . . . . . . . . . . . . . . . . . . . . . 6-1
Exterior Lighting . . . . . . . . . . . . . . . 6-1
Interior Lighting . . . . . . . . . . . . . . . . 6-5
Lighting Features . . . . . . . . . . . . . . 6-6
Infotainment System . . . . . . . . . 7-1
Introduction . . . . . . . . . . . . . . . . . . . . 7-1
Radio . . . . . . . . . . . . . . . . . . . . . . . . . 7-10
Audio Players . . . . . . . . . . . . . . . . 7-16
Phone . . . . . . . . . . . . . . . . . . . . . . . . 7-21
Trademarks and License Agreements . . . . . . . . . . . . . . . . . 7-32 Climate Controls
. . . . . . . . . . . . . 8-1
Climate Control Systems . . . . . . 8-1
Air Vents . . . . . . . . . . . . . . . . . . . . . . . 8-6
Driving and Operating . . . . . . . . 9-1
Driving Information . . . . . . . . . . . . . 9-2
Starting and Operating . . . . . . . 9-14
Engine Exhaust . . . . . . . . . . . . . . 9-21
Automatic Transmission . . . . . . 9-23
Manual Transmission . . . . . . . . . 9-25
Brakes . . . . . . . . . . . . . . . . . . . . . . . 9-27
Ride Control Systems . . . . . . . . 9-29
Cruise Control . . . . . . . . . . . . . . . . 9-32
Object Detection Systems . . . . 9-35
Fuel . . . . . . . . . . . . . . . . . . . . . . . . . . 9-36
Towing . . . . . . . . . . . . . . . . . . . . . . . 9-40
Conversions and Add-Ons . . . 9-46
Page 4 of 378
Black plate (4,1)Chevrolet Orlando Owner Manual - 2012
iv Introduction
Using this Manual
To quickly locate information about
the vehicle, use the Index in the
back of the manual. It is an
alphabetical list of what is in the
manual and the page number where
it can be found.
Danger, Warnings, and
Cautions
Warning messages found on vehicle
labels and in this manual describe
hazards and what to do to avoid or
reduce them.
Dangerindicates a hazard with a
high level of risk which will result in
serious injury or death.
Warning orCaution indicates a
hazard that could result in injury or
death.
{WARNING
These mean there is something
that could hurt you or other
people.
Notice: This means there is
something that could result in
property or vehicle damage. This
would not be covered by the
vehicle's warranty.
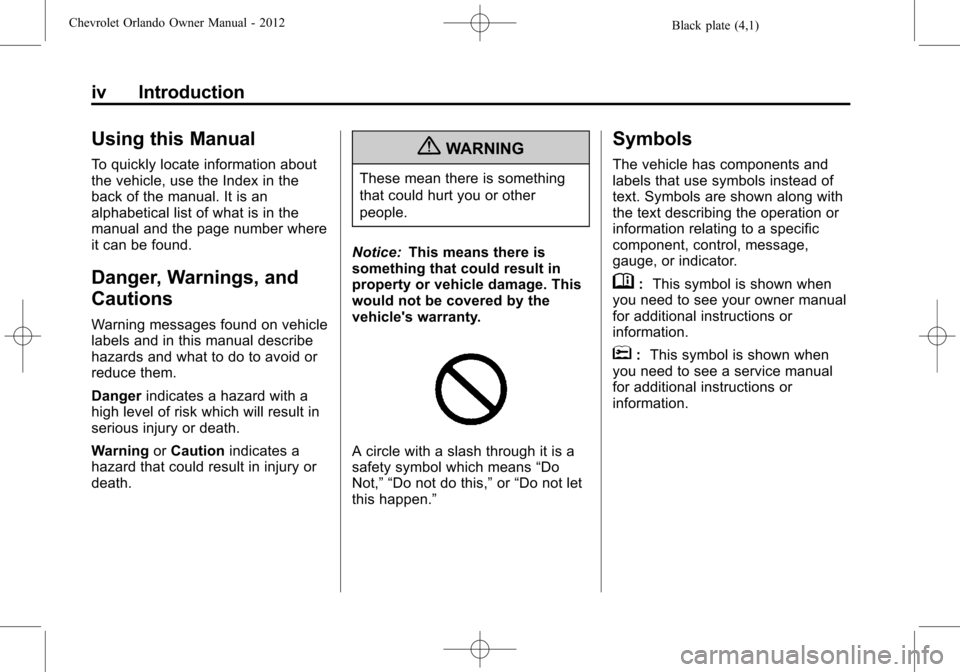
A circle with a slash through it is a
safety symbol which means “Do
Not,” “Do not do this,” or“Do not let
this happen.”
Symbols
The vehicle has components and
labels that use symbols instead of
text. Symbols are shown along with
the text describing the operation or
information relating to a specific
component, control, message,
gauge, or indicator.
M: This symbol is shown when
you need to see your owner manual
for additional instructions or
information.
*: This symbol is shown when
you need to see a service manual
for additional instructions or
information.
Page 5 of 378

Black plate (5,1)Chevrolet Orlando Owner Manual - 2012
Introduction v
Vehicle Symbol Chart
Here are some additional symbols
that may be found on the vehicle
and what they mean. For more
information on the symbol, refer to
the Index.
9:Airbag Readiness Light
#:Air Conditioning
!:Antilock Brake System (ABS)
%:Audio Steering Wheel Controls
or OnStar®
$: Brake System Warning Light
":Charging System
I:Cruise Control
B: Engine Coolant Temperature
O:Exterior Lamps
#:Fog Lamps
.: Fuel Gauge
+:Fuses
3: Headlamp High/Low-Beam
Changer
j: LATCH System Child
Restraints
*: Malfunction Indicator Lamp
::Oil Pressure
}:Power
/:Remote Vehicle Start
>:Safety Belt Reminders
7:Tire Pressure Monitor
d:Traction Control/StabiliTrak®
M:Windshield Washer Fluid
Page 9 of 378

Black plate (3,1)Chevrolet Orlando Owner Manual - 2012
In Brief 1-3
A.Air Vents on page 8‑6.
B. Turn and Lane-Change Lever. See Turn and Lane-Change
Signals on page 6‑4.
Headlamp High/Low-Beam
Changer on page 6‑2.
C. Instrument Cluster on page 5‑9.
D. Windshield Wiper/Washer on
page 5‑3.
Rear Window Wiper/Washer on
page 5‑5.
E. Infotainment on page 7‑1.
F. Infotainment Display.
G. Light Sensor. See Automatic
Headlamp System on page 6‑3.
H. Instrument Panel Storage on
page 4‑1.
USB Port and Auxiliary Input
Jack (Inside Instrument Panel
Storage). See Auxiliary Devices
on page 7‑18. I.
CD Player on page 7‑16.
J. TCS/StabiliTrak Button. See StabiliTrak
®System on
page 9‑31.
K. Exterior Lamp Controls on
page 6‑1.
Instrument Panel Illumination
Control on page 6‑5.
Front Fog Lamps on page 6‑4.
L. Front Storage on page 4‑1.
M. Data Link Connector (DLC) (Out of View). See Malfunction
Indicator Lamp on page 5‑13.
N. Cruise Control on page 9‑32.
O. Steering Wheel Adjustment on
page 5‑2.
P. Horn on page 5‑3.
Q. Steering Wheel Controls on
page 5‑3. R.
Power Door Locks on page 2‑7.
S. Heated Front Seats on page 3‑7
(If Equipped).
T. Climate Control Systems on
page 8‑1.
Automatic Climate Control
System on page 8‑3.
U. Shift Lever. See Automatic
Transmission on page 9‑23 or
Manual Transmission on
page 9‑25.
V. Parking Brake on page 9‑28.
W. Power Outlets on page 5‑6.
X. Hazard Warning Flashers on
page 6‑3.
Y. Passenger Safety Belt Reminder Light. See Safety Belt
Reminders on page 5‑11.
Page 11 of 378
Black plate (5,1)Chevrolet Orlando Owner Manual - 2012
In Brief 1-5
When the engine starts, the parking
lamps will turn on and remain on as
long as the engine is running. The
doors will be locked and the climate
control system may come on.
The engine will continue to run for
10 minutes. Repeat the steps for a
10-minute time extension. Remote
start can be extended only once.
Canceling a Remote Start
To cancel a remote start, do one of
the following:
.Aim the RKE transmitter at the
vehicle and press and hold
/
until the parking lamps turn off.
.Turn on the hazard warning
flashers.
.Turn the vehicle on and then off.
See Remote Vehicle Start on
page 2‑5.
Door Locks
To lock or unlock the vehicle from
outside, use the Remote Keyless
Entry (RKE) transmitter or the key.
From inside the vehicle, use the
power door lock switch.
See Door Locks on page 2‑6.
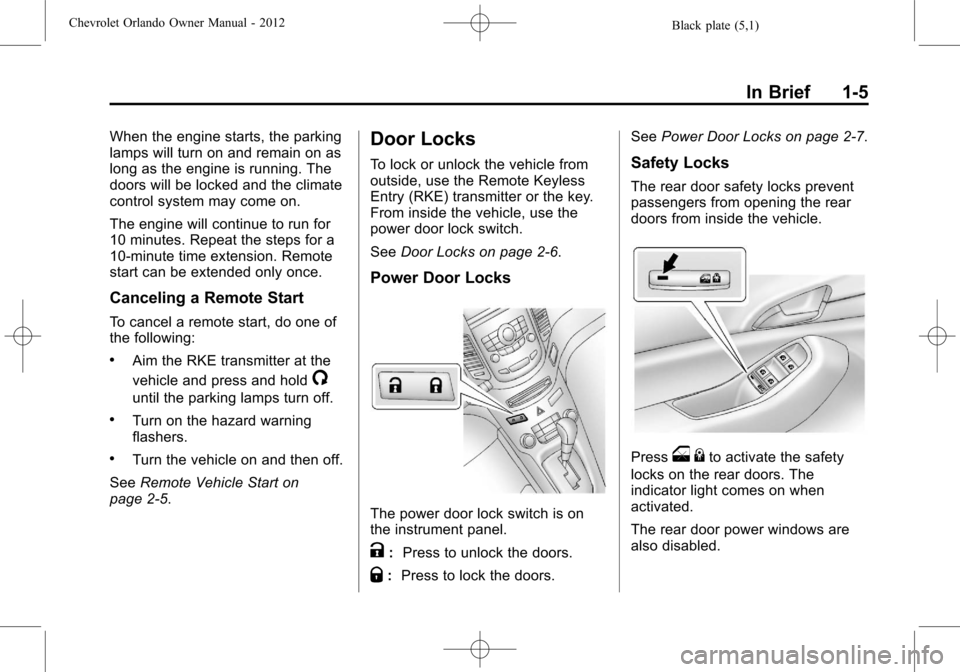
Power Door Locks
The power door lock switch is on
the instrument panel.
K:Press to unlock the doors.
Q:Press to lock the doors. See
Power Door Locks on page 2‑7.
Safety Locks
The rear door safety locks prevent
passengers from opening the rear
doors from inside the vehicle.
Presso{to activate the safety
locks on the rear doors. The
indicator light comes on when
activated.
The rear door power windows are
also disabled.
Page 18 of 378
Black plate (12,1)Chevrolet Orlando Owner Manual - 2012
1-12 In Brief
;:Turns on the parking lamps,
taillamps, license plate lamps,
sidemarker lamps, and instrument
panel lights.
5: Turns on the headlamps,
parking lamps, taillamps, license
plate lamps, sidemarker lamps, and
instrument panel lights. A warning
chime sounds if the driver door is
opened when the ignition switch is
off and the headlamps are on.
#: For vehicles with fog lamps,
press to turn the lamps on or off.
For more information, see:
.Exterior Lamp Controls on
page 6‑1.
.Daytime Running Lamps (DRL)
on page 6‑2.
.Front Fog Lamps on page 6‑4.
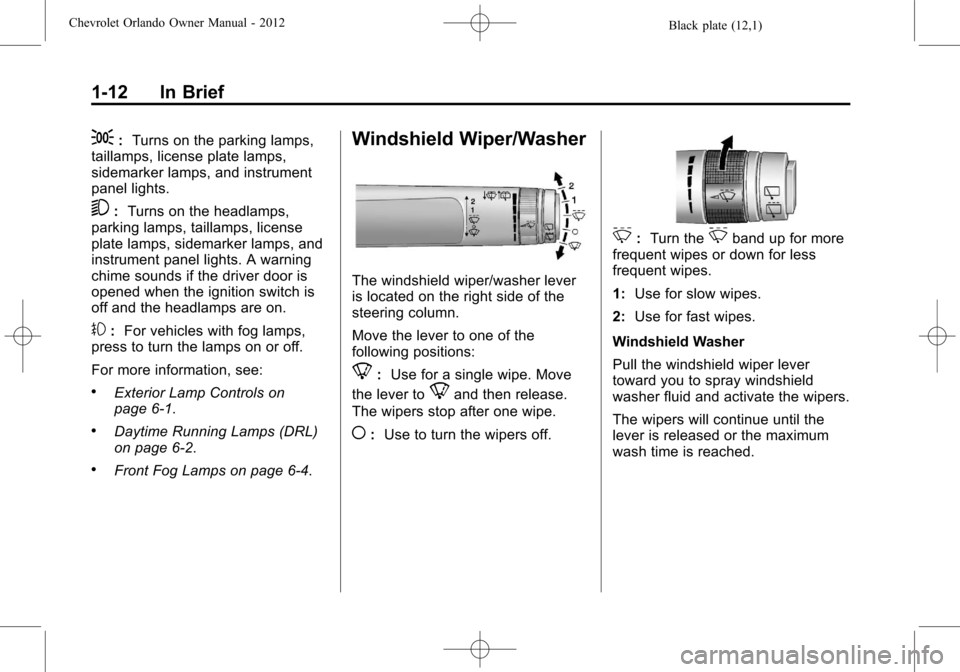
Windshield Wiper/Washer
The windshield wiper/washer lever
is located on the right side of the
steering column.
Move the lever to one of the
following positions:
8: Use for a single wipe. Move
the lever to
8and then release.
The wipers stop after one wipe.
(: Use to turn the wipers off.
3:Turn the3band up for more
frequent wipes or down for less
frequent wipes.
1: Use for slow wipes.
2: Use for fast wipes.
Windshield Washer
Pull the windshield wiper lever
toward you to spray windshield
washer fluid and activate the wipers.
The wipers will continue until the
lever is released or the maximum
wash time is reached.
Page 26 of 378
Black plate (20,1)Chevrolet Orlando Owner Manual - 2012
1-20 In Brief
StabiliTrak®System
The StabiliTrak system assists with
directional control of the vehicle in
difficult driving conditions. The
system is on when the vehicle is
started.
.To turn off both Traction Control
and StabiliTrak, press and hold
the TCS/StabiliTrak button, until
iandgilluminate and the
appropriate DIC message
displays. See Ride Control
System Messages on page 5‑30.
The TCS/StabiliTrak button has
the
gsymbol and is located on
the instrument panel,
.Press the TCS/StabiliTrak button
again to turn on both systems.
For more information, see
StabiliTrak
®System on page 9‑31.
Tire Pressure Monitor
This vehicle may have a Tire
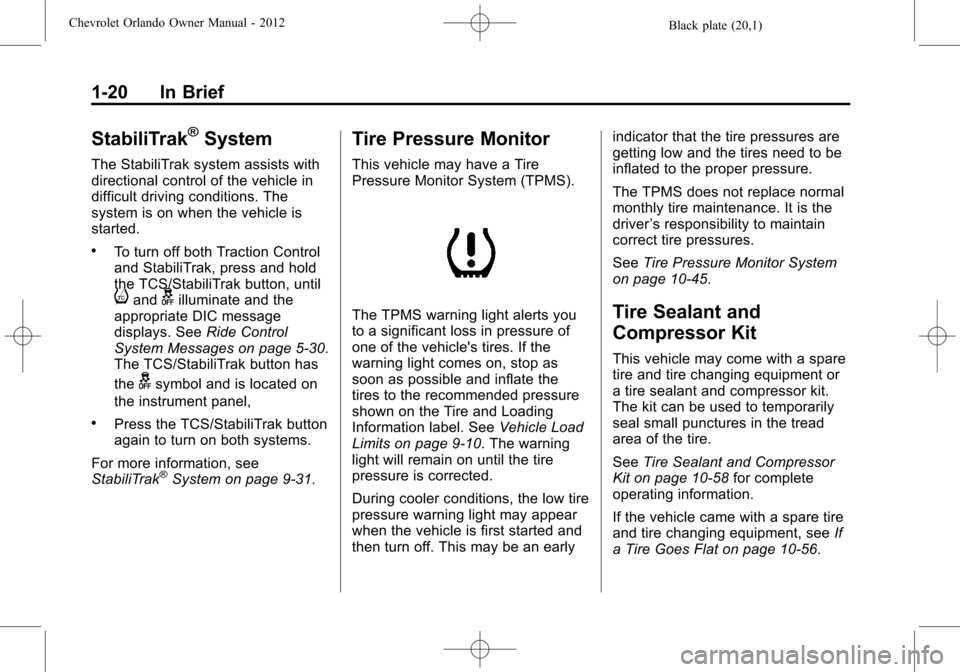
Pressure Monitor System (TPMS).
The TPMS warning light alerts you
to a significant loss in pressure of
one of the vehicle's tires. If the
warning light comes on, stop as
soon as possible and inflate the
tires to the recommended pressure
shown on the Tire and Loading
Information label. See Vehicle Load
Limits on page 9‑10. The warning
light will remain on until the tire
pressure is corrected.
During cooler conditions, the low tire
pressure warning light may appear
when the vehicle is first started and
then turn off. This may be an early indicator that the tire pressures are
getting low and the tires need to be
inflated to the proper pressure.
The TPMS does not replace normal
monthly tire maintenance. It is the
driver
’s responsibility to maintain
correct tire pressures.
See Tire Pressure Monitor System
on page 10‑45.Tire Sealant and
Compressor Kit
This vehicle may come with a spare
tire and tire changing equipment or
a tire sealant and compressor kit.
The kit can be used to temporarily
seal small punctures in the tread
area of the tire.
See Tire Sealant and Compressor
Kit on page 10‑58 for complete
operating information.
If the vehicle came with a spare tire
and tire changing equipment, see If
a Tire Goes Flat on page 10‑56.
Page 30 of 378
Black plate (2,1)Chevrolet Orlando Owner Manual - 2012
2-2 Keys, Doors, and Windows
Keys and Locks
Keys
{WARNING
Leaving children in a vehicle with
the ignition key is dangerous for
many reasons. Children or others
could be badly injured or even
killed. They could operate the
power windows or other controls
or even make the vehicle move.
The windows will function with the
keys in the ignition and children
could be seriously injured or killed
if caught in the path of a closing
window. Do not leave the keys in
a vehicle with children.
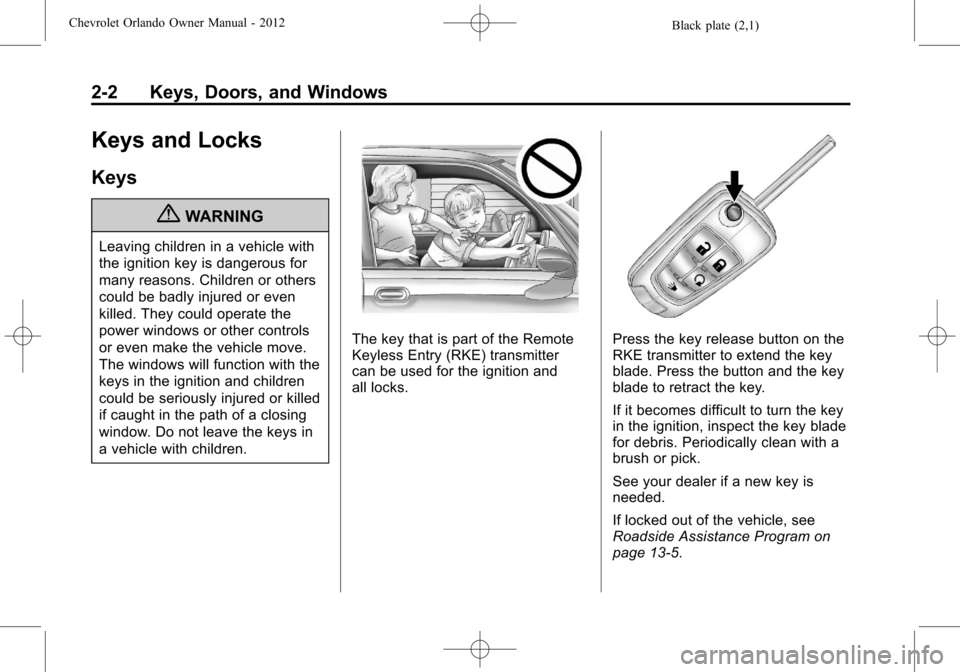
The key that is part of the Remote
Keyless Entry (RKE) transmitter
can be used for the ignition and
all locks.Press the key release button on the
RKE transmitter to extend the key
blade. Press the button and the key
blade to retract the key.
If it becomes difficult to turn the key
in the ignition, inspect the key blade
for debris. Periodically clean with a
brush or pick.
See your dealer if a new key is
needed.
If locked out of the vehicle, see
Roadside Assistance Program on
page 13‑5.