2012 CHEVROLET CRUZE maintenance
[x] Cancel search: maintenancePage 258 of 400
Black plate (4,1)Chevrolet Cruze Owner Manual - 2012
10-4 Vehicle Care
Vehicle Checks
Doing Your Own
Service Work
{WARNING
You can be injured and the
vehicle could be damaged if you
try to do service work on a vehicle
without knowing enough about it.
.Be sure you have sufficient
knowledge, experience, the
proper replacement parts,
and tools before attempting
any vehicle
maintenance task.
.Be sure to use the proper
nuts, bolts, and other
fasteners. Metric and English
fasteners can be easily
confused. If the wrong
fasteners are used, parts
can later break or fall off.
You could be hurt.If doing some of your own service
work, use the proper service
manual. It tells you much more
about how to service the vehicle
than this manual can. To order the
proper service manual, see
Service
Publications Ordering Information
on page 13‑12.
This vehicle has an airbag system.
Before attempting to do your own
service work, see Servicing the
Airbag-Equipped Vehicle on
page 3‑30.
Keep a record with all parts receipts
and list the mileage and the date of
any service work performed. See
Maintenance Records on
page 11‑16.
Hood
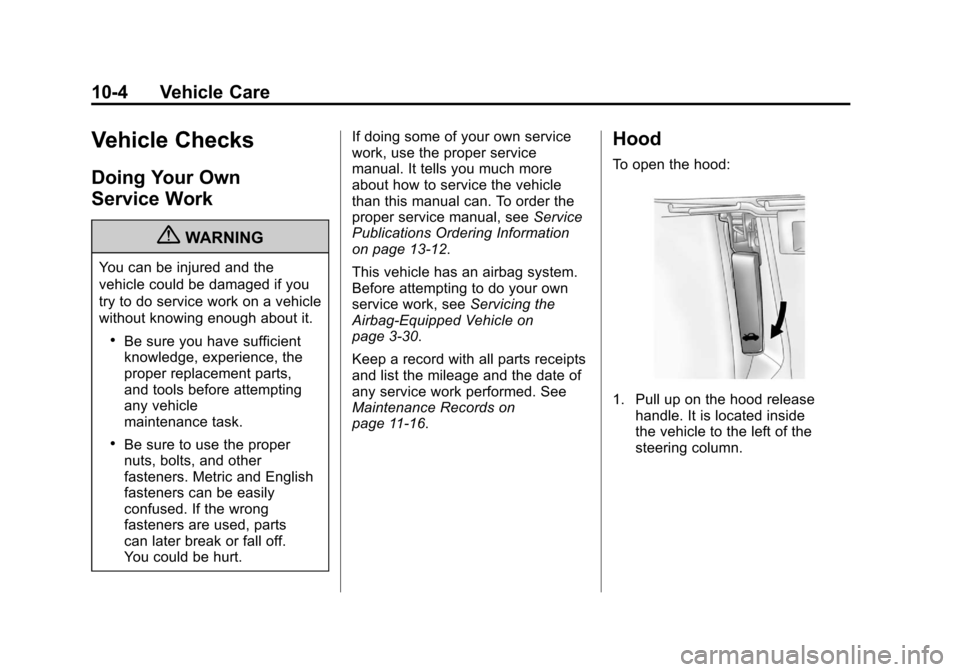
To open the hood:
1. Pull up on the hood release handle. It is located inside
the vehicle to the left of the
steering column.
Page 267 of 400
Black plate (13,1)Chevrolet Cruze Owner Manual - 2012
Vehicle Care 10-13
How to Reset the Engine Oil
Life System
Reset the system whenever the
engine oil is changed so that the
system can calculate the next
engine oil change. To reset the
system:
1. Using the DIC MENU button andthumbwheel, scroll until you
reach REMAINING OIL LIFE on
the DIC (oil can symbol with
% sign for Canada).
2. Press the SET button to reset the oil life at 100%. When
prompted, use the thumbwheel
to highlight YES or NO.
Press the SET/CLEAR button
to confirm.
Be careful not to reset the oil life
display accidentally at any time
other than after the oil is changed.
It cannot be reset accurately.
If the CHANGE ENGINE OIL SOON
DIC message or Code 82 DIC
message comes back on when the vehicle is started, the engine oil life
system has not reset. Repeat the
procedure.
Automatic Transmission
Fluid
How to Check Automatic
Transmission Fluid
It is not necessary to check
the transmission fluid level.
A transmission fluid leak is the
only reason for fluid loss. If a leak
occurs, take the vehicle to your
dealer service department and have
it repaired as soon as possible.
The vehicle is not equipped with
a transmission fluid level dipstick.
There is a special procedure for
checking and changing the
transmission fluid. Because this
procedure is difficult, this should
be done at the dealer service
department. Contact the dealer for
additional information.
Change the fluid and filter at the
intervals listed in
Maintenance
Schedule on page 11‑3, and be
sure to use the fluid listed in
Recommended Fluids and
Lubricants on page 11‑13.
Manual Transmission
Fluid
How to Check Manual
Transmission Fluid
It is not necessary to check the
manual transmission fluid level.
A transmission fluid leak is the only
reason for fluid loss. If a leak
occurs, take the vehicle to your
dealer service department and have
it repaired as soon as possible.
See Recommended Fluids and
Lubricants on page 11‑13 for the
proper fluid to use.
Page 268 of 400
Black plate (14,1)Chevrolet Cruze Owner Manual - 2012
10-14 Vehicle Care
Hydraulic Clutch
For vehicles with a manual
transmission, it is not necessary to
regularly check brake/clutch fluid
unless there is a leak suspected.
Adding fluid will not correct a leak.
A fluid loss in this system could
indicate a problem. Have the
system inspected and repaired.
When to Check and What
to Use
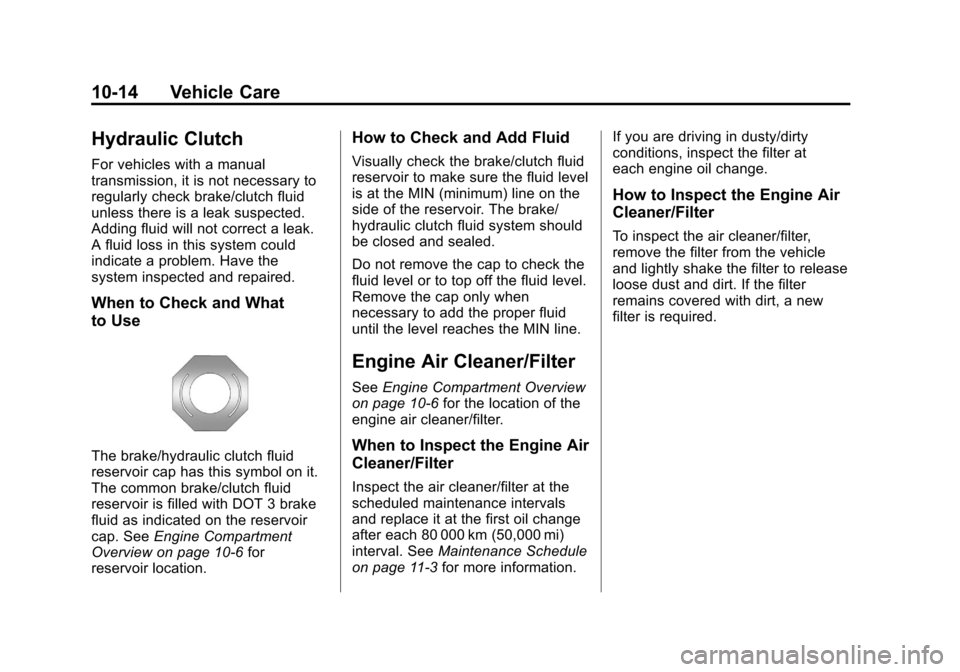
The brake/hydraulic clutch fluid
reservoir cap has this symbol on it.
The common brake/clutch fluid
reservoir is filled with DOT 3 brake
fluid as indicated on the reservoir
cap. SeeEngine Compartment
Overview on page 10‑6 for
reservoir location.
How to Check and Add Fluid
Visually check the brake/clutch fluid
reservoir to make sure the fluid level
is at the MIN (minimum) line on the
side of the reservoir. The brake/
hydraulic clutch fluid system should
be closed and sealed.
Do not remove the cap to check the
fluid level or to top off the fluid level.
Remove the cap only when
necessary to add the proper fluid
until the level reaches the MIN line.
Engine Air Cleaner/Filter
See Engine Compartment Overview
on page 10‑6 for the location of the
engine air cleaner/filter.
When to Inspect the Engine Air
Cleaner/Filter
Inspect the air cleaner/filter at the
scheduled maintenance intervals
and replace it at the first oil change
after each 80 000 km (50,000 mi)
interval. See Maintenance Schedule
on page 11‑3 for more information. If you are driving in dusty/dirty
conditions, inspect the filter at
each engine oil change.
How to Inspect the Engine Air
Cleaner/Filter
To inspect the air cleaner/filter,
remove the filter from the vehicle
and lightly shake the filter to release
loose dust and dirt. If the filter
remains covered with dirt, a new
filter is required.
Page 277 of 400
Black plate (23,1)Chevrolet Cruze Owner Manual - 2012
Vehicle Care 10-23
Some driving conditions or climates
can cause a brake squeal when the
brakes are first applied or lightly
applied. This does not mean
something is wrong with the brakes.
Properly torqued wheel nuts are
necessary to help prevent brake
pulsation. When tires are rotated,
inspect brake pads for wear and
evenly tighten wheel nuts in the
proper sequence to torque
specifications inCapacities and
Specifications on page 12‑2.
If the vehicle has rear drum brakes,
they do not have wear indicators,
but if a rear brake rubbing noise is
heard, have the rear brake linings
inspected immediately. Rear brake
drums should be removed and
inspected each time the tires are
removed for rotation or changing.
Drum brakes have an inspection
hole to inspect lining wear during
scheduled maintenance. When the
front brake pads are replaced, have
the rear brakes inspected, too. Brake linings should always be
replaced as complete axle sets.
Brake Pedal Travel
See your dealer if the brake pedal
does not return to normal height,
or if there is a rapid increase in
pedal travel. This could be a sign
that brake service might be
required.
Brake Adjustment
Every time the brakes are applied,
with or without the vehicle moving,
the brakes adjust for wear.
Replacing Brake System Parts
The braking system on a vehicle is
complex. Its many parts have to be
of top quality and work well together
if the vehicle is to have really good
braking. The vehicle was designed
and tested with top-quality brake
parts. When parts of the braking
system are replaced, be sure to get
new, approved replacement parts.
If this is not done, the brakes might
not work properly.For example, installing disc brake
pads that are wrong for the vehicle,
can change the balance between
the front and rear brakes
—for the
worse. The braking performance
expected can change in many other
ways if the wrong replacement
brake parts are installed.
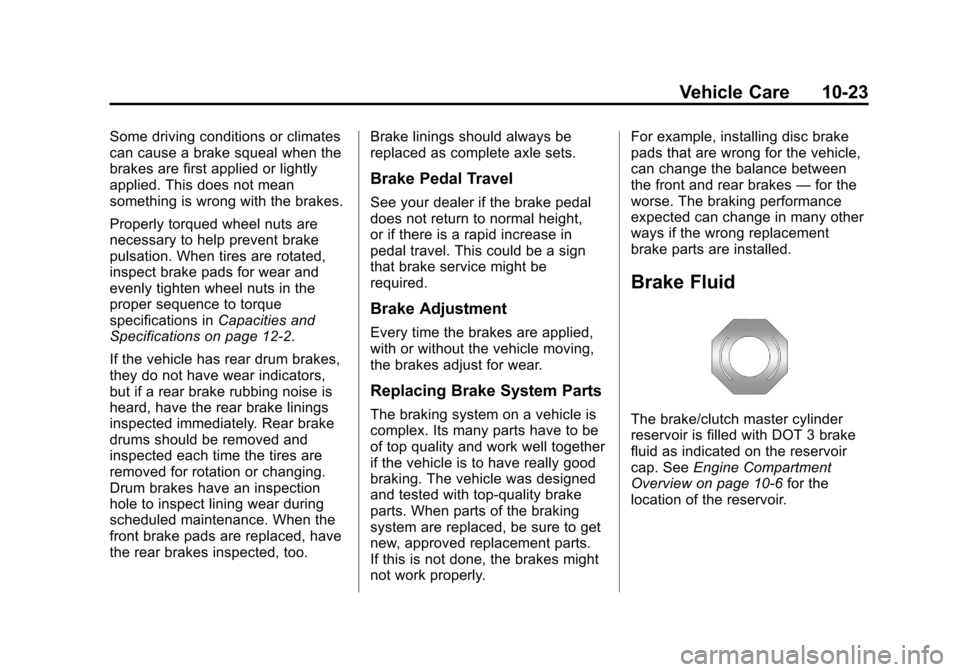
Brake Fluid
The brake/clutch master cylinder
reservoir is filled with DOT 3 brake
fluid as indicated on the reservoir
cap. See Engine Compartment
Overview on page 10‑6 for the
location of the reservoir.
Page 282 of 400
Black plate (28,1)Chevrolet Cruze Owner Manual - 2012
10-28 Vehicle Care
Wiper Blade Replacement
Windshield wiper blades should
be inspected for wear or cracking.
SeeMaintenance Schedule on
page 11‑3 for more information.
Replacement blades come in
different types and are removed
in different ways. For proper
windshield wiper blade length
and type, see Maintenance
Replacement Parts on page 11‑15.
Notice: Allowing the wiper blade
arm to touch the windshield when
no wiper blade is installed could
damage the windshield. Any
damage that occurs would not be
covered by your warranty. Do not
allow the wiper blade arm to
touch the windshield. To replace the windshield wiper
blade:
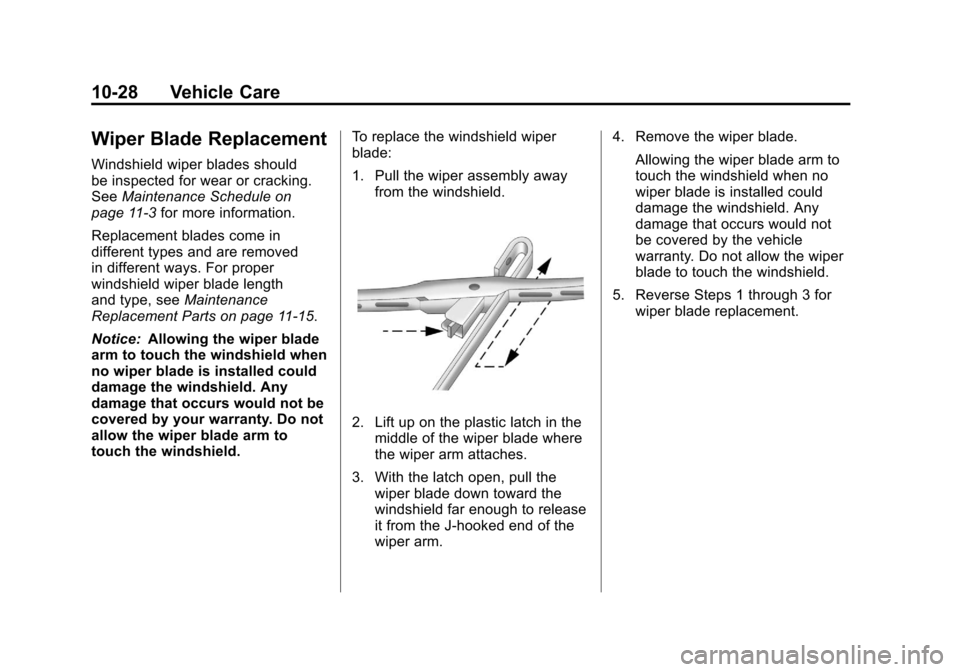
1. Pull the wiper assembly away
from the windshield.
2. Lift up on the plastic latch in themiddle of the wiper blade where
the wiper arm attaches.
3. With the latch open, pull the wiper blade down toward the
windshield far enough to release
it from the J-hooked end of the
wiper arm. 4. Remove the wiper blade.
Allowing the wiper blade arm to
touch the windshield when no
wiper blade is installed could
damage the windshield. Any
damage that occurs would not
be covered by the vehicle
warranty. Do not allow the wiper
blade to touch the windshield.
5. Reverse Steps 1 through 3 for wiper blade replacement.
Page 305 of 400
Black plate (51,1)Chevrolet Cruze Owner Manual - 2012
Vehicle Care 10-51
tire inflation pressure label, you
should determine the proper tire
inflation pressure for those tires.)
As an added safety feature, your
vehicle has been equipped with a
tire pressure monitoring system
(TPMS) that illuminates a low tire
pressure telltale when one or
more of your tires is significantly
under‐inflated.
Accordingly, when the low tire
pressure telltale illuminates, you
should stop and check your tires as
soon as possible, and inflate them
to the proper pressure. Driving on a
significantly under‐inflated tire
causes the tire to overheat and can
lead to tire failure. Under‐inflation
also reduces fuel efficiency and
tire tread life, and may affect
the vehicle's handling and
stopping ability.Please note that the TPMS is
not a substitute for proper tire
maintenance, and it is the driver's
responsibility to maintain correct tire
pressure, even if under‐inflation has
not reached the level to trigger
illumination of the TPMS low tire
pressure telltale.
Your vehicle has also been
equipped with a TPMS malfunction
indicator to indicate when the
system is not operating properly.
The TPMS malfunction indicator is
combined with the low tire pressure
telltale. When the system detects a
malfunction, the telltale will flash for
approximately one minute and then
remain continuously illuminated.
This sequence will continue upon
subsequent vehicle start‐ups as
long as the malfunction exists.
When the malfunction indicator is
illuminated, the system may not be
able to detect or signal low tire
pressure as intended. TPMS
malfunctions may occur for a variety
of reasons, including the installation
of replacement or alternate tires or
wheels on the vehicle that prevent
the TPMS from functioning properly.
Always check the TPMS malfunction
telltale after replacing one or more
tires or wheels on your vehicle to
ensure that the replacement or
alternate tires and wheels allow the
TPMS to continue to function
properly.
See
Tire Pressure Monitor
Operation on page 10‑52 for
additional information.
Page 306 of 400

Black plate (52,1)Chevrolet Cruze Owner Manual - 2012
10-52 Vehicle Care
Federal Communications
Commission (FCC) Rules and
with Industry Canada
Standards
SeeRadio Frequency Statement on
page 13‑16 for information
regarding Part 15 of the Federal
Communications Commission (FCC)
Rules and with Industry Canada
Standards RSS-GEN/210/220/310.
Tire Pressure Monitor
Operation
This vehicle may have a Tire
Pressure Monitor System (TPMS).
The TPMS is designed to warn the
driver when a low tire pressure
condition exists. TPMS sensors are
mounted onto each tire and wheel
assembly, excluding the spare tire
and wheel assembly. The TPMS
sensors monitor the air pressure in
the tires and transmit the tire
pressure readings to a receiver
located in the vehicle.
When a low tire pressure condition
is detected, the TPMS illuminates
the low tire pressure warning light
located on the instrument cluster.
If the warning light comes on, stop
as soon as possible and inflate the
tires to the recommended pressure
shown on the Tire and Loading
Information label. See Vehicle Load
Limits on page 9‑10.
A message to check the pressure in
a specific tire displays in the Driver
Information Center (DIC) display.
The low tire pressure warning light
and the DIC warning message come
on at each ignition cycle until the
tires are inflated to the correct
inflation pressure. Using the DIC,
tire pressure levels can be viewed.
For additional information and details about the DIC operation and
displays see
Driver Information
Center (DIC) on page 5‑23.
The low tire pressure warning light
may come on in cool weather when
the vehicle is first started, and then
turn off as the vehicle is driven. This
could be an early indicator that the
air pressure is getting low and must
be inflated to the proper pressure.
A Tire and Loading Information label
shows the size of the original
equipment tires and the correct
inflation pressure for the tires when
they are cold. See Vehicle Load
Limits on page 9‑10, for an example
of the Tire and Loading Information
label and its location. Also see Tire
Pressure on page 10‑49.
The TPMS can warn about a low
tire pressure condition but it does
not replace normal tire
maintenance. See Tire Inspection
on page 10‑55, Tire Rotation on
page 10‑55 andTires on
page 10‑42.
Page 309 of 400

Black plate (55,1)Chevrolet Cruze Owner Manual - 2012
Vehicle Care 10-55
11. Proceed to the driver side reartire, and repeat the procedure
in Step 8. The horn sounds
two times to indicate the
sensor identification code has
been matched to the driver
side rear tire, and the TPMS
sensor matching process is no
longer active. The TIRE
LEARNING ACTIVE message
on the DIC display screen
goes off.
12. Turn the ignition to LOCK/OFF.
13. Set all four tires to the recommended air pressure
level as indicated on the Tire
and Loading Information label.Tire Inspection
We recommend that the tires,
including the spare tire, if the
vehicle has one, be inspected
for signs of wear or damage at
least once a month.
Replace the tire if:
.The indicators at three or
more places around the tire
can be seen.
.There is cord or fabric
showing through the tire's
rubber.
.The tread or sidewall is
cracked, cut, or snagged
deep enough to show cord or
fabric.
.The tire has a bump, bulge,
or split.
.The tire has a puncture, cut,
or other damage that cannot
be repaired well because of
the size or location of the
damage.
Tire Rotation
Tires should be rotated every
12 000 km (7,500 mi). See
Maintenance Schedule on
page 11‑3.
Tires are rotated to achieve
a uniform wear for all tires.
The first rotation is the most
important.
Any time unusual wear is
noticed, rotate the tires as soon
as possible and check the wheel
alignment. Also check for
damaged tires or wheels.