2012 BMW Z4 SDRIVE35I steering wheel
[x] Cancel search: steering wheelPage 134 of 220
TelephoneVehicle equipment
This chapter describes all series equipment as
well as country-specific and special equipment
offered for this model series.Therefore, it also
describes equipment that may not be found in
your vehicle, for instance due to the selected
special equipment or the country version. This
also applies to safety-related functions and sys‐
tems.
At a glance
Note
Equipment version with the full preparation
package mobile phone or a hands-free system.
The concept
Mobile phones can be connected with the vehi‐
cle via Bluetooth.
After these devices are paired once, they are
recognized automatically when the ignition is
switched on as soon as they are in the vehicle
and can then be operated via the radio, the but‐
tons on the steering wheel, and via voice acti‐
vation.
After a suitable mobile phone is paired with the
vehicle once, you can operate the mobile phone
via the radio, the buttons on the steering wheel,
and via voice activation.
Bluetooth® is a registered trademark of Blue‐
tooth® SIG, Inc.
Using the mobile phone while driving
Make entries only when traffic and road
conditions allow. Do not hold the mobile phone
in your hand while you are driving; use the
hands-free system instead. If you do not ob‐
serve this precaution, you can endanger the ve‐
hicle occupants and other road users.◀Snap-in adapter
The snap-in adapter is used to:▷Hold the mobile phone.▷Recharge the battery.▷Connect the mobile phone to an outside an‐
tenna of the vehicle.
This provides for better network reception
and consistent sound quality.
Avoid operating a mobile phone that has been
detected by the vehicle on the keypad of the
mobile phone, as this may lead to malfunctions.
Approved mobile phones
Details on which mobile phones and external
devices with a Bluetooth interface are sup‐
ported by the mobile phone preparation pack‐
age can be obtained at www.bmwusa.com/blue‐
tooth.
Notes
At high temperatures, the charging function of
the mobile phone may be limited and functions
may not be executed.
Playing music from the mobile phone
Depending on your mobile phone and the vehi‐
cle equipment, you can play the music data of
the mobile phone in the vehicle.
Seite 134CommunicationTelephone134
Online Edition for Part no. 01 40 2 609 184 - 09 11 500
Page 138 of 220
▷It may not be possible to display phone book
entries with special characters.▷The number of phone book entries to be
stored is too high.▷Is the data volume of the contact too large,
e. g., due to stored information such as
notes? Reduce the data volume of the con‐
tact.
The phone connection quality is poor.
▷The strength of the Bluetooth signal on the
mobile phone can be adjusted, depending
on the mobile phone.▷Insert the mobile phone into the snap-in
adapter or place it in the area of the center
console.▷Adjust the volume of the microphone and
loudspeakers.
If all points in this list have been checked and the
required function is still not available, contact
Customer Relations or the service center.
Controls
The following functions can be operated on the
radio:
▷Accept/reject a call.▷Dial a phone number.▷Dial a phone number from the phone book.▷Dial a stored phone number, such as from
the list of accepted calls.▷In conjunction with the full preparation pack‐
age mobile phone: BMW Assist, refer to
page 145.
When the ignition and the radio ready state are
switched off, such as after the remote control is
removed, an existing call can be continued for
up to 25 minutes on the hands-free system.
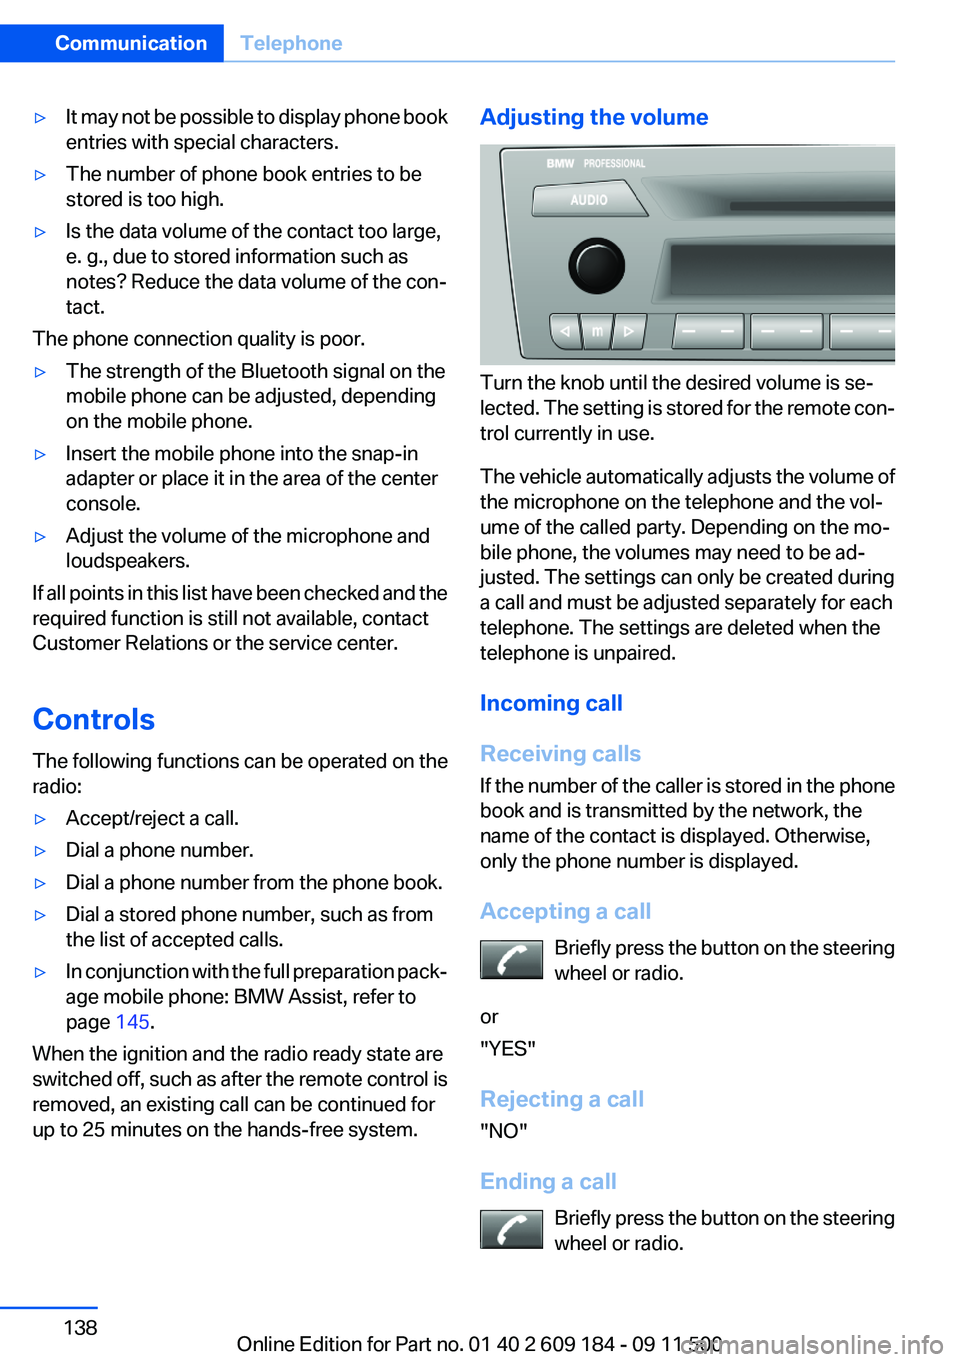
Adjusting the volume
Turn the knob until the desired volume is se‐
lected. The setting is stored for the remote con‐
trol currently in use.
The vehicle automatically adjusts the volume of
the microphone on the telephone and the vol‐
ume of the called party. Depending on the mo‐
bile phone, the volumes may need to be ad‐
justed. The settings can only be created during
a call and must be adjusted separately for each
telephone. The settings are deleted when the
telephone is unpaired.
Incoming call
Receiving calls
If the number of the caller is stored in the phone
book and is transmitted by the network, the
name of the contact is displayed. Otherwise,
only the phone number is displayed.
Accepting a call Briefly press the button on the steering
wheel or radio.
or
"YES"
Rejecting a call
"NO"
Ending a call Briefly press the button on the steering
wheel or radio.
Seite 138CommunicationTelephone138
Online Edition for Part no. 01 40 2 609 184 - 09 11 500
Page 139 of 220
or
"END"
Entering a phone number
Dialing a number1.Switch on the radio ready state or the igni‐
tion.2. Press the button.3."PHONE"4."#"5.Enter the desired phone number on the but‐
tons 0–9.
To delete the last digit: "DEL"6. Briefly press the button on the
steering wheel or radio.
or
Press the right knob to dial the phone num‐
ber.
Phone book
Dialed phone numbers, incoming calls and en‐
tries in the phone book are stored on lists if the
mobile phone is connected to the vehicle via
Bluetooth.
Five lists are available:
▷"A-Z"
Entries of the phone book of the SIM card or
of the mobile phone, which consist of a
name and phone number, are sorted in al‐
phabetical order.▷"TOP8"
The Top 8 list contains the eight phone
numbers that were dialed most frequently.▷"LAST8"
The last eight phone numbers that were di‐
aled are stored. The phone number dialed
last is at the top of the list.▷"CALLS"The phone numbers of the last eight ac‐
cepted calls are stored. For this to be pos‐
sible, it must be possible to transmit the
phone number of the caller.▷"MISSED"
The phone numbers of the last eight calls
that were not accepted are stored. For this
to be possible, it must be possible to trans‐
mit the phone number of the caller.
Dialing a phone number from the phone
book
The list A-Z is available for phone book entries.
If entries with different names but the same
phone number are transferred to the vehicle
from the mobile phone, only one entry is dis‐
played.
The display of the phone book entries on the
radio may differ from the display on the mobile
phone, such as the order of the first and last
names.
1.Switch on the radio ready state or the igni‐
tion.2. Press the button.3."PHONE"4."A-Z"5. The arrows indicate that additional
letters can be displayed.
Turn the right knob to display additional let‐
ters if necessary.6.Turn the right knob to select the first letter
of the entry.7.Select the entry with the function button.
The phone number is dialed.
To display all entries:
1.Turn the right knob to select the first letter
of the entry and press the knob.2.Turn the right knob to select the desired en‐
try and press the knob.
orSeite 139TelephoneCommunication139
Online Edition for Part no. 01 40 2 609 184 - 09 11 500
Page 140 of 220
Press the button on the steering
wheel or radio to dial the number.
The phone number is dialed.
Editing and dialing a phone number
from the phone book
You can edit the phone number of an entry be‐
fore making a call. This change is not stored in
the phone book.
1.Selecting an entry.2."EDIT"3.To delete a digit: "DEL"4.Enter additional digits on the buttons 0–9.5.Press the right knob to dial the phone num‐
ber.
Dialing a phone number from the phone
book using the buttons on the steering
wheel
1. Press and hold the button to display
the Telephone menu.2.Press the arrow buttons on the steering
wheel to leaf through the phone book.3. Press the button to dial the phone
number.
Dialing a phone number stored in a list
To select an entry and establish a connection:
1.Switch on the radio ready state or the igni‐
tion.2. Press the button.3."PHONE"4.Select a list, for instance "TOP8"5.Turn the right knob to select an entry and
press the knob to dial the phone number.
Deleting an individual entry
1.Select an entry from the list.2."DEL"
DTMF suffix dialing
DTMF suffix dialing can be used for gaining ac‐
cess to network services or for controlling devi‐
ces, e.g., to make a remote inquiry of an answer‐
ing machine. The DTMF code is needed for this
purpose.
This function is only available if a connection ex‐
ists and if the hands-free system is being used.
1."Keypad"2.Enter the DTMF code on the buttons 0–9.3.If necessary, press and hold the function
button on the right or left to enter special
characters.
Displaying the call duration
During a call:
"DURAT"
Hands-free system
General information
Calls that are being made on the hands-free
system can be continued on the mobile phone
and vice versa.
From the mobile phone to the hands-
free system
Calls that were begun outside of the Bluetooth
range of the vehicle can be continued on the
hands-free system with the ignition switched
on.
Depending on the mobile phone, the system au‐
tomatically switches to the hands-free system.
If the system does not switch over automatically,
follow the instructions on the mobile phone dis‐
play; refer also to the mobile phone operating
instructions.
Seite 140CommunicationTelephone140
Online Edition for Part no. 01 40 2 609 184 - 09 11 500
Page 141 of 220
From the hands-free system to the
mobile phone
Calls that are made on the hands-free system
can in some cases be continued on the mobile
phone; this depends on the mobile phone.
Follow the instructions on the mobile phone dis‐
play; refer also to the mobile phone operating
instructions.
Voice operation
General information
Depending on the vehicle equipment, the mo‐
bile phone can be operated by means of voice
activation as described below.
The concept▷The mobile phone can be operated without
taking your hands from the steering wheel.▷In many cases, the entries are accompanied
by announcements or questions.▷›...‹ Verbal instructions for voice operation.
Using voice activation
Activating the voice activation system
1. Press the button on the steering
wheel.2.Say the command.
Terminating the voice activation
system
Press the button on the steering wheel
or ›Cancel‹.
Possible commands
Having possible commands read aloud Press the button on the steering wheel.
›Help‹.
Possible commands are announced.
The digits from zero to nine are recognized. The
digits can be spoken separately or combined in
a sequence to accelerate the entry.
Using alternative commands
The system often recognizes a number of dif‐
ferent commands to run a function; for instance:
›Dial name‹ or ›Name‹
Example: dialing a phone number1. Press the button on the steering
wheel.2.›Dial number‹
The system says: »Please say the number«.3.For instance, ›123 456 790‹
The system says: »123 456 790. Continue?
«.4.›Dial‹
The system says: »Dialing number«.
Calling
Dialing a phone number
1.›Dial number‹2.Say the phone number.3.›Dial‹
Correcting the phone number
The sequence of digits can be deleted after the
system has repeated the digits.
›Correct number‹
The command can be repeated as often as nec‐
essary.
Deleting a phone number
›Delete‹
All digits entered up to that point are deleted.
Seite 141TelephoneCommunication141
Online Edition for Part no. 01 40 2 609 184 - 09 11 500
Page 180 of 220

Contact your service center.◀
Manual transmission
Gearshift lever in neutral position.
7-gear Sport automatic transmission Manually release the transmission lock
Manually release the transmission lock,
even if there is no malfunction involving the
transmission. Otherwise, there is the danger
that the transmission lock will be engaged au‐
tomatically during towing.◀
Manually release the transmission lock, refer to
page 58.
Adhere to the towing speed and distance
Do not exceed a towing speed of 30 mph/
50 km/h and a towing distance of 30 miles/50 km
or damage to the transmission can occur.◀
Observe during towing Observe the notes on towing
Observe all notes on towing or vehicle
damage or accidents can occur.◀▷Make sure that the ignition is switched on;
otherwise, the low beams, tail lamps, turn
signals, and windshield wipers may be un‐
available.▷When the engine is stopped, there is no
power assist. Consequently, more force
needs to be applied when braking and steer‐
ing.▷Larger steering wheel movements are re‐
quired.▷Switch on the hazard warning system, de‐
pending on local regulations.▷If the electrical system has failed, clearly
identify the vehicle being towed by placing
a sign or a warning triangle in the rear win‐
dow.▷Do not tow the vehicle with the rear axle
tilted, as the front wheels could turn.Towing methods
Do not lift the vehicle
Do not lift the vehicle by the tow fitting or
body and chassis parts; otherwise, damage may
result.◀
Tow bar
The tow fittings used should be on the same
side on both vehicles.
Should it prove impossible to avoid mounting
the tow bar at an offset angle, please observe
the following:▷Clearance and maneuvering capability will
be sharply limited during cornering.▷The tow bar will generate lateral forces if it
is attached offset.
Tow rope
When starting to tow the vehicle, make sure that
the tow rope is taut.
To avoid jerking and the associated stresses on
the vehicle components when towing, always
use nylon ropes or nylon straps.
Attaching the tow rope correctly
Only secure the tow rope on the tow fit‐
ting; otherwise, damage can occur when it is se‐
cured on other parts of the vehicle.◀
Tow truck Do not lift the vehicle
Do not lift the vehicle by the tow fitting or
body and chassis parts; otherwise, damage may
result.◀
Secure the vehicle against rolling off
Apply the parking brake after towing and
secure the vehicle against rolling off if neces‐
sary.
Have the operability of transmission position P
checked by the service center.◀
Seite 180MobilityBreakdown assistance180
Online Edition for Part no. 01 40 2 609 184 - 09 11 500
Page 209 of 220
Band-aids, refer to First aidkit 177
Bar, refer to Towing meth‐ ods 180
Battery– Disposal 30, 175– Power failure 174– Remote control 20– Replacement in the remote
control 30– Replacement, vehicle bat‐
tery 174– Vehicle 174
Before entering the car
wash 182
Being towed 179
Belts, refer to Safety belts 38
Belt tensioners, refer to Safety belts 38
Beverage holder, refer to Cu‐ pholder 105
Blower, refer to Air flow rate 90, 93
BMW Assist 145
BMW Assist, refer to Connec‐ tedDrive 145
BMW EfficientDynamics, refer to Saving fuel 112
BMW homepage 6
BMW Internet page 6
BMW Maintenance Sys‐ tem 168
Bottle holder, refer to Cu‐ pholder 105
Brake assistant, refer to Dy‐ namic Brake Control 81
Brake discs, breaking in 108
Brake force display 80
Brake force distribution, elec‐ tronic 81
Brake lamps
– Brake force display 80– Bulb replacement 172, 173
Brake lights, adaptive 80
Brake pads, breaking in 108
Brakes
– ABS 81Braking– Notes 109– Parking brake 49
Braking safely 109
Breakdown assistance 177
Breaking in 108
Bulbs, replacing, refer to Lamps and bulbs 170
Button for starting the engine, refer to Start/Stop button 45
Buttons on the steering wheel 12
Bypassing, see Starting aid 177
C
California Proposition 65 Warning 7
Camera, care 185
Can holder, refer to Cu‐ pholder 105
Capacities
– Cargo area, refer to
Weights 204– Fuel tank, refer to Filling ca‐
pacities 206
Car battery 174
Car care products 183
Care 182
Care, displays 185
Care, vehicle 183
Cargo 110
Cargo area
– Capacity 204– Lamp, refer to Interior
lamps 72– Opening from the inside 27– Opening from the out‐
side 27
Cargo, securing 101
Cargo straps, securing cargo 112
Car key, refer to Integrated key/remote control 20
Carpet, care 184
Car phone– Installation location, refer to
Center armrest 103
Car vacuum cleaner, connect‐
ing, refer to Connecting elec‐
trical devices 100
Car wash 182
Car wash
– With Comfort Access 29
Catalytic converter, refer to
Hot exhaust system 109
CBS Condition Based Serv‐ ice 168
CD/DVD changer 124
CD/DVD notes 126
Cell phone, installation loca‐ tion, refer to Center arm‐
rest 103
Center armrest 103
Center brake lamp
– Bulb replacement 173
Center console, refer to
Around the center con‐
sole 15
Central locking
– Comfort Access 28– From the inside 26– Setting the unlocking char‐
acteristics 22
Central locking system
– From the outside 21– Principle 21
Changes, technical, refer to
Safety 6
Changing wheels/tires 161
Chassis number, refer to En‐ gine compartment 163
Check Control 66
Children, transporting safely 43
Child restraint fixing sys‐ tem 43
Child seats, refer to Transport‐ ing children safely 43
Chrome parts, care 184
Circulation of air, refer to Re‐ circulated air mode 90, 94
Seite 209Everything from A to ZReference209
Online Edition for Part no. 01 40 2 609 184 - 09 11 500
Page 212 of 220
Footwell lamps, refer to Inte‐rior lamps 72
For your own safety 6
Front airbags 73
FTM Flat Tire Monitor 75
Fuel– Refer to Average fuel con‐
sumption 62
Fuel, average consump‐
tion 62
Fuel consumption display
– Average fuel consump‐
tion 62
Fuel display 61
Fuel filler flap
– Unlocking in case of an elec‐
trical malfunction 152
Fuel gauge 61
Fuel quality 154
Fuel tank capacity, refer to Fill‐ ing capacities 206
Fuel tank contents, refer to Filling capacities 206
Fuses 175
G
Garage door opener, refer to Universal Garage Door
Opener 96
Gasoline 154
Gasoline display 61
Gear display
– 7-gear automatic transmis‐
sion 55– 8-gear automatic transmis‐
sion 55
General driving notes 108
Glove compartment 103
Grilles, refer to Air vents 89
Gross vehicle weight, refer to Weights 204
H
Handbrake, refer to Parking brake 49
Hand-held transmitter, alter‐
nating code 97
Hands-free microphone 15
Hardtop 33
Hazard warning system 15
Head airbags 73
Headlamp control, auto‐ matic 69
Headlamp courtesy delay fea‐ ture 68
Headlamp flasher 50
Headlamps, care 183
Headlamps, cleaning 51
Headliner 16
Heating 89
Heating– Mirrors 41– Rear window 91, 94– Seats 38
Heavy cargo, stowing 111
Height adjustment
– Seats 36– Steering wheel 42
Height, refer to Dimen‐
sions 203
High-beam Assistant 71
High beams 70
High beams/low beams, refer to High-beam Assistant 71
High beams, headlamp flasher 70
High-pressure washers 182
Hills 110
Hill start assistant, refer to Drive-off assistant 84
Holder for beverages 105
Holder for remote control, re‐ fer to Ignition lock 45
Homepage 6
Hood 164
Horn 12
Hot exhaust system 109
Hydroplaning 109
I
Ice warning, refer to External temperature warning 60
Icy roads, refer to External temperature warning 60
Identification marks– Tires 158
Ignition 46
Ignition
– Switched off 46– Switched on 46
Ignition key position 1, refer to
Radio ready state 45
Ignition key position 2, refer to Ignition on 46
Ignition key, refer to Remote control with integrated
key 20
Ignition lock 45
Indication of a flat tire 76
Indicator and warning lamps 15
Indicator and warning lamps, Tire Pressure Monitor
TPM 78
Individual air distribution 90
Inflation pressure monitoring, refer to Tire Pressure Monitor
TPM 77
Inflation pressure, refer to Tire inflation pressure 155
Inflation pressure warning, tires 75
Initializing
– Compass, refer to Calibrat‐
ing 99– Flat Tire Monitor FTM 76
Installation location
– Telephone 103
Instrument cluster 14
Instrument lighting 71
Instrument panel, refer to In‐ strument cluster 14
Instruments, refer to Cock‐ pit 12
Integrated key 20
Seite 212ReferenceEverything from A to Z212
Online Edition for Part no. 01 40 2 609 184 - 09 11 500