2012 BMW Z4 SDRIVE35I steering wheel
[x] Cancel search: steering wheelPage 57 of 220

Sport program and manual mode M/S
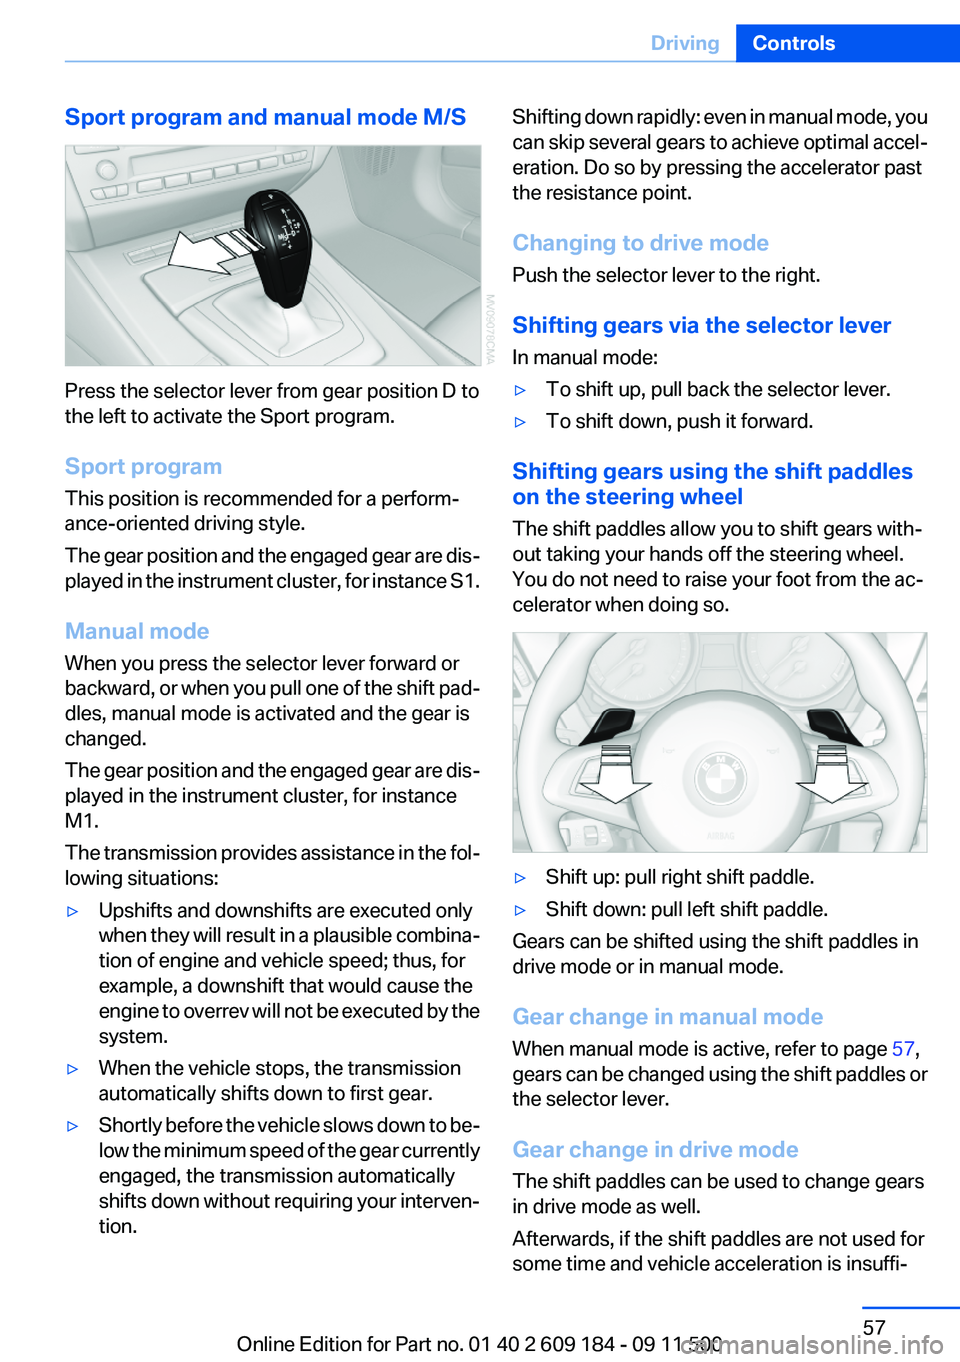
Press the selector lever from gear position D to
the left to activate the Sport program.
Sport program
This position is recommended for a perform‐
ance-oriented driving style.
The gear position and the engaged gear are dis‐
played in the instrument cluster, for instance S1.
Manual mode
When you press the selector lever forward or
backward, or when you pull one of the shift pad‐
dles, manual mode is activated and the gear is
changed.
The gear position and the engaged gear are dis‐
played in the instrument cluster, for instance
M1.
The transmission provides assistance in the fol‐
lowing situations:
▷Upshifts and downshifts are executed only
when they will result in a plausible combina‐
tion of engine and vehicle speed; thus, for
example, a downshift that would cause the
engine to overrev will not be executed by the
system.▷When the vehicle stops, the transmission
automatically shifts down to first gear.▷Shortly before the vehicle slows down to be‐
low the minimum speed of the gear currently
engaged, the transmission automatically
shifts down without requiring your interven‐
tion.Shifting down rapidly: even in manual mode, you
can skip several gears to achieve optimal accel‐
eration. Do so by pressing the accelerator past
the resistance point.
Changing to drive mode
Push the selector lever to the right.
Shifting gears via the selector lever
In manual mode:▷To shift up, pull back the selector lever.▷To shift down, push it forward.
Shifting gears using the shift paddles
on the steering wheel
The shift paddles allow you to shift gears with‐
out taking your hands off the steering wheel.
You do not need to raise your foot from the ac‐
celerator when doing so.
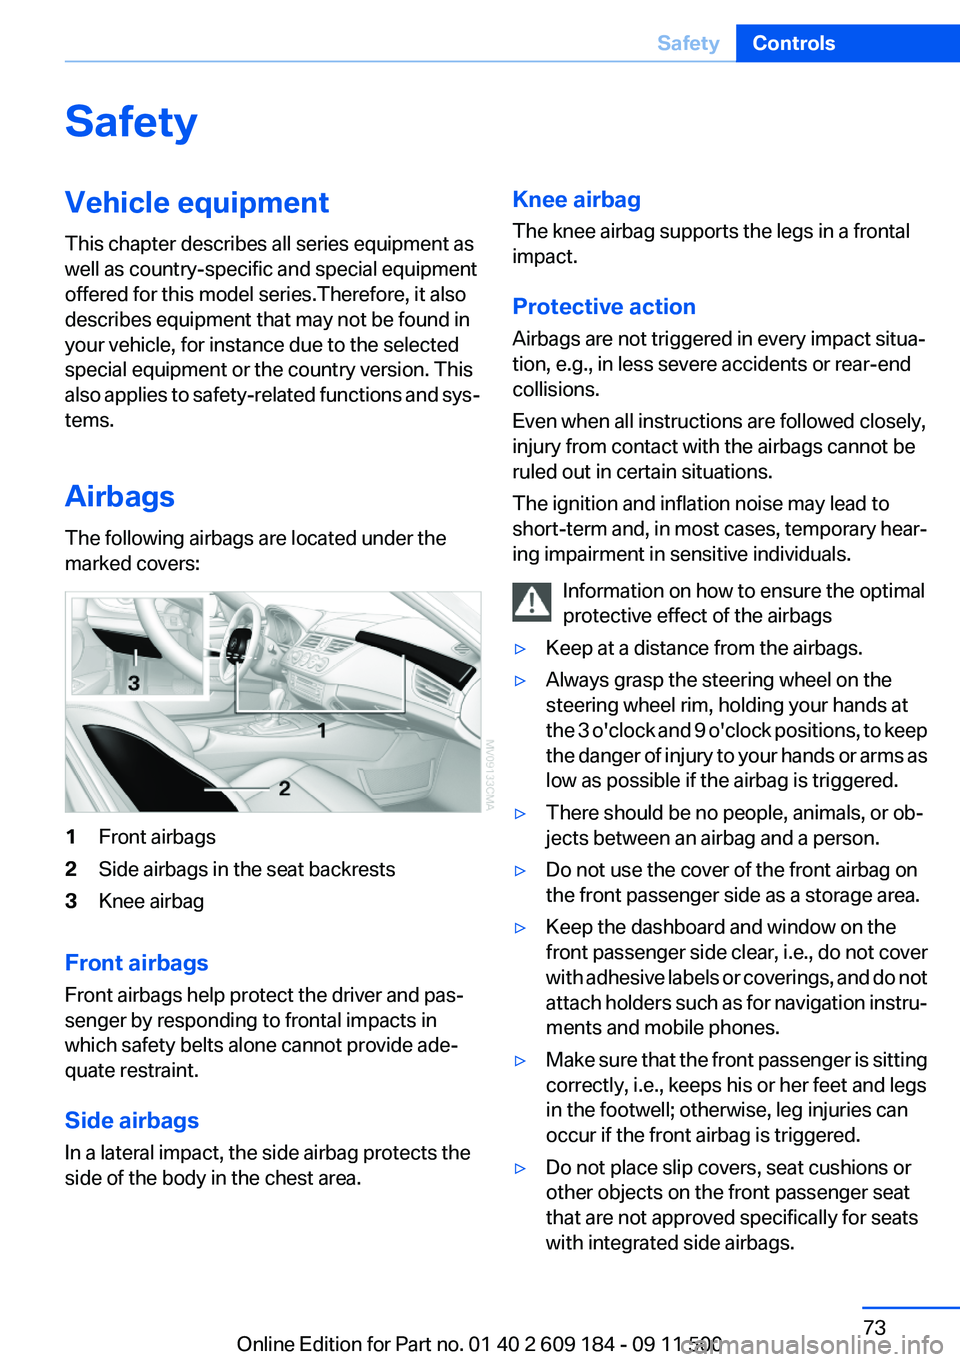
▷Shift up: pull right shift paddle.▷Shift down: pull left shift paddle.
Gears can be shifted using the shift paddles in
drive mode or in manual mode.
Gear change in manual mode
When manual mode is active, refer to page 57,
gears can be changed using the shift paddles or
the selector lever.
Gear change in drive mode
The shift paddles can be used to change gears
in drive mode as well.
Afterwards, if the shift paddles are not used for
some time and vehicle acceleration is insuffi‐
Seite 57DrivingControls57
Online Edition for Part no. 01 40 2 609 184 - 09 11 500
Page 73 of 220

SafetyVehicle equipment
This chapter describes all series equipment as
well as country-specific and special equipment
offered for this model series.Therefore, it also
describes equipment that may not be found in
your vehicle, for instance due to the selected
special equipment or the country version. This
also applies to safety-related functions and sys‐
tems.
Airbags
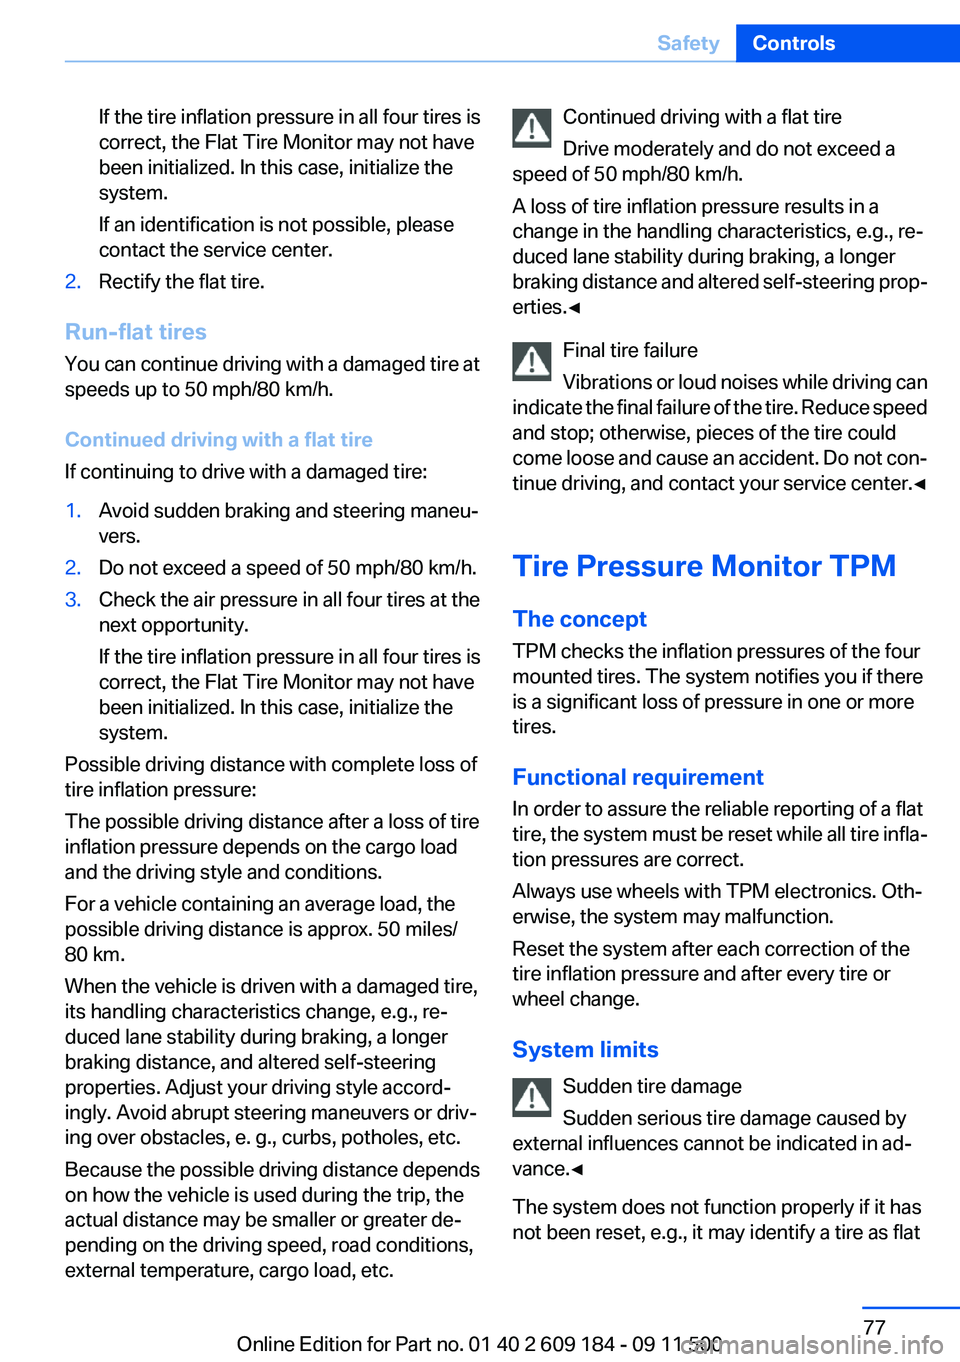
The following airbags are located under the
marked covers:1Front airbags2Side airbags in the seat backrests3Knee airbag
Front airbags
Front airbags help protect the driver and pas‐
senger by responding to frontal impacts in
which safety belts alone cannot provide ade‐
quate restraint.
Side airbags
In a lateral impact, the side airbag protects the
side of the body in the chest area.
Knee airbag
The knee airbag supports the legs in a frontal
impact.
Protective action
Airbags are not triggered in every impact situa‐
tion, e.g., in less severe accidents or rear-end
collisions.
Even when all instructions are followed closely,
injury from contact with the airbags cannot be
ruled out in certain situations.
The ignition and inflation noise may lead to
short-term and, in most cases, temporary hear‐
ing impairment in sensitive individuals.
Information on how to ensure the optimal
protective effect of the airbags▷Keep at a distance from the airbags.▷Always grasp the steering wheel on the
steering wheel rim, holding your hands at
the 3 o'clock and 9 o'clock positions, to keep
the danger of injury to your hands or arms as
low as possible if the airbag is triggered.▷There should be no people, animals, or ob‐
jects between an airbag and a person.▷Do not use the cover of the front airbag on
the front passenger side as a storage area.▷Keep the dashboard and window on the
front passenger side clear, i.e., do not cover
with adhesive labels or coverings, and do not
attach holders such as for navigation instru‐
ments and mobile phones.▷Make sure that the front passenger is sitting
correctly, i.e., keeps his or her feet and legs
in the footwell; otherwise, leg injuries can
occur if the front airbag is triggered.▷Do not place slip covers, seat cushions or
other objects on the front passenger seat
that are not approved specifically for seats
with integrated side airbags.Seite 73SafetyControls73
Online Edition for Part no. 01 40 2 609 184 - 09 11 500
Page 74 of 220

▷Do not hang pieces of clothing, such as jack‐
ets, over the backrests.▷Make sure that passengers do not lean their
heads against the side airbag; otherwise, se‐
rious injuries could result if the airbag sud‐
denly deployed.▷Do not remove the airbag restraint system.▷Do not remove the steering wheel.▷Do not apply adhesive materials to the air‐
bag cover panels, cover them or modify
them in any way.▷Never modify either the individual compo‐
nents or the wiring in the airbag system. This
also applies to the covers of the steering
wheel, the dashboard and the seats.◀
In the case of a malfunction, deactivation
and after triggering of the airbags
Do not touch the individual components imme‐
diately after the system has been triggered; oth‐
erwise, there is the danger of burns.
Only have the airbags checked, repaired or dis‐
mantled and the airbag generator scrapped by
your service center or a workshop that has the
necessary authorization for handling explosives.
Non-professional attempts to service the sys‐
tem could lead to failure in an emergency or un‐
desired triggering of the airbag, either of which
could result in injury.◀
Warning notices and information about the air‐
bags can also be found on the sun visors.
Automatic deactivation of the
passenger airbags
The system determines whether the front pas‐
senger seat is occupied by measuring the re‐
sistance of the human body. The front and side
airbags on the front passenger side are acti‐
vated or deactivated accordingly by the system.
The indicator lamp above the interior rearview
mirror shows the current status of the passen‐
ger airbags, deactivated or activated, refer to
Status of passenger airbags below.
Passenger feet in the footwell
Make sure that the front passenger keeps
his or her feet in the footwell; otherwise, the front
passenger airbags may not function properly.◀
Child restraint fixing system in the front
passenger seat
Before transporting a child on the passenger
seat, read the safety and operating instructions
under Transporting children safely, refer to
page 43.◀
Malfunction of the automatic
deactivation system
The front passenger airbags may be deactivated
if adolescents and adults sit in certain positions;
the indicator lamp for the front passenger air‐
bags comes on. In this case, change the sitting
position so that the front passenger airbags are
activated and the indicator lamp goes out. If the
desired airbag status cannot be achieved by
changing the sitting position, do not transport
the passenger in the vehicle.
To make sure that occupation of the seat cush‐
ion can be detected correctly:▷Do not attach seat covers, seat cushion pad‐
ding, ball mats or other items to the passen‐
ger seat unless they are specifically recom‐
mended by BMW.▷Do not place any objects on the front pas‐
senger seat.▷Do not place objects under the seat that
could press against the seat from below.
Status of passenger airbags
Seite 74ControlsSafety74
Online Edition for Part no. 01 40 2 609 184 - 09 11 500
Page 76 of 220

▷When driving on a snowy or slippery road
surface.▷Sporty driving style: slip in the drive wheels,
high lateral acceleration.▷When driving with snow chains.
Initialization
The initialization process adopts the set inflation
tire pressures as reference values for the detec‐
tion of a flat tire. Initialization is started by con‐
firming the inflation pressures.
Do not initialize the system when driving with
snow chains.
Operating principle, refer to page 62.
1.Start the engine immediately before pulling
away, but do not drive off yet.2.Lightly push button 1 in the turn indicator
lever up or down repeatedly until the appro‐
priate symbol appears in the display, ac‐
companied by the word "RESET".3.Press button 2 to confirm your choice of the
Flat Tire Monitor.4.Press button 2 for approx. 5 seconds until
the display appears:5.Drive away.
Initialization is completed while the car is on
the move without providing feedback.
Indication of a flat tire
The warning lamps come on in yellow
and red. In addition, a signal sounds.
There is a flat tire or a major loss in tire
inflation pressure.
1.Reduce your speed and stop cautiously.
Avoid sudden braking and steering maneu‐
vers.2.Check whether the vehicle is fitted with reg‐
ular tires or run-flat tires.
Run-flat tires, refer to page 161, are labeled
with a circular symbol containing the letters
RSC marked on the tire sidewall.
Do not continue driving without run-flat
tires
Do not continue driving if the vehicle is not
equipped with run-flat tires; continued driving
may result in serious accidents.◀
When a flat tire is indicated, DSC Dynamic Sta‐
bility Control is switched on if necessary.
Actions in the event of a flat tire
Normal tires
1.Identify the damaged tire.
Do this by checking the air pressure in all
four tires.Seite 76ControlsSafety76
Online Edition for Part no. 01 40 2 609 184 - 09 11 500
Page 77 of 220

If the tire inflation pressure in all four tires is
correct, the Flat Tire Monitor may not have
been initialized. In this case, initialize the
system.
If an identification is not possible, please
contact the service center.2.Rectify the flat tire.
Run-flat tires
You can continue driving with a damaged tire at
speeds up to 50 mph/80 km/h.
Continued driving with a flat tire
If continuing to drive with a damaged tire:
1.Avoid sudden braking and steering maneu‐
vers.2.Do not exceed a speed of 50 mph/80 km/h.3.Check the air pressure in all four tires at the
next opportunity.
If the tire inflation pressure in all four tires is
correct, the Flat Tire Monitor may not have
been initialized. In this case, initialize the
system.
Possible driving distance with complete loss of
tire inflation pressure:
The possible driving distance after a loss of tire
inflation pressure depends on the cargo load
and the driving style and conditions.
For a vehicle containing an average load, the
possible driving distance is approx. 50 miles/
80 km.
When the vehicle is driven with a damaged tire,
its handling characteristics change, e.g., re‐
duced lane stability during braking, a longer
braking distance, and altered self-steering
properties. Adjust your driving style accord‐
ingly. Avoid abrupt steering maneuvers or driv‐
ing over obstacles, e. g., curbs, potholes, etc.
Because the possible driving distance depends
on how the vehicle is used during the trip, the
actual distance may be smaller or greater de‐
pending on the driving speed, road conditions,
external temperature, cargo load, etc.
Continued driving with a flat tire
Drive moderately and do not exceed a
speed of 50 mph/80 km/h.
A loss of tire inflation pressure results in a
change in the handling characteristics, e.g., re‐
duced lane stability during braking, a longer
braking distance and altered self-steering prop‐
erties.◀
Final tire failure
Vibrations or loud noises while driving can
indicate the final failure of the tire. Reduce speed
and stop; otherwise, pieces of the tire could
come loose and cause an accident. Do not con‐
tinue driving, and contact your service center. ◀
Tire Pressure Monitor TPM
The concept
TPM checks the inflation pressures of the four
mounted tires. The system notifies you if there
is a significant loss of pressure in one or more
tires.
Functional requirement
In order to assure the reliable reporting of a flat
tire, the system must be reset while all tire infla‐
tion pressures are correct.
Always use wheels with TPM electronics. Oth‐
erwise, the system may malfunction.
Reset the system after each correction of the
tire inflation pressure and after every tire or
wheel change.
System limits Sudden tire damage
Sudden serious tire damage caused by
external influences cannot be indicated in ad‐
vance.◀
The system does not function properly if it has
not been reset, e.g., it may identify a tire as flatSeite 77SafetyControls77
Online Edition for Part no. 01 40 2 609 184 - 09 11 500
Page 78 of 220

in spite of the fact that the tire is filled to the cor‐
rect inflation pressure.
The system is deactivated and is unable to de‐
tect flat tires if a wheel not equipped with TPM
electronics has been mounted, e.g., a compact
wheel, or if TPM is experiencing temporary in‐
terference from other systems or devices that
use the same frequency.
Resetting the system
Reset the system after each correction of the
tire inflation pressure and after every tire or
wheel change.
Operating principle, refer to page 62.1.Start the engine, but do not start driving.2.Lightly push button 1 in the turn indicator
lever up or down repeatedly until the appro‐
priate symbol appears in the display, ac‐
companied by the word "RESET".3.Press button 2 to confirm your choice of the
Tire Pressure Monitor.
The following display appears:4.Press button 2 for approx. 5 seconds until
the small warning lamp lights up yellow and
the following display appears:5.Drive away.
After driving a few minutes, the set inflation
pressures in the tires are accepted as the
target values to be monitored. The system
reset is completed during your drive, and
can be interrupted at any time. When driving
resumes, the reset is continued automati‐
cally. The indicator lamp goes out after the
system reset is completed.
Low tire pressure message
The warning lamps come on in yellow
and red. In addition, a signal sounds.
▷There is a flat tire or a major loss in
tire inflation pressure.▷The system was not reset after a wheel
change and thus issues warnings based on
the inflation pressures initialized last.1.Reduce your speed and stop cautiously.
Avoid sudden braking and steering maneu‐
vers.2.Check whether the vehicle is fitted with reg‐
ular tires or run-flat tires.
Run-flat tires , refer to page 160, are labeled
with a circular symbol containing the letters
RSC marked on the tire sidewall.Seite 78ControlsSafety78
Online Edition for Part no. 01 40 2 609 184 - 09 11 500
Page 84 of 220

Activating COMFORTPress the button repeatedly until COM‐
FORT is selected in the instrument
cluster.
Displays in the instrument cluster
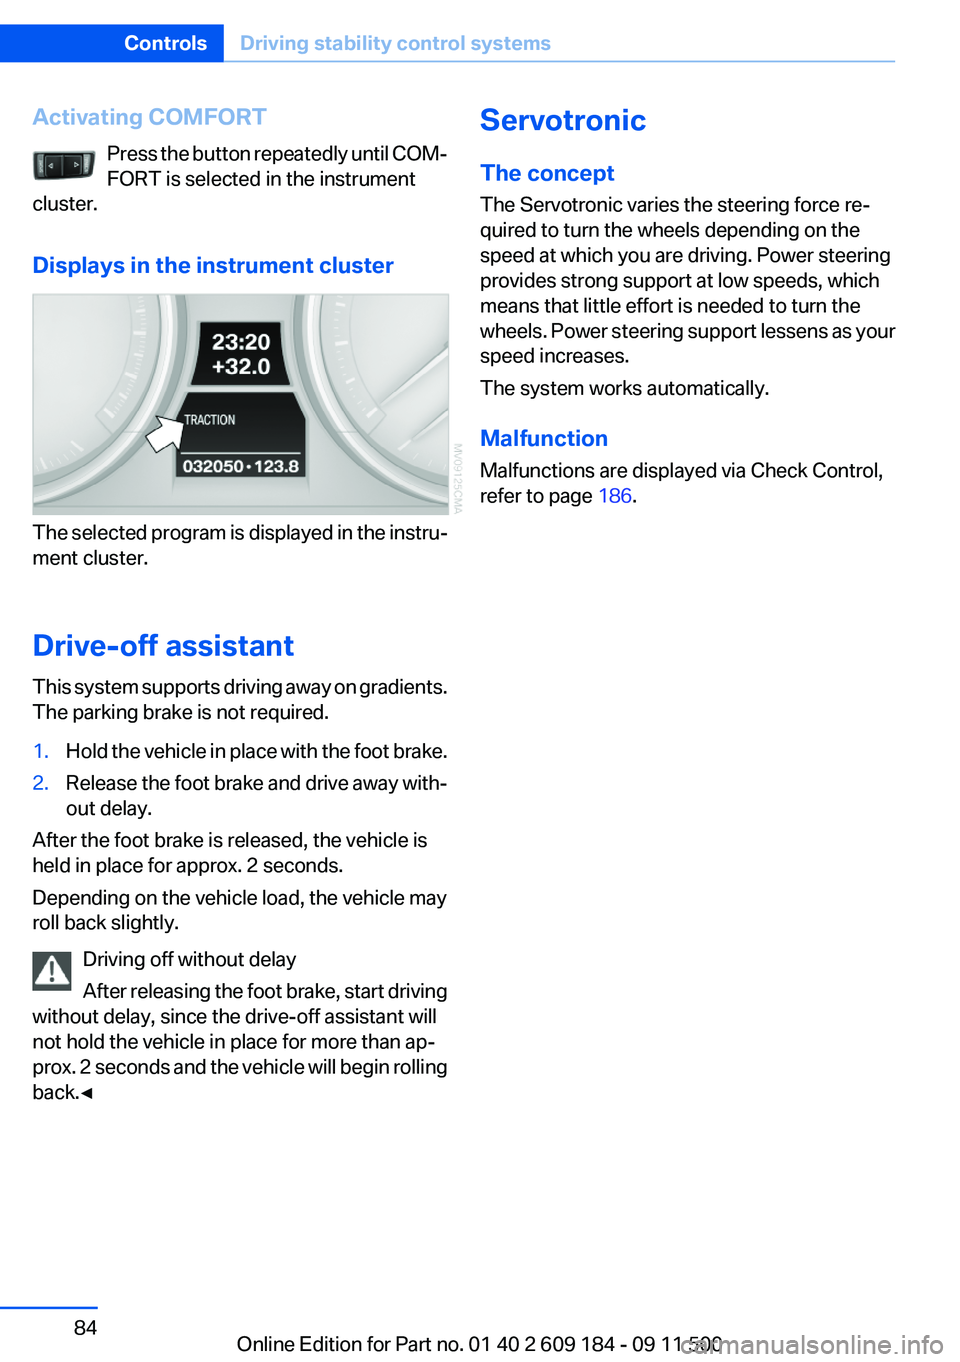
The selected program is displayed in the instru‐
ment cluster.
Drive-off assistant
This system supports driving away on gradients.
The parking brake is not required.
1.Hold the vehicle in place with the foot brake.2.Release the foot brake and drive away with‐
out delay.
After the foot brake is released, the vehicle is
held in place for approx. 2 seconds.
Depending on the vehicle load, the vehicle may
roll back slightly.
Driving off without delay
After releasing the foot brake, start driving
without delay, since the drive-off assistant will
not hold the vehicle in place for more than ap‐
prox. 2 seconds and the vehicle will begin rolling
back.◀
Servotronic
The concept
The Servotronic varies the steering force re‐
quired to turn the wheels depending on the
speed at which you are driving. Power steering
provides strong support at low speeds, which
means that little effort is needed to turn the
wheels. Power steering support lessens as your
speed increases.
The system works automatically.
Malfunction
Malfunctions are displayed via Check Control,
refer to page 186.Seite 84ControlsDriving stability control systems84
Online Edition for Part no. 01 40 2 609 184 - 09 11 500
Page 90 of 220

supply continuously; the levers change the
direction of the airflow.5Air vent: air for the knee area, footwell
Air conditioner
1Vent settings2Recirculated air mode3Cooling function4Temperature5Air volume6Rear window defrosterVent settings
Direct the flow of air to the win‐
dows
, to the upper body area
, or to the knee area and foot‐
well
. Intermediate positions are
possible. In the 6 o'clock position, a
small amount of air is also directed toward the
windows to keep them from fogging over.
Recirculated air mode If the air outside the car has an un‐
pleasant odor or contains pollu‐
tants, shut off the supply to the interior of the car
temporarily. The system then recirculates the air
currently within the vehicle.
The recirculated air mode can also be activated/
deactivated, refer to page 12, via a button on the
steering wheel.
Only use recirculated air mode for a limited
period
If condensation starts to form on the inside win‐
dow surfaces during operation in the recircu‐
lated air mode, you should switch it off while also
increasing the air flow rate as required. The re‐
circulated air mode should not be used contin‐
uously for lengthy periods; otherwise, the qual‐
ity of the air inside the car will gradually
deteriorate.◀
Air volume Press the corresponding button.
The higher the rate, the more ef‐
fective the heating or cooling will
be.
The air flow rate may be reduced or the blower
may be switched off entirely to save on battery
power.
Switching the system on/off Press the left button at the mini‐
mum fan speed. The blower and air
conditioner are completely
switched off and the air supply is cut off.Seite 90ControlsClimate90
Online Edition for Part no. 01 40 2 609 184 - 09 11 500