2012 BMW Z4 SDRIVE35I roof
[x] Cancel search: roofPage 33 of 220

The window closes without pinch protec‐
tion.
Retractable hardtop
General information
Adhere to the following instructions:
▷It is advisable that you close the retractable
hardtop when you park the vehicle. Not only
does the closed hardtop protect the vehicle
interior against unanticipated weather dam‐
age, it also offers theft protection. However,
even when the hardtop is closed, valuables
should only be stored in the locked cargo
area.▷Do not attach roof rack systems to the re‐
tractable hardtop, and in particular do not
attach magnetic racks.▷Do not attach rack systems to the trunk lid,
and in particular do not attach magnetic
racks.▷When the retractable hardtop is operated,
the trunk lid swings back and up.
Before operating the retractable hardtop,
ensure that there is enough clearance, e.g.,
in tight parking spaces.▷If you open the hardtop while it is wet, e.g.,
after driving in the rain, water may drip into
the cargo area.
If necessary, remove items from the cargo
area beforehand to avoid water stains or
soiling.▷At temperatures below 14 ℉/-10 ℃, the re‐
tractable hardtop cannot be moved.
Do not touch the mechanism and keep the
opening path clear.
During opening and closing, do not reach into
the mechanism and keep children away from the
opening path of the retractable hardtop; other‐
wise, there is the risk of injury.◀
Only open or close the hardtop while the
vehicle is stationary.
Do not drive away until the hardtop movement
is completed. Driving when the hardtop is not
fully opened or not fully closed may result in
damage or injury.◀
Do not place objects on the retractable
hardtop.
Do not place any objects on the retractable hard‐
top or on the trunk lid; otherwise, they could fall
during movements of the retractable hardtop
and cause damage or injury.◀
Before opening and closing Always open or close the hardtop fully.
Do not let the hardtop stop in an inter‐
mediate position when opening or closing. Oth‐
erwise, there is the danger of personal injury
since the hardtop will be lowered automatically
after a few minutes.◀▷Observe the safety precautions above.▷Ensure that the trunk lid is closed.▷The vehicle should be parked on fairly level
ground. Excessive angle is indicated by a
lamp.▷Fold down the trunk cover and make sure it
engages, refer to the instructions below.▷Do not place any objects next to or on the
cargo area partition and close the storage
compartment on the left side of the cargo
area.▷Do not exceed the maximum loading height
under the cargo area partition; refer to the
label in the cargo area showing a line indi‐
cating the maximum height.Seite 33Opening and closingControls33
Online Edition for Part no. 01 40 2 609 184 - 09 11 500
Page 105 of 220

Observe when loading the rear storage
shelf
▷When loading the rear storage shelf, do not
move both seats all the way forward while
moving them to their uppermost position
and leaning the backrests forward. Other‐
wise, the seats could hit and damage the
seal on the windshield and the sun visor.▷Only transport light and small objects on the
rear storage shelf; otherwise, braking ma‐
neuvers and swerving may lead to a safety
hazard due to objects flying about the pas‐
senger compartment. Only transport heavy
luggage in the trunk if it has been appropri‐
ately secured.◀
Cupholders
Shatter-proof containers and no hot
drinks
Use light and shatter-proof containers and do
not transport hot drinks. Otherwise, there is the
increased danger of injury in an accident.◀
Unsuitable containers
Do not forcefully push unsuitable contain‐
ers into the cupholders. This may result in dam‐
age.◀
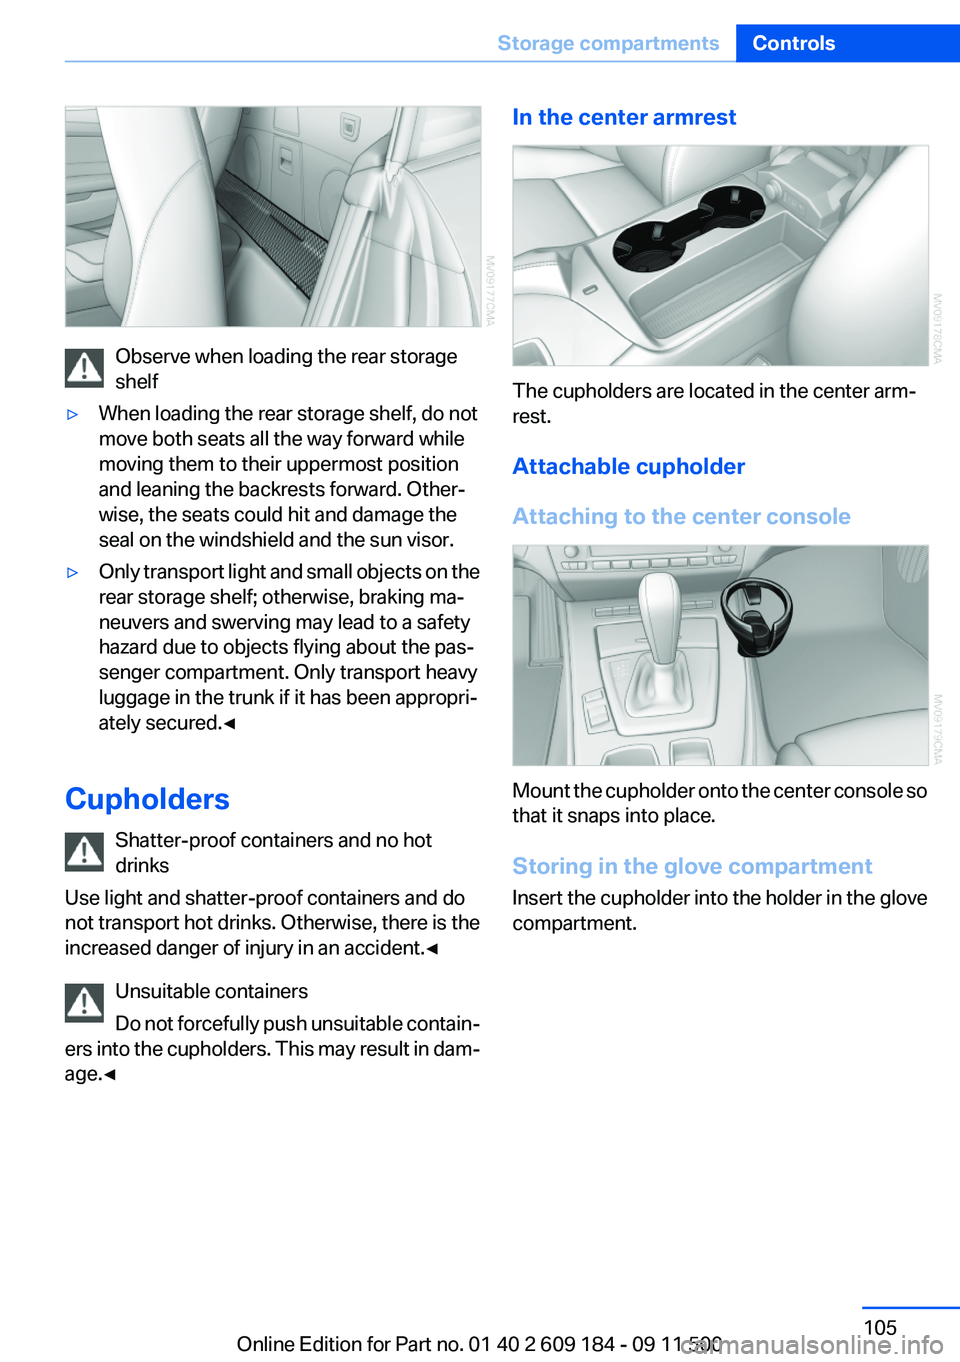
In the center armrest
The cupholders are located in the center arm‐
rest.
Attachable cupholder
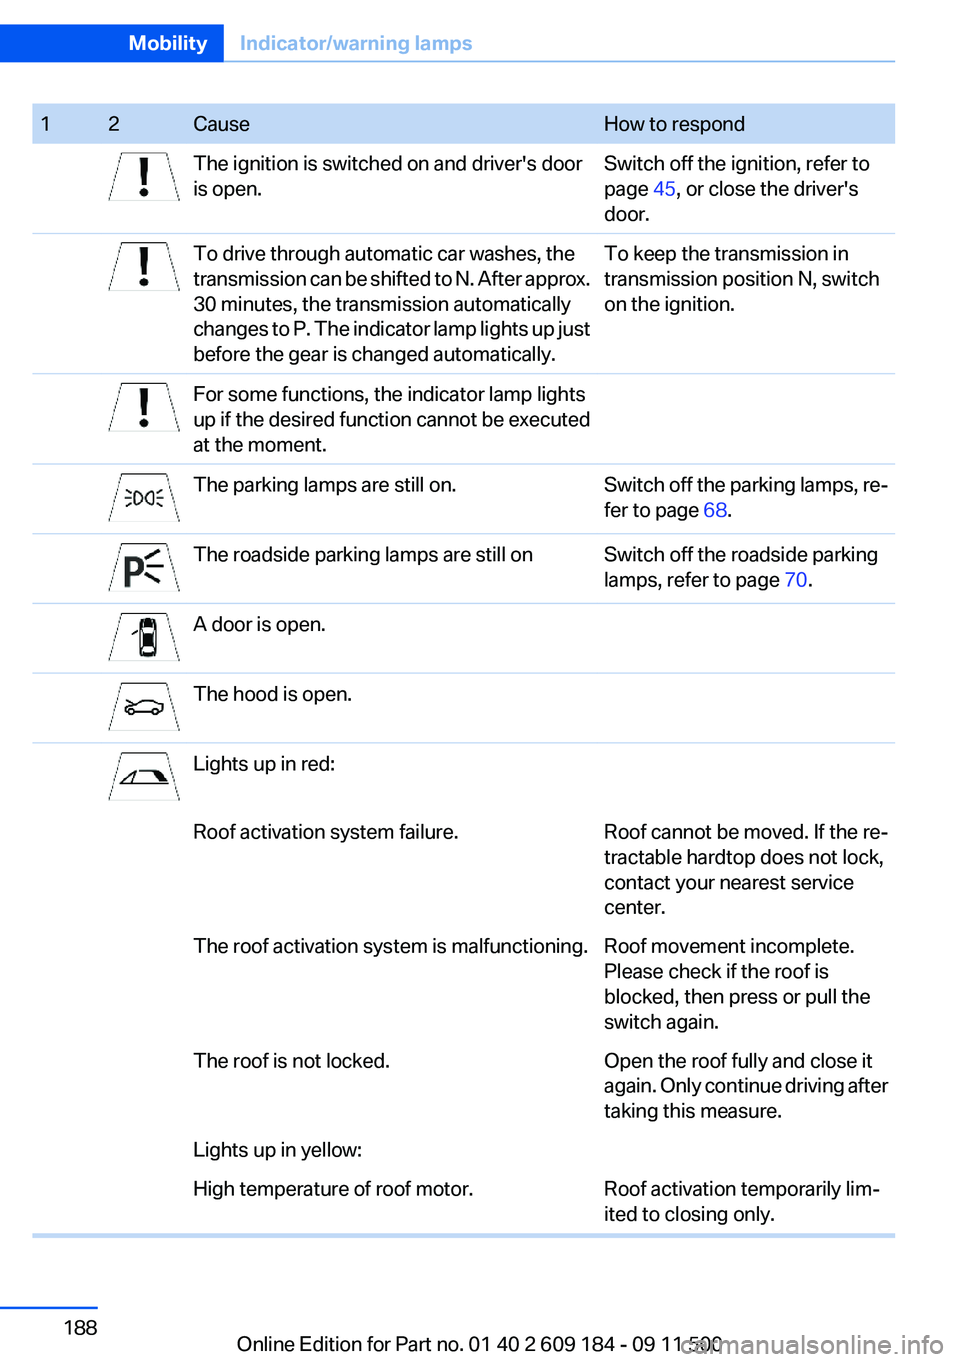
Attaching to the center console
Mount the cupholder onto the center console so
that it snaps into place.
Storing in the glove compartment
Insert the cupholder into the holder in the glove
compartment.
Seite 105Storage compartmentsControls105
Online Edition for Part no. 01 40 2 609 184 - 09 11 500
Page 168 of 220

MaintenanceVehicle equipment
This chapter describes all series equipment as
well as country-specific and special equipment
offered for this model series.Therefore, it also
describes equipment that may not be found in
your vehicle, for instance due to the selected
special equipment or the country version. This
also applies to safety-related functions and sys‐
tems.
BMW Maintenance System
The maintenance system provides information
on required maintenance measures and thus
provides support in maintaining road safety and
the operational reliability of the vehicle.
Condition Based Service CBS
Sensors and special algorithms take into ac‐
count the driving conditions of your vehicle.
Based on this, Condition Based Service deter‐
mines the maintenance requirements.
The system makes it possible to adapt the
amount of maintenance you need to your user
profile.
Details on the service requirements, refer to
page 65, can be displayed on the instrument
cluster.
Service data in the remote control
Information on the required maintenance is con‐
tinuously stored in the remote control. Your
service center will read out this data and suggest
the right array of service procedures for your ve‐
hicle.
Therefore, hand your service specialist the re‐
mote control that you used most recently.Storage periods
Storage periods during which the vehicle bat‐
tery was disconnected are not taken into ac‐
count.
If this occurs, have a service center update the
time-dependent maintenance procedures,
such as checking brake fluid and, if necessary,
changing the engine oil and the microfilter/acti‐
vated-charcoal filter.
Service and Warranty
Information Booklet for US
models and Warranty and
Service Guide Booklet for
Canadian models
Please consult your Service and Warranty Infor‐
mation Booklet for US models and Warranty and
Service Guide Booklet for Canadian models for
additional information on service requirements.
Maintenance and repair should be performed by
your service center. Make sure to have regular
maintenance procedures recorded in the vehi‐
cle's Service and Warranty Information Booklet
for US models, and in the Warranty and Service
Guide Booklet for Canadian models. These en‐
tries are proof of regular maintenance.Seite 168MobilityMaintenance168
Online Edition for Part no. 01 40 2 609 184 - 09 11 500
Page 188 of 220

12CauseHow to respondThe ignition is switched on and driver's door
is open.Switch off the ignition, refer to
page 45, or close the driver's
door.To drive through automatic car washes, the
transmission can be shifted to N. After approx.
30 minutes, the transmission automatically
changes to P. The indicator lamp lights up just
before the gear is changed automatically.To keep the transmission in
transmission position N, switch
on the ignition.For some functions, the indicator lamp lights
up if the desired function cannot be executed
at the moment.The parking lamps are still on.Switch off the parking lamps, re‐
fer to page 68.The roadside parking lamps are still onSwitch off the roadside parking
lamps, refer to page 70.A door is open.The hood is open.Lights up in red:Roof activation system failure.Roof cannot be moved. If the re‐
tractable hardtop does not lock,
contact your nearest service
center.The roof activation system is malfunctioning.Roof movement incomplete.
Please check if the roof is
blocked, then press or pull the
switch again.The roof is not locked.Open the roof fully and close it
again. Only continue driving after
taking this measure.Lights up in yellow:High temperature of roof motor.Roof activation temporarily lim‐
ited to closing only.Seite 188MobilityIndicator/warning lamps188
Online Edition for Part no. 01 40 2 609 184 - 09 11 500
Page 189 of 220

12CauseHow to respondThe cargo area partition is not in the lower‐
most position.Press down the cargo area parti‐
tion until it engages on both
sides.Roof activation only possible while vehicle is
stationary.The vehicle is not level; roof activation is not
possible.Move the vehicle to a level sur‐
face.The trunk lid is open.The fuel cap is missing or loose.Make sure that the fuel cap is
correctly positioned and close it
until it clicks audibly. Do not jam
the strap between the fuel cap
and the vehicle.The windshield washer fluid level is too low.Add washer fluid as soon as pos‐
sible, refer to page 52.Lights up in red:Service is due.Arrange a service appointment.
Check the service requirements,
refer to page 65.Lights up in yellow:The engine will start the next time the Start/
Stop button is touched, possibly without the
brake or clutch being depressedThe remote control is malfunctioning or, in
cars with Comfort Access, was not detected.The engine cannot be started.
Have the remote control
checked, if necessary.The battery in the remote control is dis‐
charged.Use the remote control for a lon‐
ger journey or, in cars with Com‐
fort Access, replace the battery.The belt tensioners and/or airbag system has
failed.Have the system checked imme‐
diately.Seite 189Indicator/warning lampsMobility189
Online Edition for Part no. 01 40 2 609 184 - 09 11 500
Page 215 of 220

Refueling 152
Remaining range, refer to Range 62
Remote control– Battery replacement 30– Comfort Access 28– Garage door opener 96– Malfunction 25, 29– Removing from the ignition
lock 45– Trunk lid 23– Universal 96
Replacement fuses, refer to
Spare fuses 175
Replacement remote con‐ trol 20
Replacing wheels/tires 161
Reporting safety defects 8
Reservoir for washer fluid 52
Restraining systems
– Refer to Safety belts 38
Restraint system
– For children 43
Retaining straps, securing
cargo 112
Retractable hardtop
– Convenient opening and
closing 23– Opening and closing 34– Remote control 23
Retreaded tires 161
Reverse gear
– 7-gear automatic transmis‐
sion 56– 8-gear automatic transmis‐
sion 53– Manual transmission 52
Roadside parking lamps 70
Roadworthiness test 65
Roof load capacity 204
Roof, refer to Retractable hardtop 33
Rope, refer to Tow-starting and towing 180
RPM, refer to Engine data 202
RSC Runflat System Compo‐
nent, refer to Run-flat
tires 161
Rubber components, care 184
Run-flat tires 161
Run-flat tires– Tire inflation pressure 155
Running lights, refer to Parking
lamps/low beams 68
S
Safety 6
Safety-belt height adjust‐ ment 39
Safety belts 38
Safety belts
– Damage 39– Indicator/warning lamp 39– Reminder 39
Safety belts, care 184
Safety systems
– Airbags 73– Safety belts 38
Safety tires 161
Saving fuel 112
Screw thread for tow fit‐ ting 179
Seat adjustment, electric 37
Seat adjustment, mechani‐ cal 36
Seat and mirror memory 39
Seat and mirror memory, re‐ trieving automatically 24
Seat Belt Reminder, refer to Safety belt reminder 39
Seat belts
– Refer to Safety belts 38
Seat heating 38
Seats
– Adjusting 36– Adjusting electrically 37– Heating 38– Memory, refer to Seat and
mirror memory 39– Storing the setting, refer to
Seat and mirror memory 39Sensors, care 185
Service and warranty 7
Service requirements, CBS Condition Based Serv‐
ice 168
Service requirements, dis‐ play 65
Service, Roadside Assis‐ tance 177
Servotronic 84
Settings– Clock, 12h/24h format 63
Settings and information 62
Settings, configuring, refer to Personal Profile 20
Shift paddles on steering
wheel
– 7-gear automatic transmis‐
sion 57– 8-gear automatic transmis‐
sion 54
Side airbags 73
Side windows, refer to Win‐ dows 31
Signal horn, refer to Horn 12
Sitting safely 36
Ski bag, refer to Through- loading opening with
integrated transport bag 101
Slot for remote control 45
Snap-in adapter, mobile phone 143
Snap-in adapter, refer to Cen‐ ter armrest storage compart‐
ment 103
Socket, OBD Onboard Diag‐ nostics 169
Socket, refer to Connecting electrical devices 100
SOS, refer to Emergency Re‐ quest, initiating 176
Spare fuses 175
Special equipment, series equipment 6
Specified oil types 166
Speed, average 62
Speedometer 14
Seite 215Everything from A to ZReference215
Online Edition for Part no. 01 40 2 609 184 - 09 11 500