2012 BMW Z4 SDRIVE35I service
[x] Cancel search: servicePage 96 of 220

Interior equipmentVehicle equipment
This chapter describes all series equipment as
well as country-specific and special equipment
offered for this model series.Therefore, it also
describes equipment that may not be found in
your vehicle, for instance due to the selected
special equipment or the country version. This
also applies to safety-related functions and sys‐
tems.
Universal Garage Door
Opener
The concept
The Universal Garage Door Opener can be used
to operate up to 3 functions in radio-controlled
systems, such as garage door drives or lighting
systems. The Universal Garage Door Opener
replaces up to 3 different hand-held transmit‐
ters. To operate it, the buttons on the interior
rearview mirror must be programmed for the de‐
sired functions. The hand-held transmitter for
the system is needed for the programming pro‐
cedure.
During programming
During programming and before activat‐
ing a device using the integrated universal re‐
mote control, ensure that there are no people,
animals, or objects in the range of movement of
the remote-controlled device; otherwise, there
is a risk of injury or damage.
Also follow the safety instructions of the hand-
held transmitter.◀
Before selling the vehicle, delete the stored
functions for security reasons.
Compatibility If this symbol is printed on the packaging
or in the operating instructions of thesystem being operated, the system is generally
compatible with the Universal Garage Door
Opener.
If you have any questions, please contact:▷Your service center.▷www.homelink.com on the Internet.
HomeLink is a registered trademark of Johnson
Controls, Inc.
Controls on the interior rearview mirror
1Buttons2LED3Hand-held transmitter, required for pro‐
gramming.
Programming
General information
1.Switch on the ignition.2.Initial setup:
Press the right and left buttons on the inte‐
rior rearview mirror simultaneously for ap‐
prox. 20 seconds until the LED on the inte‐
rior rearview mirror begins to flash. All
programmed settings of the buttons on the
interior rearview mirror are deleted.3.Hold the hand-held transmitter of the sys‐
tem to be operated a distance of approx. 1
to 3 in/2.5 to 8 cm away from the buttons on
the interior rearview mirror. The requiredSeite 96ControlsInterior equipment96
Online Edition for Part no. 01 40 2 609 184 - 09 11 500
Page 102 of 220
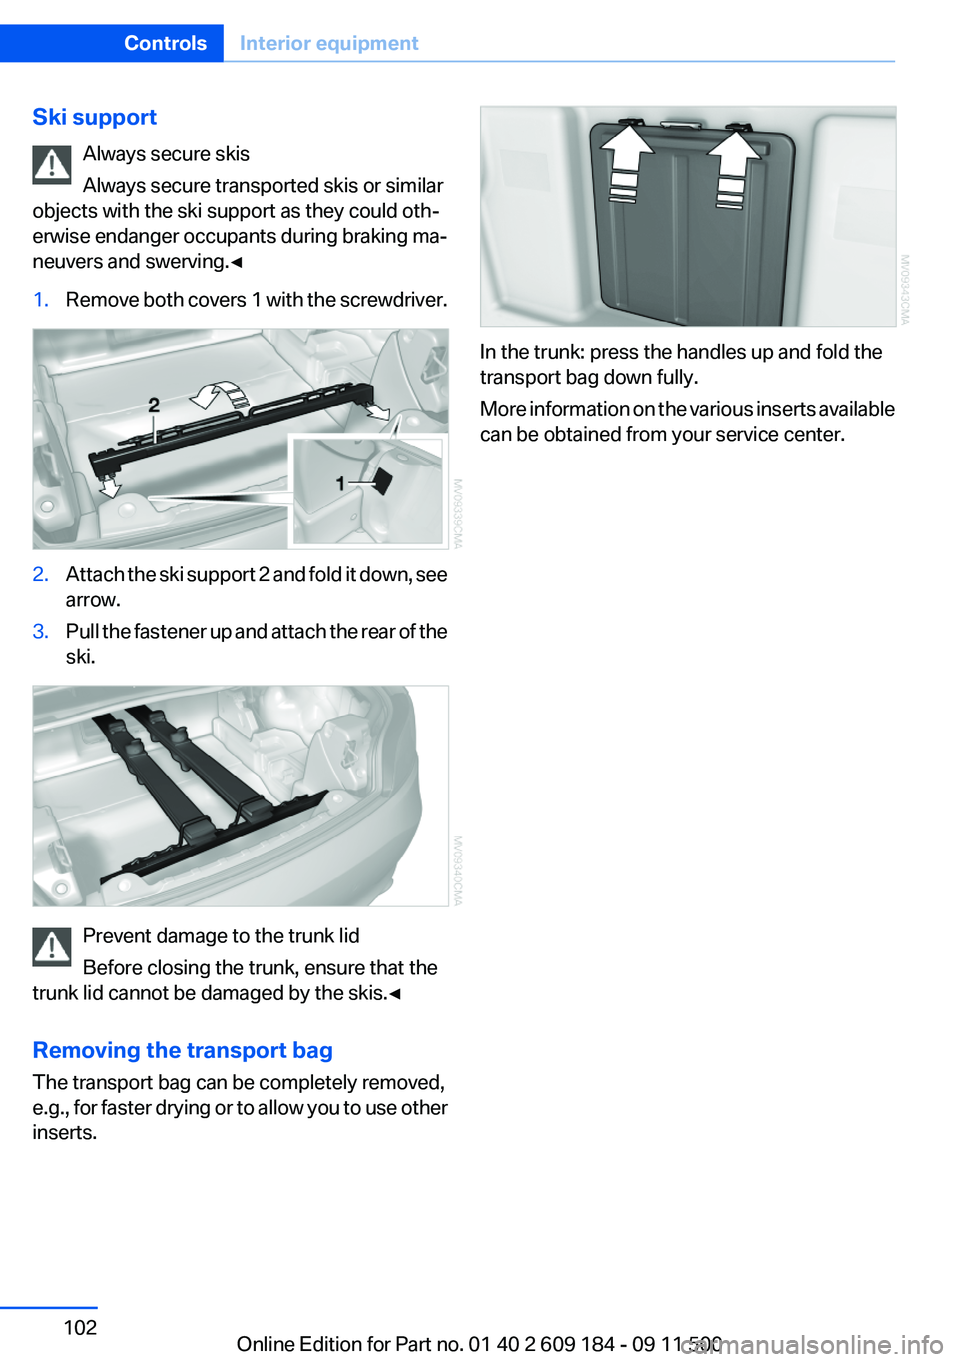
Ski supportAlways secure skis
Always secure transported skis or similar
objects with the ski support as they could oth‐
erwise endanger occupants during braking ma‐
neuvers and swerving.◀1.Remove both covers 1 with the screwdriver.2.Attach the ski support 2 and fold it down, see
arrow.3.Pull the fastener up and attach the rear of the
ski.
Prevent damage to the trunk lid
Before closing the trunk, ensure that the
trunk lid cannot be damaged by the skis.◀
Removing the transport bag
The transport bag can be completely removed,
e.g., for faster drying or to allow you to use other
inserts.
In the trunk: press the handles up and fold the
transport bag down fully.
More information on the various inserts available
can be obtained from your service center.
Seite 102ControlsInterior equipment102
Online Edition for Part no. 01 40 2 609 184 - 09 11 500
Page 104 of 220
Storage compartments inside
the vehicle
No non-slip mats on the dashboard
Do not use non-slip materials, such as
non-slip mats, on the dashboard, or it could be
damaged by the substances in the materials.◀
The following compartments are available, de‐
pending on how your vehicle is equipped:
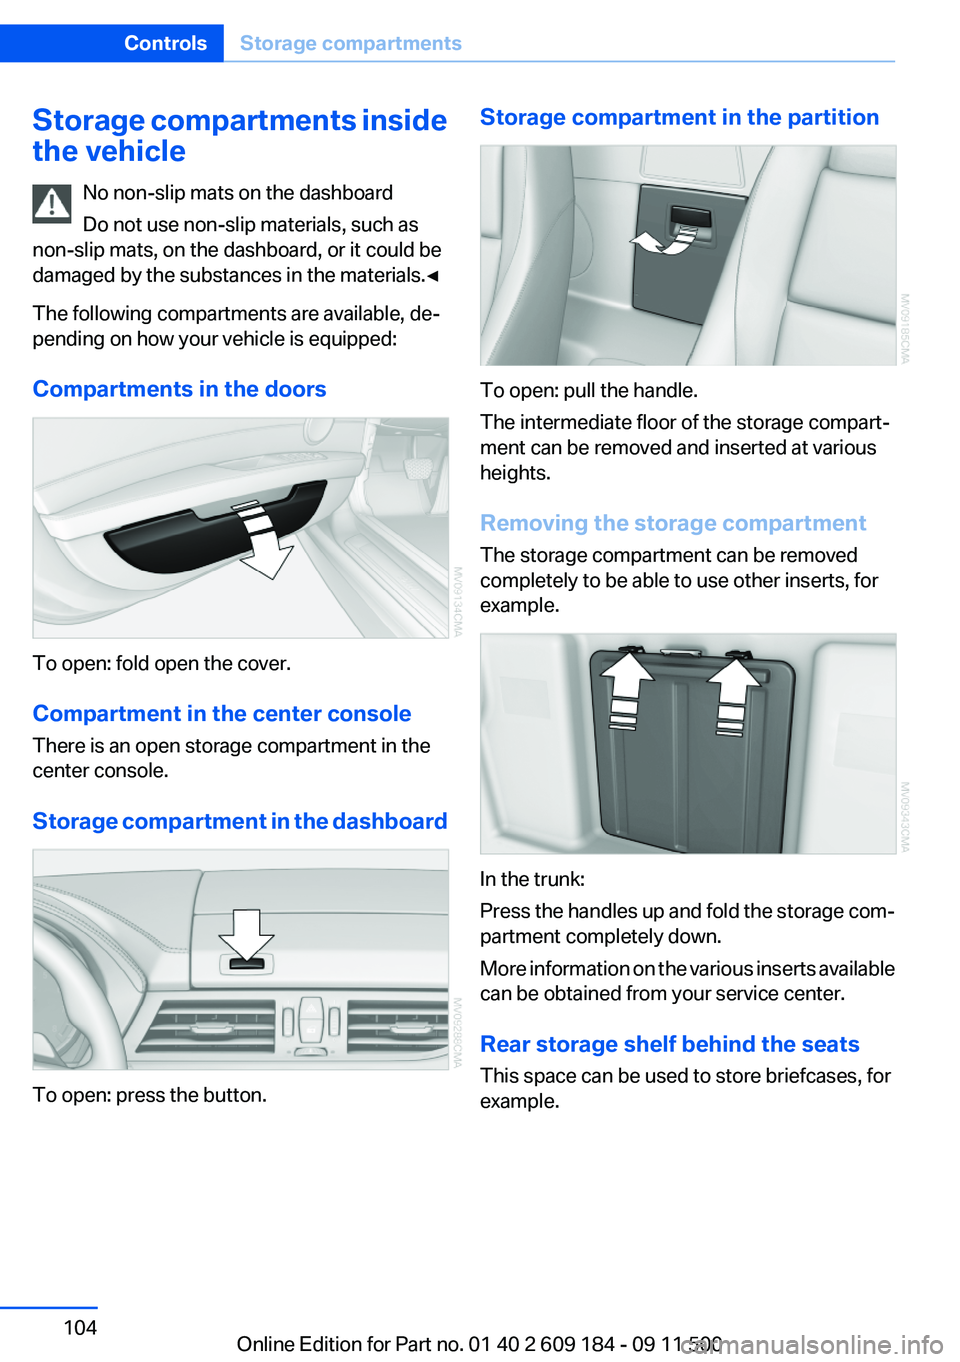
Compartments in the doors
To open: fold open the cover.
Compartment in the center console
There is an open storage compartment in the
center console.
Storage compartment in the dashboard
To open: press the button.
Storage compartment in the partition
To open: pull the handle.
The intermediate floor of the storage compart‐
ment can be removed and inserted at various
heights.
Removing the storage compartment
The storage compartment can be removed
completely to be able to use other inserts, for
example.
In the trunk:
Press the handles up and fold the storage com‐
partment completely down.
More information on the various inserts available
can be obtained from your service center.
Rear storage shelf behind the seats
This space can be used to store briefcases, for
example.
Seite 104ControlsStorage compartments104
Online Edition for Part no. 01 40 2 609 184 - 09 11 500
Page 112 of 220
Lateral storage shelfLoading the rear storage shelf
When loading the rear storage shelf, do
not move both seats all the way forward while
moving them to their uppermost position and
leaning the backrests forward. Otherwise, the
seats could hit and damage the seal on the wind‐
shield and the sun visor.◀
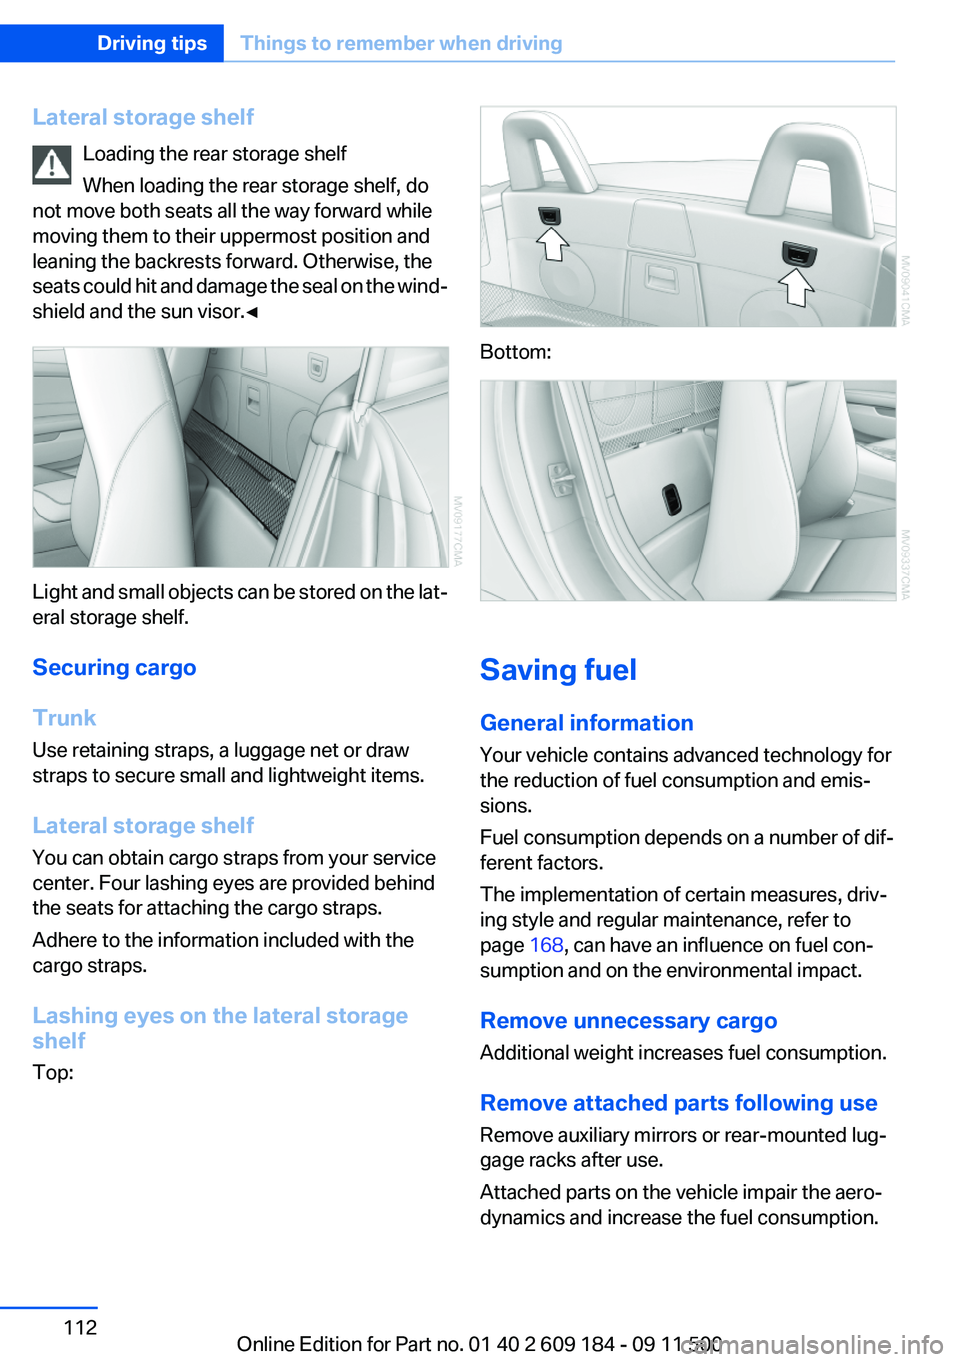
Light and small objects can be stored on the lat‐
eral storage shelf.
Securing cargo
Trunk
Use retaining straps, a luggage net or draw
straps to secure small and lightweight items.
Lateral storage shelf
You can obtain cargo straps from your service
center. Four lashing eyes are provided behind
the seats for attaching the cargo straps.
Adhere to the information included with the
cargo straps.
Lashing eyes on the lateral storage
shelf
Top:
Bottom:
Saving fuel
General information
Your vehicle contains advanced technology for
the reduction of fuel consumption and emis‐
sions.
Fuel consumption depends on a number of dif‐
ferent factors.
The implementation of certain measures, driv‐
ing style and regular maintenance, refer to
page 168, can have an influence on fuel con‐
sumption and on the environmental impact.
Remove unnecessary cargo
Additional weight increases fuel consumption.
Remove attached parts following use
Remove auxiliary mirrors or rear-mounted lug‐
gage racks after use.
Attached parts on the vehicle impair the aero‐
dynamics and increase the fuel consumption.
Seite 112Driving tipsThings to remember when driving112
Online Edition for Part no. 01 40 2 609 184 - 09 11 500
Page 123 of 220
Changing the channel using the buttons
Press the button for the correspond‐
ing direction. The next enabled channel is
opened.
Search
1. Press and hold the button for the
corresponding direction. The activated
channels appear on the display one after the
other.2.Release the button to select the displayed
channel.
Notes
When there is a signal blockage or the transmis‐
sion is suspended momentarily for more than
4 seconds, a message will appear on the display.
Service may be interrupted or unavailable for
specific reasons such as environmental or topo‐
graphic conditions and others that Satellite
Radio cannot directly control. Signal may not be
available under tunnels, in parking garages, next
to tall buildings, nearby trees with dense foliage,
nearby mountains or other possible strong sour‐
ces of radio interference. Service should resume
normally after the source of signal unavailability
has been cleared.
CD/multimedia
CD player and CD/DVD changer
Filling the CD player
Insert the CD into the CD drive with the printed
side up.
Playback begins automatically.
Reading can take a few minutes with com‐
pressed audio files.
Starting the CD player
A CD is contained in the CD player.1.Switch on the car radio if necessary.2. Press the button.3."CD"
Starting the CD/DVD changer
1.Switch on the car radio if necessary.2.Fill the CD/DVD compartments, refer to
page 125.3. Press the button.4."DVD"5.Press the button of the desired CD/DVD
number.
The corresponding CD/DVD number is shown
on the display. At the end of the last track, the
device changes to the next CD/DVD.
Skipping to another track
Press the button repeatedly until the
desired track is played.
With the right knob:
Turn the right knob until the desired track is
played back.
Fast forward/reverse
Hold the button down.
Tracks can be heard but are distorted.
Briefly playing and selecting a track
"SC"
All tracks are played briefly one after the other.
To interrupt the function and select a track:
"SC"
Random playback
"RND"
Seite 123Professional RadioEntertainment123
Online Edition for Part no. 01 40 2 609 184 - 09 11 500
Page 128 of 220
Adjusting the volume1. Press the button.2."AUX"3."Vol-AUX"4.Connect the audio device, switch it on and
select a track on the audio device.
USB audio interface/mobile phone
audio interface
At a glance
It is possible to connect external audio devices.
The sound is output on the vehicle loudspeak‐
ers.
Connectors for external devices
▷Connection via USB audio interface: Apple
iPod/iPhone, USB devices, e.g., MP3 play‐
ers, USB flash drives, or mobile phones that
are supported by the USB audio interface.▷Connection via snap-in adapter, refer to
page 143, when equipped with extended
connectivity of the music player in the mo‐
bile phone: Apple iPhone or mobile phones.
Playback is only possible if no audio device
is connected to the analog AUX-IN port.
Due to the large number of different audio devi‐
ces available on the market, it cannot be ensured
that every audio device/mobile phone is opera‐
ble on the vehicle.
Ask your service center about suitable audio de‐
vices/mobile phones.
Audio files
Standard audio files can be played back:
▷MP3.▷WMA.▷WAV (PCM).▷AAC, M4A.▷Playback lists: M3U, WPL, PLS.File system
Standard file systems for USB devices are sup‐
ported. The FAT 32 format is recommended.
Connecting
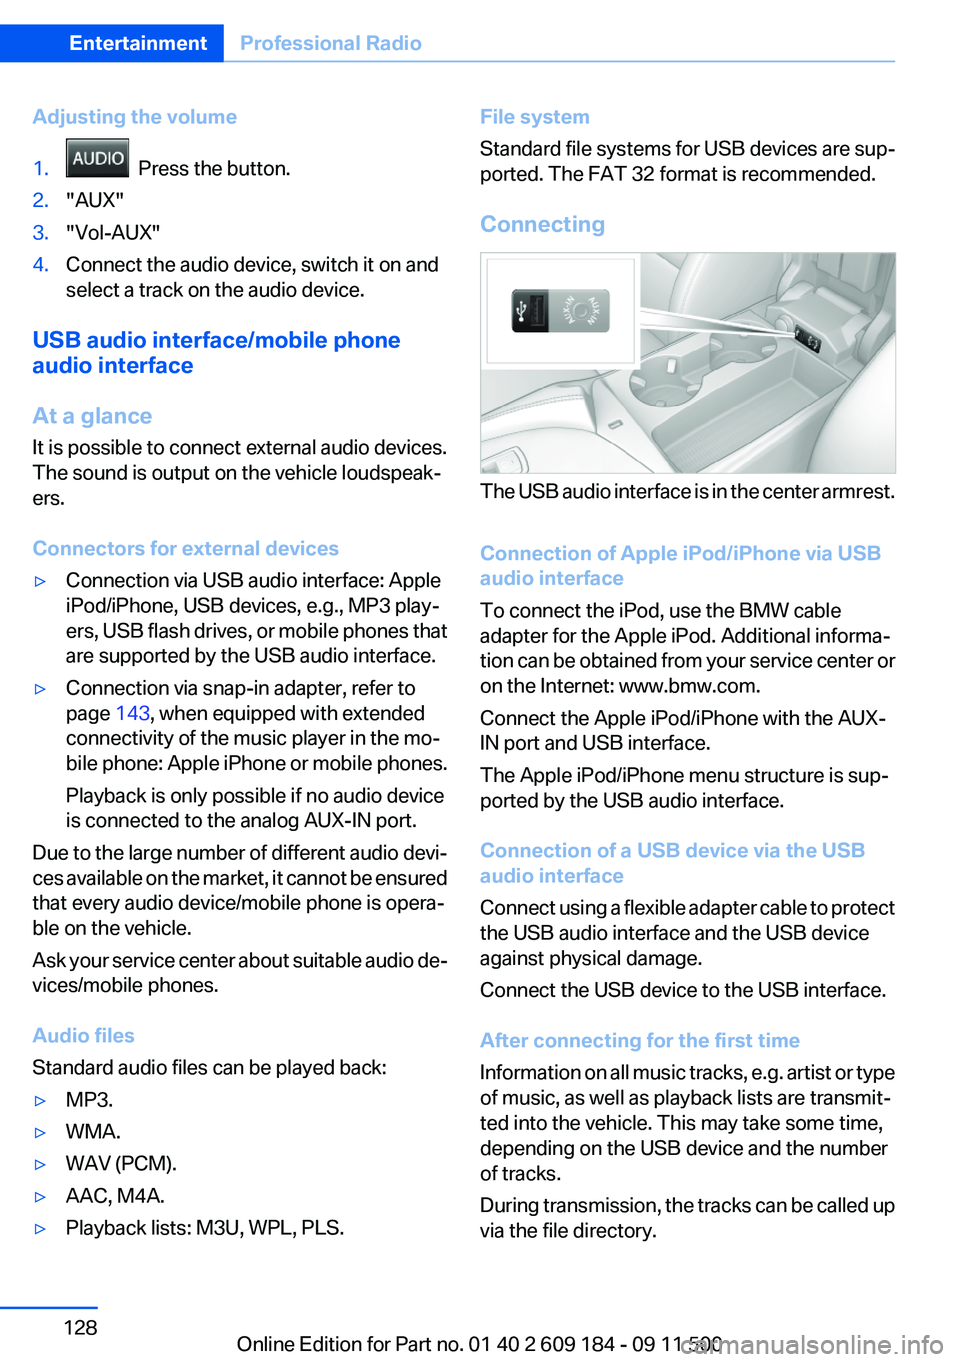
The USB audio interface is in the center armrest.
Connection of Apple iPod/iPhone via USB
audio interface
To connect the iPod, use the BMW cable
adapter for the Apple iPod. Additional informa‐
tion can be obtained from your service center or
on the Internet: www.bmw.com.
Connect the Apple iPod/iPhone with the AUX-
IN port and USB interface.
The Apple iPod/iPhone menu structure is sup‐
ported by the USB audio interface.
Connection of a USB device via the USB
audio interface
Connect using a flexible adapter cable to protect
the USB audio interface and the USB device
against physical damage.
Connect the USB device to the USB interface.
After connecting for the first time
Information on all music tracks, e.g. artist or type
of music, as well as playback lists are transmit‐
ted into the vehicle. This may take some time,
depending on the USB device and the number
of tracks.
During transmission, the tracks can be called up
via the file directory.
Seite 128EntertainmentProfessional Radio128
Online Edition for Part no. 01 40 2 609 184 - 09 11 500
Page 133 of 220
Communication
All of the options available to you for mobile
communication with family, friends, business
partners, and service providers are described in this chapter.Online Edition for Part no. 01 40 2 609 184 - 09 11 500
Page 138 of 220
▷It may not be possible to display phone book
entries with special characters.▷The number of phone book entries to be
stored is too high.▷Is the data volume of the contact too large,
e. g., due to stored information such as
notes? Reduce the data volume of the con‐
tact.
The phone connection quality is poor.
▷The strength of the Bluetooth signal on the
mobile phone can be adjusted, depending
on the mobile phone.▷Insert the mobile phone into the snap-in
adapter or place it in the area of the center
console.▷Adjust the volume of the microphone and
loudspeakers.
If all points in this list have been checked and the
required function is still not available, contact
Customer Relations or the service center.
Controls
The following functions can be operated on the
radio:
▷Accept/reject a call.▷Dial a phone number.▷Dial a phone number from the phone book.▷Dial a stored phone number, such as from
the list of accepted calls.▷In conjunction with the full preparation pack‐
age mobile phone: BMW Assist, refer to
page 145.
When the ignition and the radio ready state are
switched off, such as after the remote control is
removed, an existing call can be continued for
up to 25 minutes on the hands-free system.
Adjusting the volume
Turn the knob until the desired volume is se‐
lected. The setting is stored for the remote con‐
trol currently in use.
The vehicle automatically adjusts the volume of
the microphone on the telephone and the vol‐
ume of the called party. Depending on the mo‐
bile phone, the volumes may need to be ad‐
justed. The settings can only be created during
a call and must be adjusted separately for each
telephone. The settings are deleted when the
telephone is unpaired.
Incoming call
Receiving calls
If the number of the caller is stored in the phone
book and is transmitted by the network, the
name of the contact is displayed. Otherwise,
only the phone number is displayed.
Accepting a call Briefly press the button on the steering
wheel or radio.
or
"YES"
Rejecting a call
"NO"
Ending a call Briefly press the button on the steering
wheel or radio.
Seite 138CommunicationTelephone138
Online Edition for Part no. 01 40 2 609 184 - 09 11 500