2012 BMW 650I belt
[x] Cancel search: beltPage 89 of 282

▷
Make sure that the front passenger is sitting
correctly, i.e., keeps his or her feet and legs
in the footwell; otherwise, leg injuries can
occur if the front airbag is triggered.
▷ Do not place slip covers, seat cushions or
other objects on the front passenger seat
that are not approved specifically for seats
with integrated side airbags.
▷ Do not hang pieces of clothing, such as jack‐
ets, over the backrests.
▷ Make sure that occupants keep their heads
away from the side airbag; otherwise, inju‐
ries can occur if the airbags are deployed.
▷ Do not remove the airbag restraint system.
▷ Do not remove the steering wheel.
▷ Do not apply adhesive materials to the air‐
bag cover panels, cover them or modify
them in any way.
▷ Never modify either the individual compo‐
nents
or the wiring in the airbag system. This
also applies to steering wheel covers, the
dashboard, and the seats.◀
Even when all instructions are followed closely,
injury from contact with the airbags cannot be
ruled out in certain situations.
The ignition and inflation noise may lead to
short-term
and, in most cases, temporary hear‐
ing impairment in sensitive individuals.
In the case of a malfunction, deactivation
and after triggering of the airbags
Do not touch the individual components imme‐
diately after the system has been triggered; oth‐
erwise, there is the danger of burns.
Only have the airbags checked, repaired or dis‐
mantled and the airbag generator scrapped by
your service center or a workshop that has the
necessary authorization for handling explosives.
Non-professional attempts to service the sys‐
tem could lead to failure in an emergency or un‐
desired triggering of the airbag, either of which
could result in injury.◀
Warnings and information on the airbags are
also found on the sun visors. Functional readiness of the airbag
system
When
the ignition is switch on, the warn‐
ing lamp in the instrument cluster lights
up briefly and thereby indicates the op‐
erational readiness of the entire airbag system
and the belt tensioner.
Airbag system malfunctioning
▷ In radio ready state, the warning lamp does
not come on.
▷ The warning lamp lights up continuously.
When there is a malfunction, have the air‐
bag system checked immediately
When there is a malfunction, have the airbag
system checked immediately; otherwise, there
is
a risk that the system does not function as ex‐
pected in the event of an accident despite cor‐
responding severity of the accident.◀
Automatic deactivation of the front
passenger airbags
The system determines whether the front pas‐
senger seat is occupied by measuring the re‐
sistance of the human body.
The front, knee, and side airbag on the front
passenger side are activated or deactivated ac‐
cordingly.
Leave feet in the footwell
Make sure that the front passenger keeps
his or her feet in the footwell; otherwise, the front
passenger airbags may not function properly.◀
Child restraint fixing system in the front
passenger seat
Before transporting a child on the front passen‐
ger seat, see the safety notes and instructions
under Children on the front passenger seat.◀
Malfunction of the automatic
deactivation system
When transporting older children and adults, the
front passenger airbags may be deactivated in
certain sitting positions. In this case, the indica‐ Seite 89
89Online Edition for Part no. 01 40 2 606 521 - 03 11 490
Reference Mobility Communication Entertainment Navigation Driving tips
Controls At a glance
Page 91 of 282
Rollover protection system
The concept
The
rollover protection system is activated dur‐
ing an accident or a critical driving situation,
when there is extreme tilt with respect to the
longitudinal axis or when there is loss of ground
contact. The safety frames located behind the
rear headrests extend within fractions of a sec‐
ond.
In addition to the rollover bracket integrated in
the front windshield frame, the rollover protec‐
tion system guarantees the required head clear‐
ance of all vehicle occupants.
Maintaining movement space
Always keep the movement space of the
rollover protection system clear. Otherwise,
there may be damage or injuries when the roll‐
over protection system is triggered.◀
In less severe accidents, the secured safety belt
and, depending on the severity of the accident,
the belt tensioner and airbag restraint system
provide protection.
Triggered rollover protection system
After deployment or damage
After deployment of the rollover protec‐
tion system or in the event of damage, have the
system checked and replaced.
Have this work performed only by your service
center; otherwise, it cannot be ensured that this
safety feature will function properly.◀
Do not move convertible top
When the rollover protection system is ex‐
tended, do not move the convertible top. Oth‐
erwise, damages or injuries may result.◀
If the rollover protection system was not placed
under any stress after an automatic triggering, it
can be pushed back by hand, e.g. to close the
convertible top. Three people are necessary for
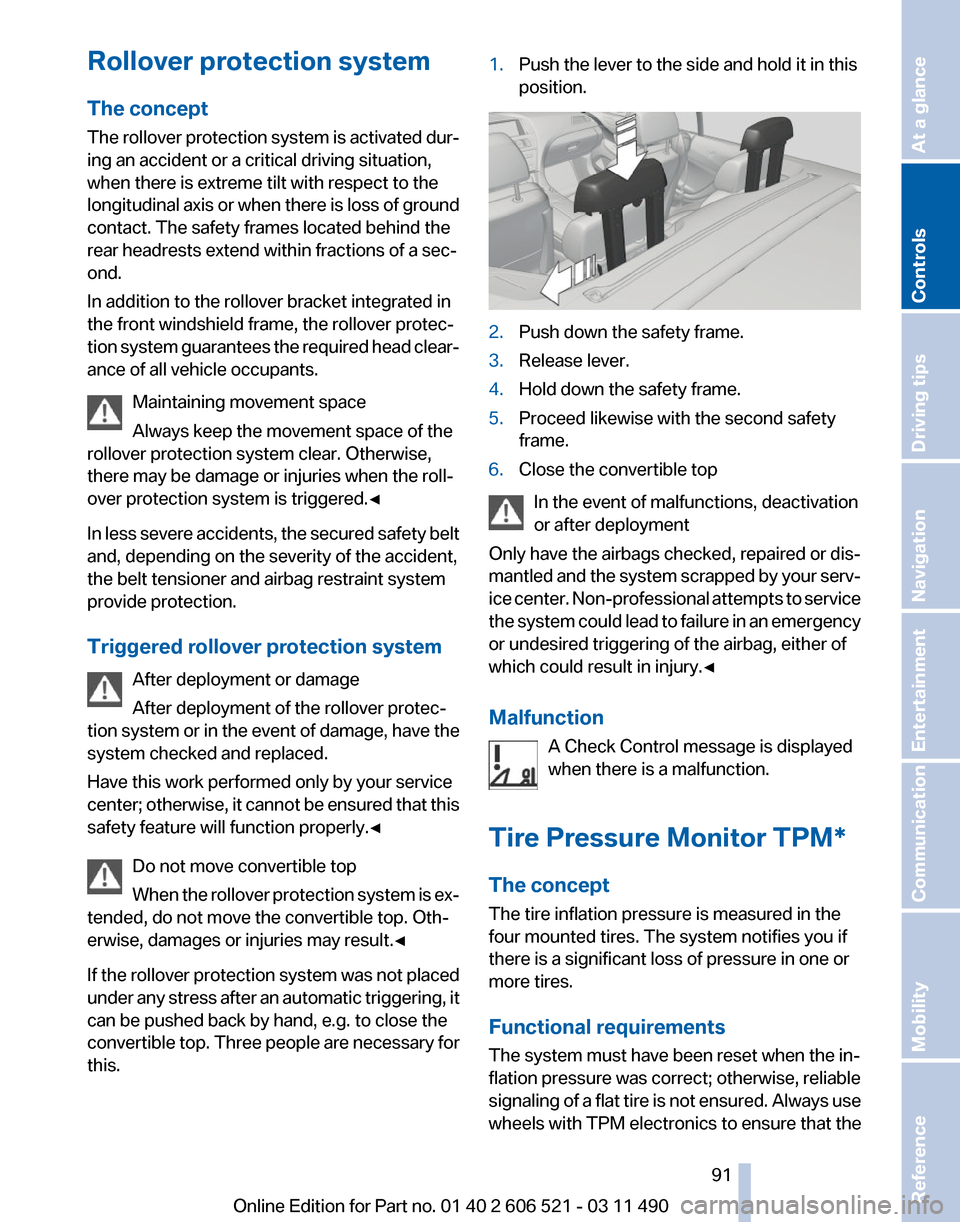
this. 1.
Push the lever to the side and hold it in this
position. 2.
Push down the safety frame.
3. Release lever.
4. Hold down the safety frame.
5. Proceed likewise with the second safety
frame.
6. Close the convertible top
In the event of malfunctions, deactivation
or after deployment
Only have the airbags checked, repaired or dis‐
mantled
and the system scrapped by your serv‐
ice center. Non-professional attempts to service
the system could lead to failure in an emergency
or undesired triggering of the airbag, either of
which could result in injury.◀
Malfunction
A Check Control message is displayed
when there is a malfunction.
Tire Pressure Monitor TPM*
The concept
The tire inflation pressure is measured in the
four mounted tires. The system notifies you if
there is a significant loss of pressure in one or
more tires.
Functional requirements
The system must have been reset when the in‐
flation pressure was correct; otherwise, reliable
signaling of a flat tire is not ensured. Always use
wheels with TPM electronics to ensure that the Seite 91
91Online Edition for Part no. 01 40 2 606 521 - 03 11 490
Reference Mobility Communication Entertainment Navigation Driving tips
Controls At a glance
Page 141 of 282
4.
The resulting figure equals the available
amount
of cargo and luggage load capacity.
For example, if the YYY amount equals
1,000 lbs and there will be four 150 lbs pas‐
sengers in your vehicle, the amount of avail‐
able cargo and luggage load capacity is
400 lbs: 1,000 lbs minus 600 lbs = 400 lbs.
5. Determine the combined weight of luggage
and
cargo being loaded on the vehicle. That
weight may not safely exceed the available
cargo and luggage load capacity calculated
in Step 4.
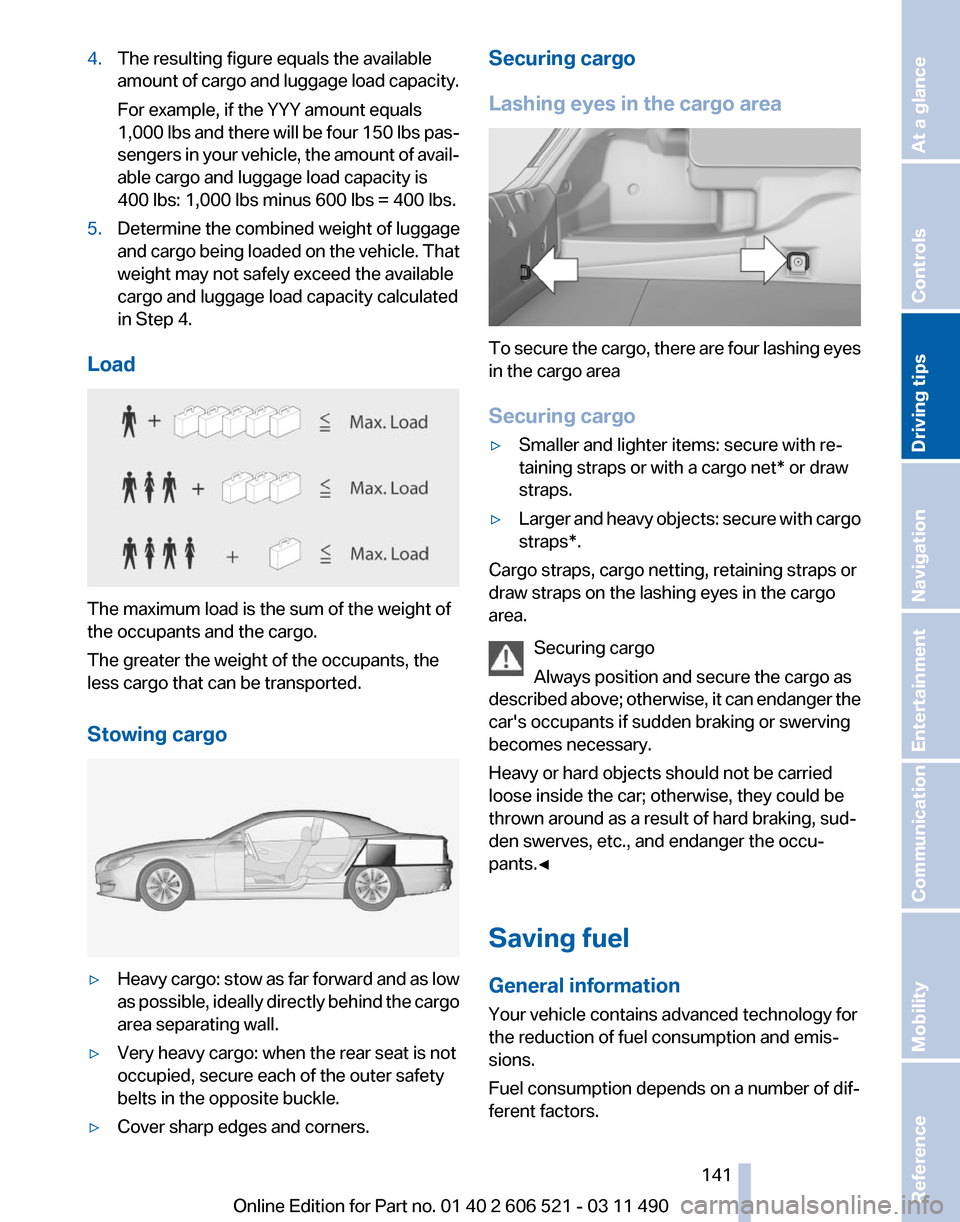
Load The maximum load is the sum of the weight of
the occupants and the cargo.
The greater the weight of the occupants, the
less cargo that can be transported.
Stowing cargo
▷
Heavy cargo: stow as far forward and as low
as
possible, ideally directly behind the cargo
area separating wall.
▷ Very heavy cargo: when the rear seat is not
occupied, secure each of the outer safety
belts in the opposite buckle.
▷ Cover sharp edges and corners. Securing cargo
Lashing eyes in the cargo area
To secure the cargo, there are four lashing eyes
in the cargo area
Securing cargo
▷
Smaller and lighter items: secure with re‐
taining straps or with a
cargo net* or draw
straps.
▷ Larger and heavy objects: secure with cargo
straps*.
Cargo straps, cargo netting, retaining straps or
draw straps on the lashing eyes in the cargo
area.
Securing cargo
Always position and secure the cargo as
described
above; otherwise, it can endanger the
car's occupants if sudden braking or swerving
becomes necessary.
Heavy or hard objects should not be carried
loose inside the car; otherwise, they could be
thrown around as a result of hard braking, sud‐
den swerves, etc., and endanger the occu‐
pants.◀
Saving fuel
General information
Your vehicle contains advanced technology for
the reduction of fuel consumption and emis‐
sions.
Fuel consumption depends on a number of dif‐
ferent factors. Seite 141
141Online Edition for Part no. 01 40 2 606 521 - 03 11 490
Reference Mobility Communication Entertainment Navigation
Driving tips Controls At a glance
Page 165 of 282
When surround is activated, multi-channel play‐
back is simulated when a stereo audio track is
played.
Volume
▷
"Speed volume": speed-dependent volume
control.
▷ "PDC": volume of the PDC signal* com‐
pared to the entertainment sound output.
▷ "Gong": volume of the signal, such as the
safety belt reminder, compared to the en‐
tertainment sound output.
▷ "Microphone": volume of the microphone*
during a phone call.
▷ "Loudspeak.":
volume of the loudspeakers*
during a phone call.
The following volumes are only stored for the
respective paired telephone:
"Microphone",
"Loudspeak.".
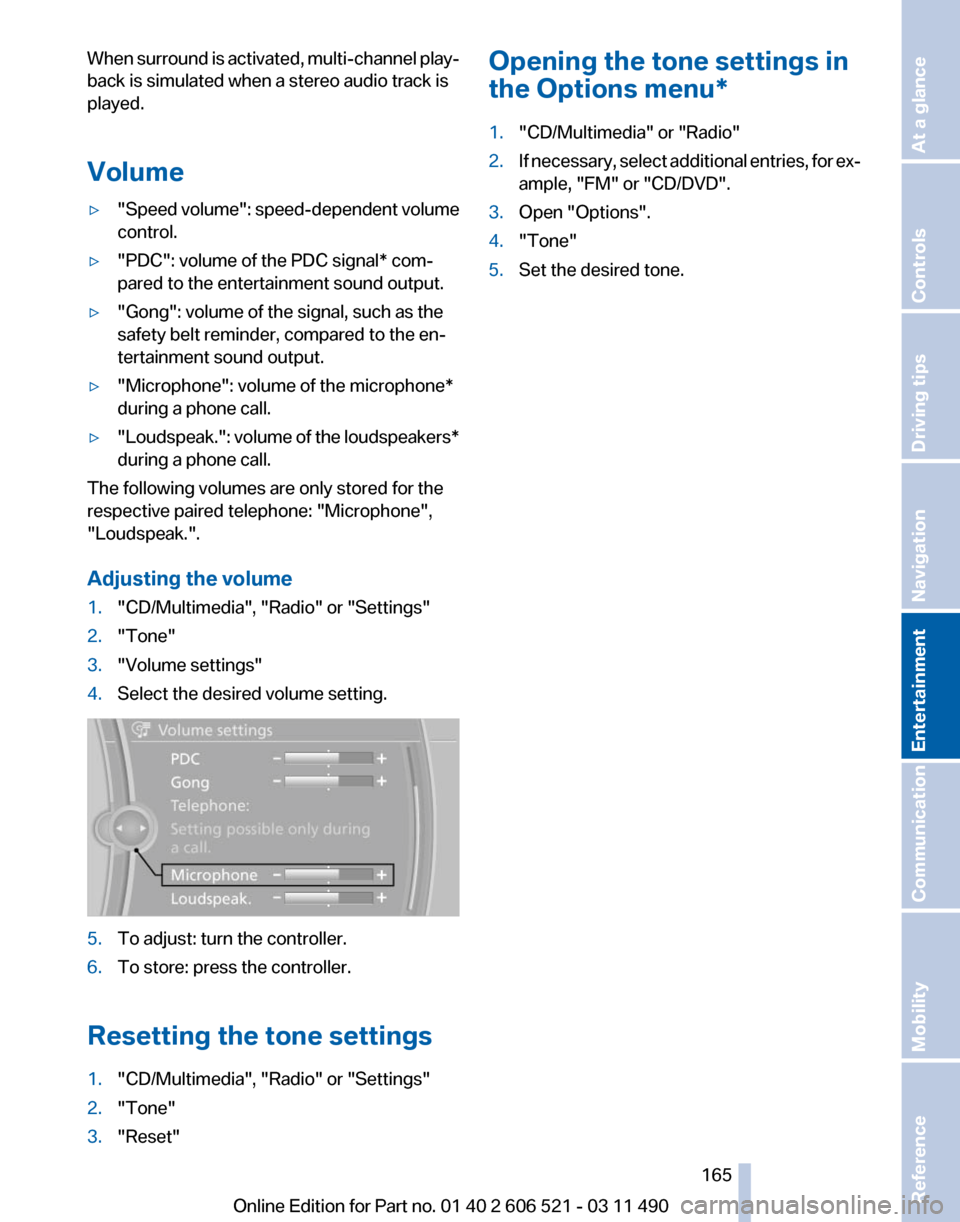
Adjusting the volume
1. "CD/Multimedia", "Radio" or "Settings"
2. "Tone"
3. "Volume settings"
4. Select the desired volume setting. 5.
To adjust: turn the controller.
6. To store: press the controller.
Resetting the tone settings
1. "CD/Multimedia", "Radio" or "Settings"
2. "Tone"
3. "Reset" Opening the tone settings in
the Options menu
*
1. "CD/Multimedia" or "Radio"
2. If necessary, select additional entries, for ex‐
ample, "FM" or
"CD/DVD".
3. Open "Options".
4. "Tone"
5. Set the desired tone.
Seite 165
165Online Edition for Part no. 01 40 2 606 521 - 03 11 490
Reference Mobility Communication
Entertainment Navigation Driving tips Controls At a glance
Page 256 of 282
To guard against discoloration, such as from
clothing,
provide leather care roughly every two
months.
Clean light-colored leather more frequently as
dust and dirt are more noticeable.
Use leather care products; otherwise, dirt and
grease will gradually break down the protective
layer of the leather surface.
Suitable care products are available from the
service center.
Upholstery material care
Vacuum regularly with a vacuum cleaner.
If they are very dirty, e.g., beverage stains, use a
soft sponge or microfiber cloth with a suitable
interior cleaner.
Clean the upholstery down to the seams using
large sweeping motions. Avoid rubbing the ma‐
terial vigorously.
Damage from Velcro® fasteners
Open Velcro® fasteners on pants or other
articles of clothing can damage the seat covers.
Ensure that any Velcro® fasteners are closed.◀
Caring for special components
Light-alloy wheels
Use wheel cleaner, particularly during the winter
months. Do not use aggressive, acidic, strongly
alkaline or abrasive cleaners, or steam jets
above 140 ℉/60 ℃; follow the manufacturer's
instructions.
Chrome surfaces*
Carefully clean components such as the radiator
grille or door handles with an ample supply of
water, possibly with shampoo added, particu‐
larly when they have been exposed to road salt.
Rubber components
Aside from water, treat only with rubber cleans‐
ers.
When cleaning rubber seals, do not use any sil‐
icon-containing car care products in order to
avoid damage or reduced noise damping. Fine wood parts*
Clean fine wood facing and fine wood compo‐
nents
only with a moist rag. Then dry with a soft
cloth.
Plastic components
These include:
▷ Imitation leather surfaces.
▷ Headliner.
▷ Lamp lenses.
▷ Instrument cluster cover.
▷ Matte black spray-coated components.
Clean with a microfiber cloth.
Moisten the cloth lightly and use plastic
cleanser, if necessary.
Do not soak the headliner.
Do not use cleansers that contain alcohol
or solvents
Do
not use cleansers that contain alcohol or sol‐
vents, such as lacquer thinners, heavy-duty
grease removers, fuel, or such; this could lead to
surface damage.◀
Safety belts
Dirty belt straps impede the reeling action and
thus have a negative impact on safety.
Chemical cleaning
Do not clean chemically; this can destroy
the webbing.◀
Use only a mild soapy solution, with the safety
belts clipped into their buckles.
Do not allow the reels to retract the safety belts
until they are dry.
Floor carpets and floor mats*
No objects in the area around the pedals
Keep floor mats, carpets, and any other
objects out of the area of motion of the pedals;
otherwise, the function of the pedals could be
impeded while driving
Do not place additional floor mats over existing
mats or other objects. Seite 256
256 Online Edition for Part no. 01 40 2 606 521 - 03 11 490
Care
Page 272 of 282
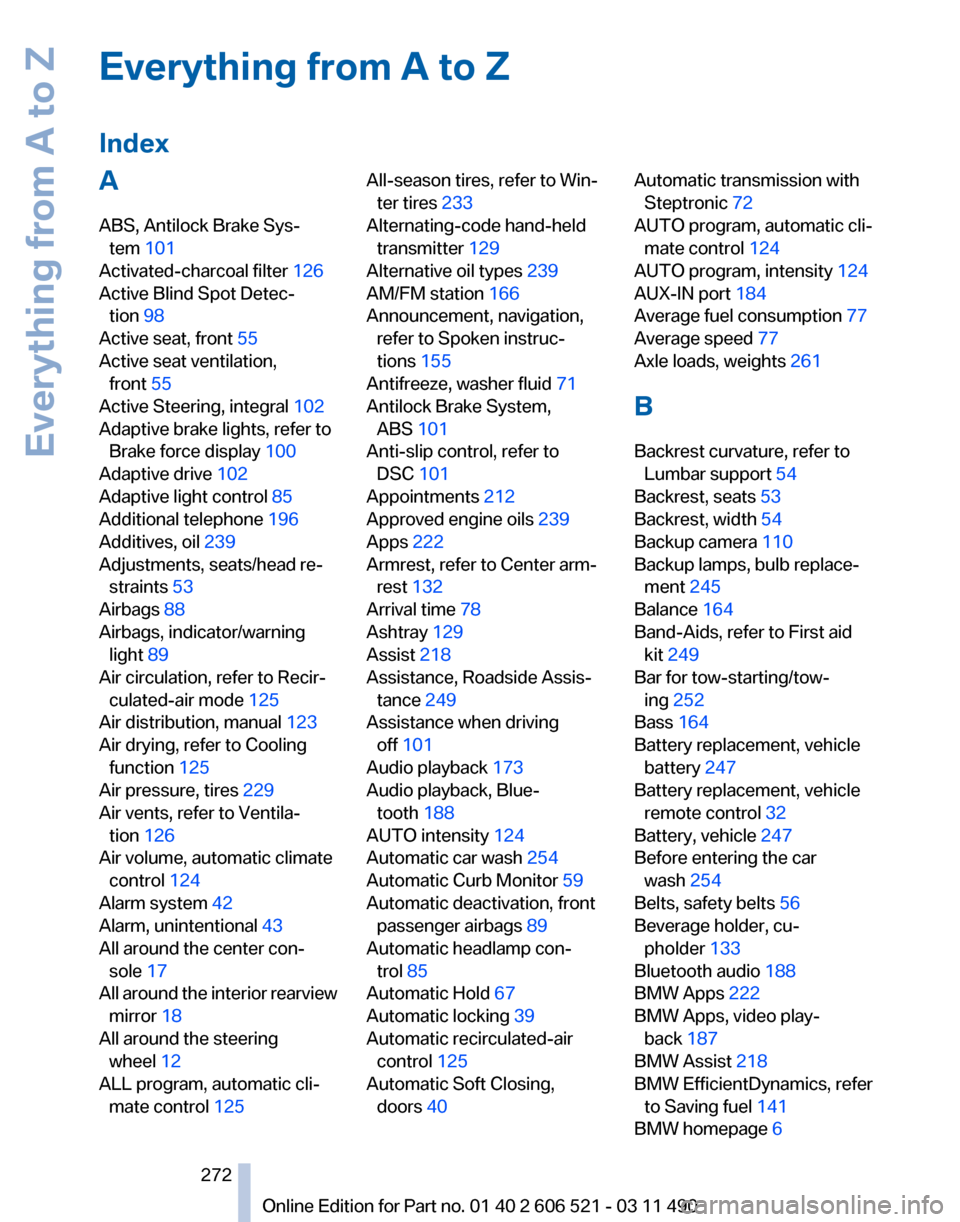
Everything from A to Z
Index
A
ABS, Antilock Brake Sys‐
tem 101
Activated-charcoal filter 126
Active Blind Spot Detec‐ tion 98
Active seat, front 55
Active seat ventilation, front 55
Active Steering, integral 102
Adaptive brake lights, refer to Brake force display 100
Adaptive drive 102
Adaptive light control 85
Additional telephone 196
Additives, oil 239
Adjustments, seats/head re‐ straints 53
Airbags 88
Airbags, indicator/warning light 89
Air circulation, refer to Recir‐ culated-air mode 125
Air distribution, manual 123
Air drying, refer to Cooling function 125
Air pressure, tires 229
Air vents, refer to Ventila‐ tion 126
Air volume, automatic climate control 124
Alarm system 42
Alarm, unintentional 43
All around the center con‐ sole 17
All
around the interior rearview
mirror 18
All around the steering wheel 12
ALL program, automatic cli‐ mate control 125 All-season tires, refer to Win‐
ter tires 233
Alternating-code hand-held transmitter 129
Alternative oil types 239
AM/FM station 166
Announcement, navigation, refer to Spoken instruc‐
tions 155
Antifreeze, washer fluid 71
Antilock Brake System, ABS 101
Anti-slip control, refer to DSC 101
Appointments 212
Approved engine oils 239
Apps 222
Armrest, refer to Center arm‐ rest 132
Arrival time 78
Ashtray 129
Assist 218
Assistance, Roadside Assis‐ tance 249
Assistance when driving off 101
Audio playback 173
Audio playback, Blue‐ tooth 188
AUTO intensity 124
Automatic car wash 254
Automatic Curb Monitor 59
Automatic deactivation, front passenger airbags 89
Automatic headlamp con‐ trol 85
Automatic Hold 67
Automatic locking 39
Automatic recirculated-air control 125
Automatic Soft Closing, doors 40 Automatic transmission with
Steptronic 72
AUTO program, automatic cli‐ mate control 124
AUTO program, intensity 124
AUX-IN port 184
Average fuel consumption 77
Average speed 77
Axle loads, weights 261
B
Backrest curvature, refer to Lumbar support 54
Backrest, seats 53
Backrest, width 54
Backup camera 110
Backup lamps, bulb replace‐ ment 245
Balance 164
Band-Aids, refer to First aid kit 249
Bar for tow-starting/tow‐ ing 252
Bass 164
Battery replacement, vehicle battery 247
Battery replacement, vehicle remote control 32
Battery, vehicle 247
Before entering the car wash 254
Belts, safety belts 56
Beverage holder, cu‐ pholder 133
Bluetooth audio 188
BMW Apps 222
BMW Apps, video play‐ back 187
BMW Assist 218
BMW EfficientDynamics, refer to Saving fuel 141
BMW homepage 6
Seite 272
272 Online Edition for Part no. 01 40 2 606 521 - 03 11 490
Everything from A to Z
Page 278 of 282

Random playback
174
RDS 167
Reading out loud 214
Rear axle steering 102
Rear lamps 245
Rearview mirror 59
Rear window defroster 125
Recirculated-air mode 125
Recommended tire brands 233
Refueling 226
Remaining range 74
Reminders 213
Remote control/key 32
Remote control, malfunc‐ tion 38
Remote
control, universal 128
Replacement fuse 247
Replacing parts 243
Replacing wheels/tires 233
Reporting safety defects 8
Reserve warning, refer to Range 74
Resetting, Tire Pressure Mon‐ itor TPM 92
Residual heat, automatic cli‐ mate control 125
Retaining straps, securing cargo 141
Retreaded tires 233
Roadside Assistance 219
Roadside parking lamps 85
Rollover protection system 91
Roll stabilization, refer to Adaptive Drive 102
Roll stabilization, refer to Dy‐ namic Drive 102
Roof load capacity 261
Rope for tow-starting/tow‐ ing 252
Route 154
Route criteria, route 153
Route, displaying 154
Routes, avoiding 154
Route section, bypassing 155
RSC Runflat System Compo‐ nent, refer to Run-flat
tires 234 Rubber components,
care 256
Run-flat tires 234
S
Safe braking 139
Safety 7
Safety belt reminder 56
Safety belts 56
Safety belts, care 256
Safety systems, airbags 88
Satellite radio 168
Saving fuel 141
Scale, changing during navi‐ gation 156
Screen, refer to Control Dis‐ play 19
Screwdriver 243
Screw thread for tow fit‐ ting 252
Seat belts, refer to Safety belts 56
Seat heating, front 55
Seating position for chil‐ dren 62
Seat, mirror, and steering wheel memory 58
Seats 53
Seat ventilation, front 55
Selection list in instrument cluster 76
Selector lever, automatic transmission 72
Sensors, care 257
Service and warranty 7
Service requirements, CBS Condition Based Serv‐
ice 241
Service requirements, dis‐ play 81
Service, Roadside Assis‐ tance 249
Settings on Control Dis‐ play 79
Settings, storing for seat, mir‐ rors, steering wheel 58 Shifting, automatic transmis‐
sion 72
Shifting, manual transmis‐ sion 71
Shift paddles on steering wheel 73
Short commands 263
Shoulder support 54
Side airbags 88
Side View 114
Signaling, horn 12
Signals when unlocking 37
Sitting safely 53
Size 260
Ski bag 131
Smallest turning circle 261
Smoker's package 129
Snap-in adapter, mobile phone 205
Snow chains 234
Socket 130
Socket, OBD Onboard Diag‐ nostics 241
Software applications, iPhone 222
Software update 191
Spare fuse 247
Special destinations, naviga‐ tion 149
Specified engine oil types 239
Speed, average 77
Speed limit, setting 78
Speedometer 14
Split screen 23
Split
screen map settings 157
Spoken instructions, naviga‐ tion 155
SPORT+ program, Dynamic Driving Control 104
Sport automatic transmis‐ sion 73
SPORT program, Dynamic Driving Control 104
Sport program, transmis‐ sion 73
Stability control systems 101
Start/Stop button 65
Seite 278
278 Online Edition for Part no. 01 40 2 606 521 - 03 11 490
Everything from A to Z