Page 82 of 324
81
uuGauges and Multi-Information DisplayuMulti-Information Display
Continued
Instrument Panel
■
Customization flow
CHG SETTING Press and hold the button.DEFAULT ALLEXIT
METER SETUPPOSITION SETUPLIGHTING SETUPDOOR SETUP
ADJUST OUTSIDE TEMP. DISPLAY
LANGUAGE SELECTIONELAPSED TIME RESET
TRIP A RESET with REFUEL
MEMORY POSITION LINK
*
INTERIOR LIGHT DIMMING TIMEAUTO LIGHT SENSITIVITY
HEADLIGHT AUTO OFF TIMER
AUTO DOOR LOCKSECURITY RELOCK TIMER
AUTO DOOR UNLOCKDOOR LOCK MODEKEYLESS LOCK ACKNOWLEDGMENT
SEL/RESET
Press and hold the button.
EXIT
SEL/RESETSEL/RESETSEL/RESET
SEL/RESET
SEL/RESET
* Not available on all models
Page 83 of 324

82
uuGauges and Multi-Information DisplayuMulti-Information Display
Instrument Panel
■
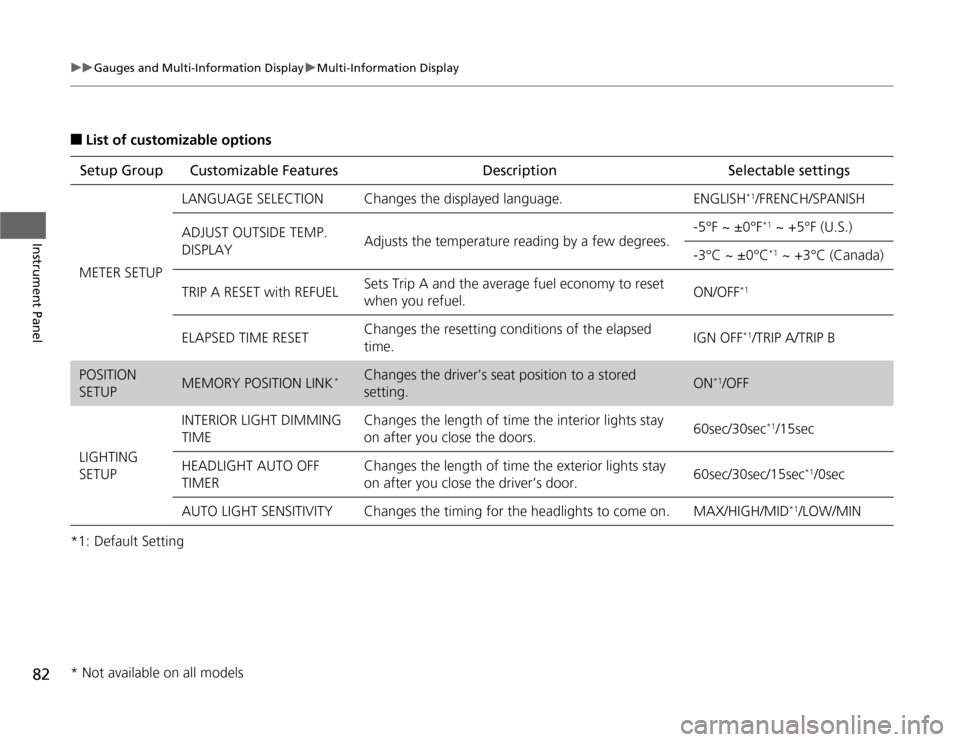
List of customizable options
*1: Default SettingSetup Group Customizable Features Description Selectable settingsMETER SETUP
LANGUAGE SELECTION
Changes the displayed language.
ENGLISH
*1/FRENCH/SPANISH
ADJUST OUTSIDE TEMP.
DISPLAY
Adjusts the temperature reading by a few degrees.
-5°F ~ ±0°F
*1 ~ +5°F (U.S.)
-3°C ~ ±0°C
*1 ~ +3°C (Canada)
TRIP A RESET with REFUEL
Sets Trip A and the average fuel economy to reset
when you refuel.
ON/OFF
*1
ELAPSED TIME RESET
Changes the resetting conditions of the elapsed
time.
IGN OFF
*1/TRIP A/TRIP B
POSITION
SETUP
MEMORY POSITION LINK
*
Changes the driver’s seat position to a stored
setting.
ON
*1/OFF
LIGHTING
SETUP
INTERIOR LIGHT DIMMING
TIME
Changes the length of time the interior lights stay
on after you close the doors.
60sec/30sec
*1/15sec
HEADLIGHT AUTO OFF
TIMERChanges the length of time the exterior lights stay
on after you close the driver’s door.60sec/30sec/15sec
*1/0sec
AUTO LIGHT SENSITIVITY Changes the timing for the headlights to come on. MAX/HIGH/MID
*1/LOW/MIN
* Not available on all models
Page 85 of 324
84
uuGauges and Multi-Information DisplayuMulti-Information Display
Instrument Panel
■
Example for customization settings
The steps for changing the TRIP A RESET with REFUEL setting to ON are shown
below. The default setting for TRIP A RESET with REFUEL is OFF.
1.Press and hold button until CHG
SETTING appears on the display.
2.Press the SEL/RESET button to go into the
METER SETUP group.
3.Press the SEL/RESET button again.
uLANGUAGE SELECTION appears first in
the display.
Page 86 of 324
85
uuGauges and Multi-Information DisplayuMulti-Information Display
Instrument Panel
4.Press the button until TRIP A
RESET with REFUEL appears on the
display, then press the SEL/RESET button.
uThe display switches to the
Customization setup screen, where you
can select ON, OFF, or EXIT.
5.Press the button and select ON,
then press the SEL/RESET button.
uThe ON setup screen appears, then the
display returns to the Customization
menu screen.
6.Press the button until EXIT
appears in the display, then press the SEL/
RESET button.
7.Repeat step 6 until you return to the normal
screen.
Page 89 of 324

88Controls
Setting the ClockClockYou can adjust the time in the clock display, using the CLOCK button.
1.Press the MENU button.
2.Rotate to select CLOCK ADJUST in the
display.
3.Press . CLOCK ADJUST appears.
4.Rotate to select the item you want to
adjust (12/24 hour mode, hour, minute).
Then press .
5.Rotate to make the adjustment.
6.Press to enter your selection. The display
returns to CLOCK ADJUST. Repeat steps 4
to 6 to adjust other items.
7.To enter the selection, Rotate and select
SET, then press .
8.Press the MENU button to go back to the
normal display.■
Adjusting the Time
1Clock
You can switch the clock display between 24 hours
and 12 hours when in the menu mode.
Selector Knob Icon details
Rotate to select.
Press to enter.
To set the time to the nearest hour:
Press and hold the CLOCK button until the clock
display begins to blink, then press the
(3
(Reset)
button.
Depending on the displayed time, the clock sets
forward or backward.
Example:
1:06 will reset to 1:00
1:53 will reset to 2:00
The clock is automatically updated through the
navigation system, so the time does not need to be
adjusted.
Models with navigation system
Models without navigation system
Menu Button
12/24 Hour Mode
Hour Setting
Minute Setting
Page 90 of 324

89
Continued
Controls
Locking and Unlocking the DoorsKey Types and FunctionsThis vehicle comes with the following keys:
Use the keys to start and stop the engine, and
to lock and unlock all the doors, trunk, and
fuel fill door. You can also use the remote
transmitter to lock and unlock the doors,
trunk, and fuel fill door.
The seat automatically moves to the preset
position when you unlock the door using the
remote transmitter on the master key.
2Driving Position Memory System P. 111
The master key folds up inside the remote
transmitter.
1.Press the release button to release the key
out from the transmitter.
uMake sure to fully extend the key.
2.To close the key, press the release button
then push the key inside the transmitter
until you hear a click.
■
Retractable Master Keys
1Key Types and Functions
All of the keys have an immobilizer system. The
immobilizer system helps to protect against vehicle
theft.
2Immobilizer System P. 98
The keys contain precision electronics.
Adhere to the following advice to prevent damage to
the electronics:•Do not leave the keys in direct sunlight, or in
locations with high temperature or high humidity.•Do not drop the keys or set heavy objects on them.•Keep the keys away from liquids.•Do not take the keys apart except for replacing the
battery.
If the circuits in the keys are damaged, the engine
may not start, and the remote transmitter may not
work.
If the keys do not work properly, have them
inspected by a dealer.
If the key is not fully extended, the immobilizer
system may not work properly, and the engine may
not start.
Avoid contact with the key whenever it extends or
retracts.
Panic Button Trunk Button
Lock
Button
Release ButtonUnlock
Button
Models with a driving position system
Release Button
Press
Page 112 of 324

111
uuOperating the Switches Around the Steering WheeluDriving Position Memory System
*
Continued
Controls
Driving Position Memory System
*
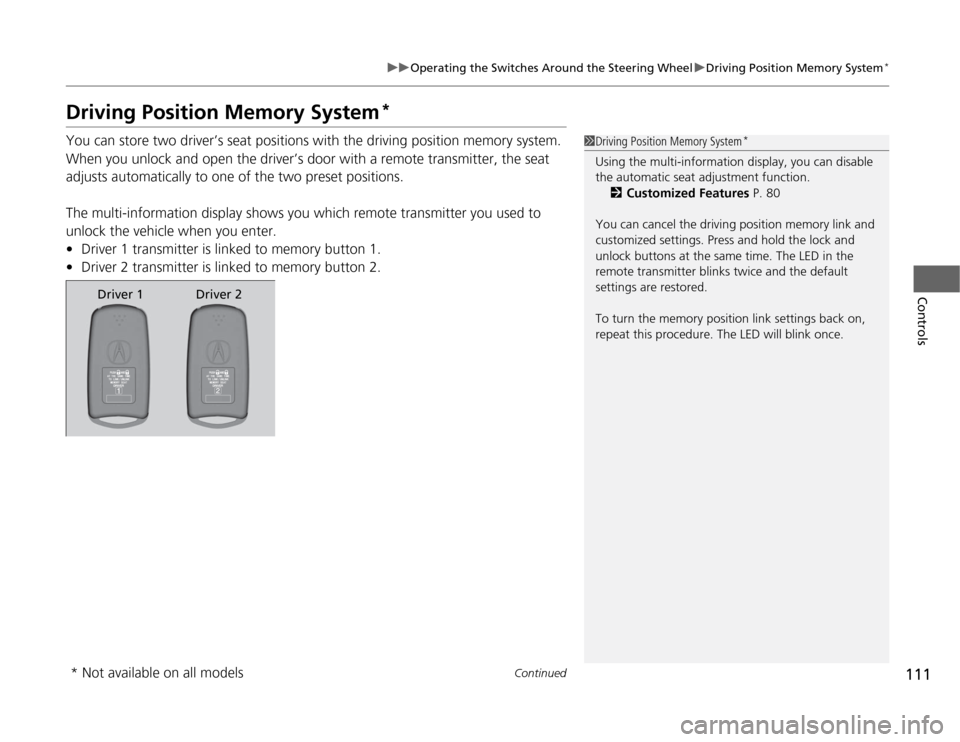
You can store two driver’s seat positions with the driving position memory system.
When you unlock and open the driver’s door with a remote transmitter, the seat
adjusts automatically to one of the two preset positions.
The multi-information display shows you which remote transmitter you used to
unlock the vehicle when you enter.
•Driver 1 transmitter is linked to memory button 1.
•Driver 2 transmitter is linked to memory button 2.
1Driving Position Memory System
*
Using the multi-information display, you can disable
the automatic seat adjustment function.
2Customized Features P. 80
You can cancel the driving position memory link and
customized settings. Press and hold the lock and
unlock buttons at the same time. The LED in the
remote transmitter blinks twice and the default
settings are restored.
To turn the memory position link settings back on,
repeat this procedure. The LED will blink once.
Driver 1 Driver 2
* Not available on all models
Page 141 of 324

140
uuAudio SystemuAuxiliary Input Jack
Features
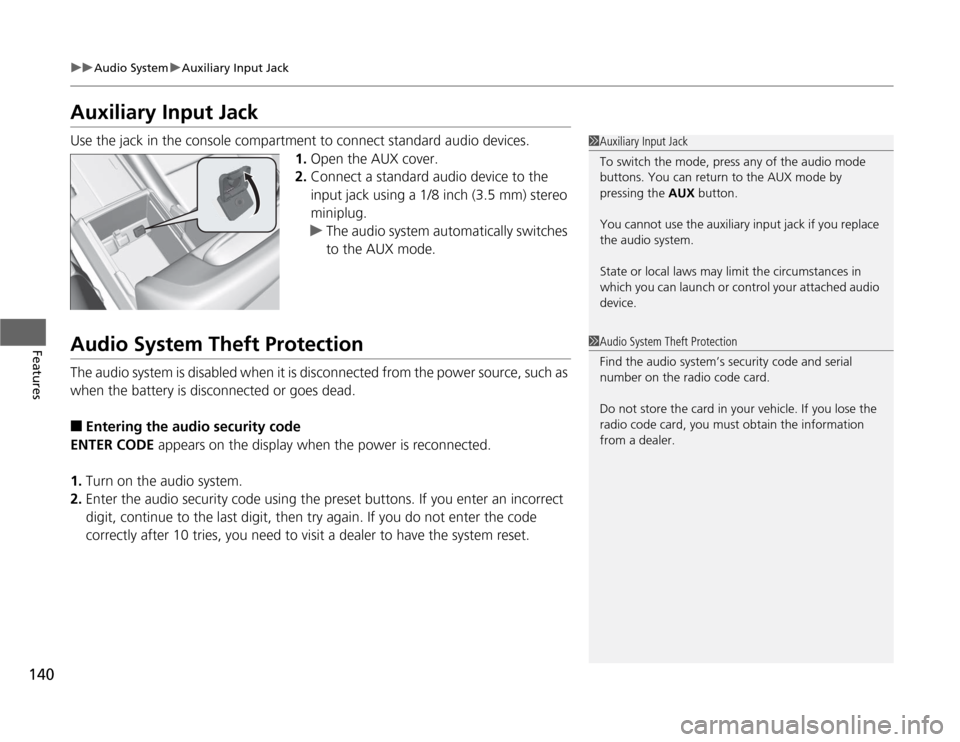
Auxiliary Input JackUse the jack in the console compartment to connect standard audio devices.
1.Open the AUX cover.
2.Connect a standard audio device to the
input jack using a 1/8 inch (3.5 mm) stereo
miniplug.
uThe audio system automatically switches
to the AUX mode.Audio System Theft ProtectionThe audio system is disabled when it is disconnected from the power source, such as
when the battery is disconnected or goes dead.■
Entering the audio security code
ENTER CODE appears on the display when the power is reconnected.
1.Turn on the audio system.
2.Enter the audio security code using the preset buttons. If you enter an incorrect
digit, continue to the last digit, then try again. If you do not enter the code
correctly after 10 tries, you need to visit a dealer to have the system reset.
1Auxiliary Input Jack
To switch the mode, press any of the audio mode
buttons. You can return to the AUX mode by
pressing the AUX button.
You cannot use the auxiliary input jack if you replace
the audio system.
State or local laws may limit the circumstances in
which you can launch or control your attached audio
device.1Audio System Theft Protection
Find the audio system’s security code and serial
number on the radio code card.
Do not store the card in your vehicle. If you lose the
radio code card, you must obtain the information
from a dealer.