Page 412 of 621
Delete-Select this option to delete
the current message.
Voice-Select this option to hear a
voice read the entire message. This
gives you more information than the
screen can display at one time. When
you select the Voice option, it
changes to a Stop Reading option.
Select the option again to stop the
voice.
Call-Select this option to call a
phone number embedded in the
message. When you selectCall,theBluetooth
®HandsFreeLink
®(HFL)
dials the number for you.
To make a call, your
Bluetooth
®
compatible phone must be paired to
the vehicle's HandsFreeLink system,
powered on, and located within the
vehicle (see page 383).Find Acura Dlr.-Select this
option to find the nearest Acura
dealer using the navigation system.
Call Your Dealer-Select this
option to call the Acura dealer you
purchased your vehicle from.
AcuraLink also directs you to this
dealer so you can schedule a
maintenance appointment or receive
information about a message. If your
assigned servicing dealer changes,
AcuraLink will reset to call that
dealer.Diagnostic Info-Select this option
to get more information about the
current diagnostic message. To use
this option, your cellphone must be
paired with the HFL. In addition, the
paired phone must have a compatible
data service and be set up with the
AcuraLink system to make a data
connection. Access the
handsfreelink.com website to find
out which data services are currently
compatible with AcuraLink.
Message Preferences
To set your AcuraLink preferences
(the types of messages you want to
receive, if any), visit the My Acura
website at
www.owners.acura.com,
and
choose what you would like to
receive. If you do not have internet
access, call Acura Client Relations at
(800) 382-2238; they can set your
message preferences for you.
CONTINUED
AcuraLink
®
(U.S. models only)
405
Features
Page 416 of 621
When you see the Maintenance
Minder message on the multi-
information display, you will also
receive a message in the navigation
screen. To open the message, press
ENTER. Select‘‘New Messages,’’
then press ENTER. You will see the
list of all messages. The most recent
message is listed at the top.
Select the received message, then
press ENTER. You will see the
message as shown. To make an
appointment, select‘‘Schedule
Dealer Appt.’’then press ENTER.The system will automatically
connect to the Acura server, then
show you an appropriate
appointment date and time on the
navigation screen. If you accept this
appointment, select‘‘Confirm
Appointment,’’then press ENTER.
CONTINUED
AcuraLink
®
(U.S. models only)
409
Features
Page 417 of 621
The confirmation message will be
displayed on the screen. Make sure
to confirm the appointment date,
time and dealer. If it is OK, press
ENTER.
If you want to change or reschedule
the appointment date, select
‘‘Cancel,’’then press ENTER.Scheduled Dealer Appointment
To reschedule the appointment:Press the INFO/PHONE button to
go to the information screen. Select
‘‘Messages,’’then select‘‘Scheduled
Dealer Appointment’’from the
message category list. Then press
ENTER.You will see the screen to reschedule
as shown. To make an appointment,
select‘‘Reschedule Appointment,’’
then press ENTER.
The system will automatically
connect to the Acura server, then
show you a new appointment date
and time on the navigation screen. If
you accept this appointment, select
‘‘Confirm Appointment,’’then press
ENTER.
AcuraLink
®
(U.S. models only)
410
Page 418 of 621
To cancel the appointment:Press the INFO/PHONE button to
go to the information screen. Select
‘‘Messages’’, then select‘‘Scheduled
Dealer Appointment’’from the
message category list. Then press
ENTER. You will see the screen to
cancel as shown. To cancel the
appointment select‘‘Cancel
Appointment’’, then press ENTER.
The system will request you to
confirm the cancellation on the
navigation screen. To cancel the
appointment, select‘‘YES,’’then
press ENTER. If you select‘‘NO,’’
the screen goes back to the previous
message display.
The system will automatically
connect to the Acura server, then
show you the confirmation on the
navigation screen. If you accept the
cancellation, press ENTER.
If you select the cancellation
appointment, you cannot try to
reschedule the appointment. If you
want to change or reschedule the
appointment date, call your dealer
directly with the HFL.
CONTINUED
AcuraLink
®
(U.S. models only)
411
Features
Page 420 of 621
Diagnostic Info
When an indicator comes on or a
message is displayed on the Multi-
Information Display (MID),
AcuraLink can provide information
about the cause of the indicator or
message and the recommended
action to address it. This helps you
handle the problem as it occurs,
preventing or limiting costly repairs.
The AcuraLink system cannot
determine some mechanical
problems (such as squeaks or
rattles) that are not triggered by the
diagnostic indicator monitors.
For more information on the
instrument panel indicators, see page
68.
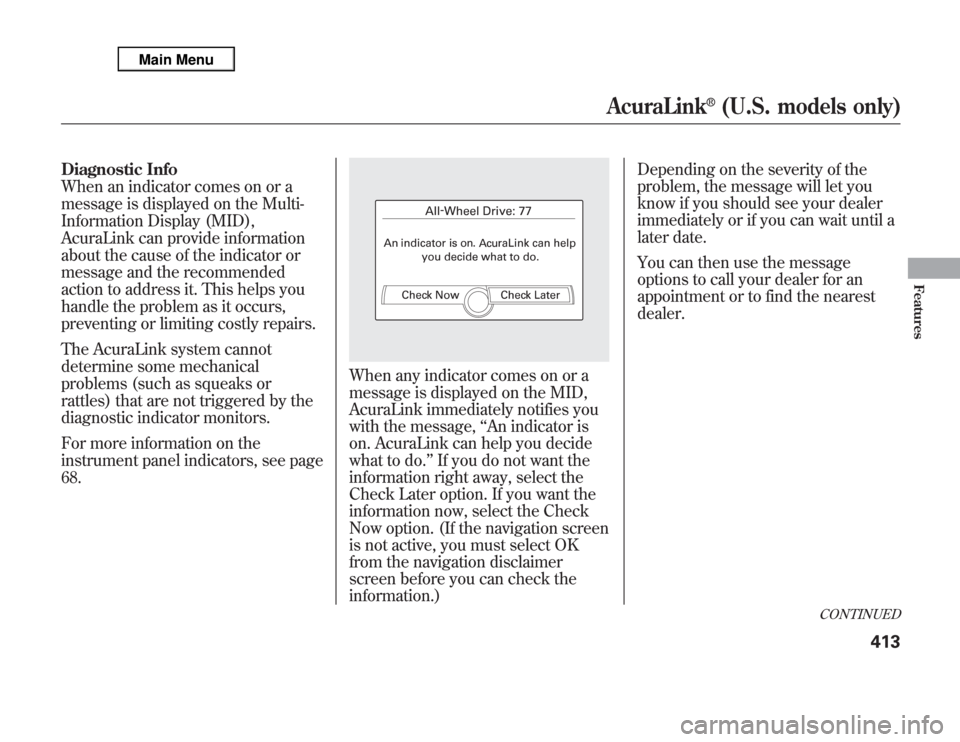
When any indicator comes on or a
message is displayed on the MID,
AcuraLink immediately notifies you
with the message,‘‘An indicator is
on. AcuraLink can help you decide
what to do.’’If you do not want the
information right away, select the
Check Later option. If you want the
information now, select the Check
Now option. (If the navigation screen
is not active, you must select OK
from the navigation disclaimer
screen before you can check the
information.)Depending on the severity of the
problem, the message will let you
know if you should see your dealer
immediately or if you can wait until a
later date.
You can then use the message
options to call your dealer for an
appointment or to find the nearest
dealer.
CONTINUED
AcuraLink
®
(U.S. models only)
413
Features
Page 422 of 621
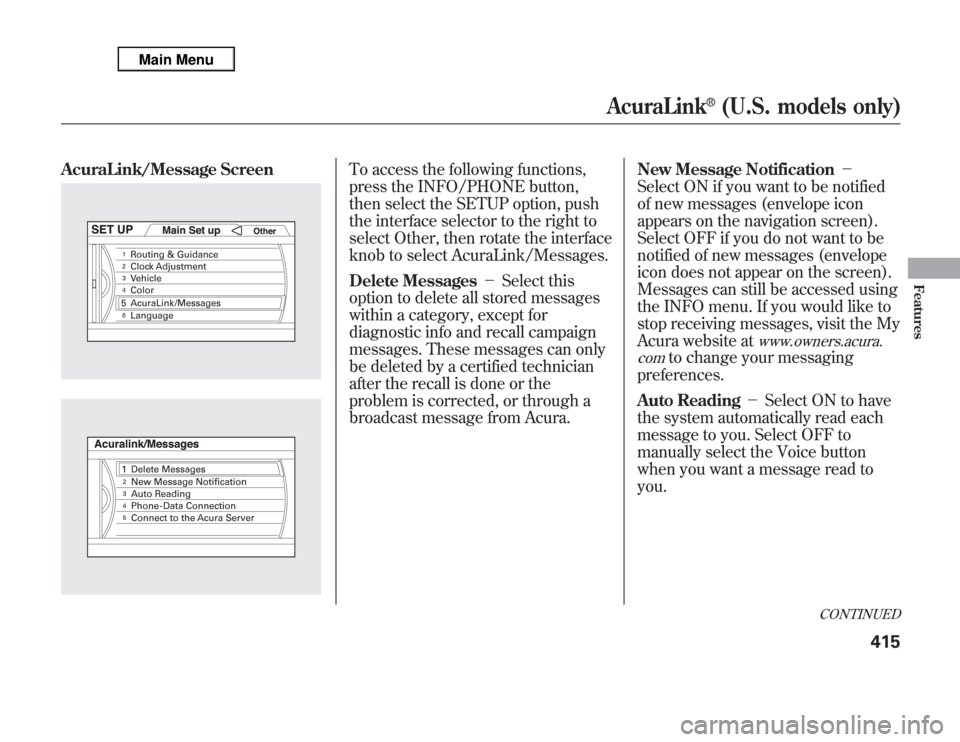
AcuraLink/Message Screen
To access the following functions,
press the INFO/PHONE button,
then select the SETUP option, push
the interface selector to the right to
select Other, then rotate the interface
knob to select AcuraLink/Messages.
Delete Messages-Select this
option to delete all stored messages
within a category, except for
diagnostic info and recall campaign
messages. These messages can only
be deleted by a certified technician
after the recall is done or the
problem is corrected, or through a
broadcast message from Acura.New Message Notification-
Select ON if you want to be notified
of new messages (envelope icon
appears on the navigation screen).
Select OFF if you do not want to be
notified of new messages (envelope
icon does not appear on the screen).
Messages can still be accessed using
the INFO menu. If you would like to
stop receiving messages, visit the My
Acura website at
www.owners.acura.
com
to change your messaging
preferences.
Auto Reading-Select ON to have
the system automatically read each
message to you. Select OFF to
manually select the Voice button
when you want a message read to
you.
CONTINUED
AcuraLink
®
(U.S. models only)
415
Features
Page 424 of 621
Connect to the Acura Server-
The default setting is prompt. When
a diagnostic info message appears,
and you select the Check Now
option, the system will prompt you
before connecting to the Acura
server. If you do not wish to connect
at that time, select No at the prompt,
and you will see the information from
the onboard database. The‘‘Auto’’
setting will remove the prompt when
you select the Check Now option and
will automatically connect to the
Acura server. This setting only
applies when you have a
Bluetooth
®
enabled phone that is paired with the
HFL and you have completed the
Phone-Data Connection setup.
As required by the FCC:
This device complies with Part 15 of the
FCC rules. Operation is subject to the
following two conditions: (1) This device
may not cause harmful interference, and
(2) this device must accept any
interference received, including
interference that may cause undesired
operation.
Changes or modifications not expressly
approved by the party responsible for
compliance could void the user's
authority to operate the equipment.
Rearview Mirror with Rearview
Camera DisplayOn models with navigation systemRefer to the navigation system
manual for operation of the rearview
camera.
CONTINUED
AcuraLink
®
(U.S. models only), Rearview Mirror with Rearview Camera Display
417
Features
Page 425 of 621
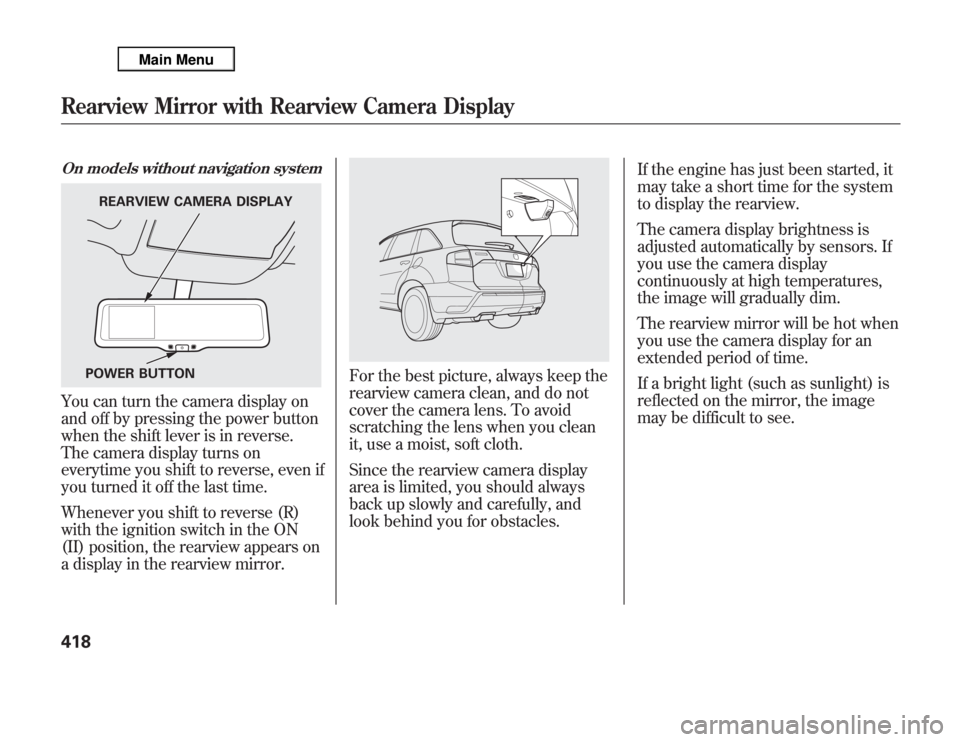
On models without navigation systemYou can turn the camera display on
and off by pressing the power button
when the shift lever is in reverse.
The camera display turns on
everytime you shift to reverse, even if
you turned it off the last time.
Whenever you shift to reverse (R)
with the ignition switch in the ON
(II) position, the rearview appears on
a display in the rearview mirror.
For the best picture, always keep the
rearview camera clean, and do not
cover the camera lens. To avoid
scratching the lens when you clean
it, use a moist, soft cloth.
Since the rearview camera display
area is limited, you should always
back up slowly and carefully, and
look behind you for obstacles.If the engine has just been started, it
may take a short time for the system
to display the rearview.
The camera display brightness is
adjusted automatically by sensors. If
you use the camera display
continuously at high temperatures,
the image will gradually dim.
The rearview mirror will be hot when
you use the camera display for an
extended period of time.
If a bright light (such as sunlight) is
reflected on the mirror, the image
may be difficult to see.
REARVIEW CAMERA DISPLAY
POWER BUTTON
Rearview Mirror with Rearview Camera Display418